
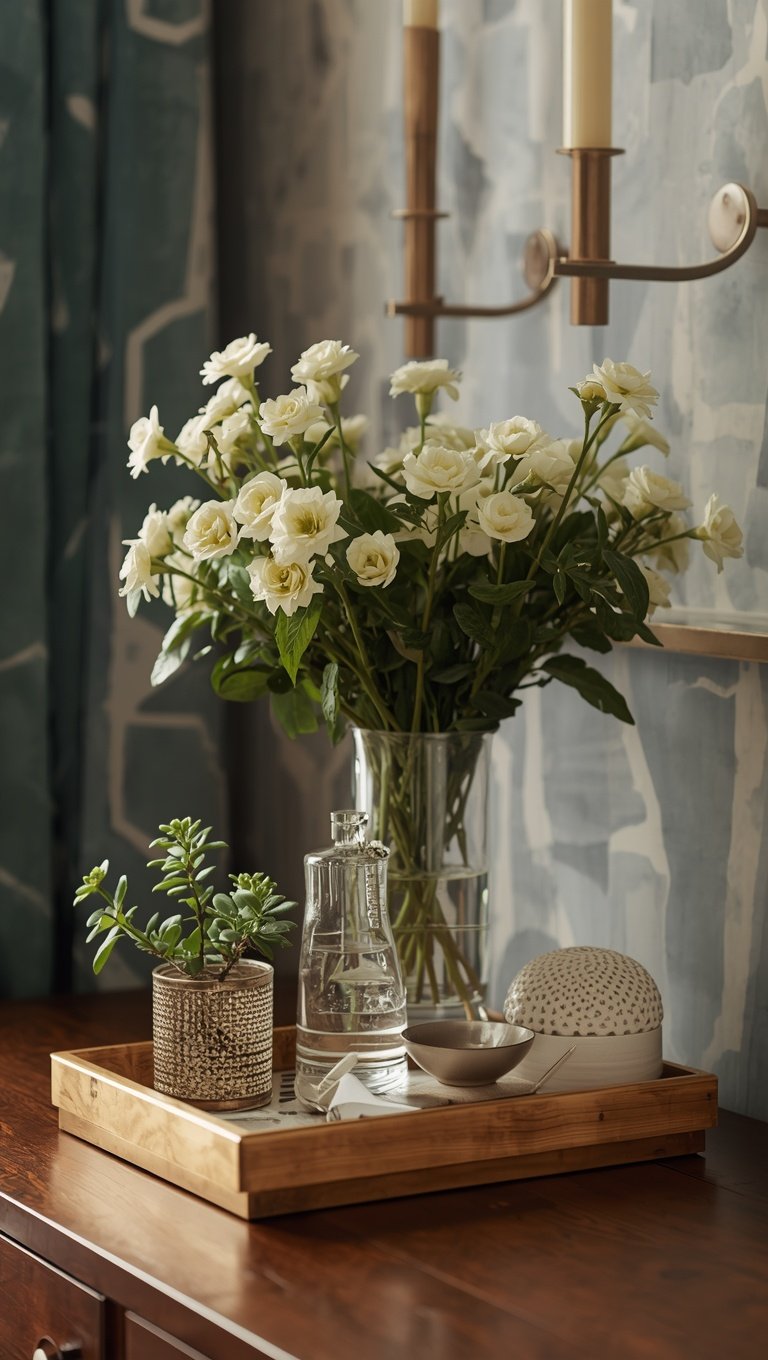

I used to have this one corner of my kitchen counter that made me cringe every single time I walked past it.
Mail, hand cream, a random receipt, my kid’s hair tie, three pens that didn’t work.
It wasn’t messy exactly, just… scattered, you know?
And then one lazy Sunday I grabbed an old tray from my hallway closet and just corralled everything onto it.
I’m not kidding when I say it changed how that whole counter felt.
Same stuff, same clutter honestly, but suddenly it looked intentional.
That’s the tray magic, my friends, and today I’m walking you through exactly how I use it in every single room of my home.
Why a Tray Instantly Calms a Chaotic Surface

Okay so here’s the thing nobody tells you about clutter.
It’s not really about how much stuff you have.
It’s about whether that stuff looks like it belongs somewhere.
A tray gives your eye a boundary, a little frame that says “this mess is on purpose.”
When I first heard that idea I honestly rolled my eyes a bit.
But then I tried it on my entryway table and I got it immediately.
The keys, the sunglasses, the little dish of spare change, all of it stayed exactly the same.
The only thing that changed was the tray underneath.
And somehow my brain stopped registering it as clutter at all.
It just read as “styled.”
That’s the emotional trick here, and it’s such a relief once you feel it.
You don’t have to be a minimalist to have a home that feels calm.
You just have to give your chaos a container.
I think about this every time I walk into a room now, honestly.
Is this surface begging for a boundary?
Nine times out of ten the answer is yes.
So if you take nothing else away from this post, take this.
A tray isn’t decoration first.
It’s a mental trick that happens to also look pretty.
And once you see it that way, you’ll start finding trays everywhere.
Choosing the Right Tray Material for Your Space

I have a confession.
I own way too many trays.
Wood, marble, brass, woven rattan, even a little ceramic one shaped like a shell.
But I didn’t buy them randomly, I promise.
Each material sets a totally different mood.
Wood feels warm and grounded, like something out of a cozy farmhouse kitchen.
I reach for wood trays in spaces that already feel a little cold or sparse.
Marble or stone feels elevated and cool to the touch, almost hotel-like.
Those live in my bathroom and on my dresser, where I want a touch of luxury.
Brass or gold-rimmed trays add warmth and a little glow, especially under lamplight.
I’m obsessed with how mine catches the evening light on my console table.
And woven or rattan trays bring in texture and a relaxed, lived-in feeling.
Those are my go-to for casual spaces like a sunroom or a reading nook.
Here’s my honest tip though.
Don’t match your tray to your furniture exactly.
Let it contrast a little instead.
A wood table with a marble tray feels curated.
A wood table with a wood tray just kind of disappears.
So before you buy anything, look at the surface it’s going on.
Ask yourself what feeling is missing there.
Then let the material fill that gap.
The Rule of Three That Makes Every Tray Look Styled

If I could only teach you one styling rule, it would be this one.
Group things in odd numbers, ideally three.
Our eyes just love it, there’s something about it that feels balanced instead of stiff.
So on my coffee table tray, I never do two candles.
I do one candle, one small stack of books, one little object like a dried floral stem.
Three elements, three different heights, three different shapes.
When I tried doing four items once, out of habit, it looked strangely off.
I couldn’t figure out why until I took one thing away.
And there it was, that click of “oh, that’s better.”
So here’s my little formula, and I use this constantly.
Something tall, something short, something in between.
A candle or vase for height.
A stack of coasters or books for the middle.
A small dish or trinket for the low point.
It sounds so simple when I type it out.
But it works every single time, I swear.
My tip for beginners is to start with items you already own.
Walk around your house and just gather three things that feel like they go together.
Not matchy-matchy, just similar in mood.
Set them on the tray and step back.
Nine times out of ten your brain will tell you immediately if something’s missing or something needs to go.
Trust that gut feeling.
It’s usually right.
Playing With Height for Visual Interest

This one took me embarrassingly long to figure out.
For years I styled trays with everything sitting flat, same height, same eye line.
And it always looked fine, but never special.
Then a friend of mine, who has genuinely gorgeous taste, pointed out that everything on my tray was the same size.
I went home and just started stacking.
A little tray under my perfume bottles, then a small book underneath one candle to lift it up.
Suddenly the whole vignette had rhythm to it.
Your eye moves up and down instead of just sliding across flatly.
That’s the difference between “fine” and “wow, I love this.”
So here’s what I do now, every time.
I pick my tallest item first, usually a vase or a taller candle.
Then I add a medium height piece, maybe a small stack of coasters or a short vessel.
Then something low and flat, like a ring dish or a smooth stone.
If everything still feels too even, I’ll literally slide a coaster or a small book under one item just to break the line.
Nobody sees the trick, they just feel that the tray looks finished.
And honestly, that’s the whole secret to good styling in one sentence.
Nobody needs to see the effort.
They just need to feel the result.
So next time your tray feels a little flat, don’t rearrange the items.
Just change their heights instead.
Coffee Table Tray Styling That Actually Gets Used

Your coffee table tray has to do double duty, and I think people forget that.
It needs to look pretty, sure, but you also need to set your coffee mug down on it without panicking.
When I redid my living room last year, I used a big rectangular wood tray with a slight lip.
That lip matters more than you’d think.
It keeps candles from sliding when my kids inevitably bump the table.
On it, I keep one chunky candle, a small stack of coffee table books I actually read, and a little bowl for remotes.
Yes, remotes can be styled, I promise.
I just tucked them into a woven bowl instead of leaving them loose.
My favorite trick here is leaving just a little open space on the tray.
That’s where my mug or my wine glass goes at the end of a long day.
If every inch is covered in decor, the tray stops being useful and starts being precious.
And precious things don’t get lived with, they get avoided.
I want my home to feel used, not like a showroom.
So my tip is this.
Style eighty percent of the tray, and leave the rest open on purpose.
That empty corner isn’t a mistake.
It’s an invitation to actually enjoy your space.
An optional variation I love is swapping the books seasonally.
Right now mine has a moody, warm-toned book on top because it matches my fall candle.
Small swap, big difference in how the whole tray feels.
Bathroom Counter Trays for a Spa-Like Feel

My bathroom counter used to look like a drugstore aisle exploded.
Lotions, a hairbrush, three different lip balms, you know the drill.
The tray fix here felt almost too easy, but it genuinely works.
I use a small marble tray right by the sink, and everything I use daily lives on it.
Hand soap, a hand cream I actually love the smell of, and one small candle.
That’s it, three things, back to that rule again.
The trick that made it feel spa-like instead of just tidy was choosing products with a similar look.
I decant my hand soap into a plain glass pump bottle instead of using the plastic one it came in.
Sounds fussy, I know, but it took two minutes and it made a huge visual difference.
My personal tip is to keep only what you touch every single day on that tray.
Everything else goes in a drawer, no exceptions.
An optional variation for a guest bathroom is swapping the candle for a small stack of neatly rolled hand towels instead.
It feels welcoming without adding clutter.
The emotional reason this one hits so hard is simple.
Your bathroom is where you start and end your day.
If that little corner feels calm, honestly, your whole morning feels calmer too.
I noticed that shift almost immediately after I made the switch, and it genuinely surprised me how much it mattered.
Kitchen Counter Trays Near the Stove or Sink

Kitchens collect chaos faster than any other room, hands down.
Oils, sponges, dish soap, that one utensil crock nobody organizes.
I put a simple wood tray right beside my stove, and it holds my everyday cooking oil, salt cellar, and a small dish for spoon rests.
The tray means I can lift the whole group up and wipe underneath in one swipe, which, if you cook a lot, you will love more than almost any decor tip I could give you.
By the sink, I use a slightly larger tray to catch the dish soap, a hand brush, and a little pump of hand lotion.
It keeps water from pooling directly on the counter, too, which is such a nice little bonus.
My favorite hack here is picking a tray with a slight edge or lip, since kitchens get wet and things slide.
A flat tray with no lip will just send your olive oil sliding into the backsplash the first time someone bumps the counter.
Ask me how I know.
For color, I like keeping kitchen trays neutral, since the ingredients and packaging already bring in plenty of color and pattern.
A simple black or wood tray lets everything else calm down visually.
If you want a variation, try a galvanized metal tray for a slightly more farmhouse, lived-in feel.
It’s a small styling choice, but it makes even a daily-use zone feel like it was thought through on purpose, not just tolerated.
Entryway and Console Trays as a Catch-All

Your entryway sets the tone for your whole home, and I take that seriously.
When guests walk in, they see this spot first, before anything else.
On my console table, I keep a low, wide tray for keys, sunglasses, and my everyday jewelry that I take off the second I walk in.
It’s genuinely the reason I stopped losing my keys every morning, and that alone made it worth doing.
I add one taller item, usually a vase with a single dramatic stem, just so the tray doesn’t read as purely functional.
That one tall piece is what turns “catch-all bin” into “styled vignette,” and it’s such a small addition for how much impact it has.
My tip for entryways specifically is to choose a tray that’s easy to wipe down, since this spot collects dust and grime from shoes and bags constantly.
A glossy lacquer or metal tray works beautifully here.
An optional variation if your entryway is tiny is using a smaller round tray instead, tucked onto a narrow shelf or the top of a shoe bench.
Even six inches of tray real estate can hold your keys and a little dish for loose change.
If I had a small hallway like that, this is exactly what I’d do first, no question.
The emotional payoff here is real too.
Walking into a calm entryway after a long day feels like your home is greeting you gently instead of adding to your stress.
Nightstand Trays for a Cozy, Intentional Feel

My nightstand used to be an actual disaster, if I’m being honest with you.
Lip balm, my phone charger, a half-empty water glass, three books I swore I’d finish.
I added a small round tray, wood with a slightly raised edge, and it changed the whole vibe of my bedside instantly.
Now my lamp sits just off the tray, and the tray itself holds my current book, a small candle, and a tiny dish for rings I take off before bed.
The charger cord still lives there too, because real life happens, but it feels tucked in rather than tossed on.
My favorite part is that little dish for jewelry.
I used to just set my rings anywhere and then panic-search for them in the morning.
Now they have one specific home, and that tiny habit alone has saved me so much stress.
For tone, I lean warm here, wood or a soft matte ceramic, nothing glossy or cold near where I sleep.
Kindda ironic given how “spa-like” I wanted my bathroom to feel, but nightstands ask for something softer, more like a hug than a hotel.
An optional variation for couples is doing a small tray on each side, so both nightstands feel equally styled instead of one looking like an afterthought.
My tip here is to keep the candle unlit most nights and just enjoy the way it looks in lamplight.
Sometimes the coziest thing on the tray isn’t something you use.
It’s just something that makes the corner of your eye happy right before you fall asleep.
Seasonal Swaps That Keep Your Trays Feeling Fresh

I don’t rebuy trays every season, and honestly, you shouldn’t either.
I just swap what sits on top of them, and it makes such a huge difference for so little effort.
In the fall, my coffee table tray gets a small pumpkin, a moody candle, and one of those cinnamon-scented pinecone bundles I’m honestly a little obsessed with.
In spring, the same tray holds a small vase of fresh stems, something light like ranunculus, and a lighter-colored candle.
The tray itself, the base layer, never changes.
Only the mood on top of it shifts with the season, which keeps the whole system low effort and high impact.
My tip is to build a little bin of seasonal tray items you rotate through, kept somewhere easy to grab like a hall closet.
That way the swap takes ten minutes, not an entire afternoon of decorating.
An optional variation is doing a mini swap for holidays specifically, even just for a week or two.
A tiny stack of ornaments or a small dish of cinnamon sticks can transform a tray without you touching anything else in the room.
The emotional reason this one works so well is simple.
Noticing small seasonal shifts in your home makes time feel a little more special.
It’s a tiny ritual, and I genuinely look forward to it every time the weather turns.
Building a Color Palette Your Trays Actually Follow

Here’s a mistake I made for years before I figured this out.
I’d buy pretty tray items one at a time, whatever caught my eye in the moment.
And they never looked cohesive together, no matter how I arranged them.
Once I started sticking to a simple palette, everything clicked into place.
My rule now is two neutrals plus one accent color, and that’s it.
So on my living room tray, it’s wood tones, cream, and then a soft sage green accent from one candle or a little dish.
When I want to switch things up, I only swap the accent color, never the whole palette.
That one tweak keeps the room feeling like “me” while still letting it evolve.
My tip is to actually take a photo of your tray once it’s styled and look at it in Black and White on your phone.
It sounds silly, but it strips away color and shows you instantly if the shapes and heights are actually working.
If it looks good in black and white, the color is just the icing.
An optional variation, if you love a more eclectic look, is choosing one wildcard item that breaks the palette completely, like one deep red trinket in an otherwise neutral scheme.
One wildcard reads as intentional.
Three wildcards just reads as clutter again, so keep it to one.
The Biggest Tray Styling Mistakes I See (and Made Myself)

Okay, let’s talk about what not to do, because I’ve made every single one of these mistakes personally.
Mistake one, overcrowding the tray until it becomes its own pile of clutter.
If your tray needs a tray, you’ve gone too far, and I say that with love because I’ve been there.
Mistake two, choosing a tray that’s too small for the surface it’s on.
A tiny tray on a huge console table just looks lost and a little sad.
Mistake three, matching everything too perfectly, so the whole vignette feels stiff instead of collected over time.
Real homes look like they evolved, not like they were bought in one matching set from a single aisle.
Mistake four, forgetting function completely.
A gorgeous tray that you’re afraid to actually use will just end up shoved in a closet within a month.
Mistake five, ignoring scale, so everything on the tray is roughly the same size with no tall or short moment to catch the eye.
My honest tip for fixing any of these is to just take everything off the tray and start over from scratch.
Add back only your favorite three or four pieces, one at a time, stepping back after each one.
You’ll feel it the moment it clicks, I promise you that.
It’s such a relief once you trust that instinct instead of overthinking every placement.
Budget-Friendly and DIY Tray Ideas I Genuinely Love

You do not need to spend a lot of money to make this work, and I want to be really clear about that.
Some of my favorite trays came from thrift stores, garage sales, or honestly just repurposed items I already owned.
An old picture frame with the glass laid flat inside it makes a shockingly chic little tray.
A wooden cutting board, especially a vintage one with some character, works beautifully as a rustic tray on a kitchen counter.
I’ve even used a small ceramic plate with a slight lip as a mini catch-all tray on my bathroom counter, and nobody’s ever guessed it wasn’t meant for that.
My favorite budget tip is thrifting mismatched trays and unifying them with a coat of matte spray paint in one consistent color.
Suddenly a random collection looks like it was curated on purpose, and it costs practically nothing.
For a DIY option, a simple slab of wood with the edges sanded smooth and finished with a food-safe oil makes a gorgeous, sturdy tray for a fraction of retail price.
My tip is to not chase perfection here.
A slightly uneven DIY tray has so much more soul than something mass-produced anyway.
An optional variation is layering a small cloth napkin or a piece of linen fabric under your tray items for texture, especially if the tray itself is a plain material like metal or glass.
It’s such a small, nearly free addition that makes the whole thing feel intentional and soft.

