ocks aren’t just what you stub your toe on anymore – they’re the secret weapon that can turn your ordinary garden into an Instagram-worthy outdoor masterpiece.
From creating dramatic focal points to solving those tricky drainage issues, rock landscaping offers endless possibilities that’ll make your neighbors wonder how you became such a design genius overnight.

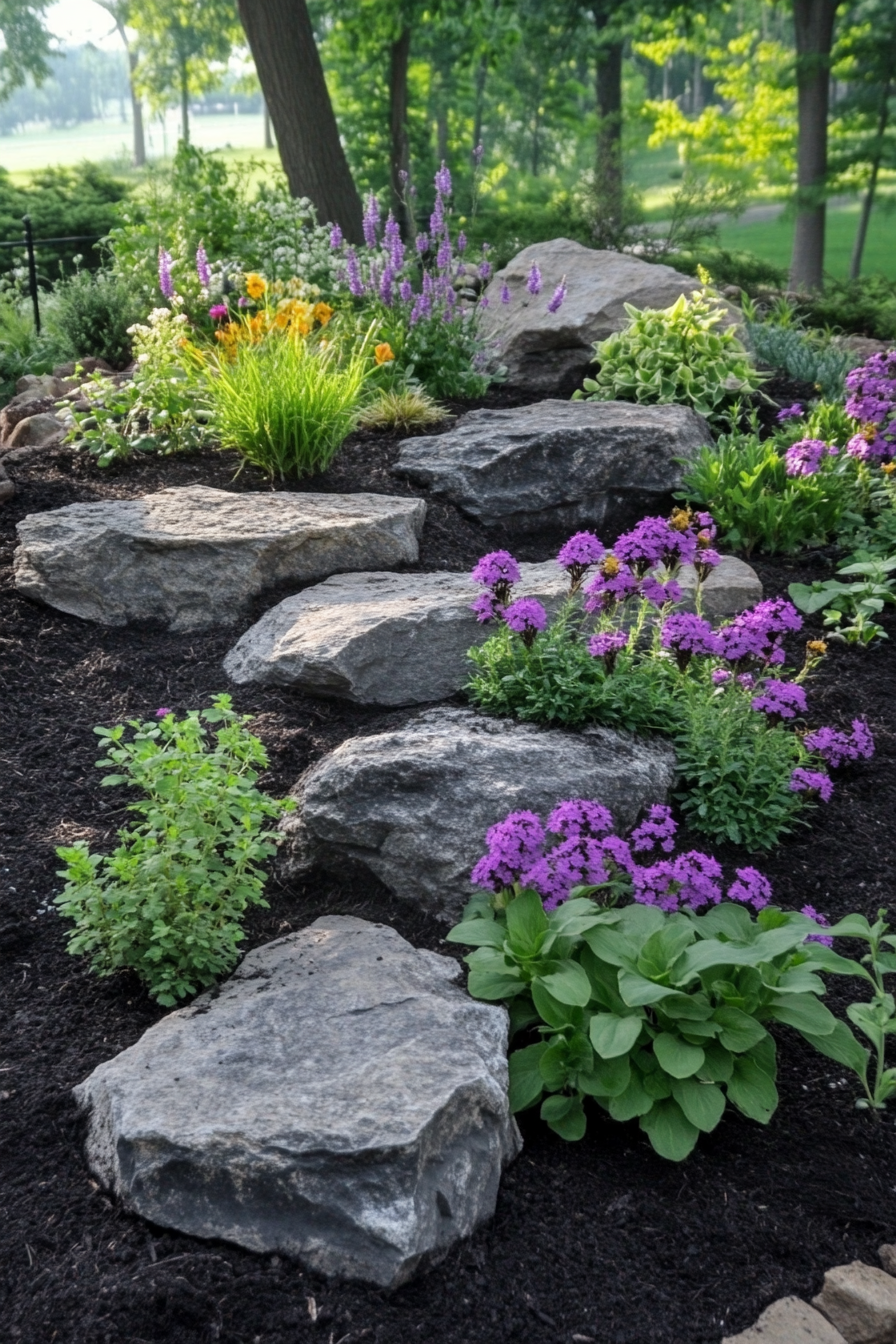
Create a Stunning Alpine Rock Garden That Looks Like a Mountain Retreat


Picture walking into your backyard and feeling like you’ve been transported to the Swiss Alps – that’s exactly what a well-designed alpine rock garden can do for your space.
This landscaping approach combines carefully selected rocks with drought-resistant plants to create a miniature mountain ecosystem right in your yard.
Start by choosing a sloped area or creating one with imported soil, as alpine gardens work best when they have natural drainage and varying elevations.
Select rocks of different sizes, focusing on limestone, sandstone, or granite pieces that look weathered and natural rather than freshly quarried.
The key is arranging these rocks to mimic how they’d naturally settle on a mountainside – partially buried, clustered in groups, and positioned to create small pockets where plants can take root.
Plant selection makes all the difference in achieving that authentic alpine look.
Choose succulents like hens and chicks, sedums, and ice plants that thrive in rocky conditions and require minimal water once established.
Add small ornamental grasses like blue fescue or buffalo grass to create texture and movement.
Spring bulbs such as crocuses and dwarf daffodils can be tucked between rocks to provide early season color.
The beauty of an alpine garden lies in its low-maintenance nature – once established, it practically takes care of itself.
Your rock garden will change dramatically with the seasons, showing off different textures and colors as plants go dormant or burst into bloom.
Position larger boulders as anchor points and fill in with medium-sized rocks, leaving irregular spaces for planting.
This creates a natural, unforced appearance that looks like it’s been there for decades.
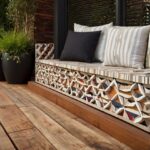
Tap to Explore These Beauties
See my ideas in action 👇 Tap any image to explore full details.
Build a Mesmerizing Dry Creek Bed That Solves Drainage Problems in Style

Nothing says “landscape design genius” quite like a dry creek bed that manages to be both gorgeous and functional at the same time.
This feature mimics the natural path of a seasonal stream, using various sized rocks and stones to create the illusion of flowing water even when it’s bone dry.
Start by observing how water naturally flows across your property during heavy rains, then design your creek bed to follow these natural drainage patterns.
Dig out a meandering channel that varies in width from narrow sections to wider “pooling” areas, creating the organic curves that real streams develop over time.
Line the bottom and sides with landscape fabric to prevent weeds from poking through your beautiful rock work.
Layer different sizes of river rock, starting with larger stones along the edges to define the banks, then filling the center with medium-sized smooth rocks.
Add smaller pebbles and gravel to fill gaps and create that authentic riverbed texture.
The magic happens when you vary the rock colors and sizes throughout the length of your creek bed.
Use darker stones in deeper sections and lighter colored rocks in shallow areas to enhance the illusion of depth and water flow.
Place larger boulders strategically as if they’ve been naturally deposited by flowing water over time.
Plant the banks with moisture-loving plants like ornamental grasses, ferns, and hostas to complete the realistic stream ecosystem look.
During actual rainstorms, your decorative creek bed transforms into a functional drainage solution, channeling water away from your home’s foundation and preventing erosion.
The result is a stunning landscape feature that works year-round, providing visual interest even during dry spells while protecting your property from water damage.
Construct Eye-Catching Retaining Walls That Add Structure and Drama

Retaining walls aren’t just practical solutions for sloped yards – they’re opportunities to add serious architectural drama and create multiple levels of usable space in your landscape.
Rock retaining walls bring a timeless, natural beauty that complements any home style while solving erosion problems and creating flat areas for planting or entertaining.
Natural stone options like fieldstone, flagstone, or stacked slate create walls that look like they’ve been part of your landscape forever.
The key to a stunning retaining wall lies in selecting stones that complement your home’s architecture and existing landscape materials.
Start your wall project by excavating a level foundation that extends below the frost line in your area to prevent shifting and cracking.
Build your wall with a slight backward lean, called a batter, which helps it withstand the pressure of soil behind it.
Choose stones with relatively flat surfaces for easier stacking, and place the largest, most stable rocks as your foundation course.
Each subsequent layer should be positioned so joints don’t line up with the layer below, creating a strong interlocking pattern.
Fill gaps between stones with smaller rocks or mortar, depending on whether you want a formal or rustic appearance.
Behind the wall, install proper drainage with gravel backfill and perforated drainage pipe to prevent water pressure from building up.
Cap your wall with attractive flat stones that provide a finished edge and create opportunities for built-in seating.
Plant the terraced areas above your retaining wall with cascading flowers or trailing plants that will soften the hard edges and integrate the structure into your overall landscape design.
Multiple retaining walls at different levels can create a stunning stepped garden effect that maximizes planting space while adding incredible visual depth to your yard.
Find Your Room’s Color Palette
Tap a vibe — get a curated 5-color palette with hex codes you can copy ✨
Install Statement Boulders That Become Irresistible Focal Points

A single well-placed boulder can instantly transform your entire landscape from ordinary to absolutely spectacular, creating a focal point that draws the eye and anchors your whole design.
Think of statement boulders as the sculptures of the landscape world – they add mass, texture, and natural beauty that no manufactured decoration can match.
Choose boulders that complement your local geology and home architecture, selecting pieces with interesting shapes, colors, or textures that will look stunning year-round.
The placement of your statement boulder is crucial for maximum impact.
Position it according to the rule of thirds, placing it off-center rather than directly in the middle of a space for the most pleasing visual effect.
A boulder placed at the intersection of pathways creates a natural gathering point, while one positioned near a seating area provides a backdrop for outdoor conversations.
Partially bury your boulder so it appears to have naturally emerged from the earth rather than simply being dropped in place.

💭 I Wrote a Book About My Biggest Decorating Mistakes!
When I decorated my first home, I thought I knew what I was doing. Spoiler: I didn’t. 😅
💸 I bought a sofa way too big for my living room. Paint colors that looked amazing in the store but terrible on my walls.
The general rule is to bury about one-third of the boulder’s height, which also provides stability and prevents it from looking like it’s just sitting on top of the ground.
Surround your statement boulder with complementary plantings that enhance its natural beauty without overwhelming it.
Low-growing perennials, ornamental grasses, and ground covers create a naturalistic setting that makes the boulder appear to be part of an established ecosystem.
Seasonal color from flowering plants can highlight different aspects of your boulder throughout the year.
Proper lighting can transform your boulder into a dramatic nighttime feature, using uplighting to create shadows and emphasize its texture and form.
Multiple boulders of varying sizes can be grouped together to create an even more impressive rock outcropping that becomes the centerpiece of your entire landscape design.
What’s Your Decor Personality?
5 questions · 30 seconds · Instant style match 🏡
Design Elegant Gravel Pathways That Guide and Delight

Gravel pathways offer the perfect combination of practicality and beauty, creating defined routes through your garden while adding texture and visual interest to your overall landscape design.
These versatile walkways can be formal and geometric or curved and naturalistic, depending on your personal style and the character of your outdoor space.
Choose gravel colors and sizes that complement your home’s exterior and existing landscape materials for a cohesive look that ties everything together.
Pea gravel provides a classic, refined appearance and comes in various colors from neutral beiges to warm browns and cool grays.
Crushed granite offers a more angular texture with excellent drainage properties, while decomposed granite compacts well for a smoother walking surface.
River rock creates a more dramatic, textured pathway that makes a bold statement and provides excellent drainage in wet climates.
Proper pathway construction ensures your gravel walkway will look beautiful and function well for years to come.
Excavate the pathway area to a depth of about four inches, then lay landscape fabric to prevent weeds from growing through your gravel.
Install metal or plastic edging along the sides to keep gravel contained and maintain clean, defined borders.
Add a base layer of coarse gravel for drainage, then top with your chosen decorative gravel to a depth of about two inches.
Compact the surface lightly to create a stable walking surface while maintaining the loose, natural appearance of the stones.
Enhance your gravel pathway with strategic plantings along the borders, using low-growing perennials, ornamental grasses, or seasonal flowers to soften the edges.
Larger accent plants at pathway intersections or curves create natural stopping points and add vertical interest to the horizontal line of the walkway.
Regular maintenance involves occasional raking to redistribute gravel and adding fresh material annually to maintain proper depth and appearance.
Create Low-Maintenance Rock Mulch Beds That Suppress Weeds Naturally

Rock mulch transforms ordinary planting beds into sophisticated, low-maintenance landscape features that provide year-round beauty without the constant upkeep that organic mulches require.
Unlike wood chips or bark that decompose and need regular replacement, rock mulch provides permanent ground cover that suppresses weeds while allowing water and air to reach plant roots.
Select rock mulch that complements your home’s color scheme and existing hardscape materials for a unified, professional appearance.
Lava rock offers excellent drainage and comes in rich reds and blacks that create dramatic contrast with green foliage.
River rock provides smooth, rounded textures in earth tones that work well with both contemporary and traditional landscape styles.
Crushed gravel delivers a more formal appearance and comes in precise size grades for consistent coverage.
Proper installation of rock mulch begins with thorough soil preparation and weed elimination.
Remove all existing vegetation and weeds from the planting area, then install high-quality landscape fabric to create a barrier against future weed growth.
Cut precise holes in the fabric for each plant, ensuring the openings are just large enough to accommodate the root ball without creating gaps for weeds to emerge.
Apply rock mulch to a depth of two to three inches, which provides adequate weed suppression without overwhelming smaller plants.
Keep mulch pulled back several inches from plant stems to prevent moisture buildup and potential rot issues.
The key to success with rock mulch lies in choosing plants that complement this type of ground cover.
Drought-tolerant perennials, ornamental grasses, and sculptural plants like yucca or agave create striking contrasts against the stone background.
Rock mulch also provides excellent drainage for plants that prefer drier conditions, making it ideal for xeriscaping and low-water garden designs.
💭 Ever wondered what your room would actually look like rearranged?
I built a free tool that lets you drag furniture around a 2D floor plan. No signup, no catch.
See the Room Planner →Build a Cozy Rock Fire Pit Area for Year-Round Outdoor Entertainment

A rock fire pit creates an instant gathering space that extends your outdoor living season and becomes the heart of backyard entertainment throughout the year.
Building your fire pit with natural stone materials ensures it blends seamlessly with your landscape while providing a durable, attractive focal point for family and friends.
Choose your location carefully, positioning the fire pit at least ten feet away from structures, overhanging trees, or other flammable materials.
Select a level area or create one by grading and compacting the soil to provide a stable foundation for your stone construction.
Natural fieldstone, cut limestone, or fire-resistant volcanic rock all make excellent choices for fire pit construction, each offering different aesthetic qualities and durability characteristics.
Fieldstone provides a rustic, natural appearance that works well in informal landscape settings.
Cut stone creates clean lines and geometric shapes that complement contemporary outdoor designs.
Volcanic rock offers superior heat resistance and unique textures that create visual interest.
Excavate a circular area about four feet in diameter and six inches deep, then add a base layer of gravel for drainage and stability.
Build your fire pit walls by dry-stacking stones in overlapping courses, leaving small gaps between stones for airflow while creating a stable structure.
Line the interior with fire bricks or heat-resistant stones to protect the outer walls from extreme temperatures and extend the life of your fire pit.
Surround your fire pit with comfortable seating arranged in a circle to encourage conversation and ensure everyone can enjoy the warmth equally.
Natural stone benches, Adirondack chairs, or built-in rock seating all work well for creating a complete outdoor room.
Add pathway lighting to guide guests safely to and from the fire pit area during evening gatherings.
This or That?
Pick your fave — see what other readers chose! 👀
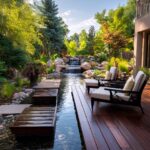
Craft a Tranquil Rock Water Feature That Brings Nature’s Sounds Home

The gentle sound of water flowing over rocks creates an instant sense of tranquility that transforms any outdoor space into a peaceful retreat from daily stress.
Rock water features combine the visual beauty of natural stone with the soothing sounds of moving water to create focal points that engage multiple senses.
Start with a location that’s visible from your home’s interior so you can enjoy your water feature from inside during colder months.
Choose a spot with access to electricity for pump operation and consider how the feature will look from different viewpoints throughout your landscape.
Natural rock formations work best when they appear to have always been part of your landscape rather than obviously manufactured additions.
Select rocks with interesting shapes, textures, and colors that complement your existing landscape materials and home architecture.
Limestone creates elegant, formal appearances while granite provides rugged, natural textures.
Slate offers smooth surfaces that create gentle water flows, while volcanic rock provides dramatic colors and interesting textures.
Design your water feature to work with your landscape’s natural topography, taking advantage of existing slopes or creating berms to provide elevation changes.
Position larger boulders as the primary structural elements, then fill in with medium and small rocks to create naturalistic arrangements.
Install a recirculating pump system with a hidden reservoir to keep water flowing continuously while minimizing maintenance requirements.
Use flexible tubing to direct water flow to multiple points, creating streams, waterfalls, or bubbling springs depending on your design goals.
Surround your water feature with moisture-loving plants like ferns, hostas, and ornamental grasses to create a lush, natural ecosystem.
Add aquatic plants to any pooling areas to help maintain water quality and provide habitat for beneficial wildlife.
Proper lighting extends the enjoyment of your water feature into evening hours while creating dramatic effects with moving water and stone textures.
Establish Clean Rock Borders That Define and Organize Your Landscape

Rock borders provide the perfect solution for creating clean, defined edges that separate different areas of your landscape while adding natural beauty and permanent structure.
These versatile design elements work equally well for outlining planting beds, defining pathways, or creating boundaries between lawn and garden areas.
Choose border materials that complement your home’s architecture and existing landscape features for a cohesive, professionally designed appearance.
Natural fieldstone creates rustic, informal borders that work well with cottage gardens and traditional landscape styles.
Cut stone provides geometric precision that complements contemporary designs and formal garden layouts.
River rock offers smooth, rounded edges that create gentle transitions between different landscape zones.
Proper installation ensures your rock borders will maintain their appearance and function effectively for decades without shifting or settling.
Mark out your border lines using spray paint or rope to establish smooth curves and straight edges before beginning installation.
Excavate a shallow trench along your marked lines, removing grass and weeds to create a clean foundation for your stone placement.

Install landscape edging material behind where your rocks will sit to prevent soil erosion and maintain sharp definition between bordered areas.
Select rocks of similar size for consistency, or vary sizes deliberately to create more naturalistic, informal appearances.
Set each rock firmly into the ground so it won’t shift during lawn maintenance or under foot traffic.
Position rocks close together to prevent weeds from growing between them while maintaining natural spacing that doesn’t look forced or artificial.
Backfill around each rock with soil to ensure stability and create seamless transitions between the border and surrounding landscape.
Enhance your rock borders with complementary plantings that soften hard edges while maintaining the defined separation you’ve created.
Low-growing perennials, ornamental grasses, or seasonal annuals planted just inside the border create beautiful color displays that highlight your stone work.
Quick Design Dilemma
Cast your vote — see what other readers think! 🤔
Create a Serene Zen Rock Garden for Meditation and Relaxation

Japanese-inspired rock gardens transform ordinary outdoor spaces into contemplative retreats that promote relaxation and mindful appreciation of natural beauty.
These minimalist landscapes use carefully arranged rocks, gravel, and sparse plantings to create spaces for quiet reflection and meditation.
The philosophy behind zen gardens emphasizes simplicity, balance, and the beauty found in natural materials arranged with intentional purpose.
Start your zen garden in a quiet corner of your yard where you can create a sense of enclosure and separation from busy household activities.
Choose a relatively flat area or create one by careful grading, as zen gardens work best with subtle elevation changes rather than dramatic slopes.
Select rocks with interesting shapes and textures, focusing on pieces that suggest natural weathering and timeless stability.
Arrange larger rocks as focal points, positioning them according to principles of asymmetrical balance rather than formal symmetry.
The most important rock, called the “guardian stone,” should be placed first and becomes the anchor around which other elements are arranged.
Fill open areas with carefully raked gravel or sand that can be patterned to suggest flowing water or wind-blown textures.
Use a wooden rake to create parallel lines, concentric circles, or flowing curves that add visual movement to the static stone elements.
Plant selection should be minimal and purposeful, using evergreen shrubs, ornamental grasses, or architectural plants that maintain their structure throughout the seasons.
Bamboo provides screening and gentle movement, while carefully pruned evergreens add sculptural qualities without overwhelming the stone features.
Moss can be encouraged to grow on rocks and in shadier areas to add subtle color and texture that suggests age and natural development.
Add simple wooden benches or flat rocks positioned for comfortable seating and contemplation of your zen garden’s peaceful beauty.
The maintenance of a zen garden becomes part of its meditative appeal, with regular raking and careful tending serving as mindful practices that connect you with your outdoor space.
Your garden doesn’t have to stay stuck in the stone age of boring grass and basic flower beds.
With these rock landscaping ideas, you’ve got everything you need to create an outdoor space that’s both stunning and practical, requiring less maintenance while delivering maximum visual impact year after year.
💭 I Wrote a Book About My Biggest Decorating Mistakes!
When I decorated my first home, I thought I knew what I was doing. Spoiler: I didn’t. 😅
💸 I bought a sofa way too big for my living room. Paint colors that looked amazing in the store but terrible on my walls.