Tired of that boring concrete slab you call a patio?
Pallets to the rescue!
These wooden workhorses aren’t just for shipping goods anymore—they’re the secret weapon of budget-conscious DIYers everywhere.
With just a few basic tools and some weekend dedication, you’ll transform your outdoor space into a magazine-worthy retreat that costs a fraction of professional decking.
The Floating Oasis Pallet Deck

Nothing transforms an unused patch of yard like a floating deck that seems to hover just above the ground.
This design works particularly well on slightly uneven terrain where a traditional deck would require extensive leveling.
The beauty lies in its simplicity—by using pallets as your foundation, you’ll create a structurally sound platform without the need for concrete footings or complex joinery.
Start by selecting 12-15 high-quality pallets with consistent dimensions and minimal damage, as these will form your deck’s skeleton.
Heat-treated pallets (marked with “HT”) are ideal since they’re free from harmful chemicals and more resistant to rot.
Before assembly, clear your chosen area of rocks and vegetation, then lay down landscape fabric to prevent weed growth underneath your new deck.
Level the ground as much as possible, but don’t stress about perfection—one advantage of this design is the ability to use adjustable deck supports or bricks under each corner for fine-tuning the height.
Connect your base pallets using galvanized metal brackets and heavy-duty screws for a structure that will withstand the elements.
Once your foundation is secure, add a second layer of pallets perpendicular to the first for maximum stability and load-bearing capacity.
Top the entire structure with pallet boards that have been sanded smooth, removing any splinters or rough edges that might catch on bare feet or clothing.
Finish with two coats of exterior-grade stain in your preferred shade, making sure to get into all the cracks and joints for comprehensive protection.
Add weather-resistant throw pillows, potted plants, and perhaps a small side table to create a cozy conversation area that practically begs for morning coffee or evening cocktails.
For nighttime ambiance, weave waterproof LED string lights through the perimeter or install solar-powered deck lights that will illuminate your space without increasing your electricity bill.
The entire project costs approximately $150-200 depending on whether you source free pallets or purchase them, making it roughly 80% cheaper than conventional decking materials.
Multi-Level Pallet Paradise

Why settle for flat when you can go three-dimensional with a multi-level deck that adds visual interest and defines different functional zones?
This approach turns even the most mundane backyard into an architectural showpiece while maximizing every square inch of available space.
The key to this design’s success lies in thoughtful planning—sketch your layout with at least three different heights to create distinct areas for dining, lounging, and perhaps a hot tub or fire pit zone.
Begin by establishing your base level using the floating deck technique described earlier, ensuring it’s rock-solid as it will support the weight of additional tiers.
For each successive level, create sturdy “risers” using pallets stacked and secured vertically, reinforced with diagonal bracing for lateral stability.
Remember that each level only needs to rise 7-10 inches above the previous one to create a noticeable step-up effect without becoming a tripping hazard.
Pay special attention to the transitions between levels by incorporating wide steps that invite movement from one zone to another.
Integrate built-in seating along level changes by securing pallet backs at sitting height, then adding foam cushions covered in outdoor fabric for comfort.
Weather-proof your creation with multiple coats of marine-grade sealant, focusing extra attention on the joints where moisture tends to collect.
Enhance the visual separation between zones by using different stain colors for each level, creating a subtle ombré effect that guides the eye upward.
Add personality with level-specific decorative elements—perhaps string lights over the dining area, potted grasses around the lounge space, and candle lanterns near the conversation pit.
Install removable panels in strategic locations to access the underside of your deck for storage or maintenance needs down the road.
This more complex project might cost $300-400 and require a full weekend plus some evening work, but the results will completely transform your outdoor living potential.
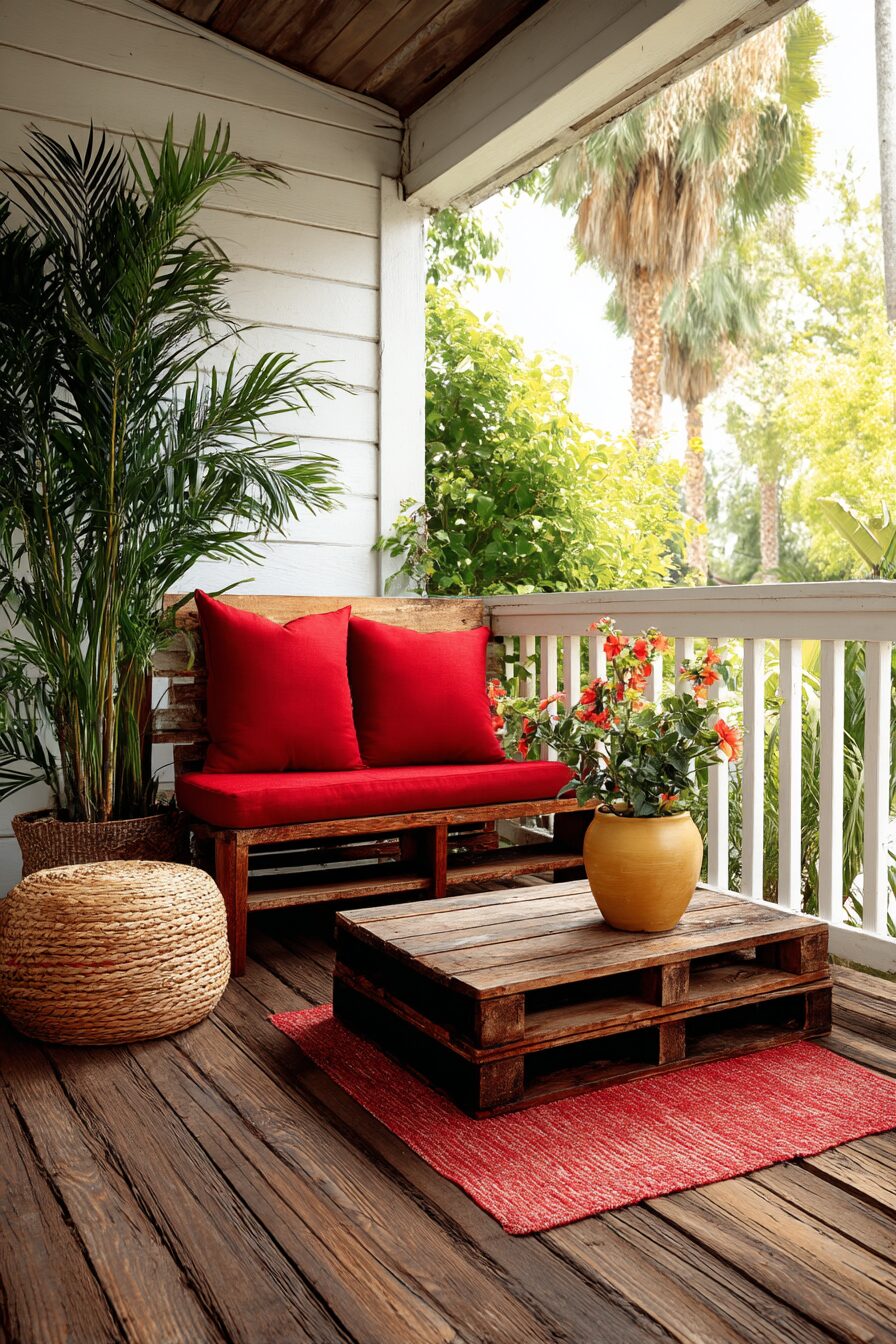
Bohemian-Inspired Pallet Lounge

Channel your inner free spirit with a low-profile pallet lounge deck that prioritizes comfort, conversation, and laid-back vibes.
This design sits closer to the ground than traditional decking, creating an intimate atmosphere that encourages guests to kick off their shoes and stay awhile.
Start with a simple single-layer pallet foundation covering an area approximately 10×12 feet—large enough for comfortable gathering but not so vast that it loses its cozy appeal.
Sand every visible surface meticulously until splinter-free, paying special attention to edges and corners where people might rest their arms or legs.
Skip the traditional stain in favor of whitewashing the wood with diluted white paint, creating a sun-bleached effect that complements the bohemian aesthetic.
Build the centerpiece of your design—an oversized U-shaped seating arrangement—by securing pallets together in a configuration that encourages face-to-face interaction.
Create ample seating depth (at least 30 inches) to accommodate large, plush cushions that invite lounging rather than perching.
Invest in high-quality outdoor foam at least 4 inches thick for seat bases, and add a second layer of softer foam for backrests to achieve sofa-like comfort.
Cover your cushions in weather-resistant fabrics featuring global-inspired patterns, mixing rather than matching for an eclectic yet cohesive look.
Anchor your seating area with a statement coffee table made from stacked pallets topped with a concrete or ceramic tile surface that can handle drinks without coasters.
Layer the deck with outdoor rugs in complementary patterns, creating zones within the larger space and adding welcome softness underfoot.
Incorporate abundant textiles through outdoor-friendly throw pillows, poufs, and even hanging tapestries that can be easily brought inside during inclement weather.
Add dimension with a pallet daybed in one corner, elevated slightly higher than the surrounding seating to create a focal point perfect for afternoon napping.
Complete the atmosphere with strategic lighting—consider Moroccan-inspired metal lanterns, rattan light fixtures, and perhaps even a dramatic overhead element made from a repurposed pallet suspended as a chandelier base.
This sensory-rich environment costs approximately $400-500 including all fabric and cushions, but creates an outdoor living room that rivals indoor comfort.
Integrated Pallet Planter Deck


Why choose between greenery and seating when you can seamlessly combine both in a living deck that brings nature into your everyday outdoor experience?
This clever design incorporates built-in planters throughout the deck structure, creating natural divisions, privacy screens, and stunning visual impact.
Begin with a standard pallet foundation, but leave strategic gaps (approximately 2×2 feet) throughout the layout where your integrated planters will eventually sit.
Construct the planter boxes using pallet boards ripped to consistent widths, creating containers approximately 18 inches deep to accommodate both ornamental and edible plants.
Line each planter with heavy-duty landscape fabric before filling with soil to prevent wood rot and ensure proper drainage through holes drilled in the bottom.
Create a cohesive look by building matching planter benches where the backs of the seats double as one side of a planter, maximizing your materials efficiency.
Engineer your planters with removable inner liners made from plastic containers or fabric grow bags for easier seasonal changeovers and maintenance.
Include an integrated irrigation system using inexpensive drip lines connected to a timer, ensuring your plants thrive even during busy periods when manual watering might be forgotten.
Select plant varieties that complement each other not just visually but also in terms of water and light requirements to simplify ongoing care.
Incorporate vertical growing elements by attaching trellises made from pallet slats to select planters, perfect for flowering vines or space-saving vegetable varieties.
Create visual rhythm by alternating planter heights and widths throughout the deck, drawing the eye through the space while maintaining a sense of overall harmony.
Add built-in storage beneath some planters by installing hinged lids on bench seating, providing weather-protected space for cushions, garden tools, or outdoor entertainment essentials.
This functional design costs approximately $350-450 including soil and starter plants, but creates a dynamic outdoor space that evolves and improves with each growing season.
Rustic Fire Pit Surround Deck

Transform evening gatherings with a purpose-built pallet deck designed specifically around a central fire feature that draws people together long after sunset.
This circular or octagonal design creates a natural gathering space where conversations flow as freely as the warmth from your carefully positioned fire pit.
Begin by marking your circle’s circumference (typically 16-20 feet in diameter) using spray paint or string, ensuring you have ample room for both the fire feature and surrounding seating.
Build your foundation using shortened pallets arranged in a radial pattern, with the outer edges forming your perfect circle or octagon shape.
Create a sunken center approximately 4 feet in diameter where your fire pit will sit, lining this area with fire-resistant materials like stone or concrete pavers for safety.
Pay careful attention to local fire codes regarding minimum distances from structures and overhead trees before finalizing your layout.
Install heavy-duty metal edging around the fire pit zone to create a clear boundary between the flames and wooden deck elements.
Build integrated bench seating using curved pallet sections that follow the deck’s perimeter, angled slightly toward the center for optimal fire viewing.
Add waterproof storage underneath select bench sections where fire tools, extra wood, and emergency supplies can be kept close at hand.
Enhance safety by applying fire-retardant treatment to all wooden elements closest to the pit, providing an extra layer of protection beyond your standard weather sealant.
Create a convenient wood storage feature as part of your deck design, perhaps as a decorative half-wall that also provides windbreak benefits on breezy evenings.
Add swivel capabilities to some seating sections so guests can easily turn from fire-watching to conversation without changing seats.
Install indirect lighting around the perimeter that won’t compete with the fire’s glow but ensures safe movement around the outer edges of the deck.
This specialized deck costs approximately $400-500 including a basic fire pit, but creates a magnetic gathering space that extends your outdoor enjoyment well into the cooler months.
Coastal-Themed Pallet Boardwalk


Bring beachfront vibes to your backyard with a boardwalk-inspired pallet deck that channels the relaxed atmosphere of your favorite seaside getaway.
This linear design features deliberate gaps between boards that allow rainwater drainage while mimicking the nostalgic feel of oceanfront promenades.
Start by creating a simple rectangular foundation using pressure-treated 2x4s as sleepers laid perpendicular to your intended walking direction.
Space these support beams approximately 16 inches apart to prevent any bouncing or flexing when the deck is traversed.
Dismantle your pallets completely, setting aside only the best boards with minimal splits or damage for your walking surface.
Arrange these boards perpendicular to your support beams, leaving ¼-inch gaps between each board for authentic boardwalk styling and excellent drainage.
Sand all walking surfaces until silky smooth, rounding the edges slightly to prevent splinters and create a worn, weathered appearance.
Stain the entire structure in a weathered gray or whitewashed finish that evokes driftwood found along coastal shores.
Add rope accents by threading marine-grade line through drilled holes as decorative railings or handrails in specific areas.
Include nautical touches like cleats repurposed as coat hooks or decorative dock pilings at entrance points to reinforce the seaside theme.
Install a hammock or hanging chair at one end, perfectly positioned for afternoon naps with gentle breezes.
Incorporate beach-inspired container plantings featuring ornamental grasses, succulents, and salt-tolerant flowering plants that complement the coastal aesthetic.
Add weatherproof speakers disguised as landscape rocks to provide ambient sound without disrupting your carefully crafted visual theme.
This transportive design costs approximately $300-400 and creates an instant vacation feel that tricks your brain into relaxation mode the moment you step onto the boards.
Pallet Privacy Screen Deck


Reclaim your outdoor sanctuary from prying eyes with a strategic pallet deck design that incorporates vertical elements for seclusion without the fortress feel.
This thoughtful approach solves the common suburban dilemma of desiring outdoor living space that doesn’t feel like you’re on display to the neighborhood.
Begin with a standard pallet foundation sized to your available space, focusing extra attention on the perimeter where your privacy elements will be anchored.
Create a sturdy frame around the outer edge using 4×4 posts at corners and every 6 feet along straight runs, sinking them at least 2 feet into concrete for windproof stability.
Build modular privacy screens using intact pallets stood vertically, securing them between posts with heavy-duty brackets that allow for seasonal adjustments or future reconfiguration.
Alternate solid panels with slatted sections to maintain airflow and create interesting light patterns while still blocking direct sightlines.
Add height variation by stepping your screens up and down in a rhythmic pattern, preventing the closed-in feeling that comes with uniform tall barriers.
Install hinged sections in strategic locations that can swing open to welcome desirable views or cross-breezes when privacy isn’t a concern.
Soften the utilitarian look of your screens by adding planter boxes to the tops of select sections, cascading vines or flowering plants will eventually create living privacy.
Create depth by positioning some screens offset from the deck edge, forming secluded alcoves perfect for reading nooks or intimate conversation areas.
Install solar-powered cap lights on top of posts to illuminate your space after dark without harsh spotlights that destroy the cozy atmosphere.
Paint or stain different sections in a coordinated color palette that adds visual interest while maintaining cohesion with your home’s exterior.
Add architectural details like lattice toppers, decorative cutouts, or even stained glass inserts in select panels to transform utilitarian screens into artistic statements.
This practical privacy solution costs approximately $450-550 depending on height and coverage, but delivers the priceless feeling of relaxing completely unselfconsciously in your outdoor space.
Modular Pallet Conversation Pit

Revolutionize your outdoor entertaining with a sunken conversation pit that creates an instant atmosphere of intimacy and encourages hours of relaxed interaction.
This distinctive design draws inspiration from mid-century architecture while utilizing humble pallets to achieve high-end impact on a modest budget.
Begin by excavating a rectangular area approximately 12×12 feet and 12-18 inches deep, creating your sunken zone where conversation will flourish.
Line the excavated area with landscape fabric and a layer of crushed stone for drainage before adding a level sand base.
Build your foundation using pressure-treated lumber in a grid pattern, creating a stable platform that sits just above your drainage layer.
Add pallet flooring over this foundation, ensuring boards are secured tightly with minimal gaps for comfort and easy cleaning.
Construct the outer perimeter of your conversation pit using stacked pallets to create a continuous bench that defines the space and provides ample seating.
Build entry steps at one or two access points, making them wide enough (at least 3 feet) to allow comfortable movement in and out of the pit.
Add waterproof foam cushions around the entire perimeter in a U or full-square configuration, encouraging face-to-face interaction rather than side-by-side seating.
Integrate a central fire feature or large coffee table as a focal point, sized appropriately to allow comfortable legroom while providing a surface for drinks and snacks.
Install indirect lighting around the perimeter at foot level, creating a warm glow that highlights the architectural nature of the space without harsh overhead illumination.
Add weatherproof storage underneath bench seating for extra cushions, throw blankets, and entertainment essentials that need to stay close at hand.
Create a distinctive overhead element—perhaps a pergola made from pallet wood or a string light canopy—that defines the conversation zone and adds vertical dimension.
This statement-making design costs approximately $500-600 including excavation and cushions, but creates an unforgettable entertainment space that will become the default gathering spot for every occasion.
Illuminated Pallet Pathway Deck

Guide guests through your outdoor space with an innovative pathway deck that combines practical walkway functionality with dramatic nighttime illumination.
This linear design solves multiple landscape challenges while creating an architectural feature that transforms completely after sunset.
Begin by mapping your pathway’s course, considering natural traffic patterns between key areas like your home’s entrance, seating areas, and garden features.
Create a simple foundation using pressure-treated 2x4s as ground-contact supports, ensuring slight elevation for proper drainage away from the walking surface.
Dismantle pallets completely, selecting only the straightest, most defect-free boards for your walking surface where sure footing is essential.
Space these boards with consistent ½-inch gaps that allow water to drain quickly while creating dramatic light effects when illuminated from below.
Install waterproof LED strip lighting beneath the walking surface, tucking it against your support beams where it remains protected yet can shine through your carefully planned gaps.
Connect all lighting to a central control system that allows for color changes, brightness adjustment, and programmable effects for different occasions.
Create wider “landing pad” areas at directional changes or key destinations, perhaps incorporating distinctive patterns in the board arrangement to signal these transitions.
Add vertical elements at strategic points along the pathway—perhaps pallet board railings or decorative posts—that can house additional accent lighting for depth.
Build in slight elevation changes when appropriate, using shallow steps with integrated lighting at the risers for both safety and visual impact.
Incorporate covered sections where pathway lighting is supplemented by overhead elements, creating a tunnel-like effect for dramatic transitions between open areas.
Add perimeter plantings with distinctive textures that will be highlighted by your pathway’s spillover illumination, extending the design impact beyond the deck itself.
This functional art installation costs approximately $350-450 including lighting elements, but creates an unforgettable experience that makes nighttime the best time to enjoy your outdoor space.
Indoor-Outdoor Pallet Transition Space


Blur the lines between your home’s interior and your backyard with a thoughtfully designed transition deck that creates seamless flow and expands your effective living space.
This strategic approach focuses on the often-overlooked threshold zone, turning it into a feature that enhances both your indoor and outdoor areas.
Begin by measuring the area immediately outside your access door, then extend your planned deck to create a generous landing zone at least 8 feet deep.
Ensure your deck height precisely matches your interior floor level, eliminating the traditional step-down that subconsciously signals leaving the home’s comfort.
Select your smoothest, most defect-free pallets for this transition area where bare feet will frequently travel, sanding extensively for interior-quality finish.
Apply multiple coats of high-quality deck stain in a shade that complements your interior flooring, creating visual continuity from inside to outside.
Install weather stripping and threshold treatments that minimize gaps while allowing proper door function, reducing the elements that can enter your home.
Consider adding a retractable awning or pergola cover directly connected to your home’s exterior wall, providing protection that extends your outdoor season.
Create built-in storage elements that serve both indoor and outdoor needs—perhaps shoe storage on one side and garden supply organization on the other.
Install lighting that matches the quality and color temperature of your interior fixtures, maintaining the same ambiance as you move from inside to outside.
Add outdoor-friendly versions of typically indoor elements—perhaps an exterior rug, artwork mounted on fence panels, or even “window” frames defining views.
Incorporate an outdoor beverage station or serving counter positioned for easy access from the kitchen, making entertainment seamlessly integrated.
Position comfortable seating in conversational arrangements that mirror your interior layouts, reinforcing the psychological connection between spaces.
This transformative approach costs approximately $400-500 but effectively increases your home’s usable square footage during good weather months—a fraction of what a proper addition would cost.
With these innovative approaches, you’re now equipped to create an outdoor oasis that perfectly matches your lifestyle, budget, and design sensibilities.
Remember that the beauty of pallet projects lies in their flexibility—feel free to mix and match elements from different designs to create your ultimate custom solution.
The only limit is your imagination (and perhaps your weekend availability).
Happy building!


