Creating an outdoor kitchen doesn’t have to drain your bank account or require a contractor’s expertise.
With some creativity, basic tools, and weekend warrior spirit, you can build an amazing outdoor cooking space that rivals expensive installations.
These DIY projects will help you maximize your outdoor entertaining potential while keeping costs surprisingly low.
Design Your Dream Room in Minutes! – By Madison
🏡 Start Creating FREE →Build a Rustic Pizza Oven Using Firebricks and Clay

Nothing says “backyard chef extraordinaire” quite like pulling fresh pizza from your own handmade outdoor oven.
You can construct a functional pizza oven for under $200 using firebricks, clay, sand, and basic masonry skills.
Start by creating a circular foundation using concrete pavers or poured concrete, ensuring it’s level and sturdy enough to support the oven’s weight.
Build the oven floor by laying firebricks in a tight pattern, using sand to fill any gaps and create a smooth cooking surface.
Create the dome structure by mixing clay soil with sand and water to form a moldable mixture that hardens when dried.
Build the dome over a sand form, starting with a door opening that’s roughly 60% of the dome’s height for optimal airflow.
Layer the clay mixture about 4 inches thick, smoothing it carefully to maintain the dome shape and eliminate air pockets.
Allow the dome to dry slowly over several days, covering it with damp towels to prevent cracking from rapid moisture loss.
Once completely dry, carefully remove the sand from inside and fire the oven gradually with small fires to cure the clay.
Add insulation around the dome using vermiculite concrete or ceramic fiber blankets to improve heat retention and efficiency.
Build a simple roof structure over the oven to protect it from rain and extend its lifespan significantly.
Install a chimney pipe through the roof to direct smoke away from your cooking and entertaining areas.
Create storage space underneath the oven for firewood, pizza peels, and other essential cooking accessories.
Add finishing touches like stone veneer or stucco to match your home’s exterior and create a polished appearance.
Your homemade pizza oven will reach temperatures over 800°F, perfect for authentic Neapolitan-style pizzas that cook in just 90 seconds.
Create a Stylish Bar Counter from Reclaimed Pallet Wood

Transform discarded shipping pallets into a stunning outdoor bar that looks like it came from an upscale restaurant.
Free pallets are often available from local businesses, making this project incredibly budget-friendly while promoting environmental sustainability.
Start by selecting pallets that are heat-treated rather than chemically treated, ensuring they’re safe for food preparation areas.
Disassemble the pallets carefully using a pry bar and hammer, saving all usable boards for your construction project.
Sand all the wood thoroughly to remove splinters and create smooth surfaces that won’t snag clothing or skin.
Plan your bar dimensions based on your space and needs, typically aiming for 42 inches high and 24 inches deep.
Build a sturdy frame using 2×4 lumber to provide structural support for the pallet wood facade and countertop.
Attach the reclaimed pallet boards vertically to create an attractive rustic exterior that showcases the wood’s natural character.
Install horizontal supports inside the frame to hold shelves for storing glasses, bottles, and bar accessories.
Create a countertop using additional pallet boards arranged horizontally and secured with wood glue and screws.
Sand the entire bar surface again, focusing extra attention on the countertop where people will lean and place drinks.
Apply multiple coats of marine-grade polyurethane to protect the wood from moisture and UV damage.
Add a footrest rail along the front of the bar at comfortable height for guests to rest their feet.
Install battery-powered LED strip lighting underneath the countertop to create ambient lighting for evening entertaining.
Include hooks on the sides for hanging bar towels, bottle openers, and other frequently used tools.
Your finished pallet bar will provide years of service while giving your outdoor space an authentic, weathered charm.
Construct a Functional Grill Station Using Cinder Blocks

Building a permanent grill station with cinder blocks creates a professional-looking cooking area for a fraction of commercial costs.
This project requires no special masonry skills and can be completed in a single weekend with basic tools.
Start by excavating and leveling a foundation area slightly larger than your planned grill station footprint.
Pour a concrete pad or lay pavers to create a stable, level base that won’t shift over time.
Plan your design on paper first, including spaces for the grill, side prep areas, and storage compartments.
Begin stacking cinder blocks without mortar to test your layout and make adjustments before permanent installation.
Use construction adhesive designed for masonry to bond the blocks together, creating a strong but removable connection.
Leave openings in the front row of blocks to create storage compartments for propane tanks, grilling tools, and supplies.
Build up the walls to a comfortable working height, typically 34-36 inches for most people.
Create recesses in the block walls to accommodate your specific grill model, ensuring proper ventilation around the unit.
Install a concrete or stone countertop over portions of the block structure to provide prep space and serving areas.
Add doors to the front storage compartments using weather-resistant materials like cedar or composite decking.
Route holes through the back wall for gas lines and electrical connections if you plan to add lighting or outlets.
Include a small sink area if water lines are accessible, dramatically increasing the station’s functionality.
Paint or stain the cinder blocks if desired, though many people prefer the industrial aesthetic of raw concrete.
Your completed grill station will provide decades of reliable service while anchoring your outdoor kitchen design.

💭 I Wrote a Book About My BIGGEST Decorating Mistakes!
When I decorated my first home, I thought I knew what I was doing. Spoiler alert: I DIDN’T. 😅
💸 I bought a sofa that was WAY TOO BIG for my living room. I chose paint colors that looked amazing in the store but terrible on my walls. I spent THOUSANDS on pieces that didn’t work together. Sound familiar?
“Things I Wish I Knew Before I Decorated My First Home” is your shortcut to avoiding ALL my costly mistakes. ✨ Inside, you’ll find practical, NO-NONSENSE advice that will save you time, money, and a whole lot of decorating regret. 🏡
Design Your Dream Room in Minutes! – By Madison
🏡 Start Creating FREE →Transform an Old Dresser Into a Mobile Kitchen Island

Repurposing vintage furniture creates unique outdoor kitchen pieces with character that can’t be bought in stores.
An old dresser can become a fully functional mobile kitchen island with storage, prep space, and vintage charm.
Start by finding a solid wood dresser at thrift stores, estate sales, or online marketplaces for maximum affordability.
Strip off any existing paint or finish using chemical strippers or sanders to reach the bare wood underneath.
Inspect the dresser thoroughly for structural damage and make necessary repairs to drawers and frame components.
Sand all surfaces smooth and apply wood conditioner to ensure even stain or paint absorption.
Choose marine-grade finishes designed for outdoor use to protect against moisture and temperature fluctuations.
Remove the top drawers and create an open shelf for storing frequently used cooking utensils and serving pieces.
Install a butcher block or tile countertop over the dresser top to create a durable food preparation surface.
Add heavy-duty casters to the bottom, including at least two locking wheels to secure the island during use.
Install hooks on the sides for hanging dish towels, oven mitts, and other lightweight kitchen accessories.
Line the remaining drawers with weather-resistant materials or removable trays for easy cleaning and organization.
Add a towel bar to one side and a paper towel holder to create additional convenience features.
Install battery-powered LED lights inside the open shelves to improve visibility during evening food preparation.
Create a spice rack on one end using small shelves or magnetic strips to keep seasonings easily accessible.
Your upcycled dresser island will roll wherever you need extra prep space while providing ample storage for outdoor entertaining.
Install a Budget-Friendly Outdoor Sink Station

Adding running water to your outdoor kitchen transforms meal preparation and cleanup from chore to convenience.
You can create a functional sink station for under $300 using basic plumbing supplies and creative problem-solving.
Start by selecting a location near your house where you can tap into existing water lines with minimal excavation.
Choose a simple stainless steel utility sink that can withstand outdoor conditions without rusting or deteriorating.
Build a basic cabinet frame using pressure-treated lumber to house the sink and provide storage underneath.
Install shut-off valves both inside your house and at the outdoor sink to prevent freeze damage during winter.
Run PEX tubing underground from your house to the sink location, burying it below the frost line in your area.
Create a simple drainage system using a bucket or connecting to existing landscape drainage if local codes permit.
Install a small electric water heater underneath the sink cabinet if hot water is important for your outdoor cooking.
Add a backsplash using tile, stone, or other water-resistant materials to protect the wall behind the sink.
Include soap dispensers and paper towel holders mounted conveniently near the sink for easy access.
Install a small mirror above the sink area to create the feeling of a complete outdoor kitchen space.
Add hooks nearby for hanging dish towels and cleaning cloths where they’ll dry quickly in outdoor air.
Create storage in the cabinet below for cleaning supplies, extra towels, and seasonal outdoor kitchen items.
Include a small trash bin that fits inside the cabinet to keep waste contained and your outdoor space tidy.
Your outdoor sink will eliminate countless trips back and forth to the house while cooking and entertaining outside.
Design a Multi-Purpose Fire Pit Cooking Area

Combining a fire pit with cooking capabilities creates a focal point that provides warmth, ambiance, and culinary functionality.
This project lets you roast marshmallows, grill steaks, and gather friends around the same beautiful feature.
Start by choosing a location at least 10 feet away from structures and overhanging tree branches for safety.
Excavate a shallow circular area and line it with sand to create a stable base for your fire pit construction.
Build the fire ring using firebricks arranged in a circle, leaving gaps between some bricks for airflow.
Create a raised platform around the fire pit using pavers or flagstones for seating and food preparation areas.
Install an adjustable grill grate system that can swing over the fire for direct cooking or move aside completely.
Add a vertical post with an arm for hanging cast iron pots and kettles over the flames for traditional cooking.
Build seating around the fire pit using natural stone, concrete blocks, or pressure-treated lumber with cushions.
Include storage boxes built into the seating for keeping firewood, cooking utensils, and outdoor games easily accessible.
Create windscreens using glass panels or metal sheets to protect the fire from strong breezes that interfere with cooking.
Install subtle landscape lighting around the area to safely navigate the space after dark.
Add a small prep table nearby for seasoning meats and preparing foods before they go over the fire.
Include long-handled cooking tools specifically designed for fire pit cooking to keep hands safe from heat.
Store cast iron cookware nearby since it performs best over open flames and retains heat excellently.
Your fire pit cooking area will become the heart of outdoor gatherings, combining primitive cooking methods with modern convenience.
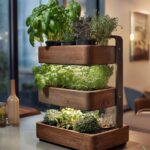
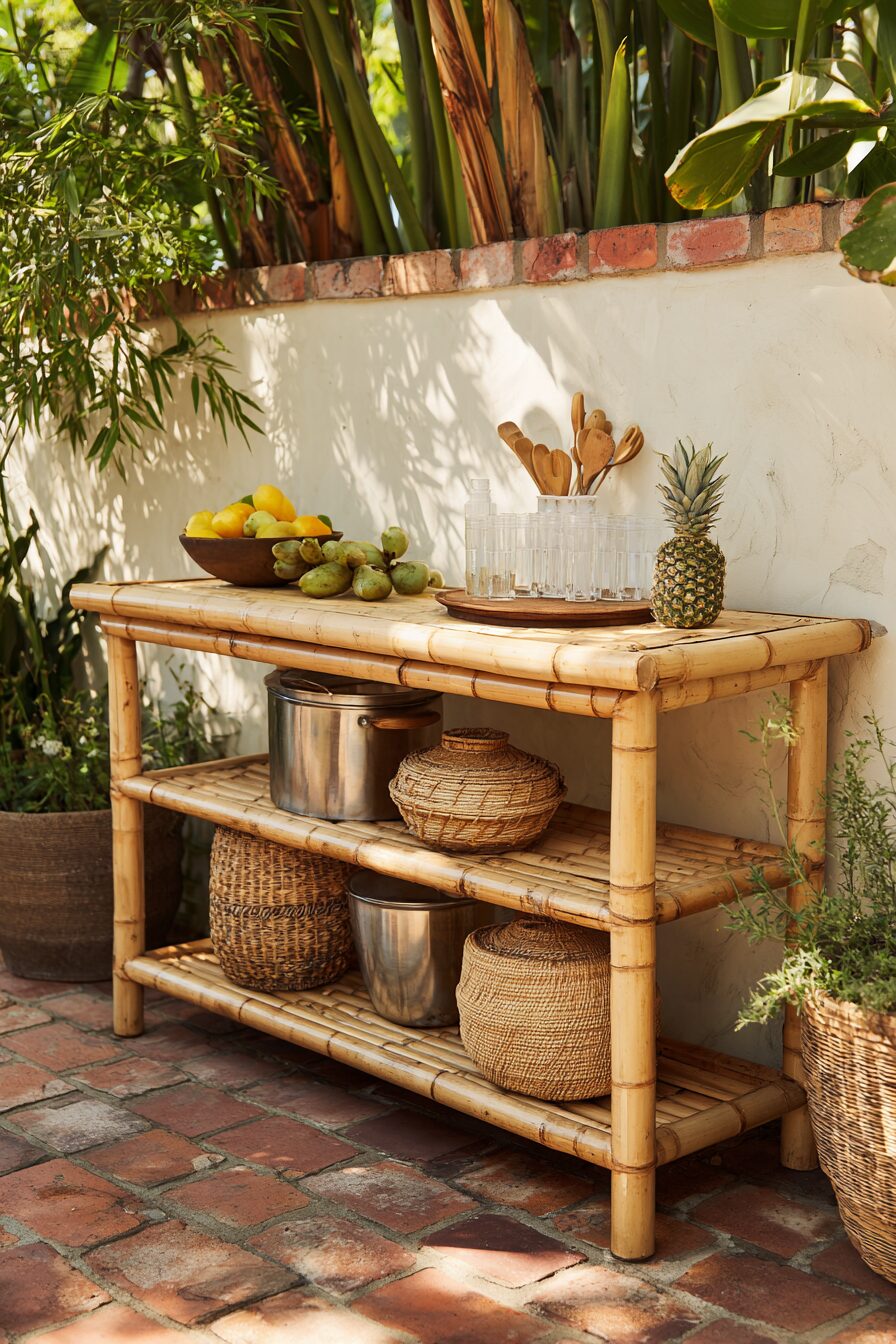
Craft a Bamboo Prep Station for Tropical Vibes

Bamboo creates an exotic outdoor kitchen aesthetic while remaining surprisingly affordable and environmentally sustainable.
This natural material works beautifully in any climate and adds instant tropical resort vibes to your backyard space.
Start by purchasing bamboo poles from garden centers or online suppliers, choosing pieces with consistent diameter and quality.
Design a simple table structure with bamboo legs and crossbars, planning all connections before beginning construction.
Use stainless steel bolts and brackets specifically designed for bamboo construction to ensure strong, lasting joints.
Create the tabletop using bamboo poles laid side by side and secured with hidden fasteners underneath.
Sand all bamboo surfaces lightly to remove any rough spots while preserving the natural texture and appearance.
Apply multiple coats of marine-grade sealant designed for bamboo to protect against moisture and UV damage.
Add bamboo shelving underneath the prep table for storing cutting boards, mixing bowls, and serving platters.
Install bamboo hooks along the edges for hanging kitchen utensils, dish towels, and lightweight cooking tools.
Create a small spice rack using bamboo segments cut to perfect lengths for holding standard spice containers.
Add casters to make the prep station mobile, allowing you to move it closer to the grill or dining area.
Include a small cutting board that fits perfectly into a recessed area of the tabletop for food preparation.
Install battery-powered LED strip lights underneath for task lighting during evening food preparation sessions.
Add bamboo privacy screens on wheels that can be positioned to block wind or create intimate cooking areas.
Your bamboo prep station will transport guests to a tropical paradise while providing essential outdoor kitchen functionality.
Design Your Dream Room in Minutes! – By Madison
🏡 Start Creating FREE →Pour Custom Concrete Countertops for a Modern Look

Concrete countertops deliver high-end aesthetics at DIY prices while allowing complete customization of color and texture.
This project requires patience and attention to detail but creates stunning results that rival expensive natural stone.
Start by building precise wooden forms that define the exact shape and size of your desired countertops.
Mix concrete with additives like fiber mesh and plasticizers to increase strength and reduce cracking over time.
Add concrete dyes or stains during mixing to achieve your preferred color, testing small batches first.
Pour the concrete in sections if creating large countertops, working quickly to maintain consistent texture throughout.
Use vibrating tools or tap the forms with hammers to eliminate air bubbles that would create surface imperfections.
Allow the concrete to cure slowly under plastic sheeting, keeping it moist for maximum strength development.
Remove the forms carefully after full curing and sand any rough edges smooth with progressively finer grits.
Apply concrete sealer designed for food contact surfaces to protect against stains and moisture penetration.
Create integrated features like drain boards, trivets, or decorative aggregates during the pouring process.
Add embedded elements like glass pieces, shells, or metal accents for unique personalized touches.
Install the finished countertops on sturdy supports that can handle the significant weight of cured concrete.
Include subtle lighting underneath the countertops to highlight the concrete’s texture and create ambient lighting.
Maintain your concrete countertops with regular resealing and gentle cleaning to preserve their appearance.
Your custom concrete surfaces will provide decades of service while showcasing your craftsmanship and creativity.
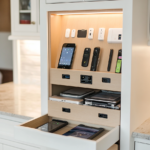
Build Smart Storage Solutions from Recycled Materials

Effective storage transforms chaotic outdoor kitchens into organized, efficient cooking spaces using materials that might otherwise become waste.
Creative repurposing saves money while reducing environmental impact and adding unique character to your outdoor space.
Start by collecting sturdy containers like large yogurt containers, coffee cans, and plastic storage bins for organizing small items.
Mount magnetic strips on metal surfaces to hold knives, bottle openers, and other metal utensils within easy reach.
Create spice storage using small glass jars mounted on boards, allowing you to see contents at a glance.
Build shelving units from old wooden crates or fruit boxes, sanding and sealing them for outdoor durability.
Install pegboard panels on walls or fences to hang pots, pans, and cooking utensils in an organized, accessible manner.
Use old wine barrels cut in half as stylish storage containers for charcoal, wood chips, or seasonal decorations.
Mount small buckets or planters on rails to create mobile storage that slides along prep areas as needed.
Create a utensil holder using a large ceramic pot filled with sand or rice to keep tools upright and accessible.
Install hooks and hangers made from repurposed materials like old horseshoes or decorative metal pieces.
Build rolling carts from salvaged materials to move supplies between storage areas and active cooking zones.
Use mesh bags or baskets to store lightweight items like napkins, paper plates, and plastic utensils.
Create weather-resistant storage boxes using old coolers or plastic containers with tight-fitting lids.
Label everything clearly with weather-resistant tags or permanent markers to maintain organization over time.
Your recycled storage solutions will keep your outdoor kitchen organized while showcasing your environmental consciousness and creativity.
💭 I Wrote a Book About My BIGGEST Decorating Mistakes!
When I decorated my first home, I thought I knew what I was doing. Spoiler alert: I DIDN’T. 😅
💸 I bought a sofa that was WAY TOO BIG for my living room. I chose paint colors that looked amazing in the store but terrible on my walls. I spent THOUSANDS on pieces that didn’t work together. Sound familiar?
“Things I Wish I Knew Before I Decorated My First Home” is your shortcut to avoiding ALL my costly mistakes. ✨ Inside, you’ll find practical, NO-NONSENSE advice that will save you time, money, and a whole lot of decorating regret. 🏡
Set Up an Outdoor Refrigeration System on a Shoestring

Keeping food and beverages cold outdoors doesn’t require expensive built-in refrigerators or constant trips to the house.
Creative cooling solutions can maintain safe food temperatures while adding convenience to your outdoor cooking experience.
Start with a high-quality cooler as your base, choosing one with thick insulation and reliable latches.
Build an insulated cabinet around the cooler using rigid foam insulation and weather-resistant exterior materials.
Install a small fan powered by a 12-volt battery to circulate air and improve cooling efficiency inside the cabinet.
Add drainage at the bottom of the cabinet to handle melting ice water without damaging surrounding materials.
Create removable ice compartments using smaller containers that fit inside your main cooling system.
Install a thermometer to monitor internal temperatures and ensure food safety during extended outdoor cooking sessions.
Add shelving systems inside the cooling cabinet to organize different types of food and maximize space efficiency.
Include dedicated areas for beverages separate from raw foods to prevent contamination and improve organization.
Create easy access doors or tops that open smoothly and seal tightly to maintain internal temperatures.
Add wheels or casters to make the entire cooling system mobile for parties or events in different areas.
Install battery-powered LED lights inside to improve visibility when searching for items in low light conditions.
Include backup cooling methods like frozen gel packs that don’t create water as they melt.
Your DIY refrigeration system will keep foods safely chilled while eliminating constant runs to the indoor kitchen.
Your outdoor kitchen dreams are closer than you think with these budget-friendly DIY projects.
Each idea can be tackled over a weekend or two, gradually building your perfect outdoor cooking space without breaking the bank.
Start with one project that excites you most, then expand your outdoor kitchen as time and budget allow.