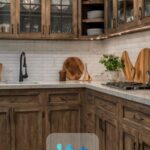
hose outdated orange oak cabinets don’t have to be a design eyesore anymore.
With the right approach, you can transform that tired kitchen into a stunning space that reflects your personal style without demolishing your budget.

Paint Them Crisp White for an Instant Refresh


Nothing transforms orange oak faster than a coat of pristine white paint.
This game-changing solution immediately brightens your entire kitchen, making it feel larger, cleaner, and infinitely more modern.
The stark contrast between the dated orange tone and fresh white is truly remarkable – visitors will think you installed brand new cabinetry.
For best results, proper prep work is absolutely essential – sand those cabinets thoroughly, apply a high-quality primer specifically designed for glossy surfaces, and finish with durable cabinet paint that resists chips and scratches.
White shades with slightly warmer undertones (like Sherwin Williams Pure White or Benjamin Moore Simply White) can complement existing elements in your kitchen without feeling too stark or clinical.
The transformation typically costs between $200-$500 for DIY supplies, making it one of the most budget-friendly options with maximum impact.
Plan for a full weekend project, as proper drying time between coats is crucial for a professional-looking finish.
Don’t forget to label and organize your cabinet doors and hardware during removal – this simple step saves hours of frustration during reassembly.
For an extra designer touch, consider painting the inside of your cabinets a contrasting color that shows when doors are open.
Tap to Explore These Beauties
See my ideas in action 👇 Tap any image to explore full details.
Embrace the Dramatic with Navy Blue Cabinets


Navy blue cabinetry has become a modern classic, offering sophisticated contrast that makes those orange oak cabinets unrecognizable.
This bold choice creates a luxurious, high-end look that pairs beautifully with brass hardware for a touch of glamour.
Navy cabinets work surprisingly well in both large and small kitchens, as the deep tone adds character without overwhelming the space.
The dramatic transformation from orange to navy is especially striking in kitchens with white walls or countertops, creating a tailored, custom appearance.
Professional designers often recommend navy for its timeless appeal that won’t quickly date like trendy colors might.
When selecting your navy shade, consider samples with slightly different undertones – some lean more toward indigo or have subtle green notes that can completely change the mood of your space.
💭 Ever wondered what your room would actually look like rearranged?
I built a free tool that lets you drag furniture around a 2D floor plan. No signup, no catch.
See the Room Planner →The rich color beautifully disguises any minor imperfections in older cabinets, making it a forgiving choice for DIY enthusiasts.
For maximum impact, pair navy cabinets with light countertops in marble, quartz, or butcher block to create striking contrast.
This sophisticated color works with multiple design styles from traditional to modern, making it a versatile choice for almost any home.
Just as with white paint, proper preparation is essential – use a high-adhesion primer tinted gray to help the navy color develop true depth and richness.
Create Striking Two-Tone Cabinets


Two-tone cabinet designs have become a designer favorite, allowing you to introduce contemporary style while minimizing work.
This approach typically involves painting upper cabinets one color (often white) and lower cabinets a contrasting shade (like charcoal, green, or blue).
The visual interest created by this technique instantly updates your kitchen from predictable to photoshoot-worthy.
Two-tone cabinets also create an optical illusion – lighter upper cabinets make ceilings appear higher, while darker base cabinets ground the space.
This strategy works particularly well in galley kitchens or smaller spaces that benefit from visual expansion.
Kitchen islands provide another opportunity for contrast, often painted in an accent color that complements both the upper and lower cabinet selections.
Beyond just painting different cabinet sections, consider incorporating different materials – perhaps painted uppers with stained wood lowers for rich textural contrast.
The beauty of this approach is its flexibility – you can go subtly sophisticated with closely related tones or boldly dramatic with high-contrast combinations.
This technique also allows you to preserve some of your cabinet’s wood character if you’re not quite ready to cover everything with paint.
Designers recommend maintaining consistency in hardware across all cabinets to unify the two-tone look.
Find Your Room’s Color Palette
Tap a vibe — get a curated 5-color palette with hex codes you can copy ✨
Add Overlay Trim for Custom Shaker Style

Transform flat, boring cabinet doors into sought-after shaker style with simple wood trim overlays.
This clever technique involves attaching thin wood strips to create the illusion of recessed panel doors without replacing anything.
The dimensional interest added by this trim work elevates basic orange oak cabinets to custom-looking cabinetry.
All you need is inexpensive 1/4-inch plywood strips, wood glue, brad nails, and basic tools to completely reimagine your cabinet fronts.
The added benefit of this approach is that the new trim helps conceal the distinctive orange oak grain pattern that makes the cabinets look dated.
Once the trim is installed, paint the entire cabinet in your chosen color for a thoroughly modern appearance that bears no resemblance to the original.
This project costs approximately $100-300 in materials but adds thousands in perceived value to your kitchen.
The transformation works equally well on drawer fronts, creating a cohesive look throughout your cabinetry.
For an even more custom look, consider adding additional trim elements like crown molding at the top of your cabinets or decorative feet at the base.
The dimensional shadows created by the new trim add architectural interest that flat cabinets simply cannot achieve.

💭 I Wrote a Book About My Biggest Decorating Mistakes!
When I decorated my first home, I thought I knew what I was doing. Spoiler: I didn’t. 😅
💸 I bought a sofa way too big for my living room. Paint colors that looked amazing in the store but terrible on my walls.
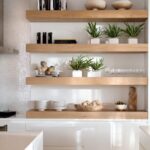
Remove Upper Cabinet Doors for Open Shelving


Create an airy, contemporary look by removing select upper cabinet doors to create open shelving.
This partial approach lets you display beautiful dishes and glassware while maintaining closed storage for less attractive necessities.
The contrast between open and closed storage creates visual rhythm that makes your kitchen feel intentionally designed rather than dated.
This transformation costs virtually nothing since you’re simply removing doors (store them safely in case a future homeowner wants them back).
Paint the interior of these now-open cabinets in a contrasting color or add peel-and-stick wallpaper for a custom look that draws the eye.
The open shelving trend continues to dominate kitchen design, giving your space an updated, Instagram-worthy look without major renovation.
To make this look successful, be selective about what you display – curate collections of matching dishes, glassware, or cooking items for a cohesive appearance.
The beauty of this approach is its reversibility – if you tire of dusting open shelves, you can simply reattach your original doors.
Design experts suggest removing doors from cabinets flanking windows or range hoods for the most balanced, intentional look.
What’s Your Decor Personality?
5 questions · 30 seconds · Instant style match 🏡
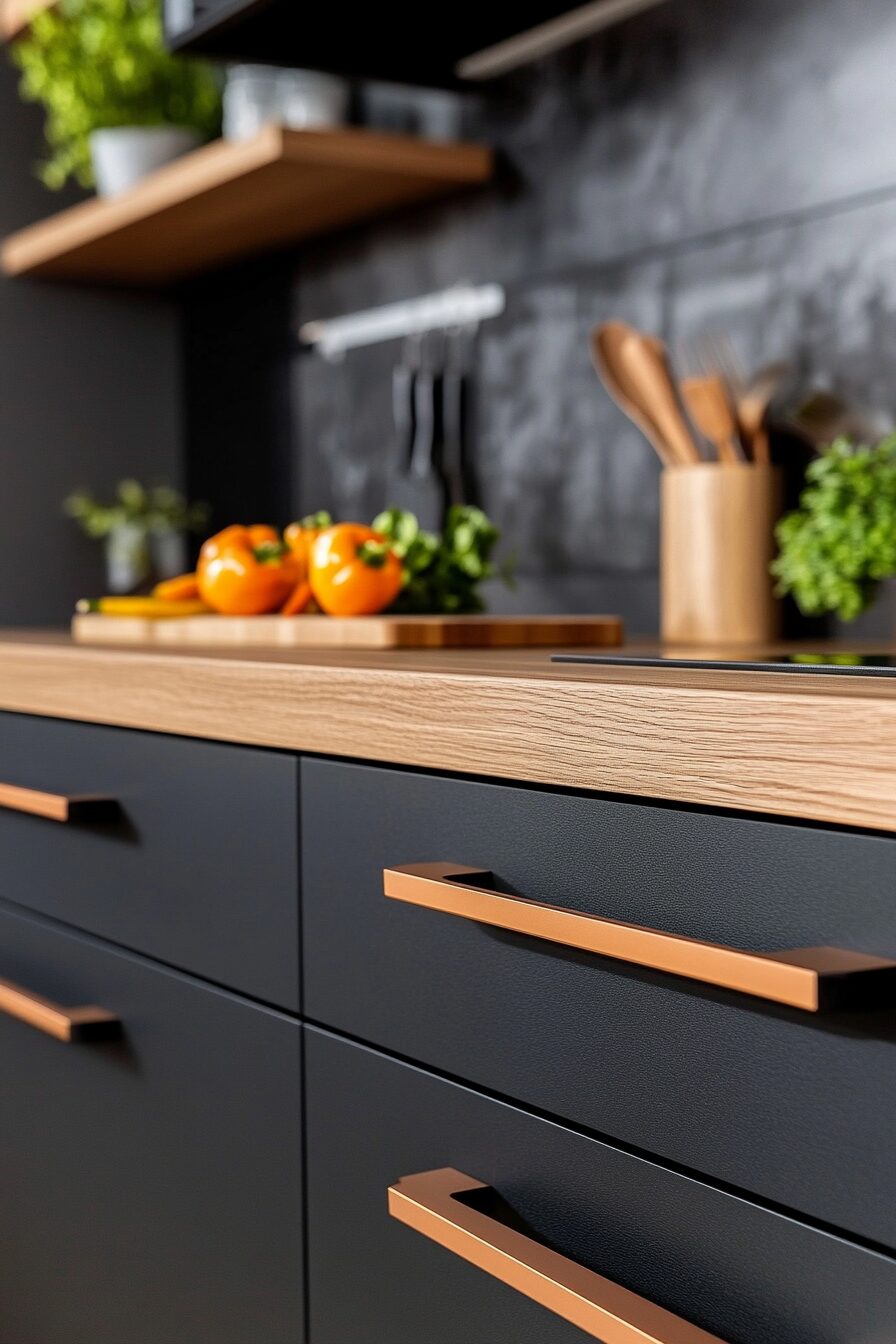
Update Hardware for Instant Transformation


Swapping dated pulls and knobs might seem minor, but new hardware dramatically modernizes orange oak cabinets.
Think of cabinet hardware as kitchen jewelry – it can completely change the character of your space.
Modern matte black pulls create striking contrast against orange oak, instantly adding contemporary edge to traditional cabinetry.
Alternatively, aged brass or copper hardware introduces warmth that complements the underlying tones in the wood while still feeling fresh.
The hardware upgrade typically costs between $100-300 total but makes your cabinets look like you invested thousands.
This single change can bridge different design styles, helping traditional cabinets feel more transitional or even modern depending on your selection.
Hardware installation requires only a screwdriver and measuring tape, making it the perfect weekend project for even novice DIYers.
For maximum impact, ensure all new hardware matches your faucet and light fixtures to create a cohesive, thoughtfully designed appearance.
If your cabinets have visible hinges, don’t forget to replace those too – this often-overlooked detail can undermine your update if neglected.
Apply Milk Paint for Rustic Farmhouse Charm

Milk paint offers a distinctive, matte finish that transforms orange oak into farmhouse-chic cabinetry with authentic character.
Unlike regular paint, milk paint can be manipulated to create subtle distressing that reveals hints of the wood beneath, adding dimension and interest.
This technique honors the wood’s history while updating its appearance – perfect for those who appreciate natural materials but crave updated style.
The slightly inconsistent, hand-applied look of milk paint adds authenticity to farmhouse or cottage-style kitchens that can’t be achieved with modern paints.
Soft, muted colors like sage green, dusty blue, or creamy white complement the farmhouse aesthetic while neutralizing orange tones.
Because milk paint naturally chips and distresses over time, it actually looks better with age – unlike glossy paints that show every scratch and ding.
This specialty paint typically costs more than standard varieties but requires less precise application technique, making it beginner-friendly.
For added protection and depth, finish milk-painted cabinets with clear furniture wax, which enhances the color while providing subtle sheen.
The wax finish is also repairable – simply buff out scratches or reapply wax to worn areas without repainting the entire surface.
This technique works particularly well in vintage homes or cottages where perfect, factory-finish cabinetry would look out of place.
This or That?
Pick your fave — see what other readers chose! 👀
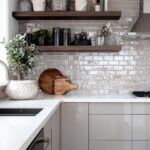
Install Glass Door Inserts for Elegant Display


Transform select cabinet doors with glass inserts to break up the wall of orange oak with sophisticated transparency.
This strategic update creates display opportunities while maintaining the basic cabinet structure, saving thousands compared to replacement.
Clear, frosted, or seeded glass options suit different styles – clear for traditional spaces, frosted for contemporary, and seeded for farmhouse aesthetics.
The interior cabinet faces will need painting since they’ll be visible through the glass, creating another opportunity to introduce accent color.
This modification typically costs $20-40 per door plus installation, making it an affordable way to add custom character.
Professional glass shops can cut inserts to size, or DIY kits are available for those comfortable with more advanced woodworking.
Strategic lighting installed inside these cabinets creates beautiful evening ambiance, highlighting special dishes or glassware.
Design experts recommend converting only 2-4 cabinets to glass fronts for balance – too many glass doors can look busy and reveal kitchen clutter.
The combination of wood framework with glass inserts creates architectural interest that elevates the entire kitchen.
Apply Wood Grain Whitewashing Technique

Whitewashing preserves beautiful wood grain while neutralizing orange tones for a subtle, sophisticated transformation.
This technique allows the natural character of the wood to remain visible while brightening and modernizing its appearance.
The semi-transparent finish creates depth and dimension that solid paint simply cannot replicate, honoring quality wood cabinetry.
This approach works particularly well in coastal, Scandinavian, or modern farmhouse design schemes where natural elements are celebrated.
The process involves applying diluted white paint or specialized whitewash stain that allows wood texture to show through while neutralizing orange.
Unlike solid paint, whitewash won’t chip or peel, making it a durable option for busy kitchens with high traffic.
The technique can be adjusted for more or less coverage – some homeowners prefer just a hint of white for subtle brightening, while others apply multiple coats for a more dramatic effect.
This finish complements natural stone countertops particularly well, creating a harmonious blend of organic textures.
For variations on this technique, consider “greywashing” with diluted gray paint or “limewashing” for a more European country aesthetic.
Whitewashed cabinets pair beautifully with modern elements like sleek appliances and contemporary lighting for an eclectic, collected-over-time feel.
Quick Design Dilemma
Cast your vote — see what other readers think! 🤔
Apply Peel-and-Stick Wood Veneer for Total Transformation


Peel-and-stick wood veneer technology has revolutionized cabinet makeovers, allowing you to completely change wood species without sanding or stripping.
These adhesive wood sheets come in varieties like walnut, maple, or white oak – instantly erasing orange oak grain with more desirable wood patterns.
The application process requires careful measurement and patience but minimal tools – making it accessible to most DIYers with basic skills.
Once applied, these veneers can be sealed with polyurethane for durability, creating a finish indistinguishable from solid wood.
This technique costs approximately $500-800 for an average kitchen but creates the appearance of brand new cabinetry worth thousands more.
Modern veneer products include realistic woodgrain texture that maintains the tactile quality of real wood, unlike flat laminate alternatives.
The thin profile of these products means they won’t affect how doors and drawers function – no adjustments to hinges or hardware are typically needed.
For those who appreciate natural wood but dislike orange oak specifically, this solution preserves the warmth of wood while updating its appearance.
This approach is particularly valuable for high-quality cabinets with solid construction that deserve preservation rather than replacement.
Some manufacturers offer samples, allowing you to test compatibility with your cabinets before committing to the full transformation.
Remember that quality cabinets deserve thoughtful updating rather than replacement – saving you thousands while reducing environmental waste.
The perfect approach depends on your budget, skill level, and design preferences, but any of these ideas will create remarkable results worth sharing.
💭 I Wrote a Book About My Biggest Decorating Mistakes!
When I decorated my first home, I thought I knew what I was doing. Spoiler: I didn’t. 😅
💸 I bought a sofa way too big for my living room. Paint colors that looked amazing in the store but terrible on my walls.