Kitchen towels are a ubiquitous necessity in every home, but with a bit of creativity, they can become so much more.
Crafting custom kitchen towels is an easy, fun way to add personality and charm to your cooking space.
With a variety of DIY techniques like embroidery, painting, applique and more, you can make ordinary towels into beautiful, decorative pieces that reflect your style.
You’ll learn techniques like stenciling, stamping, sewing and more to make towels that are as practical as they are pretty.
These DIY ideas will have you excited to dress up your kitchen space with handmade style.
Embroidered Kitchen Towels

A simple yet elegant way to liven up your kitchen is with embroidered kitchen towels.
Embroidery is an easy craft that allows you to add a personal touch to plain linen or cotton towels.
You don’t need any special embroidery skills to get started.
Even basic stitches like a running stitch or back stitch can create beautiful designs.
First, think about what motifs or images you’d like to embroider.
Floral designs, fruits, initials, and monograms are classic embroidery choices for kitchen towels.
Sketch out some quick doodles on paper to plan your design.
Keeping the design simple will make it easier to embroider.
Once you’ve settled on a design, trace it onto the towel using a fabric marker or lightweight tracing paper.
Center the design so it’s visible when the towel hangs from the oven door or refrigerator handle.
Hoop the towel to keep it taut while embroidering.
Embroidery hoops can be found in any craft store.
Use embroidery floss in your choice of colors to stitch the design following your traced lines.
Split the floss so you’re using only 2 or 3 of the strands—this will keep the stitches from getting too bulky.
Work slowly and keep your stitches consistent.
Avoid pulling too tightly or the fabric may pucker.
When you’ve finished stitching, remove the hoop and gently wash the towel by hand.
This helps set the stitches.
Trim any loose threads and your embroidered kitchen towel is ready to use!
Change up the look by using contrasting floss colors, metallic threads, or different weight yarns like pearl cotton.
Add personal details like monograms or names to make these handmade towels meaningful gifts.
Embroidered kitchen towels are a thoughtful housewarming or wedding present too.
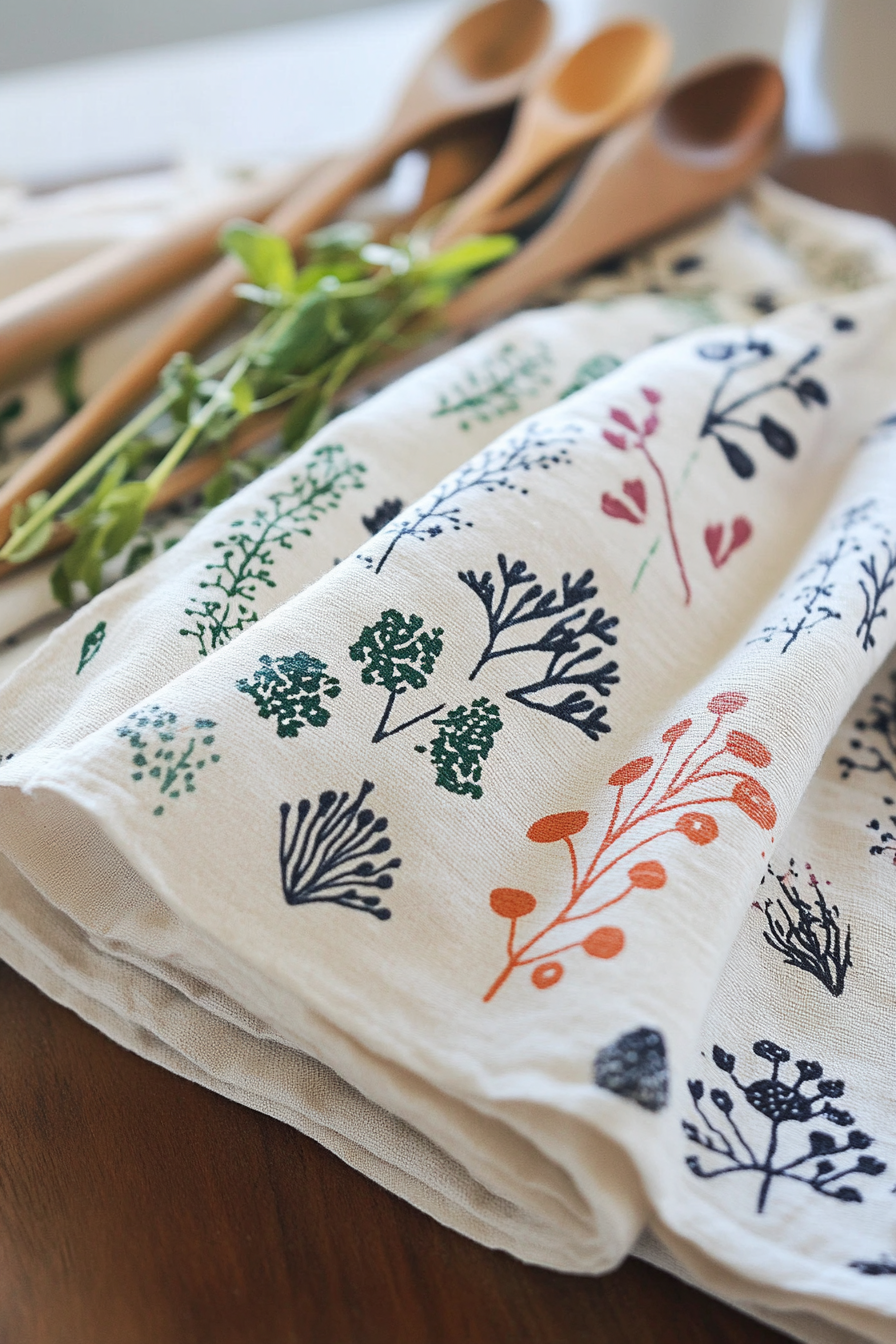
Stamped Kitchen Towels

For a quick and easy kitchen towel craft, try stamping simple designs using carved erasers, potatoes, corks, or other household items.
This technique allows you to customize plain towels in minutes with minimal effort or artistic skill required.
Start by gathering some carving materials you can shape into stamps.
Round erasers work well for circular motifs.
Slice potatoes in half to create curved stamp shapes.
Bottle corks, chopsticks, and old jar lids also make great stamp shapes.
Use a penknife or small chisel to carve patterns into the stamp materials—think simple shapes like stars, circles, hearts, leaves, or flowers.
Prep the towels by washing and drying them first.
Lay the towel flat on a protected work surface—the stamp pads can leave marks behind.
Choose fabric ink pads in your desired colors—the ink is specially formulated to not bleed through the towel fabric.
Test out your stamps on scrap paper first.
Then firmly press the stamps down onto the ink pad and transfer the image onto the towel with a firm, even press.
Lift straight up so the image doesn’t smudge.
Continue stamping until you fill the towel surface.
You can stamp randomly or in tidy rows.
For best results, stamp in a consistent direction.
Leave plenty of open space around the stamped designs—an overcrowded look can be cluttered.
Once you’re happy with the stamped design, set it aside to dry completely.
Heat set the fabric ink by ironing the towel on a medium-high setting before the first wash.
Now you have custom stamped kitchen towels to brighten up your décor!
Painted Kitchen Towels

Tap into your creative side with painted kitchen towels!
This is a fun weekend craft to make colorful towels featuring your own unique designs.
With some simple painter’s tape and fabric paints, you can make artwork for your kitchen in no time.
Start by washing and drying plain cotton or linen towels so the fabric is prepped for the paint.
Use painter’s tape to mark off any geometric shapes, patterns, stripes, borders, or silhouettes you’d like to feature in your painted design.
Apply the tape along the edges you want to keep crisp.
Next, squeeze out some fabric paints in your chosen colors onto a paper plate or foam tray.
Use a foam brush or short, stiff bristle brush to apply the paint within your taped-off sections in even strokes.
You can paint freestyle shapes and figures too.
Work your way across the towel, gently removing the tape after each section is filled in.
This will keep the paint from bleeding under the edges.
Let the paint dry completely between adding layers to build up the colors.
Once your painted design is finished and dry, set the fabric paint permanentlly by ironing the towel on a medium-high setting.
Then rinse in cool water and wash the towel before first use.
The painted colors will remain vibrant even after regular machine washing.
Jazz up your kitchen with your painted towels hanging from the oven door or draped on the front of the sink.
The design options are endless – be as creative as you like with your painted kitchen towel craft!
Monogrammed Kitchen Towels

Personalize your kitchen space with customized monogrammed towels!
This simple craft lets you embellish store-bought towels with your family’s initials or a special name.
Monogrammed towels make charming gifts too.
Purchase some plain linen or cotton kitchen towels.
Soak them in warm water mixed with a few teaspoons of salt—this helps set the dye.
Rinse and let dry.
Cut out monogram letters from contrasting colored felt using stencils or freehand, if you’re feeling creative!
Pin the letters in place on the towel and carefully stitch around the edges using matching sewing thread and a straight stitch.
For a beginner-friendly option, use iron-on vinyl monogram letter decals instead of hand sewing.
Arrange the vinyl letters on the towel, then press with a hot iron to adhere them.
Finish off your monogrammed towel by tying a ribbon or trim around one corner—this adds a pop of color and visual interest.
Now you have customized towels ready to hang in your kitchen or gift to someone special!
Change up the style by choosing script or block letters, a favorite name rather than initials, or experiment with thread colors.
Felt is easy to work with but you can use fabric, burlap, or vinyl for the letters too.
However you design them, these DIY towels are sure to become kitchen staples!
Appliquéd Kitchen Towels

Appliqué involves stitching one piece of fabric onto another to create a design.
It’s a fun way to decorate kitchen towels with shapes, motifs, or images using fabric scraps.
This no-sew appliqué technique uses iron-on adhesive so you don’t need any special skills.
Start by sketching out some appliqué shapes or printing out clip art that you’d like to feature on your kitchen towels.
Heart shapes, fruits, flowers, leaves, or stars make classic choices.
Cut out your shapes from assorted cotton print scraps.
Follow the product instructions to apply the iron-on adhesive to the wrong side of each fabric shape.
Place the shapes on the towel, arranging them attractively.
Press with an iron to adhere the appliqués in place.
You can make the appliquéd shapes really stand out by cutting them from contrasting fabrics like checks, stripes, or bold colors different than the towel base.
Mixing multiple coordinating prints looks lively and whimsical.
For texture interest, cut shapes from non-traditional materials like lace, burlap, felt, or even wrapping paper coordinated to the towel colors.
Simply follow the same iron-on application method.
Let the adhesive cool and set fully before using your finished appliquéd towels.
The shapes will remain securely adhered even after regular machine washing due to the strong iron-on bond.
Display your unique towels in the kitchen or gift to friends!
Oven Mitt from Kitchen Towels


Put your stash of patterned kitchen towels to good use by upcycling them into charming oven mitts!
This thrifty kitchen craft repurposes out-of-rotation tea towels or thinning dish towels into practical mitts ideal for grabbing hot pans.
Start by washing and drying two coordinating towels in similar size.
Stack the two towels with the patterned sides facing out.
Cut around a hand shaped template, making sure to leave a border of at least an inch around the hand shape.
Align the two cut-out towel shapes and pin around the edges.
Sew the layers together by machine or hand using a 1⁄2 inch seam allowance.
Leave an opening along the bottom or side to allow turning the mitt right side out.
Trim the corners and clip the curves for a smoother edge.
Turn the mitt through the opening and use a chopstick to gently push out the fingers and shape.
Press with an iron and topstitch all the way around the opening to seal it closed.
You can add a creative fabric scrap cuff or binding along the wrist edge for a pop of color if desired.
Otherwise, simply topstitch around the opening for a clean look.
Fill the completed oven mitt lightly with insulation like quilt batting or cotton balls to protect hands from heat.
Your upcycled kitchen towel mitt is ready for baking duty!
The patterned fabric makes each mitt unique.
Tea Towel Apron

One yard of a pretty patterned tea towel makes a darling DIY apron perfect for puttering around the kitchen!
This fast and easy upcycle project instantly transforms an inexpensive towel into a cute and functional apron.
Start with a purchased or thrifted linen or cotton tea towel approximately 27 by 36 inches.
The pattern and colors will become the focal point for your apron.
Cut two 36-inch lengths of 1-inch wide ribbon or twill tape.
Pin the ribbons at the top corners of the towel to form the apron straps.
Adjust the placement inwards or outwards to suit your height.
Stitch the ribbons in place securely.
To make a waist tie, cut another 36-inch length of ribbon.
Fold under and press the short ends.
Pin the tie centred along the bottom edge of the towel, aligning the raw edges.
Sew in place.
Topstitch all the ribbons neatly along both long edges for a finished look.
Try using contrasting thread colors that complement the towel pattern.
For a quick and easy apron variation, you can simply tie the top corners of the tea towel around your neck, skipping the waist tie.
The transformed tea towel is now ready to wear and protect your clothing while cooking and baking!
Bandana Kitchen Towels

Bandana print fabrics are a fun and lively choice for DIY kitchen towels.
The graphic patterns and vibrant colors areperfect for a whimsical farmhouse, boho, or country décor theme.
These bandana towels are a cinch to sew using pre-cut quilt panels
Start with one yard of a bandana or paisley fabric panel, available at any quilting shop.
Cut the panel down to your desired towel size, such as 16 by 30 inches.
If you’d like a hemmed edge, fold under and press 1⁄4 inch on all sides.
Topstitch the hem allowances in place.
For a frayed look, simply leave the panel edges raw after cutting to size.
To make the towel more absorbent and durable, use cotton quilt binding folded in half lengthwise to bind all the edges.
Sew the binding to the front side of the towel using a 1⁄4 inch seam allowance.
Wrap binding around edges to back of the towel and stitch in place.
For a perfect gift, sew on a loop at one corner from cotton cording or ribbon.
Now your bandana print kitchen towel is ready to brighten up sink duty!
The graphic printed style matches any décor.
Fringed Flour Sack Towels

Flour sack towels make an economical choice for stocking the kitchen with dish towels.
You can stretch your dollar even further by fringing and embellishing the towels yourself!
Simple crafting transforms humble flour sack towels into down-home country charm.
Start with good quality plain flour sack towels, which are a natural linen-cotton blend.
For fringed edges, carefully remove a 1⁄4 inch double hem if present.
Unravel and pull out several of the crosswise yarn threads every 1⁄2 inch along all sides to form even fringe.
Give your towels a splash of personality by embroidering designs, adding appliqués or trims, or even stamping.
Country motifs like flowers, roosters, fruits, or farm animals are fitting choices.
For a monogrammed look, stitch on simple cross stitch or satin stitch initials using embroidery floss matched to your kitchen’s color scheme.
Add a pop of contrast color by tying twill tape or rickrack along the top hem.
Once you’ve customized with fringe and embellishments, your DIY flour sack towels are ready to become hardworking staples for drying dishes or wiping up spills.
The homespun style gives a cozy, down-home feel to your décor.
Lettered Tea Towels

Display heartwarming quotes and personalized names around the kitchen with cute lettered tea towels.
This easy DIY project uses iron-on vinyl and your Cricut machine to apply professional looking words and phrases onto plain tea towels.
Start with solid colored cotton tea towels.
Then, design your meaningful words or phrases using Cricut Design Space software.
Consider using names, inspirational sayings, or witty puns related to cooking and baking.
Cut your design from iron-on vinyl using a Cricut machine.
Iron the vinyl wording onto the towels following the manufacturer’s instructions for permanent adherence.
The vinyl provides a smooth, decal-like finish that you can wipe clean as needed.
For added visual interest, include multiple lines of text or mix-and-match font styles.
Letter your family members’ names onto coordinated colored towels and hang them together on the oven door or refrigerator for an organized look.
Or surprise newlyweds with his-and-hers tea towels labeled “Mr.” and “Mrs.”
DIY lettered tea towels also make thoughtful hostess gifts
Your personalized designs spread cheer every time they’re used to dry the dishes or tidy the countertops.
Lace & Linen Tea Towels


Vintage-inspired lace and linen tea towels lend a shabby chic touch to your kitchen décor and table settings.
Making your own using simple embroidery or appliqué gives cozy, romantic appeal.
Rustic floral lace pairs beautifully with natural linen tea towels.
Tack the lace directly onto the linen using a basic running stitch and coordinating sewing thread.
Stitch around the scalloped edges for a framed effect.
For a pretty appliquéd look, cut flower or other shapes from contrasting lace.
Use an iron-on adhesive to attach the lace shapes decoratively on the linen towels.
An adhesive like Stitch Witchery sets permanently after ironing.
You can also embroider floral designs directly onto the linen using basic embroidery stitches and soft, muted floss colors.
Try working in a hoop for neater stitches.
Include script initials or words for a personalized vintage touch.
Gently wash the finished lace-embellished towels by hand and line dry to maintain the delicate textures.
Display in the kitchen or give to a bride-to-be for a thoughtful bespoke gift.
The handmade lace details add timeless beauty and a touch of romance!
Damask Stencil Tea Towels

Create sophisticated damask-inspired kitchen towels in an afternoon using stencils and fabric paint.
The floral motifs only take minutes to stencil but look like they took ages!
Purchase a floral damask stencil made for fabric painting.
Tape the stencil securely in place on a pre-washed cotton tea towel.
Squeeze fabric paint onto a paper plate and use a stencil brush to dab color through the openings.
Lift the stencil and reposition to continue building the damask design across the kitchen towel surface.
Overlap the motif parts and vary the color combinations to mimic traditional damask’s tone-on-tone look.
Let the fabric paint dry fully between adding layers to blend the colors subtly.
Once finished stenciling, heat set the paint following manufacturer instructions.
Adding metallic gold or silver accents creates an elegant damask style.
For gorgeous guest towels, stencil spiraling vines, flowers, leaves, or other damask designs over the whole front of the towel.
Tie a satin ribbon at one corner for a polished presentation.
Your ornate DIY damask tea towels add instant refinement while still being wash-friendly!
Cross Stitch Tea Towels

Hand embroidered tea towels stitched in cute cross stitch designs make a thoughtful homemade gift and colorful addition to your kitchen linen collection.
The graphic patterns and motifs look sweet yet smart against a crisp linen or cotton towel.
Start by sketching out some cross stitch patterns ideal for kitchen towels.
Fruits, flowers, herbs, vegetables, and tea or coffee cups make fitting choices.
Keep the designs fairly simple and small in scale.
Transfer your patterns onto the tea towels using a light water-soluble fabric pen.
Hoop the towel fabric and use embroidery floss to stitch over the marked lines following basic cross stitch technique.
Allow the lines of X’s to fill in the images.
Use backstitch for any small detail outlines.
Work slowly and keep your stitches even and consistent.
Vary the color combinations to match your kitchen’s color scheme.
Coordinate the thread colors purposefully to create shading and dimension.
When complete, gently hand wash to remove the transfer marks and press dry with an iron.
Your cute cross stitched towels are now ready to display!
The handmade charm of cross stitch art looks so sweet in the kitchen.


