
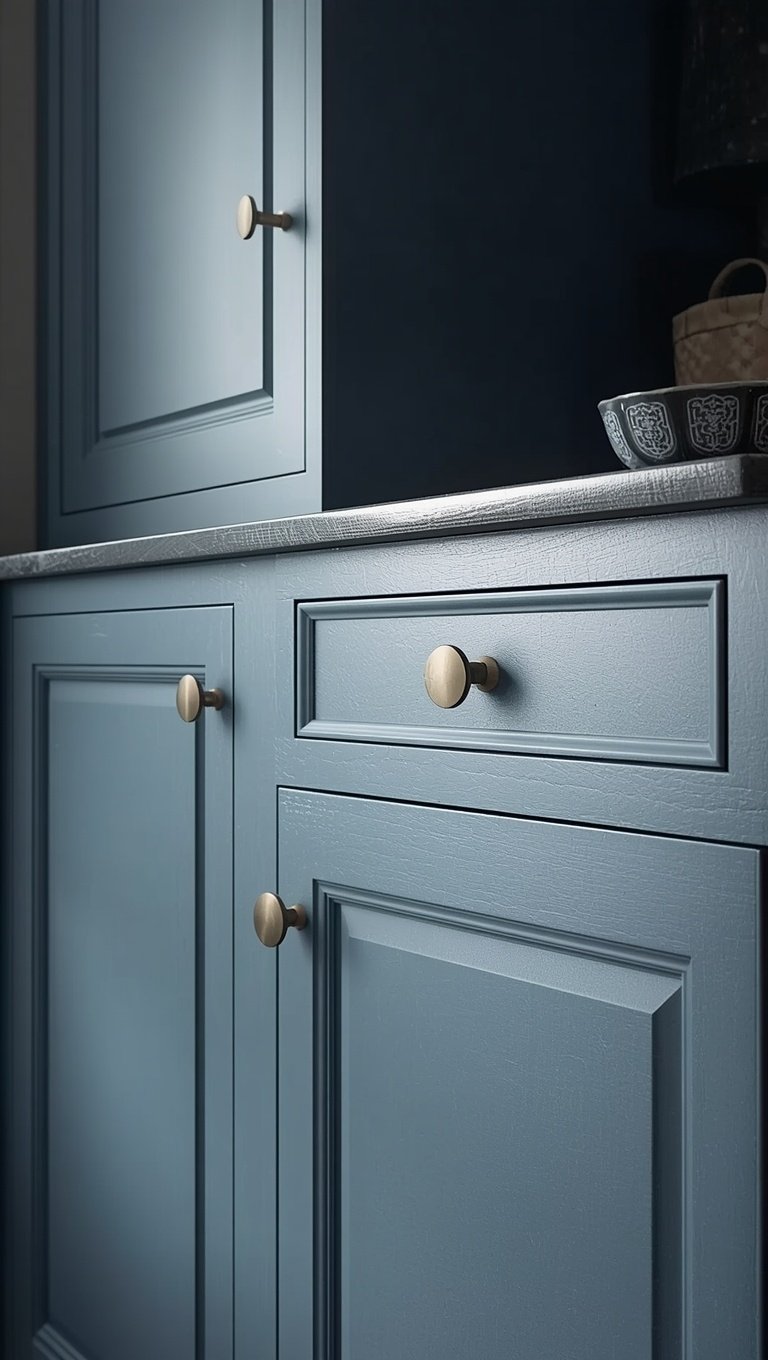

Okay, so here’s my controversial opinion.
Hardware matters more than your cabinet color.
I know, I know, that sounds backwards.
But think about it this way.
Your hand touches that knob or pull every single day, probably multiple times a day.
It’s the one part of your kitchen you actually interact with physically, not just look at.
When I redid my first house, I spent weeks agonizing over the perfect cabinet paint color.
And then I slapped on the builder-grade knobs that came with the house and called it done.
Big mistake.
The whole kitchen still felt like a rental.
It wasn’t until I swapped in warm brass pulls that the space finally felt like mine.
There’s something so satisfying about a pull that feels substantial in your hand, you know, that has a little weight to it.
Cheap hardware feels hollow and rattly.
Good hardware feels cozy, almost like a little luxury moment built into your everyday routine.
So before you agonize over paint swatches, I’d genuinely start here.
It’s the cheapest, fastest way to make a kitchen feel intentional instead of accidental.
And honestly, it’s kind of a confidence boost too.
Like, yes, I have taste, thank you very much.
The Finish That Changes Everything

Let’s talk finishes for a second, because this trips people up constantly.
Chrome, brushed nickel, matte black, brass, bronze.
It’s a lot.
When I tackled my own kitchen last fall, I actually taped little hardware samples right onto my cabinets before buying anything.
I lived with them for a week.
Morning light, evening light, the works.
And what I noticed surprised me.
The finish that looked amazing on my phone screen looked totally different under my actual kitchen lighting.
My advice, and I say this with love, don’t trust a photo online completely.
Order a couple of samples if you can.
If your kitchen leans warm, with wood tones or cream cabinets, brass or warm gold tends to feel like it belongs there naturally.
If you’re more Black and White, moody and modern, matte black or brushed nickel usually feels more at home.
There’s no wrong answer here, truly.
But there is a “this doesn’t quite match my vibe” answer, and you’ll feel it the second you see it.
Trust that gut reaction.
I always do now.
My rule of thumb is simple.
If I hesitate for more than a few seconds, it’s probably not the one.
The right finish should feel like an obvious yes.
Knobs vs Pulls, and Why It’s Not Just Personal Preference

People ask me this constantly.
Knobs or pulls, which is better?
Honestly, it kind of depends on the cabinet.
For upper cabinets, I’m a knob girl through and through.
There’s something so charming about a little round knob up top, almost like jewelry for your kitchen.
But for drawers, especially deep ones, pulls just make more sense functionally.
You need something to really grip onto when you’re hauling out a heavy pot drawer.
When I redid my kitchen, I actually mixed both, knobs on the doors and pulls on the drawers.
And I was nervous about it, ngl.
I thought it might look inconsistent or busy.
But it ended up looking intentional, almost tailored, like the kitchen was designed with actual thought instead of just grabbing one style off the shelf.
If you want a safer bet, stick with one finish family even if you mix shapes.
That consistency is what ties it all together.
My personal tip, buy one extra knob and one extra pull before committing.
Hold them up to your cabinets in real light.
You’ll know within seconds which one makes your heart do that little happy flutter.
That’s the one.
Don’t overthink it past that feeling.
The Budget Swap That Feels Expensive

Okay, confession time.
My first hardware swap cost less than a nice dinner out.
I’m talking under fifty dollars for an entire kitchen.
I found brushed gold pulls on sale and bought them in bulk.
The trick is consistency, not cost.
A uniform, cohesive set of budget-friendly hardware will always look more expensive than mismatched pricier pieces.
I learned this the hard way after mixing two slightly different gold tones once.
It looked cheap, not because the hardware was cheap, but because it didn’t match.
So my advice, buy from one line, one finish batch if you can.
Slight tone variations between manufacturers are more noticeable than you’d think.
Also, don’t skip the install hardware.
Sometimes new pulls need longer screws than what came with your cabinets.
I didn’t realize this the first time and ended up making an emergency hardware store run in my slippers.
Not my finest moment, but a good lesson.
Keep a small stash of extra screws in different lengths on hand.
It saves so much frustration later.
And if you’re renting or not ready to commit, some pulls now come in adhesive-friendly versions.
They’re not quite as sturdy, but they’re a sweet little option for testing the look.
I love a low commitment way to fall in love with a change.
Matching Hardware to Your Cabinet Style

This one’s a little more technical, but stick with me.
Sleek, flat-front cabinets tend to want sleek, minimal hardware.
Think slim bar pulls, nothing too fussy.
Shaker style cabinets, the kind with that classic recessed panel, can handle a little more personality.
Ornate knobs, mixed metals, even vintage-inspired pieces work beautifully there.
When I helped my sister pick hardware for her farmhouse kitchen, we went with cup pulls, the kind that curve slightly and feel a little old-world.
It made her cabinets feel like they’d always been there, like they had history.
Meanwhile my kitchen is more modern, so I kept everything long and linear.
Straight bars, no curves, no fuss.
It’s funny how the same swap can feel so different depending on the cabinet style underneath it.
Hardware doesn’t exist in a vacuum.
It’s in conversation with everything else in the room.
So before you fall in love with a specific style online, walk over to your actual cabinets.
Look at the lines, the panels, the overall vibe.
Ask yourself if fancy or simple feels more true to the bones of your kitchen.
That answer will guide you better than any trend list ever could.
The Mixed Metal Moment (And Why It Works)


A few years ago, mixed metals felt kind of risky.
Now, I’m fully on board and honestly a little obsessed.
There’s something so collected and lived-in about a kitchen that mixes, say, brass hardware with a black faucet.
It doesn’t feel matchy matchy in that overly staged way.
It feels like a home that evolved slowly, with pieces added over time out of love, not out of a strict design plan.
When I added warm brass pulls to my kitchen, I kept my stainless appliances as they were.
I was worried it would clash.
It didn’t.
If anything, it made the space feel warmer and more layered.
My tip here, pick one metal to be dominant and let the other play a supporting role.
For me, that’s brass on the cabinets with just a touch of black in light fixtures.
It keeps things from feeling chaotic.
Also, texture helps blend mixed metals.
A brushed finish next to a matte finish reads softer than two glossy finishes competing for attention.
If you’re nervous about mixing, start small.
Swap just a few pulls first and live with it before committing to the whole kitchen.
Sometimes seeing it in real life, in your real light, is the only way to know for sure.
Vintage and Antique Hardware Finds

Okay, this is one of my favorite rabbit holes.
Estate sales, flea markets, even old hardware store clearance bins.
Vintage hardware has this soul to it that new pieces sometimes lack.
I found a set of mismatched glass knobs at an estate sale once, and I built an entire kitchen refresh around them.
They weren’t identical, not even close, but that was sort of the charm.
Each one felt like it had a little story.
If you’re hunting for vintage pieces, my tip is to buy more than you need.
Old hardware breaks or gets lost, and finding a match later is basically impossible.
Also, give everything a good clean and maybe a light polish before installing.
Decades of grime hides under there, trust me.
There’s a small learning curve with vintage screws too, since sizing standards have changed over the years.
I’ve had to get creative with washers and spacers more than once.
It’s a little more effort, sure.
But the payoff is a kitchen that feels utterly unique, not something anyone else has.
If you love a good treasure hunt, this route might just become your favorite hobby.
I know it became mine.
Sizing Guide, The Detail Everyone Skips

Nobody wants to talk about measurements, I get it.
But sizing genuinely makes or breaks this whole project.
Too small, and your hardware looks like it’s floating, lost on a big cabinet door.
Too large, and it can feel clunky or overwhelming.
For cabinet doors, I usually go with knobs around one and a quarter inches.
For drawers, pulls somewhere between three and six inches tend to feel balanced, depending on the drawer size.
Wider drawers can handle longer pulls without looking silly.
My personal hack, cut painter’s tape into little rectangles the size of the hardware you’re considering.
Stick them right on the cabinets before you buy anything.
Step back, squint a little, and see how it feels.
I do this every single time now, no exceptions.
It saved me from a return-shipping nightmare more than once.
Also, keep proportions consistent across your whole kitchen.
Mixing wildly different sizes room to room can feel disjointed.
Small tweaks, big impact, that’s the whole philosophy here.
Measure twice, order once, as my dad always used to say about pretty much everything.
Installing It Yourself Without Losing Your Mind
I’ll be honest, my first install was a mess.

I didn’t use a template, and my holes were slightly crooked.
Not a disaster, but noticeable enough to bug me every time I opened that cabinet.
Lesson learned, buy a cheap hardware jig.
It’s a simple little tool that lines everything up so your holes are perfectly even every time.
Genuinely a game-changer for accuracy, even if I’m not allowed to call it that here.
Also, use painter’s tape as a guide before drilling.
It marks your spot and keeps the drill bit from sliding around on the smooth cabinet surface.
Go slow.
I mean it.
Rushing is how mistakes happen, and cabinet doors are not cheap to replace if you mess one up badly.
Give yourself a full afternoon, put on a good playlist, and treat it like a little project date with yourself.
That’s honestly how I approach most of my home projects now.
Low pressure, good music, snacks nearby.
It makes the whole thing feel fun instead of like a chore you’re dreading.
And when that last knob goes in, there’s this little rush of pride that hits.
Like, I did that.
What to Do With Your Old Holes

This is the part people panic about the most.
What if your new hardware doesn’t line up with your old holes?
First, don’t panic.
There are actually backplates made specifically for this situation.
They sit flush against the cabinet and cover old holes completely while giving your new hardware a fresh, finished look.
I used these on a project where the previous homeowner had installed hardware in a totally random spot.
Backplates saved me from filling and repainting every single door.
If backplates aren’t your style, wood filler and a touch of matching paint works beautifully too.
It just takes a little patience to let it dry and sand smooth.
My tip, always do a small test patch first if you’re filling holes.
Some fillers shrink slightly as they dry, and you don’t want a surprise dip showing later.
Also, if you’re switching from a single knob hole to a two-hole pull, plan your spacing carefully before you drill anything new.
Measure from your old hole as an anchor point so everything stays centered.
It’s a little bit of extra math, but it saves you from a wonky, off-center pull staring back at you every day.
Hardware for Rentals and Temporary Spaces

If you’re renting, I feel you, I’ve been there.
You want that fresh feeling without upsetting your landlord or losing your deposit.
My favorite hack here is keeping your original hardware safely stored in a labeled bag.
Swap in your new pieces for the duration of your lease, then pop the originals back on before you move out.
Nobody will ever know.
Adhesive hardware backplates have also come a long way, and they’re a nice option if you’re not comfortable drilling at all.
Just know they typically can’t hold as much weight, so they’re better for lighter, decorative touches rather than heavy daily-use drawers.
When I lived in my first apartment, I did this exact swap in my tiny kitchenette.
It made the whole space feel like an actual design choice instead of a landlord special.
My tip for renters specifically, keep your receipts and take a labeled photo of the original setup before you touch anything.
Future you, moving out in a rush, will be so grateful.
Small swaps like this remind me that a home doesn’t need to be permanent to feel like yours.
Even a temporary space deserves a little love.
Coordinating Hardware With the Rest of Your Kitchen

Hardware doesn’t live alone, it’s in conversation with your faucet, your light fixtures, even your cabinet color.
When I finished my own kitchen refresh, I made sure my faucet finish echoed my hardware finish, even if they weren’t an exact match.
Close enough reads as intentional.
Wildly different can read as accidental.
If your kitchen has Warm Wood Tones, brass or gold hardware tends to feel like it grew right out of the space naturally.
If you’re working with cooler grays and whites, brushed nickel or matte black often feels more grounded.
My personal trick, take a photo of your kitchen and edit in a rough hardware color using any basic photo app.
It’s not perfect, but it gives you a decent gut check before spending real money.
I do this constantly before big purchases now, and it’s saved me from a few regrettable decisions.
Also, don’t forget your cabinet pulls should feel like a natural extension of your overall color story, not a separate decision made in isolation.
Little things like this are what separate a kitchen that feels pulled together from one that feels like a bunch of individual choices stacked on top of each other.
Cohesion is quiet, but you feel it the moment you walk in.
The Emotional Payoff Nobody Talks About

Here’s the part that surprised me the most honestly.
I expected my kitchen to look better after this swap.
I didn’t expect it to feel better too.
There’s something about small, intentional upgrades that shift how you feel in a space, almost like the room is finally speaking your language.
Every time I walk in now and my hand meets that warm brass pull, there’s this tiny little moment of pride.
Like, I did this, I made this choice, and it was the right one.
It sounds silly maybe, getting emotional over cabinet knobs.
But our homes hold so much of our daily life, and small sensory details add up over time in ways we don’t always notice consciously.
A cozy, well-considered kitchen makes mornings feel a little softer.
Coffee tastes a little better in a space that feels like yours.
If I had to leave you with one thought, it’s this.
Don’t wait for the big renovation to feel proud of your space.
Sometimes the smallest swap is the one that changes how a whole room feels.
And if a handful of knobs can do that, just imagine what else is possible in your home once you start paying attention to these little details.
Related read: Things I Wish I Knew Before I Decorated My First Home — Instant PDF + Kindle download. Secure checkout by Stripe

