
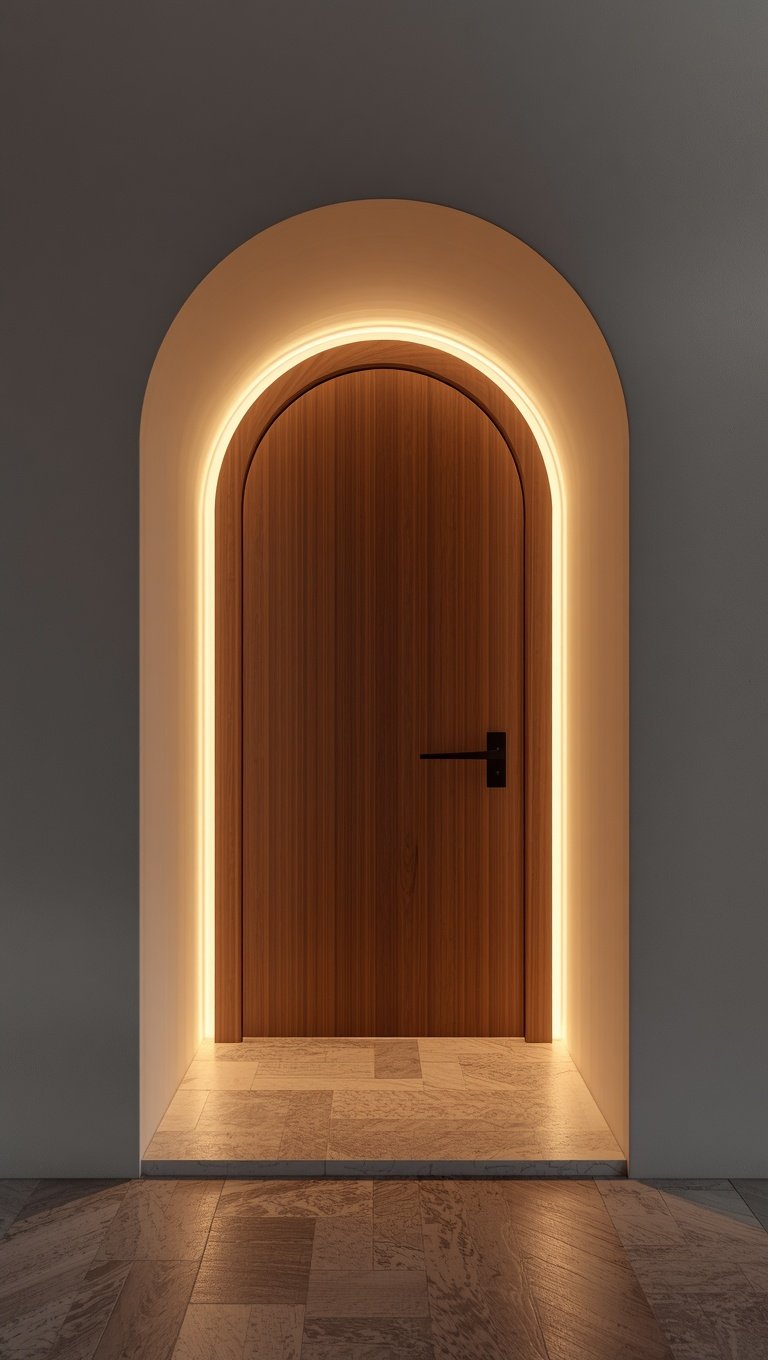

There is something about a curve that your eyes just want to follow.
When every line in a room is straight, your brain reads it as rigid, almost clinical.
But add one soft arch, even a single one, and the whole space starts to breathe.
I noticed this the second I stepped through my friend’s archway.
My shoulders literally relaxed.
It sounds dramatic, but architecture really does talk to your nervous system.
A boxy floor plan can feel efficient, sure, but it rarely feels cozy.
Cozy comes from curves, texture, and a little bit of imperfection.
When I finally arched my own hallway doorway, I remember standing back and just smiling at it.
It felt like the house exhaled.
My husband thought I was being dramatic, but I stand by it.
There is a reason old world homes, the ones we all pin and swoon over, are full of arches.
They were built in an era before boxy tract homes took over, and honestly, I think we lost something along the way.
An arch brings back a little of that soul.
It tells your eye to slow down instead of marching straight through a room.
And in a home full of squares, that pause is everything.
If you only do one architectural upgrade this year, I would gently push you toward this one.
It is not the cheapest project on this list, but it might be the most emotional one.
The Difference Between a Faux Arch and a Structural One


Okay, let’s get into the nitty gritty for a second.
There are basically two ways to get an arch, and I tried both in my own home.
A structural arch means you are actually reshaping the doorway opening itself, usually with drywall and a curved frame underneath.
A faux arch, on the other hand, sits on top of your existing square doorway using trim, and it just visually reads as an arch.
I started with faux arch trim kits in my dining room entry because I was nervous about committing.
Honestly, from three feet away, you cannot tell the difference.
The faux route is so much friendlier for renters or for anyone who is not ready to call a contractor.
A structural arch is more of a forever commitment, and it does involve some real construction.
I eventually did one structural arch in my kitchen, and it was a bigger project than I expected, but so worth it.
My tip here is simple.
Start with faux trim if you are unsure, live with it for a season, and see how you feel.
If you fall in love the way I did, you can always go bigger later.
There is zero shame in testing the waters first.
Picking the Right Arch Shape for Your Ceiling Height
Not every arch shape works in every room, and I learned this one the hard way.

My first attempt was a full Roman arch, the really round, dramatic kind, and in my nine foot ceiling room it felt slightly squished.
A full round arch wants height to breathe properly.
So I switched to what is called a segmental arch, which is a gentler, flatter curve, and it fit my ceiling so much better.
If your ceilings are on the lower side, an elliptical or segmental arch is going to feel more graceful than a tall dramatic one.
For taller ceilings, like in a foyer or a stairwell, a full round or even a Gothic point can feel really striking.
I always tell people to tape off the shape on their actual doorway before committing.
Grab painter’s tape, sketch the curve right on the wall, and step back.
Live with that tape outline for a couple days if you can.
Your eye will tell you almost immediately if the proportions feel off.
It sounds simple, but it saved me from a costly mistake in my primary bedroom entry.
I taped a shape that looked amazing on Pinterest, and in person it felt heavy and wrong for my ceiling height.
So test first, build second.
Your future self will thank you.
My Favorite Materials for DIY Arch Trim

Let’s talk materials, because this genuinely changes the whole feel of the project.
MDF trim is my go to for a smooth, painted, modern farmhouse look, and it is very forgiving for beginners.
It cuts easily and takes paint beautifully, which matters a lot when you are working with curves.
If you want something with a little more texture and warmth, flexible wood molding is incredible, though it does cost more.
I used a flexible pine molding on my kitchen arch and I am still obsessed with how it caught the afternoon light.
There are also pre bent arch kits now that come almost ready to install, which honestly feels like cheating in the best way.
For a plaster look, which I am dying to try next, some people skim coat over a curved frame for that soft, Mediterranean texture.
My honest recommendation for a first timer is MDF.
It forgives small mistakes, sands smooth, and gives you confidence before you graduate to trickier materials.
Whatever you choose, prime it well before painting.
Curved surfaces show every flaw under bad lighting, so do not skip this step.
I learned that one the hard way on my very first arch.
Where to Add Your First Arch

You do not need to arch every doorway in your home, and please do not feel like you have to.
I would start with the doorway you walk through the most, honestly.
For me that was the opening between my kitchen and dining room, the one I pass through probably thirty times a day.
Transitional spaces are ideal for a first arch, things like hallway entries, pantry doors, or the opening into a living room.
These are spots where you are not blocked by plumbing, electrical, or load bearing concerns most of the time.
I would avoid starting with a bathroom door or a closet, just because those tend to be more functional and less about the flow of the home.
Think about sightlines too.
Stand in your main living space and notice which doorway your eyes land on first.
That is usually your best candidate, because it becomes a little focal moment every time you glance that direction.
In my case, it was the kitchen opening, and arching it changed how the whole downstairs felt connected.
Suddenly two boxy rooms felt like one soft, flowing space.
That is the real magic of picking the right spot.
Painting Tricks That Make an Arch Pop


Paint can make or break an arch, and this part is so much fun.
My personal favorite trick is painting the arch trim the exact same color as the wall, just in a different sheen.
A satin or semi gloss trim against a matte wall in the same color creates this quiet, sculptural shadow line that I am obsessed with.
It is subtle, but it makes the curve feel intentional instead of like an afterthought.
If you want more drama, painting the underside of the arch, the part you see as you walk through, in a soft contrasting color is stunning.
I did a warm terracotta on the underside of my kitchen arch and it feels like a little surprise every time I walk under it.
Another idea, and this one is for my bold friends, is wallpapering just the inside curve of a deeper arch.
It turns a simple opening into a genuine design moment.
For a more classic look, a crisp white arch against a deeper wall color, like a sage or a navy, reads so timeless.
Whatever direction you choose, use a good angled brush for the curve itself.
A roller just cannot get into that tight radius cleanly.
Trust me, patience with a brush here pays off tenfold.
Pairing Arches With Furniture Shapes

Once you have your arch, the furniture around it matters more than you might think.
Straight lined, boxy furniture next to a soft arch can feel a little disconnected, almost like they are arguing with each other.
I started introducing curved pieces near my arched openings, and the whole room started to feel like it was speaking one language.
A rounded console table under an archway is one of my favorite pairings.
Curved mirrors, scalloped shelves, even a simple pedestal table can echo that arch shape in a subtle way.
You do not need to match curves everywhere, that would be a lot.
Just one or two echoing pieces near the arch is usually enough to tie the whole vibe together.
In my dining room, I swapped my rectangular mirror for an arched one directly across from the doorway, and it doubled the impact of the trim itself.
It is a small move but it reads as so intentional.
My tip here is to walk through your arch and notice what your eye sees on the other side.
If it is a hard edged, boxy piece of furniture, consider softening just that one item.
You will feel the difference immediately, I promise.
The Budget Friendly Route: Removable Arch Trim Kits

If you are renting, or just not ready to commit, this section is for you.
Removable arch trim kits have genuinely gotten so good lately.
They use adhesive or light mounting strips instead of nails, so you can take them down without a trace when you move.
I recommended this route to my sister for her apartment, and she was shocked at how real it looked once it was painted.
The key is painting it to match your existing trim color exactly, so it blends rather than looks stuck on.
These kits usually run far cheaper than a full custom trim job, which makes them a lovely low risk way to test the look.
My honest tip is to buy a sample size of your trim paint first and test it against your actual wall color before committing to the whole doorway.
Lighting changes how white looks so much throughout the day.
Another budget hack, thin flexible molding strips from a hardware store, cut and bent by hand, can mimic a custom arch for a fraction of the cost.
It takes a little patience and a lot of painter’s tape to hold the curve while the adhesive sets.
But the payoff, standing back and seeing that soft curve for the first time, is so worth the fuss.
When to Call a Contractor Versus DIY

I am a big believer in DIY, but I also know my limits, and this is where I hit mine.
Faux arch trim over an existing doorway is very doable on your own, even for a beginner.
But a true structural arch, where you are reshaping the actual opening, often involves the header above the door.
That header can be load bearing, and this is not a guessing game you want to play.
For my kitchen arch, I called in a contractor for exactly this reason.
He confirmed the wall was not load bearing, but he also caught an electrical line I had no idea was running right through that space.
I would have hit it with a saw and had a very bad day.
So my honest advice, if your project involves any actual demolition of the doorway shape itself, get one consultation, even if you plan to do the rest yourself.
It is usually a small cost for real peace of mind.
Faux trim projects, though, painting and molding, those are wonderfully safe weekend projects.
Know which category your project falls into before you start swinging a hammer.
Lighting an Archway So It Glows at Night

Lighting is the part people forget, and it genuinely changes everything after the sun goes down.
A flush mount light positioned just before you walk through an arch creates this gorgeous little glow that highlights the curve itself.
I added a small brass flush mount right at the threshold of my kitchen arch, and at night it casts the prettiest soft shadow along the trim.
If your archway is deep enough, recessed lighting tucked into the sides can wash light up along the curve, which looks incredibly high end.
Wall sconces flanking either side of the opening are another favorite of mine, especially in a hallway.
They frame the arch almost like a piece of art.
Warm bulbs are non negotiable here, in my opinion.
A cool white bulb will make even the prettiest arch feel sterile and a little clinical.
I always go for a warm two thousand seven hundred kelvin bulb near any archway, it just feels like candlelight.
My favorite little hack, a small plug in picture light mounted just above the arch, pointed slightly downward, gives the whole doorway a boutique hotel feeling for almost no money.
It is a tiny detail, but guests notice it every single time.
Mixing Arches With Other Curves in the Home
Once you fall for one arch, and you will, the curve tends to want to spread.

I started noticing every hard corner in my house after that first project, and it genuinely shifted how I shop for everything now.
Curved cabinet fronts in a kitchen echo an archway so beautifully if you have one nearby.
Rounded light fixtures, soft edged rugs, even a curved headboard can all speak the same design language as your new arch.
You do not need to overhaul your whole house at once, that would be overwhelming and honestly unnecessary.
I just try to add one curved element per room over time, letting it happen slowly and naturally.
My living room got a curved boucle chair about six months after my hallway arch went in, and it felt like the room finally clicked into place.
Little by little, the boxiness of the original build starts to soften everywhere you look.
It becomes this quiet, cohesive thread running through the whole home.
My tip, keep a small note on your phone of curved pieces you love as you shop, so when the right one shows up secondhand or on sale, you recognize it immediately.
That is honestly how I found most of my favorite pieces.
Common Mistakes I See, and Made Myself

Let’s be real for a second, because I made my fair share of blunders on this journey.
My biggest mistake was rushing the curve on my very first faux arch, and it came out slightly lopsided.
You could tell, and it bugged me every single day until I redid it properly.
Take your time tracing and cutting the curve, use a proper compass or arch template, do not eyeball it like I did.
Another mistake, choosing too dramatic an arch shape for a low ceiling room, which I mentioned earlier, and it genuinely felt claustrophobic for a while.
A third one, skipping primer on MDF trim, which led to a slightly blotchy paint finish that drove me a little crazy.
I also rushed the caulking on my first attempt, and every little gap showed once the paint dried.
Caulk generously along every seam where the trim meets the wall, then smooth it with a wet finger before it sets.
It sounds tedious, I know, but it is the difference between a project that looks professional and one that looks a little homemade.
My last tip, do not skip the sanding between coats of paint.
It feels like an annoying extra step, but it is what gives that trim its lovely smooth, finished look in the end.
How Arches Change the Whole Feel of a Hallway


Hallways are so often the most forgotten space in a boxy home, and I think that is such a shame.
They are usually narrow, straight, and honestly kind of sterile feeling.
Adding an arch at either end of a hallway completely changes how that whole corridor reads.
It stops feeling like a tube you rush through and starts feeling like a little journey.
In my own home, arching both ends of my upstairs hallway made it feel almost like a gallery, softly framing the rooms on either side.
Light behaves differently too, curving gently instead of stopping hard at a square frame.
I love standing at one end in the late afternoon and watching the light spill through the arch shape onto the floor.
It is a small thing, but it makes me stop and notice my own house, which does not happen often once you have lived somewhere a while.
If you only arch one hallway opening, choose the one that gets the most natural light.
The curve will catch it in the most beautiful way, I promise you that.
My hallway used to be my least favorite part of this house.
Now, honestly, it might be my favorite.
That is the quiet power of one soft curve in a house full of squares.
Related read: Things I Wish I Knew Before I Decorated My First Home — Instant PDF + Kindle download. Secure checkout by Stripe

