Small bathrooms can be a total pain.
You’re constantly knocking elbows against walls, playing Tetris with toiletries, and wondering if you’ll ever have enough space to actually enjoy your morning routine.
I’ve been there, struggling with a bathroom barely bigger than a closet in my first apartment, constantly dreaming of those sprawling spa-like spaces I’d see in magazines.

But here’s the thing—small bathrooms don’t have to feel like cramped nightmares.
After years of trial and error (and yes, a few Pinterest fails along the way), I’ve discovered that the right tweaks can transform even the tiniest space into something that feels both functional and stylish.
The bathroom ideas I’m about to share completely changed my perspective on what’s possible in limited square footage.
What surprised me most wasn’t just how these changes made my bathroom look bigger—they actually made my entire morning routine feel less stressful.
There’s something about walking into a well-organized, thoughtfully designed space that puts you in a better headspace to start your day.
And the best part?
Most of these solutions don’t require calling a contractor or taking out a second mortgage:
Wall-Mounted Floating Cabinets


Wall-mounted floating cabinets are a fantastic way to gain valuable on-wall storage in small bathrooms without taking up any precious floor space.
These cabinets attach directly to the wall and “float” a few inches off the surface.
Opt for an open shelf design to allow items to be seen and easily accessible.
Arrange them in a row or staggered formation at different heights Above the Vanity or toilet area.
Make sure to install them within easy reach so items can be retrieved without difficulty.
Floating cabinets mounted near the bathtub or shower are perfect for storing bath essentials like clean towels, toiletries, and shower accessories.
You can also use the space above the toilet to house rolls, sprays or air fresheners.
Choosing cabinets with glass or wicker doors lend an airy, spacious feel while still keeping items hidden from view.
Don’t forget to properly reinforce the wall to support the weight, especially if installing multiple cabinets side by side.
These on-wall organizers are quick to install and remove clutter from surfaces.
They maximize usable wall space which is often unused real estate in mini bathrooms.
Floating cabinets help produce the illusion of a more open and organized small room.
Over The Toilet Storage


Over-the-toilet storage is a fantastic way to take advantage of the vertical wall space that exists above the toilet in small bathrooms.
This area is often left unused, but it can be transformed into valuable extra storage.
There are several over-the-toilet storage options to choose from.
A wall-mounted cabinet is a good basic choice – look for one with an open shelf design for easy access.
You can also opt for framed floating shelves or a combined shelf-and-niche unit.
Make sure any overhead unit is securely installed into the wall studs for proper support.
Distribute items lightly so the unit doesn’t become too heavy.
Good items to store include rolled towels, toilet paper, air fresheners, tissues and hand soaps.
For a more comprehensive solution, go with an over-the-toilet storage cabinet that features an integrated towel bar.
This marries form and function by providing soft-closing doors, interior shelving and a built-in towel rack.
Utilizing this vertical space elevates clutter and creates the illusion of a more open, spacious bathroom layout.
Be sure to position the unit within easy reach so items can be accessed without straining over the toilet.
Over-the-toilet storage is a simple and stylish way to gain extra space in small bathrooms.
Compact Vanity With Storage


I often recommend a compact vanity with built-in storage for small washroom remodels.
These efficient countertop units minimize footprint while maximizing storage capacity.
Many compact vanity options come in widths of 22-24 inches or less.
This is narrow enough to fit into tight spaces but still provides a working surface.
I advise clients to look for models featuring integrated drawers and cabinets underneath.
Storage solutions like these keep cosmetics, toiletries and other items out of sight but easily accessible.
It prevents cluttering up the limited counter space.
Full-extension drawer glides are also preferable for full access.
In very petite bathrooms, a wall-mounted sink with attached storage complements the layout even better.
This frees up floor room compared to freestanding units.
I suggest choosing a design with an open shelf or two for displaying decor.
Quality hardware like soft-closing hinges and drawers prevent things from spilling out accidentally.
Opting for a vanity with light interior color enhances the spacious feel as well.
Stacked Storage Shelves


Stacked storage shelves are one of my go-to recommendations for maximizing storage in tight spaces.
These multidimensional units provide a versatile solution to fully utilize every wall.
Rather than a single shelf, stacked tiers create a layered effect that takes full advantage of vertical real estate.
This architectural element adds visual interest while multiplying organizational potential.
When dimensioning shelves, I advise leaving adequate clearance between stackings for easy item retrieval.
Angling shelves slightly inward prevents stored belongings from protruding too far outward.
Sturdy metal or wood is preferable to flimsy plastic for long-lasting use.
Open shelving displays items attractively and prevents that closed-in feeling of upper wall cabinets.
However, sliding glass doors can be installed on lower tiers to discreetly store private items like medications.
Proper backing prevents shelves from bowing under weight.
With multiple tiers tucked against walls, the visual trick makes smaller bathrooms appear airier and roomier.
Layers provide flexibility to group belongings by task or type.
It’s a functional and visually appealing solution.
Freestanding Tub


I often recommend freestanding tubs if you’re working with limited floor space.
These self-supported tub designs use much less real estate compared to built-in clawfoot or alcove models.
Freestanding tubs sit proudly in the center of the room rather than taking up perimeter wall length.
This frees up valuable wall space that can then be utilized better through storage solutions or tile wainscoting.
Many modern freestanding options come in compact oval or circle shapes to further minimize footprint.
Some even feature an integrated overflow to take up even less room.
you should carefully consider tub sizing and placement relative to other fixtures.
I advise leaving enough walking circumnavigation room for easy access.
A drain location on the long side of an oval tub also allows for better movement.
Anti-slip tub mats or floors provide safety when tub surfaces are extremely minimalist in style.
While slipper tubs offer luxury soaking, compact walk-in shower additions work well too if space is tight.
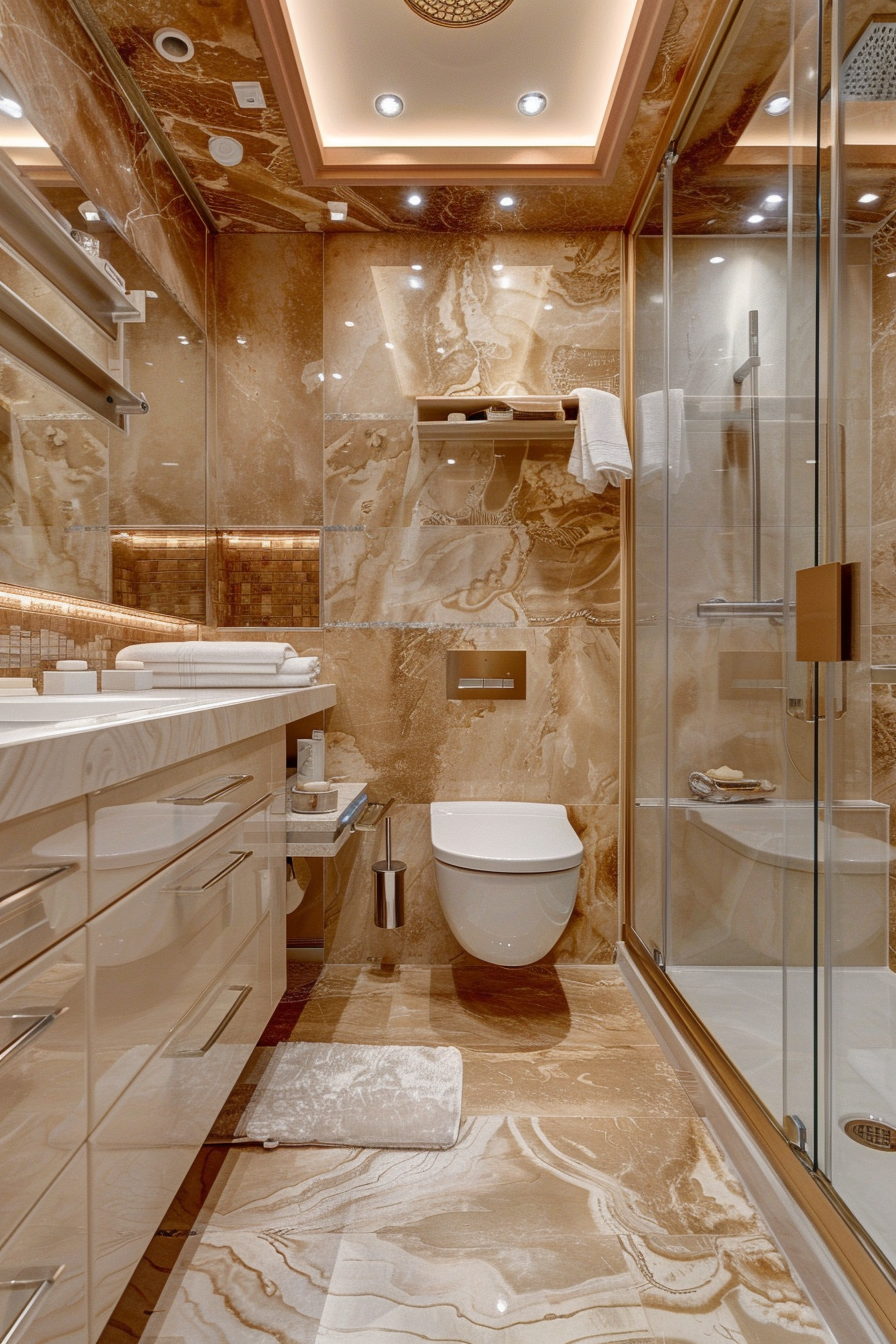
Walk In Shower


I suggest installing a walk-in shower instead of a traditional tub when space is limited.
Showers simply require less square footage than even the smallest soaking tubs.
A walk-in configuration replaces the side bathtub walls with a curved or square threshold-free entry.
This removes large non-functional blocks of ceramic or fiberglass from the perimeter.
It allows for flush transition between bathroom flooring and shower flooring to maximize usable space.
Glass shower enclosures further optimize space by providing clear views so the shower zone doesn’t feel closed off.
Frameless designs add to the airy appearance.
Niche shelving within provide places to store essentials without taking up precious interior floor room.
Multi-function handheld fixtures and adjustable showerheads satisfy various washing needs while only consuming wall mounting area.
You should choose shower dimensions that allow comfortable bathing without feeling cramped.
Properly waterproofing the entire enclosure area is crucial in any small bathroom remodel to prevent overflow damage.
Retractable Drying Rack

Space is always at a premium in small bathrooms, so incorporating a retractable drying rack is a clever way to optimize available storage solutions.
I often recommend these multifunctional fixtures.
Retractable drying racks mount high on the wall or ceiling and can fold up flush when not in use.
This saves valuable floor space typically required by traditional freestanding or over-the-door racks.
The drying surface retracts down only when needed.
Wall-mounted options integrate easily without consuming valuable counter or floor area.
Multiple bars provide surface to neatly hang several towels at once.
Opt for a crank or pull-cord design that allows smooth one-handed operation.
Some advanced designs feature segmented bars that lie completely flat when retracted.
This simplifies cleaning and allows the full wall space to remain clear.
Choose a rack sized to your specific hanging and drying needs.
Locating the rack near the shower area provides a convenient place to air freshly laundered towels.
It maximizes everyday practical use of wasted high wall space.
You can preserve a balanced, uncluttered aesthetic while still serving necessary laundry functions.
Light Colors and Tile


I’m a strong advocate of light color palettes and large format tiles in small spaces.
It helps create the illusion of extra square footage.
Light walls, floors, and countertops allow natural and artificial light to fully brighten the room.
Dark colors can make small bathrooms feel closed in.
I recommend neutral whites, greys, and soft pastels to reflect maximum illumination.
For floors and lower wall areas, consider large-format porcelain or glass tiles in the 6×24 to 12×24 inch range.
Larger tiles take up less grout joint space than smaller mosaics.
This gives the feeling of more seamless coverage without fussy lines.
Pairing light grout against light tiles also maintains reflective qualities.
Dark grout can make a small space feel heavier.
For upper wall spaces, glossy light paint is cheaper than extensive tiling and as easy to clean.
Focusing on brightness and minimum contrast allows light to bounce around and enlarge the room’s dimensions.
Visually, it appears more spacious even in tight quarters.
Proper lighting selection further complements the illumination effect.
Multifunctional Furniture


Instead of choosing single-seat vanities or standalone furniture, opt for versatile combo units.
Storage benches that lift the lid to access hidden cavities serve double-duty by providing extra seat and stash spots.
Some even integrate towel bars beneath.
This allows you to replace both a basic bench and storage cabinet.
Look for pedestal sinks resting upon base cabinets or open shelving units.
Together they function as a sink plus under-counter storage in one fell swoop.
Special narrow cabinets allow sinks to sit atop while still allowing legroom.
Wall-mounted vanities with integrated shelving or drawers on either side save precious floor room.
Units that seat guests leaning against storage drawers provide dual seating and concealed organization.
These multi-tasking pieces make the most of limited inches.
They allow fixtures, furniture and storage all in a single item.
You can gain extra functions without devoting extra space to individual elements.
I find clever combo units help maximize efficiency within constricted boundaries.
It’s a great way to achieve more without occupying extra square footage.
Niche Lighting

I’m a big proponent of niche lighting fixtures for small spaces.
These recessed lights take advantage of empty wall pockets without consuming precious counter or floor area.
Niche lights install flush within the wall, usually above vanities or shower areas.
They provide task illumination exactly where it’s needed without standalone lamps cluttering surfaces.
Select fixtures designed precisely for the niche cut-out.
Recessed LED options shed soft focused glow optimal for grooming.
Dimmable varieties allow adjusting the ambiance.
Niche sconces marry lighting and decorative wall art in a single fixture.
Integrated downlight shelving transforms empty alcoves into backlit storage nooks.
These built-in lights optimize unused vertical wall crevasses.
Unlike protruding pendants or plug-in lamps, niche fixtures maintain an uncluttered visual flow.
Installations also slash tripping hazards in tight quarters.
Promoting smart space solutions, niche lighting ranks among my favorite techniques.
It efficiently serves utility and style needs within tight parameters.
Sconces
Sconces are wall-mounted candle-style lamps that provide both task and ambient lighting.
There are a few different types of sconces that work well in small bathrooms:
- Vanity sconces mount on either side of the bathroom mirror to light up the countertop for grooming tasks.
Look for sconces with two or three bulbs each.
- Shower sconces attach to the wall outside the shower enclosure to provide safe light for showering.
Consider ones with moisture-resistant designs.
- Accent sconces add decorative flair and task lighting wherever needed most, like above towel bars or shelves.
Sconces come in many styles from traditional to modern.
Choosing a simple design helps prevent visual clutter.
Dimmer compatible options allow adjusting the mood.
Mount sconces 6-8 inches above countertops for optimal task lighting without glare.
Position shower sconces high enough to avoid accidentally hitting controls with wet hands.
Sconces make use of empty wall space without taking floor room.
They enhance both function and ambiance in small, beautifully lit bathrooms.
Full-Length Mirror with Lights
I often recommend full-length mirrors that have built-in LED lighting for small spaces.
These multifunctional fixtures save valuable floor space while providing necessary lighting and reflection.
Integrated light strips or panels run along the top or sides of the mirror frame, shedding an even glow around the viewing area.
This eliminates the need for separate standing or wall-mounted lamps.
Having integrated lighting also means there is no cluttering of tabletops or bulb replacements needed.
The streamlined look helps small bathrooms feel more spacious.
Choose frameless mirrored doors for full-length designs that mount on the back of a bathroom door.
Or opt for standalone framed mirrors mounted on the wall.
Make sure it is positioned for optimal space to view your full reflection.
Dimmable light options allow adjusting the brightness level.
Some have touch controls built right onto the frame.
The hidden lighting transforms an essential fixture into a design element.
I find mirrors with built-in LEDs make grooming easier in tight quarters without using precious floor area.
It’s an efficient 2-in-1 solution worthy of small washrooms.
Compact Sink
Always use compact sink styles when space is limited.
Countertop basins minimize footprint compared to standard drop-in or undermount sinks.
Pedestal sinks provide a classic single-sink solution with small footprint.
Opt for a sturdy metal or ceramic base so it doesn’t overwhelm a tiny space.
Make sure to leave clearance for hip and leg room when washing.
Vessel sinks sit mounted or upon custom vanities.
Their oval or round shapes take up less space on counters than rectangular models.
But be aware of limited workspace area.
Wall-mounted sinks keep counters clear while saving floor room.
Choose a suspension-style with enclosed plumbing for a sleek look.
Ensure proper backing and waterproof assembly is installed.
Compact above-counter sinks serve as a countertop basin alternative.
Their self-rimming edges fit seamlessly onto custom furniture.
Shop for extra-small dimensions in oval, round or rectangular styles.
No matter the style, focus on petite sizes no larger than 22 inches for truly tight quarters.
Proper placement near fixtures maintains efficient workflow.
Compact basins maximize usable space in small bathroom remodels.
Zero-Threshold Shower
Traditional shower stalls feature a raised Lip or threshold at the entry point that eats up valuable square footage.
Zero-threshold designs simply continue shower flooring directly from outside to provide a flush, barrier-free transition.
This removes thick boundary walls and any potential trip hazards for elderly or mobility-limited users.
Curbless designs appeal to those desiring an open yet private shower oasis.
Proper waterproofing from floor to walls is essential but allows showering from any position.
Choose drainage methods like linear drains that don’t interrupt the smooth flow.
By removing unnecessary perimeter structures, zero-threshold showers free up inches otherwise occupied.
Small bathrooms feel more roomy and user-friendly with this continuous flooring approach.
It’s especially ideal for tight layouts.
Barrier-free shower entries exemplify how clever design supports wellness needs within limited boundaries.
Clear Space Flow
Clutter is the enemy of spaciousness.
Pay attention to traffic flow and placement of fixtures/furnishings.
Keep walking paths clear by choosing wall-mounted fixtures over free-standing when possible.
This helps avoid bottlenecks.
Leave ample circulation room around the toilet and shower/tub area as focal use spaces.
Opt for pedestal or compact undermount sinks to maximize visible floor area rather than large vanity cabinets.
Freestanding towel racks preserve counter workspace.
Unify with paneled glass or frameless shower enclosures to prevent separative barriers.
Install popup or wall-mounted drains for a sleek look.
Use light, neutral paint on all surfaces and refrain from busy patterns.
Avoid floor-length curtains or bulky rugs that visually segment space.
Integrate multifunctional, space-saving furnishings.
Consider wall hooks and open shelves over bulky storage units.
Strategic lighting prevents dark areas.
By thoughtfully arranging for clear lines of sight and circulation, even tiny bathrooms will feel ventilated and easy to navigate.
Space will seem optimized when flow is maintained.


