

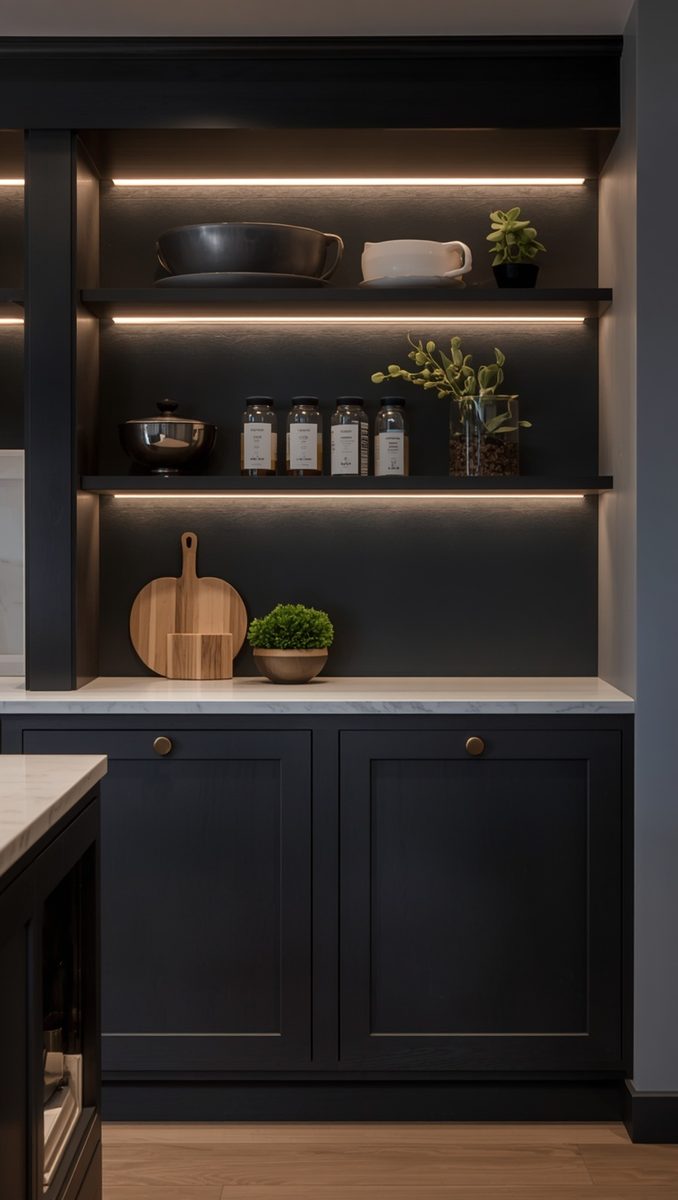
I ripped my upper cabinets off the wall on a Tuesday night and cried a little in my kitchen.
Not because it was ugly.
Because it was so, so bare, and I panicked that I’d made the biggest design mistake of my life.
That was almost two years ago, and now I genuinely can’t imagine going back.
But I’m not going to sugarcoat it for you.
Open shelving is not the effortless, breezy look Pinterest sells you.
It takes a little strategy, a little restraint, and a whole lot of “do I actually use this.”
So grab your coffee, because I’m walking you through exactly how I keep my shelves looking like a magazine spread while still, you know, functioning like an actual kitchen.
This is everything I learned the hard way, so you don’t have to.
Why I Fell for Open Shelving in the First Place

My kitchen felt heavy before.
Like it was pressing down on me every time I walked in.
Dark upper cabinets, low ceilings, that closed-in feeling that made cooking feel like a chore instead of a joy.
And I remember standing in my sister’s kitchen, looking at her open shelves, just feeling this wave of calm.
It was the light.
Everything felt like it could breathe.
So I went home and I couldn’t stop thinking about it.
I’m someone who needs my space to feel emotionally settled, not just visually nice.
And open shelving did that for me in a way closed cabinets never could.
There’s something about seeing your things, really seeing them, that makes a kitchen feel lived in and loved instead of just functional.
It’s a little bit like leaving a favorite necklace out on your dresser instead of shoving it in a drawer.
You see it, you appreciate it, you actually use it.
That’s the whole magic of this.
It’s not about showing off.
It’s about building a kitchen that feels like an extension of you.
If your kitchen currently feels a little cold or closed off, this might be the exact shift you’re craving too.
Picking the Right Wall (Not Every Kitchen Works Here)

Okay, real talk before you grab a drill.
Not every wall is meant for open shelves, and figuring this out first will save you so much regret.
I’d honestly recommend starting with the wall that gets the least grease and steam, so somewhere away from your stovetop if you can swing it.
My shelves sit just to the left of my sink, and it’s been perfect.
Splatter happens, sure, but nothing like what would happen above a busy stove.
You also want a spot with decent natural light, because open shelves genuinely come alive when the sun hits them in the afternoon.
Mine catch this soft golden glow around four o’clock and it still makes me stop what I’m doing.
If your kitchen is more of a galley style with narrow walls, I’d say go with just one or two shelves instead of a full wall.
Too much open space in a tight kitchen can start to feel cluttered fast.
And if you’re renting, this is such a low commitment way to test the look.
A lot of shelf brackets come off clean with zero wall damage.
So don’t feel like you need to commit to a full renovation to try this.
Start small, live with it for a month, and see how it feels.
The One Rule That Keeps Shelves From Looking Cluttered

This is the section I wish someone had sat me down and explained years ago.
Open shelving looks intentional when there’s a color story happening.
Mine is mostly cream, Warm Wood Tones, and soft sage green.
That’s it, that’s basically my whole palette.
When I stick to those three tones, everything I put up there just clicks together, even if the pieces don’t match perfectly.
The moment I add something bright red or a weird mismatched pattern, the whole shelf feels chaotic.
So before you start decorating, I’d genuinely sit down and pick three colors max.
Write them down if you have to.
Tape a little swatch to your fridge, I’m not kidding.
This one habit will save you from that overstuffed, garage-sale look that open shelves can slide into so easily.
And here’s a little secret, it also makes shopping so much easier.
You stop buying random cute mugs just because they’re cute.
You start asking, does this belong in my story.
I know that sounds a little dramatic for kitchenware, but it genuinely changes how your space feels.
Cohesive, calm, curated.
That’s the goal.
Not matchy-matchy, just quietly connected.
Styling Your Dishes So They Look Curated, Not Chaotic

Stacking plates sounds simple until you actually try to make it look nice.
I learned this one through a lot of trial and error, honestly.
The trick is height variation.
Don’t stack everything the same way on every shelf, it reads as flat and boring.
I do one tall stack of dinner plates, then next to it a shorter stack of salad plates turned so you can see the pattern on the front one.
That little turn makes such a difference.
It’s the difference between a shelf that looks staged and one that looks styled, if that makes sense.
I also leave a small gap of breathing room between stacks, because crowding kills the whole effect.
If your dishware doesn’t match, don’t panic.
Group by color instead of by set.
All my whites live together, and my two mismatched sage bowls sit on their own little shelf like they were always meant to be there.
Nobody has ever noticed they’re from different collections.
My tip, always put your most-used dishes at eye level or lower.
Save the top shelf for the pretty stuff you reach for less.
Function first, pretty second, and somehow it still ends up gorgeous.
Let Your Glassware Do the Talking

Glassware might be my favorite thing to style, honestly, no contest.
There’s something about the way light moves through it that just feels alive.
I keep my everyday glasses grouped in a loose cluster rather than a strict line.
A strict line feels a little sterile to me.
A soft cluster feels like it happened naturally, even though I definitely fussed over it for ten minutes.
If you have any colored glass, even just a couple of vintage pieces, this is where they shine, literally.
I found two amber juice glasses at an estate sale last spring and they’ve become the whole personality of that shelf.
When the afternoon sun hits them, it throws this little warm glow onto the wall behind it, and I catch myself smiling at it more than I’d like to admit.
A small hack, keep your glassware toward the back of a shelf on lighter days and pull it forward when you’re setting up for guests.
It instantly makes the shelf feel a little more special.
And if you’re worried about dust settling inside your glasses, just turn them upside down.
It’s such a simple fix, but it saves you a rinse before every single use.
Little things like that are what actually make open shelving livable, not just pretty for a photo.
What I Never, Ever Put on My Open Shelves

Let’s get honest for a second, because this matters more than the pretty stuff.
Anything with oil residue does not belong up here, ever.
I made this mistake early on with a set of cooking oils I thought looked cute in glass bottles.
Within a month there was this faint sticky film on everything nearby, and it was not cute anymore.
Same goes for anything you use constantly near the stove, spices, cooking spoons, that sort of thing.
They just don’t stay clean long enough to be worth the display.
I also keep anything plastic off my shelves completely.
It’s a texture thing for me, plastic just breaks the whole warm, curated feeling instantly.
Tupperware, plastic cups, all of that lives behind a closed door somewhere else in my kitchen.
And papers, mail, random mugs from work conferences, none of that gets a spot either.
I’m strict about this one because open shelves have zero forgiveness for clutter.
A closed cabinet can hide chaos.
An open shelf broadcasts it.
So if something doesn’t spark a little joy when you look at it, or if it needs to be wiped down constantly, it goes somewhere else.
This one boundary is honestly what keeps the whole system from falling apart.
Cookbooks Are Decor Too

I didn’t expect my cookbooks to become one of my favorite styling tools, but here we are.
I keep about six of my most-loved ones stacked horizontally on the bottom shelf.
Not all of them, just the ones with pretty spines or ones that mean something to me.
My grandmother’s handwritten recipe binder sits right on top of that stack, and every time I see it I think of her kitchen.
That’s the kind of thing a closed cabinet would’ve hidden forever.
If your cookbook collection is more function than beauty, that’s okay too.
Just pick your two or three prettiest ones for display and tuck the rest somewhere less visible.
I like propping one open occasionally to a page with a nice illustration, it adds this soft, lived-in feeling that photographs never quite capture from a closed spine.
A little tip, use a small bookend or even a cute vase as a stopper so the stack doesn’t slowly lean and topple.
Mine did that once during a dinner party and it was not my finest hosting moment.
Cookbooks also add this lovely texture contrast against all your smooth dishware and glass.
Paper, ceramic, glass, wood, when you mix textures like that the whole shelf feels richer.
It stops being storage and starts being a little piece of your story on the wall.
A Little Green Changes Everything

I am fully obsessed with having something alive on my shelves.
It just softens everything instantly.
A trailing pothos on my top shelf has become sort of the signature piece of my whole kitchen at this point.
It drapes down the side of the shelf and honestly does more visual work than anything else up there.
If you don’t trust yourself with plant care, and no judgment because I’ve killed my fair share, a small faux eucalyptus stem looks shockingly real these days.
I have one tucked in an old pitcher and guests genuinely ask if it’s real.
Fresh herbs work beautifully here too, if you’re near enough to your prep space to actually use them.
I keep a little basil plant on the lower shelf and it makes cooking feel so much more special somehow.
Like I’m pulling from my own little garden instead of a plastic clamshell from the store.
My tip, keep your greenery asymmetrical.
One tall plant on one side, nothing directly matching it on the other.
Perfect symmetry tends to feel a little stiff and showroom-ish.
A little imbalance is what makes a shelf feel like a real home instead of a display case.
The Styling Trick Designers Swear By

Grouping in threes.
I resisted this rule for so long because it sounded too simple to actually work.
But it does, every single time.
Instead of lining up four matching items in a row, try three items of varying heights.
A vase, then a small stack of bowls, then a single tall glass.
Different heights, different shapes, same color family.
Your eye moves through it instead of just skimming past a flat row.
I use this trick on literally every shelf now, it’s become second nature.
Even my spice jars near the stovetop, which I know I said keep those off open shelves generally, but if you do keep a small curated set out, group them in clusters of three rather than one long boring line.
The rule of three also works for negative space.
Don’t fill every single shelf edge to edge.
Leave one shelf a little more open, a little more breathable, so your eye has somewhere to rest.
That contrast between full and empty is honestly what makes the whole wall feel intentional instead of overstuffed.
Once you start seeing shelves this way, you genuinely can’t unsee it.
The Honest Truth About Dust and Upkeep

Nobody wants to talk about this part, but I promised you honesty.
Open shelves collect dust faster than closed cabinets, that’s just the truth of it.
I wipe mine down every week, and I won’t pretend that’s optional if you want them to actually look nice.
It takes maybe five minutes with a soft cloth, so it’s not some huge burden, but it is a real habit you have to build.
I do mine on Sunday mornings with my coffee, and honestly it’s become this weirdly calming little ritual now.
If you’re someone who already struggles to keep up with cleaning, I’d gently say open shelving might add a bit of friction to your routine.
That’s okay to admit.
Not every kitchen style fits every lifestyle, and that’s not a failure, that’s just self-awareness.
A hack that’s saved me so much time, fewer items means less to dust.
I know that sounds obvious, but it’s the actual secret.
The sparser your shelf, the less maintenance it demands.
So if upkeep stresses you out, lean minimal rather than maximal.
Three beautiful things you dust weekly beats twelve pretty things you resent by month two.
Why I Kept a Few Closed Cabinets Too

I want to gently push back on the idea that a kitchen needs to go fully open.
Mine didn’t, and I think it’s actually better this way.
I kept my lower cabinets completely closed, and one small upper cabinet near my stove for the genuinely ugly, purely functional stuff.
Pots, the blender, that one weird gadget I only use twice a year.
Nobody needs to see any of that, and honestly I don’t want to look at it either.
This hybrid approach gave me the best of both worlds, the beauty of open shelving without the pressure of every single item in my kitchen needing to be photo ready.
If the idea of a fully open kitchen feels overwhelming to you, this is your permission slip to do a partial version instead.
Two open shelves and the rest closed cabinetry can look just as intentional, sometimes even more so.
It also gives your eye a place to rest, since not every wall is demanding attention at once.
My advice, put your open shelving somewhere it’ll actually get seen and appreciated, like near your sink or your coffee station, and let the closed cabinets handle the less glamorous corners.
You don’t owe anyone a fully exposed kitchen.
You just owe yourself a kitchen that feels good to be in.
Swapping Things Out With the Seasons

This is probably my favorite part of the whole thing, if I’m being honest.
Open shelves let your kitchen shift with the year in this really lovely, subtle way.
In the fall, I swap in a few small dried pampas stems and a little stoneware pumpkin, nothing over the top.
In summer, it’s all about the greenery and lighter colored linens folded on the lower shelf.
It’s such a small effort for how much joy it brings me.
Just fifteen minutes with a box of seasonal bits and the whole kitchen feels refreshed.
My tip here, keep a small labeled bin in a closet just for shelf decor rotation.
That way you’re not buying new things every season, you’re just cycling through what you already love.
I’ve built mine up slowly over two years and it barely cost me anything because I add one or two pieces at a time, usually from thrift stores.
And here’s the emotional part, this rotation keeps the shelves from ever feeling stale.
A kitchen that looks exactly the same in January as it did in July can start to feel a little invisible to you.
But when it shifts gently with the seasons, you actually notice it again.
You walk in and feel that little spark, oh, I love this, all over again.
The Lighting Detail That Makes It Feel Expensive

If you take away just one thing from this whole post, let it be this.
Small puck lights under your shelves change absolutely everything.
I added a simple battery operated set, no electrician needed, and it was maybe the best forty dollars I’ve spent on this whole project.
They cast this soft warm glow down onto the counter and up onto whatever’s displayed above them.
At night, with just those lights on, my kitchen feels like a cozy little restaurant, honestly.
It’s dramatic, I know, but that’s genuinely how it feels.
The lighting is what elevates open shelves from looking like storage to looking like a designed feature.
Without it, even a beautifully styled shelf can feel a little flat once the sun goes down.
My tip, go for warm white bulbs, never cool white, because cool lighting makes everything feel clinical instead of cozy.
And if you can find a set with a dimmer remote, it’s worth the extra few dollars.
I dim mine low for regular evenings and bright when I’m actually prepping dinner.
This one small addition is the difference between shelves that look nice in daylight photos and a kitchen that genuinely feels warm and inviting every single evening, whether anyone’s taking a photo of it or not.
Related read: Things I Wish I Knew Before I Decorated My First Home — Instant PDF + Kindle download. Secure checkout by Stripe