
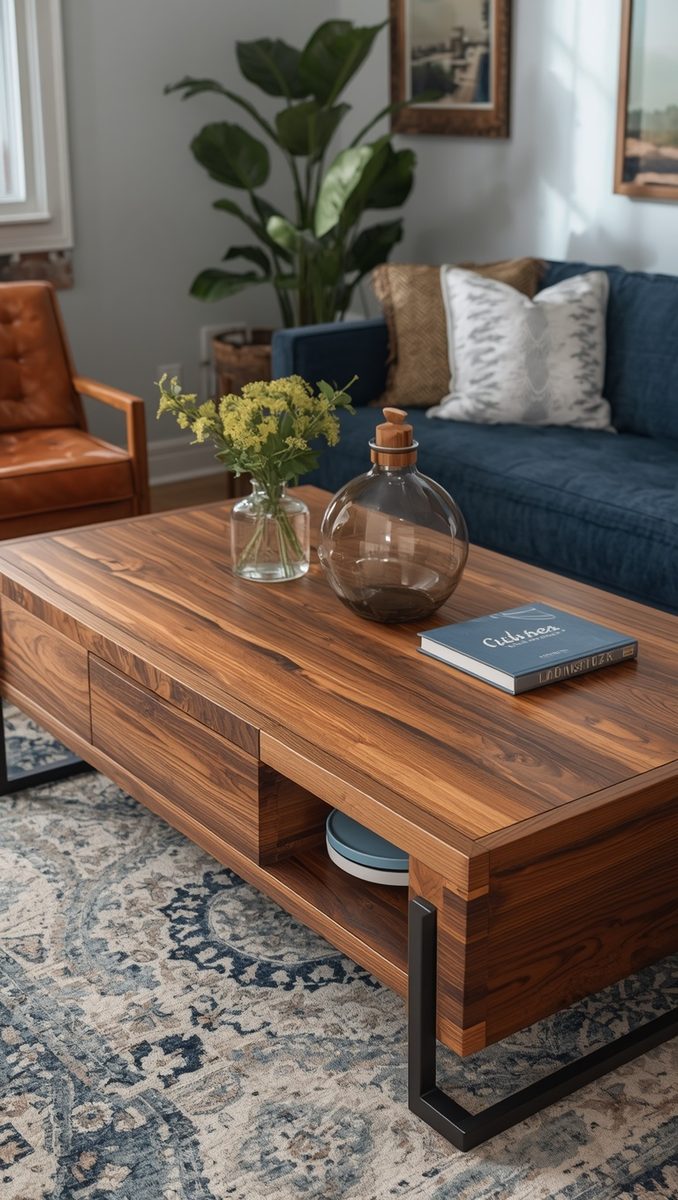
I once spent four hundred dollars on a coffee table that wobbled the second week I owned it.
Waiting on stain or polyurethane? The free polyurethane dry time calculator gives each coat a clock time and the can’s own wait before you use it.
That’s the confession.
It looked gorgeous in the store, all sleek lines and that fake “walnut” finish that peeled at the corner within a month.
I remember sitting on my living room floor at midnight, tightening a screw that would never actually hold, and just feeling kind of defeated.
So I did something that scared me a little.
I built my own.
And honestly, that clunky, slightly imperfect first table taught me more about my own home than anything I’d ever bought.
If you’ve ever felt that same little sting of buyer’s remorse, this one’s for you.
The Feeling You Get When It’s Actually Yours

There’s a specific kind of pride that comes from putting your hand flat on a table you built.
You feel the grain first.
Then you notice the little imperfections, the places where your saw wasn’t perfectly straight.
And somehow those imperfections make you love it more, not less.
I think that’s the part nobody tells you about building furniture.
It’s not really about the table.
It’s about looking around your living room and knowing you made something that will outlast a dozen store-bought replacements.
When my sister visited and asked where I “found” my coffee table, I got this little rush of happiness telling her I built it myself.
That’s a feeling you just can’t buy off a showroom floor.
So if you’re on the fence, let that be your nudge.
You don’t need to be a master woodworker.
You just need a weekend, some solid wood, and a little bit of stubbornness.
Trust me, the first cut is the scariest part, and after that it’s kind of addictive.
Why Solid Wood Beats Anything Veneer, Every Single Time

Okay, real talk for a second.
Veneer furniture is basically cardboard wearing a nice outfit.
It looks convincing in photos, but the second it gets a little humidity or a hot mug set down without a coaster, it starts to bubble and peel.
Solid wood just doesn’t do that.
It ages instead of degrading, which is such a different experience to live with.
I’ve had water rings on my walnut table that sanded right out in an afternoon.
Try doing that with particleboard.
There’s also this warmth that solid wood brings into a room that manufactured wood just can’t fake.
The light hits it differently.
You can actually see the wood breathing, if that makes sense, shifting slightly with the seasons.
And every scratch or dent just becomes part of its story instead of a reason to replace it.
If I had to pick one reason to build instead of buy, honestly, it’s this.
You’re not just making furniture.
You’re making an heirloom, something your kids might argue over one day.
That’s a wildly different investment than something from a big box store that’s designed to be replaced in five years.
The Best Wood Types for a Coffee Table (And Which One I’d Pick)

Choosing your wood is honestly half the fun.
Oak is the classic choice, and for good reason.
It’s tough, it takes stain beautifully, and that grain pattern is just so satisfying to look at.
Walnut is my personal obsession though.
It’s a little pricier, but that deep chocolate tone feels so rich and cozy in a living room.
Maple is great if you want something lighter and more modern, almost Scandinavian in feel.
And pine, don’t sleep on pine.
It’s budget-friendly and has this soft, farmhouse charm, though it dents more easily so it’s not for everyone.
If I had a small living room with lots of natural light, I’d go walnut every time.
It just glows in the afternoon sun in a way that feels almost cinematic.
For a busy household with kids or pets, I’d lean oak for the durability.
My personal tip here is to always touch the wood in person before buying if you can.
Photos lie, but your hands never do.
You’ll feel the difference in weight and smoothness immediately.
Let’s Talk Budget, Because Building Isn’t Always Cheaper

I want to be honest with you here, because I hate when blogs oversell the savings.
Building your own table isn’t always dramatically cheaper than buying, especially if you go for a premium wood like walnut.
But here’s the thing.
You’re paying for quality instead of markup.
A store table at four hundred dollars might have fifty dollars of actual materials in it.
When you build your own, almost every dollar goes into something that will actually last.
For my first table, I spent around one hundred and eighty dollars on oak, and it’s still rock solid years later.
Compare that to replacing a flimsy table every couple of years, and the math starts to look really different.
My tip is to price out your lumber before committing to a design.
Sometimes a slightly smaller tabletop saves you real money without sacrificing the look.
And don’t forget to budget for finish, sandpaper, and hardware.
Those little extras add up faster than you’d expect.
But even with all that, there’s something about spending your money on real materials that just feels good.
It’s less “consumer” and more “creator,” if that makes sense.
Beginner-Friendly Designs That Don’t Require a Full Workshop

You do not need a garage full of power tools to pull this off.
My very first table was basically four legs and a slab top, held together with pocket screws.
It wasn’t fancy, but it was sturdy, and it looked intentional.
A simple trestle-style base is another great beginner option.
It hides a lot of small imperfections because the lines are so clean and geometric.
If you’re nervous about joinery, honestly, hairpin legs are a total cheat code.
You just attach them to a finished slab and you’re basically done.
I did this for a friend’s apartment and she still gets compliments on it constantly.
For something a little more textured, a simple X-base design adds visual interest without much extra skill required.
My advice, start simple.
Your first table doesn’t need to be a masterpiece.
It needs to teach you how wood moves, how screws hold, and how finish changes everything.
Once you’ve built one simple table, the next one gets so much easier.
And weirdly, more fun.
The Tools You Actually Need (Not the Ones Pinterest Tells You To Buy)

Let’s cut through the noise here.
You do not need a full table saw setup to build a coffee table.
A circular saw with a straight edge guide will get you further than you think.
A drill is non-negotiable, obviously.
Pocket hole jigs are genuinely magical for beginners, they make joinery so much less intimidating.
An orbital sander will save your arms and your sanity.
And a simple square is one of those tools nobody mentions but you’ll reach for constantly.
I bought a cheap sander for my first project and upgraded later once I knew I actually loved this hobby.
My honest tip, don’t buy the expensive version of everything upfront.
Borrow tools if you can, or rent them for a weekend.
You’ll figure out what you actually enjoy using before committing serious money.
And clamps, so many clamps.
You will never regret owning more clamps than you think you need.
That’s basically a woodworking rule of life at this point.
Finishing Touches: Oil, Stain, or Poly

This is where your table really comes alive, honestly.
An oil finish, like tung oil or Danish oil, gives you that soft, matte, almost buttery look.
It feels incredible under your hand, but it needs occasional reapplication.
Stain lets you change the wood’s color entirely, which is great if you’re matching existing furniture.
Polyurethane is your durability champion, it creates a hard protective layer that resists spills and scratches beautifully.
For my own table, I went with a hybrid, a light stain followed by a few coats of poly.
It gave me the color I wanted with the protection my coffee-spilling household needed.
My tip here, always test your finish on a scrap piece first.
Wood can drink up stain unevenly, and you don’t want surprises on your actual tabletop.
And take your time between coats.
Rushing the drying process is the single most common mistake I see people make.
If I had all the patience in the world, I’d let each coat cure a full day before sanding lightly and applying the next.
That slow process is exactly what gives you that glassy, professional-looking finish.
Design Styles to Match Your Space

Farmhouse style loves a chunky, distressed top with turned or X-shaped legs.
It feels warm and a little imperfect, in the best way.
Mid-century modern leans toward tapered, angled legs and a cleaner, thinner tabletop profile.
It feels a little more polished and intentional.
Modern minimalist strips things back even further, often with hairpin or blocky square legs and zero ornamentation.
If your space already has a lot going on visually, I’d lean minimalist to give your eyes somewhere to rest.
Boho spaces look incredible with a live-edge top, showing off the natural curve of the tree itself.
I’m a little obsessed with live-edge, if I’m being honest.
There’s something so grounding about a piece of furniture that still looks like it came from a forest.
My tip, pull inspiration from a rug or art piece you already love.
Your coffee table doesn’t need to match everything perfectly.
It just needs to feel like it belongs in the story of the room.
Common Mistakes I Made (So You Don’t Have To)

My first big mistake was not accounting for wood movement.
Solid wood expands and contracts with humidity, and if you don’t build in room for that, your top can crack.
I learned this the hard way with a hairline crack that appeared that first winter.
Another mistake, rushing the sanding process.
I skipped grits early on and ended up with visible scratch marks under the finish.
So annoying, and totally avoidable.
I also underestimated how heavy solid wood actually is.
My first table needed sturdier legs than I originally planned, and I had to reinforce it after the fact.
Lesson learned, always overbuild your base slightly.
I also didn’t seal the underside of my tabletop, which contributed to that uneven movement I mentioned.
Sealing both sides evenly keeps the wood more stable long term.
None of these mistakes ruined my table, honestly.
They just became part of its story, and part of what I now teach my readers.
Sourcing Wood Without Spending a Fortune

Reclaimed wood is genuinely one of my favorite secrets here.
Old barns, pallets, even demolition sites sometimes have gorgeous, dense wood available for very little money.
Local sawmills are another underrated resource, often selling slabs for far less than big retailers.
I found my favorite walnut slab from a small local mill for almost half of what a lumber store wanted.
Facebook Marketplace and local classifieds are surprisingly good for this too.
People renovate constantly, and old wood furniture or flooring gets tossed out all the time.
My tip, always ask questions about the wood’s history before buying reclaimed pieces.
You want to know it’s been properly dried and isn’t hiding pests.
And don’t be afraid to negotiate at sawmills, especially for slabs with a little character or an unusual shape.
Those “imperfect” pieces are often discounted and honestly, they usually make the most interesting tables.
Making It Feel Custom Without a Custom Price Tag

You don’t need a designer budget to make your table feel special.
Chamfered edges, that small angled cut along the top edge, instantly elevate a simple slab.
Adding a subtle inlay, even a thin brass strip, gives your table a boutique feel for very little cost.
Mixing materials is another favorite trick of mine.
Pairing a warm wood top with black metal legs feels so intentional and current.
I did this on my second build and it’s honestly my favorite piece in my home now.
Rounded corners soften a design and make it feel more custom and considered.
My tip, look at furniture from higher-end brands for inspiration, then recreate the silhouette using your own wood choice.
You’ll capture that expensive feeling without the expensive price.
Small details like a waterfall edge, where the grain wraps continuously around the side, make a huge visual impact for relatively little extra effort.
Those tiny choices are what make people ask where you “found” your table.
Caring for Your Table So It Lasts a Lifetime

A little maintenance goes such a long way with solid wood.
I reapply oil finish to my table about twice a year, and it takes maybe twenty minutes.
Wiping up spills quickly prevents most staining issues before they start.
Using coasters isn’t just a suggestion, it genuinely protects your finish from heat rings.
I keep a soft cloth and furniture wax under my coffee table bench for quick touch-ups.
Avoid direct sunlight if you can, since prolonged exposure can fade certain wood tones unevenly over time.
If you do get a scratch, a little matching stain marker can hide it in seconds.
My tip, every season, give your table a light once-over with a damp cloth and a dry cloth after.
It keeps dust from building up in the grain, which can dull the natural shine.
Solid wood genuinely rewards a little attention with decades of beauty.
That’s the whole magic of it.
You’re not maintaining a product.
You’re caring for something you made with your own hands.