he Pinterest-Perfect Sectional Mistake That Changed Everything
Picture this: You’ve been pinning dreamy living rooms for months.
You finally find THE sectional – the one that looks exactly like that viral boho-chic setup with 2.3 million saves.
You measure once (okay, maybe just eyeball it), hit “buy now,” and wait for your Pinterest dreams to come true.
Then delivery day arrives.
That “cozy corner sectional” suddenly looks like it ate your entire living room for breakfast.
Sound familiar?
Here’s the plot twist: You don’t have to return it.
You don’t have to live with regret.

And you definitely don’t have to give up on having both style AND space.
I’ve spent years helping people transform their “oops, it’s too big” sectional disasters into magazine-worthy spaces.
Today, I’m sharing 15+ game-changing sectional layouts that’ll make your small living room look twice its size – and yes, they’re all Pinterest-approved.
Float in the Middle of the Room

Forget everything you know about pushing furniture against walls.
The biggest small-space myth?
That floating furniture wastes space.
Actually, floating your sectional creates the illusion of MORE room – it’s like magic for studio apartments.
The secret sauce:
- Leave 36-48 inches of walkway on all sides (yes, measure this!)
- Anchor with a rug that’s at least 2 feet larger than your sectional
- Add a round coffee table to soften those corners
Why Pinterest loves this: It creates that effortless, “I just threw this together” vibe that gets all the saves.
Plus, you can style the back of the sectional with a console table full of plants.
#FloatingFurniture goals.
Pro tip: This only works in truly open spaces.
If you have separate rooms, keep scrolling.
Tap to Explore These Beauties
See my ideas in action 👇 Tap any image to explore full details.
Divide an Open Plan

Turn your studio’s biggest challenge into its best feature.
Remember those room divider screens everyone was buying in 2020?
Your sectional can do that job – but make it fashion.
Here’s how to nail it:
- Position your sectional to create two distinct zones
- Leave a 48-inch pathway behind it (non-negotiable!)
- Use the back as a “wall” for your bedroom area
The Pinterest magic happens when you add a curtain behind the sectional.
Suddenly, your 400-square-foot studio looks like a chic one-bedroom.
I once helped a client separate her sleep space from her living area this way.
Her friends literally asked if she’d moved to a bigger apartment.
(She hadn’t.)
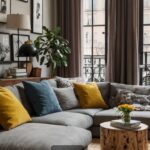
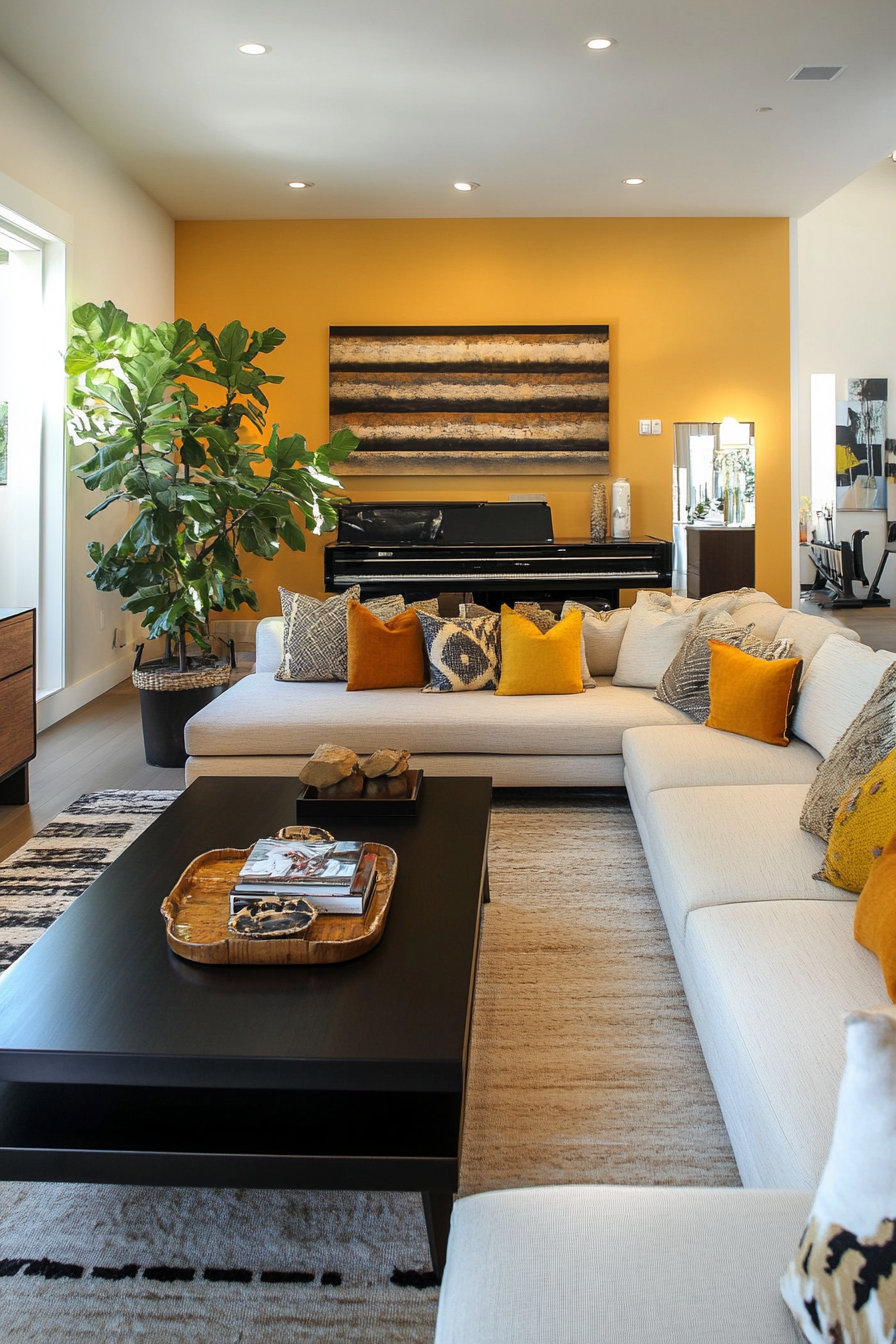
Corner It

The classic move that never fails – when done right.
Cornering a sectional seems obvious, but 90% of people do it wrong.
They shove it completely into the corner and wonder why it feels cramped.
The game-changer:
- Pull it 2 inches away from both walls (trust me on this)
- Ensure 36 inches of clearance in front
- Tuck a floor lamp behind for ambient lighting
Why this works: That tiny gap prevents the “trapped” feeling and gives you space for those Pinterest-worthy styling moments – think trailing plants or fairy lights.
Bonus move: Add a gallery wall above.
Corner sectionals + art walls = instant Pinterest board material.
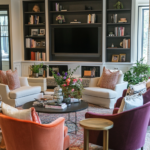
Nestle into a Nook

Got a weird alcove?
You just found your new favorite spot.
Those awkward architectural quirks that make you scratch your head?
They’re actually sectional goldmines.
Transform that nook:

Find Your Room’s Color Palette
Tap a vibe — get a curated 5-color palette with hex codes you can copy ✨
💭 I Wrote a Book About My Biggest Decorating Mistakes!
When I decorated my first home, I thought I knew what I was doing. Spoiler: I didn’t. 😅
💸 I bought a sofa way too big for my living room. Paint colors that looked amazing in the store but terrible on my walls.
- Measure twice, buy once (seriously, measure EVERYTHING)
- Look for compact sectionals with narrow arms
- Leave 24-36 inches for access
The Pinterest potential: Nook sectionals photograph like a dream.
Add some throw pillows, a chunky knit blanket, and boom – you’ve got yourself a “cozy reading corner” that’ll rack up the repins.
One client turned her awkward bay window nook into the most-used spot in her house.
Her kids call it “the snuggle zone.”
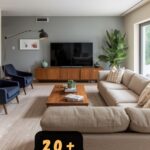
Center in a Small Space

Sometimes the boldest move is the best move.
Centering a sectional in a small room sounds crazy, right?
Wrong. It’s actually a designer secret for making rooms feel larger.
Make it work:
- Choose a low-profile sectional (under 32 inches high)
- Leave equal space on all sides (symmetry is your friend)
- Ground it with a rug, add a pouf, call it a day
Pinterest perfection tip: This layout photographs beautifully from every angle.
No more trying to find that one good corner for your room reveal.
Layer Against a Wall

The tried-and-true method – with a twist.
Yes, wall placement is common.
But common doesn’t mean boring when you know these tricks.
Level up your wall placement:
💭 Ever wondered what your room would actually look like rearranged?
I built a free tool that lets you drag furniture around a 2D floor plan. No signup, no catch.
See the Room Planner →- Float it 6 inches from the wall (game-changer alert!)
- Layer with side tables that overlap the arms
- Create a “furniture wall” with matching pieces
Why Pinterest will eat this up: That floating gap creates shadow lines that make everything look custom and expensive.
Plus, you can hide LED strips back there for that ambient glow everyone’s obsessed with.
Split Parallel to Walls

One sectional, two rooms.
Mind = blown.
Long, narrow room?
Split that sectional and create two conversation areas.
The formula:
- Place pieces parallel with 48 inches between
- Use two different rugs to define each space
- Add a console table in the middle as a divider
Pinterest bonus: This creates multiple vignettes to style and photograph.
One side for morning coffee shots, one for evening wine posts.
Content for days!
What’s Your Decor Personality?
5 questions · 30 seconds · Instant style match 🏡
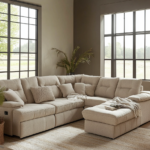
Split Perpendicular to Wall

Another way to arrange a sectional in a narrow rectangular space is splitting it perpendicular to the walls.
Position one sectional piece on each short end, facing each other with a walkway in between.
Allow at least 36-48 inches of clearance down the middle if possible.
Measure first to make sure you have enough wiggle room.
This creates a central pathway in between two conversation areas.
Using two small area rugs, coffee tables, accent seating and lighting defines each sectional seating space.

You can even use a console table down the middle aisle to connect the two zones.
Just be mindful not to clog the pathway between sectionals.
Leaving breathing room makes the split layout feel open.
Take measurements carefully to allow ideal clearance for walking through.
Zone Out a Large Space

For larger open concept combined living rooms and dining rooms, using two sectionals to zone out the big space can work beautifully.
Arrange one sectional to define the living room and one to define the dining room.
Make sure to leave a clear walkway between sectionals of at least 48-60 inches if possible.
Measure meticulously so you don’t block traffic flow.
Anchoring the sectionals into separate zones is key.
Use large area rugs underneath each one and clearly designate lighting, coffee tables, accent chairs or dining tables.
You can even place a credenza, console table or bookshelf divider between the two sectionals to define the spaces.
Get creative dividing up a cavernous space into cozy, usable zones.
Break Up an Awkward Room

Zig-zagging sectionals help break up awkward narrow living rooms or spaces with columns or pillars interrupting the flow.
Arrange the sectionals in an S-shape or zig zag pattern around obstacles.
Make sure to leave at least 36 inches clearance for walking between the sections.
Measure carefully so you don’t block circulation or create congestion.
Tying the zig zag sectionals together with one large area rug underneath defines them as one space, rather than haphazard pieces.
Adding a shared oversized coffee table in the center along with accent seating pulls the layout together.
Get creative finding unique sectional configurations to deal with challenging floor plans and obstacles.
This or That?
Pick your fave — see what other readers chose! 👀
💭 I Wrote a Book About My Biggest Decorating Mistakes!
When I decorated my first home, I thought I knew what I was doing. Spoiler: I didn’t. 😅
💸 I bought a sofa way too big for my living room. Paint colors that looked amazing in the store but terrible on my walls.
Define a Small Entryway

Using a petite sectional in an entryway or mudroom is a great option for small homes.
Tuck it into an entry nook or recess to create a designated staging area.
Make sure to leave at least 24-36 inches walkway clearance in front of and around.
Measure carefully so incoming and outgoing traffic can easily pass by.
Sectionals are great for oddly-shaped, narrow entryways.
Anchor the entry sectional with a small rug underneath and add some baskets or trays on top to stash keys, bags and shoes.
A narrow console table behind with hooks and storage completes the furnished entry.
Just don’t cram an oversized sectional into a tiny entryway.
Be sure to pick compact pieces scaled to the small space.
Psst… Check This Out
Create a Stunning Living Room Arrangement with a Wall of Windows 🪟 Take Me There →Create a Reading Nook

Carving out a cozy reading nook with a petite sectional is an excellent small space solution.
Tuck it into a corner, recess or unused niche to define a functional lounge zone.
Make sure to leave at least 24-36 inches walkway in front of and around the nook.
Measure to ensure you can squeeze past easily.
Sectionals are great for taking advantage of quirky leftover space.
Finish the snug book nook with bookshelves to hold reading material and plenty of layered lighting.

You can even place a small side table next to the sectional to hold books, snacks and drinks.
A plush rug, pillows and throws make the nook extra comfy.
Just avoid cramming an oversized sectional into a tight niche.
Seek out compact sectionals sized right for the tiny reading space.
Separate an Open Plan Bedroom

Studio living, but make it luxe.
Using a sectional as a bedroom divider is next-level space planning.
The setup:
- Face sectional toward living area
- Add curtains or a tall bookcase behind
- Leave 48-60 inches for bedroom access
Why it’s genius: You get a real living room AND bedroom privacy.
Your Instagram stories will have everyone asking for your floor plan.
Incorporate Round Shapes

Curves soften boxy rooms.
Where to add circles:
- Round coffee tables
- Oval rugs
- Circular mirrors
- Curved accent chairs
The balance: 70% angular, 30% curved for perfect harmony.
Quick Design Dilemma
Cast your vote — see what other readers think! 🤔
Zone with Area Rugs

Rugs are room definers.
Rug rules:
Patterns add personality
Size to fit furniture groupings
Different rugs for different zones
Layer for extra warmth
Go Compact
Size matters – but not how you think.
The secret to small space sectionals isn’t just overall size.
It’s about proportions that trick the eye.
What to look for:
- Arms under 3 inches thick
- Backs around 30 inches high
- Total length under 90 inches
Pinterest-approved picks: IKEA’s KIVIK, Article’s Abisko, West Elm’s Haven – all customizable to your exact measurements.
Skip the Chaise
Sometimes less really is more.
That chaise looks cozy in photos, but in real life?
It’s a space hog.
Better options:
- Classic L-shape (corner-friendly)
- Straight sectional with ottoman
- U-shape for open layouts
The exception: Bumper chaises that align flush with the sectional.
All the comfort, none of the awkward angles.
Choose a Shorter Style
Low and lifted is the way to go.
The magic numbers:
- Seat height: 16-18 inches
- Leg height: 6-8 inches minimum
- Total height: Under 32 inches
Why it matters: Lower furniture makes ceilings look higher.
It’s like a face filter for your living room.
Float It Away From Walls
The 6-inch rule that changes everything.
Pulling furniture away from walls is the #1 trick designers don’t want you to know.
(Just kidding, we’re dying to tell you.)
The benefits:
- Makes rooms look larger
- Creates styling opportunities
- Easier to clean (goodbye dust bunnies)
Skip the Large Coffee Table
Death to the shin-bruiser.
That massive coffee table?
It’s killing your floor plan.
Smart swaps:
- Lift-top ottoman (storage + surface)
- Nesting tables (flexibility queen)
- Two small tables instead of one large
Maximum width: 50 inches, or prepare for daily navigation challenges.
Add Mirrors
The oldest trick that still works.
Strategic mirrors can double your visual space.
But placement is everything.
Mirror magic:
- Minimum 24 inches wide
- Hang opposite windows or sectionals
- Use vertical mirrors near ceilings
Pinterest tip: Vintage or textured frames photograph better than plain ones.
Keep It Light and Bright
Color psychology meets spatial illusion.
The palette for space:
- Walls: White, off-white, or light gray
- Sectional: Cream, tan, or light blue-gray
- Accents: Your chance for color pops
Why it works: Light colors reflect light, dark colors absorb it.
Science, but make it stylish.
Declutter!
The free solution everyone skips.
You can have the perfect sectional layout, but if your surfaces are cluttered?
Game over.
Declutter like you mean it:
- Invest in hidden storage
- Use pretty baskets (Pinterest loves these)
- Mount your TV (those cords have to go)
The 90% rule: If surfaces are more than 10% covered, it’s too much.
Use Multipurpose Furniture
Every piece should work twice as hard.
In small spaces, single-function furniture is luxury you can’t afford.
Double-duty winners:
- Storage ottomans (seating + hiding spot)
- Lift-top coffee tables (desk by day, table by night)
- Sectionals with built-in storage
Pinterest bonus: Multifunctional pieces make great “small space hack” content.
Add Pops of Color
Neutral sectional + colorful accents = perfection.
The formula:
- Sectional: Neutral
- Pillows: 2-3 colors max
- Throws: One statement piece
- Art: Your personality spot
Why it works: Easy to change with seasons/trends without buying new furniture.
Scale Down Additional Furniture
Friends don’t let friends buy oversized accent chairs.
Smart scale choices:
- Slipper chairs over recliners
- Acrylic pieces that “disappear”
- Stools that tuck under tables
The rule: If you can’t walk around it easily, it’s too big.
Elevate with Legs
Legs aren’t just functional – they’re transformational.
Leg logistics:
- Height: 3-5 inches minimum
- Style: Match your aesthetic
- Material: Metal for modern, wood for traditional
Pro tip: Measure clearance for robot vacuums.
Future you will thank present you.
Play with Layouts
Your first arrangement is never your best.
Give yourself permission to:
- Try multiple configurations
- Live with it for a week
- Change with the seasons
- Break “rules” if they work for you
Maximize Wall Space
When you can’t go out, go up.
Vertical victories:
- Floating shelves above sectionals
- Gallery walls for personality
- Wall-mounted lighting
The sweet spot: Start shelves 8-10 inches above sectional backs.
Divide Open Floor Plans
Your sectional as architectural element.
Division strategies:
- Define zones without walls
- Create intimate spaces
- Maintain sight lines
- Add functionality
Opt for Sectional Configurations
Flexibility is your friend.
What to seek:
- Reversible pieces
- Modular components
- Pieces that work solo
- Easy reconfiguration
Why it matters: Your needs will change.
Your furniture should too.
Add Contrast with Texture
Flat textures make flat rooms.
Texture tactics:
- Velvet pillows on linen sectionals
- Chunky knits over smooth leather
- Jute rugs under plush seating
Pinterest rule: Three textures minimum for visual interest.
Incorporate Round Shapes
Curves soften boxy rooms.
Where to add circles:
- Round coffee tables
- Oval rugs
- Circular mirrors
- Curved accent chairs
The balance: 70% angular, 30% curved for perfect harmony.
Zone with Area Rugs
Rugs are room definers.
Rug rules:
- Size to fit furniture groupings
- Different rugs for different zones
- Layer for extra warmth
- Patterns add personality
Maximize Natural Light
Free lighting is the best lighting.
Light amplifiers:
- Position near windows
- Use sheer curtains
- Add mirrors strategically
- Choose light colors
- Keep windows unobstructed
The goal: Make your sectional look like it’s glowing in those golden hour photos.
💭 I Wrote a Book About My Biggest Decorating Mistakes!
When I decorated my first home, I thought I knew what I was doing. Spoiler: I didn’t. 😅
💸 I bought a sofa way too big for my living room. Paint colors that looked amazing in the store but terrible on my walls.