
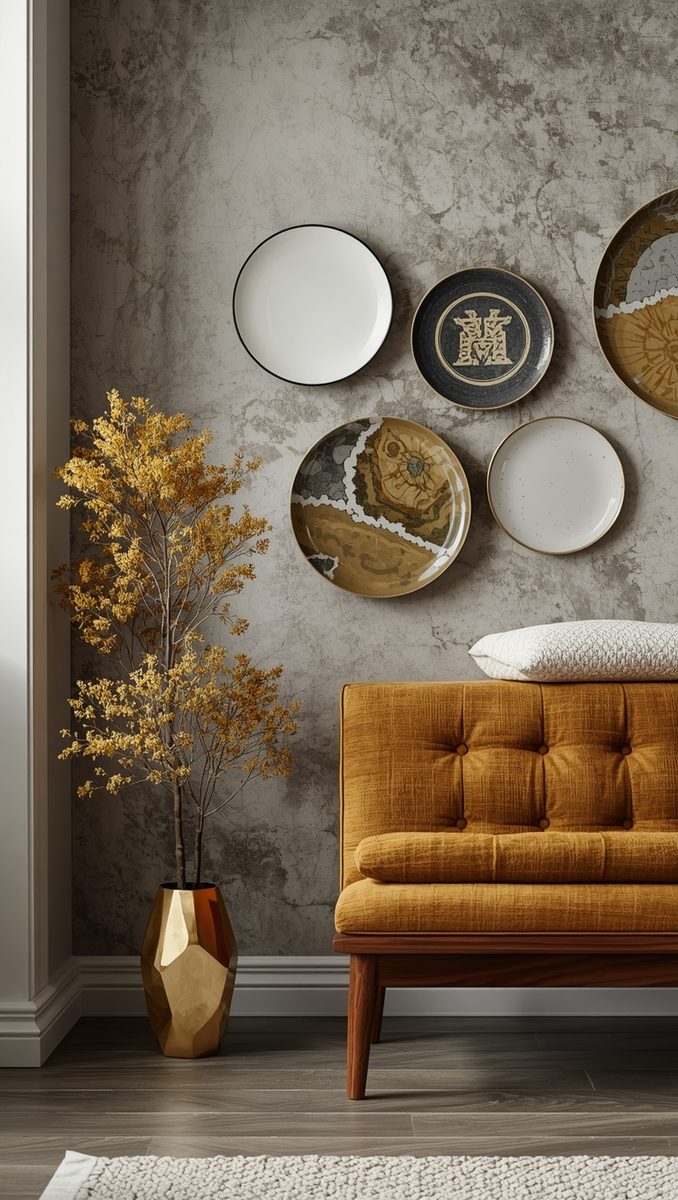
There’s something about a plate wall that just feels warmer than a framed print.
I think it’s because plates carry history, even when we don’t know whose history it is.
You look at a hand-painted floral plate from 1962 and you just know someone set a table with it, poured coffee next to it, lived a whole life around it.
That’s not something you get from a canvas print off a big box store shelf.
When I hung my first plates, my husband walked by and said the hallway suddenly felt “lived in,” and honestly, that’s exactly the compliment I was going for.
Plates also do this cool thing where they read as art but they don’t feel precious or intimidating, you know?
Nobody’s afraid to touch a wall of plates the way they might tiptoe around a fancy painting.
It’s approachable elegance, and I’m kind of obsessed with that balance.
There’s also a dimensional thing happening that flat art just can’t compete with.
Plates catch light differently depending on the time of day, and their curves throw these soft little shadows on the wall.
In the morning my plate wall glows kind of golden, and by evening it goes moody and dramatic.
So really, you’re not just hanging decor, you’re hanging something that changes with your home throughout the day.
That’s the emotional magic of it, and it’s why I keep coming back to this trick project after project.
Where I Actually Find My Best Thrifted Plates

Okay, confession: I have a slight addiction to estate sales, and my plate wall is proof.
Estate sales are honestly my number one source, because you get full sets sometimes for less than a single plate at a home store.
Thrift stores are hit or miss, but the miss is part of the fun, if I’m being real with you.
I’ve learned to go early in the week, right after weekend donations get sorted and put out.
Flea markets are my other favorite, especially the ones in small towns where sellers don’t always know what they have.
I once paid three dollars for a hand-painted plate that turned out to be from a discontinued European line, and I still think about that win.
Garage sales are more of a gamble, but when they hit, they hit big, especially in older neighborhoods.
My personal tip is to always ask if there are “more in a box somewhere,” because sellers often only put out half their stash.
If I had to rank them, estate sales first, flea markets second, thrift stores third, garage sales as the wildcard.
And honestly, don’t skip the ugly ones on the shelf, because ugly up close sometimes reads as charming and vintage once it’s grouped with others.
That’s a hack I wish someone told me years ago.
So keep your eyes soft and your expectations low, and you’ll end up surprised more often than not.
The Mixing Rule That Changed My Whole Approach

For the longest time I thought plate walls needed to “match,” and that thinking held me back.
Once I let that go, everything got so much easier and so much more interesting.
My rule now is simple: mix patterns freely, but keep one thread connecting them, like a color family or a similar era.
So my hallway wall has floral, toile, and a couple of solid rims, but they all live in creams, blush, and soft blue.
That thread is what keeps a wildly mismatched grouping from looking like a yard sale explosion.
If I had a more traditional room, I’d probably lean into gold rims and ornate detailing across the board, just for cohesion.
But in my more relaxed farmhouse-meets-cottage space, I let texture and imperfection do the connecting instead.
Odd numbers help too, three, five, seven plates in a cluster tend to feel more natural than even groupings.
I also like to vary the sizes, because a wall of all-same-size plates can start to feel a little flat and predictable.
My favorite trick is throwing in one small saucer or bread plate among the bigger dinner plates, just to break the rhythm.
It’s a tiny detail, but it makes the whole arrangement feel curated instead of accidental.
So don’t overthink matching, just find your thread and let the rest be a little wild.
My Honest Take on Hanging Hardware (And What Actually Holds)

I have tried every plate hanger on the market, and I have opinions, strong ones.
The spring-wire hangers are fine for lightweight plates, but they’ve let me down on anything heavier or oddly shaped.
My go-to now is the adhesive-back plate hanger, because it grips tight and doesn’t leave that awkward wire showing on delicate rims.
For thicker stoneware, I actually prefer a small wire hanger with rubber-coated grips, since it flexes without slipping.
I learned the hard way that skipping the “test hang” step is a mistake, because I once had a plate crash at two in the morning and scared my dog half to death.
So now I always let a new hanger sit for a full day before trusting it with anything sentimental.
My little hack is adding a dot of clear museum wax behind the plate too, just for extra peace of mind on wobbly walls.
If you’re renting, this changes a bit, and I’ll get into that trick in a later section.
For heavier ceramic plates, don’t be afraid to double up hangers if the plate allows it, it’s not cheating, it’s just smart.
And always hang your heaviest pieces closest to a stud if you can find one, because gravity does not care how pretty your plate is.
Trust me, I’ve replaced enough drywall anchors to know that lesson by heart.
Planning Your Layout Without Losing Your Mind

I used to just start hammering nails and hope for the best, and that energy did not serve me well.
Now I trace every single plate onto butcher paper first, cut it out, and tape the paper shapes to the wall.
This sounds tedious, but it saves you from a wall full of extra nail holes, I promise you that.
I move the paper shapes around for a solid day before committing to anything permanent.
My favorite starting point is a focal plate, usually my biggest or most detailed piece, placed slightly above eye level.
From there I build outward in a loose spiral, letting smaller plates fill in the gaps naturally.
If I had a stairwell, I’d actually do a cascading diagonal layout instead of a cluster, just to follow the sightline as you walk up.
Symmetry works beautifully over a mantel, but organic clustering feels more at home in a hallway or reading nook.
My little tip: step back every few plates and look from ten feet away, because up-close spacing lies to you constantly.
Photograph your paper layout too, so if a plate falls later, you know exactly where it goes back.
This step feels slow, but it’s the one that makes the whole project actually look intentional instead of thrown together.
Color Stories That Make a Random Wall Feel Curated

Color is honestly the secret thread that makes a chaotic plate collection feel like one cohesive piece.
My personal favorite palette leans into soft blush, buttery cream, and the faintest sage green, because it feels warm without being loud.
If your space is more coastal, blues and whites with the occasional touch of coral can feel effortlessly breezy.
For a moodier, richer look, I’ve seen readers use deep burgundy and gold-rimmed plates, and it reads almost like an old European dining room.
I always tell people to pull their palette from one “anchor plate,” the one piece you love most, and build outward from its colors.
That anchor plate approach saved me from an early mistake where I bought plates purely because they were cheap, not because they belonged together.
A quick hack, lay all your plates on the floor first and squint at them from a distance, colors that clash will announce themselves fast.
If something feels off, it’s almost always a temperature issue, like a cool-toned blue plate fighting with warm ivory ones nearby.
Grouping by warm or cool undertones first, then by pattern, has never failed me.
So trust your gut on this one, because if a combination feels a little uneasy to your eye, it probably is.
Renter-Friendly Tricks I Actually Use in My Own Home

I’ve rented three different places, and each one taught me a new plate wall workaround.
My favorite renter hack is using adhesive hook strips rated for the plate’s weight, tested first on a hidden spot on the wall.
For textured or plaster walls, adhesive strips can be unreliable, so I switch to a thin removable picture rail instead.
A picture rail lets you hang plates from cord or wire without ever touching the wall with a nail, which feels like magic honestly.
I also love using a large piece of framed cork or fabric board as a base, then attaching plates to that instead of the actual wall.
That way, if I move, the whole plate wall comes with me as one unit, no patching required.
For smaller plates, museum putty alone sometimes does the trick, especially on lightweight decorative pieces.
My tip here is to always check your lease first, because some buildings are surprisingly strict about even small nail holes.
If you’re really cautious, leaning a few plates on a shelf ledge or plate rail gives you the look with zero wall commitment.
I did that in my very first apartment, and it still looked intentional and pretty from across the room.
So don’t let renting talk you out of this project, there’s always a workaround if you get a little creative.
Little Styling Details That Make the Wall Feel Finished

The tiny details are honestly what separate a good plate wall from a great one, in my experience.
I like adding one small piece of dimension, like a woven basket or a mirror, tucked into the plate grouping.
That breaks up the flatness and gives your eye somewhere unexpected to land.
Lighting matters more than people think, so I angle a small picture light or sconce nearby whenever I can.
Soft warm bulbs make the glaze on the plates glow in this really cozy way come evening.
I also love leaving one small gap in the arrangement, almost like negative space that lets the plates breathe.
A wall packed edge to edge with zero breathing room can start to feel a little overwhelming instead of charming.
My personal favorite trick is adding a single dried floral stem tucked behind one plate’s hanger, just for softness.
It’s such a small thing, but it makes the whole wall feel like it’s part of the home, not just stuck onto it.
I also rotate one or two plates seasonally, swapping in something warmer for fall or lighter for spring.
That keeps the wall feeling fresh without redoing the whole project every few months.
Little touches like this are what make guests stop and actually look closely, which is always the goal.
What I’d Do Differently If I Started My Plate Wall Today

Looking back, I wish I hadn’t rushed my very first attempt, because patience really does pay off here.
If I started over, I’d collect plates over several months instead of buying a bunch all at once in a panic.
Slow collecting naturally builds in more variety, and honestly, more meaning too.
I’d also invest in better hangers from the start instead of the flimsy ones I grabbed at a big box store.
That one splurge would have saved me a cracked plate and a mini heartbreak.
I’d photograph my paper layout earlier in the process too, since I definitely lost track of my plan once or twice.
Another thing I’d change is being braver with size variation, because my first wall was a little too uniform and safe.
Bigger risks with scale ended up being my favorite part once I finally tried it in later rooms.
I’d also start with fewer plates than I think I need, because it’s so much easier to add than to remove once holes exist.
If I’m honest, the biggest lesson was learning to let the wall evolve slowly instead of trying to finish it in one weekend.
Some of my favorite plates found their spot on that wall almost a year after I started, and that slow reveal is part of why I love it so much.
Related read: Things I Wish I Knew Before I Decorated My First Home — Instant PDF + Kindle download. Secure checkout by Stripe