

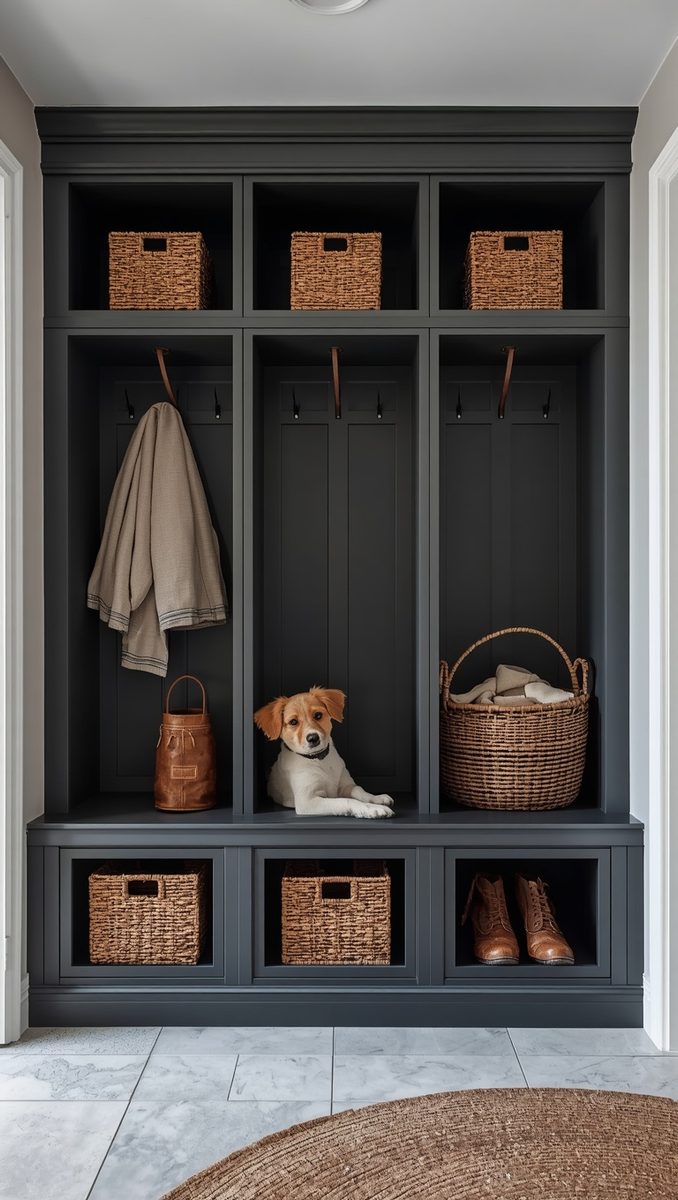
I used to dread walking through my own front door.
There was always a mountain waiting for me.
Backpacks, muddy sneakers, a stray umbrella, three jackets slung over a chair.
I’d step over it all with my groceries and sigh.
One rainy Tuesday I tripped on a boot and nearly lost an entire carton of eggs.
That was it, I was done.
I decided everybody in my house needed their very own spot to drop things.
So I started researching lockers, and honestly, I’m obsessed with how it turned out.
Let me show you what worked for me.
1. Give Every Person Their Own Locker

This was the first thing I did, and it changed everything.
One locker per person.
No sharing, no “oops, that’s your stuff in my spot.”
When I gave each family member a defined space, the dumping just sort of happened on its own.
You know how people drift toward the easiest option?
A locker with their name on it becomes that option.
If I had a tiny entryway, I’d still do this, even if it meant narrow lockers.
Twelve inches wide is plenty for a jacket and a bag.
It works because everyone feels like they belong somewhere.
That tiny sense of ownership is kind of magical.
2. Add a Bench Seat Right Below
I love a locker with a bench, and I’ll tell you why.

You need somewhere to sit when you’re wrestling off wet boots.
My bench is a simple wood plank, sanded smooth and painted a creamy white.
It feels warm and solid under my hands every single time.
I added a thick linen cushion on top, and now it’s the coziest spot in the house.
I’ve caught my kids sitting there just to read.
And my dog thinks it’s his throne.
If you’re worried about mess, pick a washable cushion cover.
Mine zips off, and I toss it in the machine every few weeks.
Easy, soft, and totally practical.
3. Open Cubbies or Doors? I Say Both

I went back and forth on this for weeks.
Open cubbies look so airy and inviting.
But doors hide the chaos when guests pop by.
So I did a mix.
The top shelves have doors, and the lower hook area stays open.
That way the daily-use stuff is grab-and-go, and the random junk stays tucked away.
If I had to pick just one, I’d go open for kids.
They actually use what they can see.
Closed doors turn into “out of sight, out of mind,” and suddenly the backpack is on the floor again.
4. Make Room for Shoes Underneath
Shoes were my biggest headache.

They multiply when you’re not looking.
So I built a low shelf at the bottom of each locker, just tall enough for two pairs.
Only two pairs, and that’s on purpose.
Everything else lives in bedroom closets.
I love how this keeps the floor clear and the whole space feels lighter.
If you have a big family, a slatted shelf helps wet shoes dry out.
I added a small rubber mat under mine for muddy days.
It wipes clean in seconds, and I feel like a genius every time.
5. Use Hooks That Can Actually Handle the Weight

Cheap hooks drove me nuts.
They’d bend or pop right out of the wall under a heavy winter coat.
I switched to sturdy matte black hooks, and they’ve held up beautifully.
I put two at adult height and one lower for the kids.
That little lower hook means my youngest hangs up her own coat now.
And she’s so proud of it!
I’d also mix hook styles if you like a collected look.
A few brass ones next to black ones feel kind of vintage and charming.
It’s a small detail, but it adds personality.
6. Label Everything, Even If It Feels Silly

I know, I know, labels sound fussy.
But hear me out.
A little chalkboard tag or a simple brass nameplate makes each locker feel intentional.
I used small wooden tags with names handwritten in white paint pen.
They look sweet and a bit farmhouse.
For the kids, I added a tiny picture next to each name when they were little.
A star, a moon, a sunflower.
It turned cleanup into a game.
If you hate the label look, try color-coding with painted hooks instead.
Same idea, softer vibe.
7. Add Baskets for the Small Stuff

Gloves, hats, sunscreen, dog leashes.
All those little things that vanish right when you need them.
I tucked woven baskets onto the upper shelf of every locker.
Each one holds the season’s must-haves.
I love natural seagrass because it adds texture and warmth.
Flat-bottomed baskets with handles are my favorite, since you can pull them down without a struggle.
One tip I swear by is keeping a spare pair of mittens in each basket.
Winter mornings are chaos, and this saves me at least once a week.
Pretty, useful, and kind of calming to look at.
8. Create a Little Drop Zone for Keys and Mail

Every home needs a landing pad.
Mine is a narrow shelf at the end of the locker run.
I added a small tray for keys, a wall pocket for mail, and a tiny dish for loose change.
It sounds simple, and it is.
But I haven’t lost my keys in months.
Months!
I also put a hook just for the car fob.
If I could only add one thing to a mudroom, this might be it.
It lowers my stress the second I walk in.
And honestly, that’s what a home should do.
9. Size Lockers to Fit Your Real Life

I measured everything before I built.
Coats, bags, boots, the oversized hockey duffel my son hauls around.
Standard lockers don’t always fit real life, you know?
Mine are about eighteen inches wide and quite deep, so bulky gear actually fits.
I left the tallest locker open for long coats and a vacuum I keep in there.
Sneaky, but it works.
If your gear is smaller, you can go slimmer and save space.
Walk around your house first and see what actually gets dumped by the door.
Then build around that.
It’s the most honest way to design a mudroom.
10. Don’t Forget the Pets

My dog has his own corner, and he loves it.
I installed a low hook for his leash and a little basket for his towel and treats.
When he comes in soggy from the yard, everything’s right there.
No more hunting for the towel while he shakes mud across my floor.
I also set a small washable rug on the floor beneath.
He curls up there while I wipe his paws.
If you have a cat, a cozy cubby with a soft cushion might be sweet.
It’s a tiny detail, but my whole family smiles every time we see it.
Pets deserve a little spot too.
11. Light It Up So It Feels Welcoming

Dark mudrooms always felt a little sad to me.
So I added a soft sconce above the bench and a small flush-mount overhead.
Warm bulbs only, nothing harsh or blue.
The glow makes the whole space feel like a hug at the end of a long day.
I also put battery-powered puck lights inside the upper shelves.
They turn on when I open the doors, and I’m kind of in love with that.
If you want a cheap upgrade, swap your bulbs first.
It’s amazing how much a warmer tone changes the mood.
Light is the secret ingredient nobody talks about.
12. Pick a Color That Feels Like a Deep Breath

Paint was my favorite part.
I went with a soft sage green on the lockers, and it feels so calm and grounded.
Against white walls, it looks fresh and a little bit dreamy.
If you want something bolder, a deep navy is gorgeous too.
I tested three samples on the wall and lived with them for a week.
That’s my best paint hack, by the way.
Look at them morning, noon, and night.
Light changes everything.
And a satin or semi-gloss finish wipes clean easily, which matters when sticky fingers come through.
13. Start Small If You’re Not Ready for a Full Build

You don’t need a custom carpenter to get this look.
I’ve seen friends use stock cabinets, secondhand bookcases, or even a row of simple wall hooks with a long bench.
Mine started as a weekend project with basic shelves and a lot of paint.
And it still works beautifully.
If I were starting over with a small budget, I’d do hooks and a bench first.
Then add cubbies one by one as I could.
There’s no rule that says it has to happen overnight.
Your mudroom can grow with you.
So grab a measuring tape, make yourself a cup of coffee, and start with just one locker.