

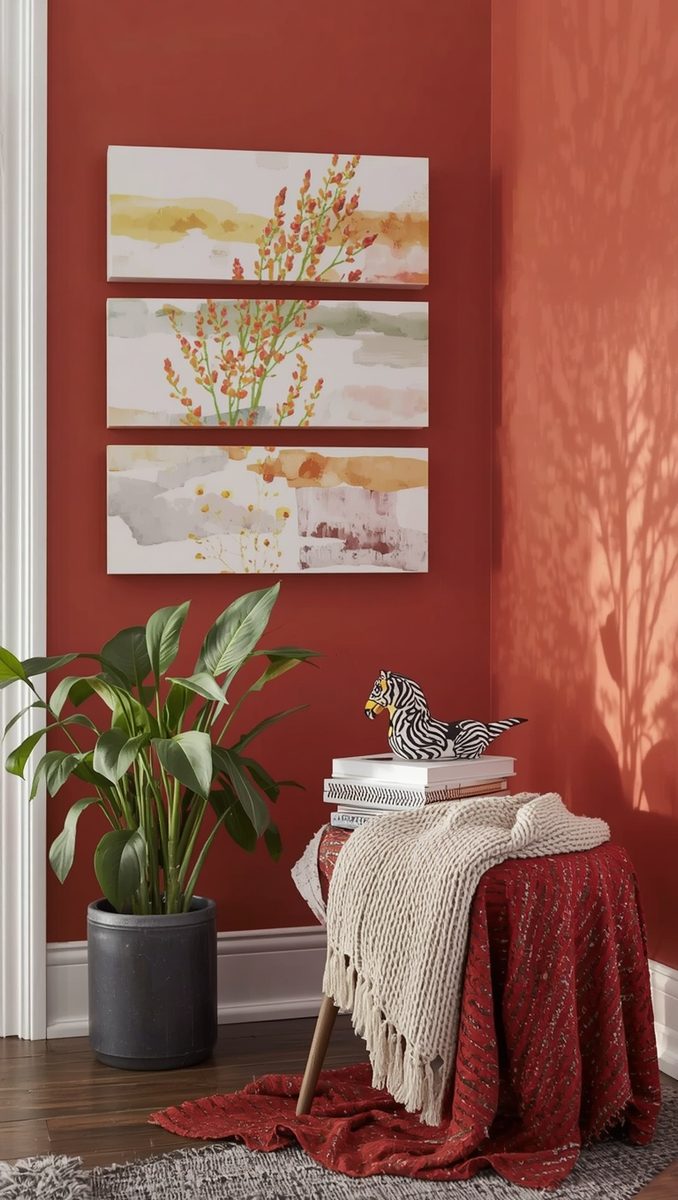
My sister walked into my living room last spring and asked who my designer was.
I laughed so hard I almost spilled my coffee.
There is no designer.
There is me, a Saturday afternoon, and exactly forty three dollars spent at a hardware store.
That’s kind of the whole secret, honestly.
You don’t need a big budget to make a room feel expensive.
You need a few smart moves and the confidence to stop apologizing for your starter furniture.
I’ve done this in three different apartments now, each one smaller and cheaper than the last.
And every single time, people ask the same question.
So today I’m handing you my actual playbook, the one I use on myself.
No fluff, just the stuff that works.
Let’s get into it.
Paint Your Trim Before You Touch Your Walls

Okay, this one changed everything for me.
I used to think a fresh wall color was the fastest way to make a room feel new.
I was wrong.
The trim is what your eye actually catches first, even if you don’t realize it.
Crisp, bright white trim against a slightly imperfect wall reads as intentional.
Dingy, yellowed trim against a gorgeous wall color reads as tired, no matter what you do.
When I redid my first apartment, I spent one weekend just on baseboards and door frames.
The whole space looked renovated.
It wasn’t.
It was twenty dollars of paint and a lot of blue tape.
My tip here is to use a semi gloss or satin finish, never matte, on trim.
That little bit of sheen catches the light and makes everything look sharper and more finished.
If you’re renting and can’t paint, even a deep clean with a magic eraser does wonders.
You’d be shocked how much grime builds up on trim without you noticing it.
I do this every single spring now, it’s become sort of a ritual for me.
Small thing, huge payoff.
That’s the theme of this whole list, honestly.
Swap Every Piece of Hardware You Own

Cabinet knobs are criminally underrated.
I mean it.
The builder grade brass knobs that came with my kitchen were doing nothing for me.
So I swapped them for brushed gold ones, all matching, all from the same cheap multipack.
Under thirty dollars, one Sunday afternoon, and suddenly my kitchen looked like it belonged in a magazine.
Cabinet pulls, drawer knobs, even light switch plates count here.
They’re small, but your hand touches them constantly, and your eye catches them just as often.
Mismatched or dated hardware is one of those things that quietly signals cheap without you clocking why.
And matching, cohesive hardware does the opposite.
It signals someone thought about this room.
My favorite trick is picking one finish and committing to it everywhere, even on light fixtures and faucets.
Consistency is doing a lot of the visual heavy lifting here.
If you rent, keep your old hardware in a labeled bag so you can swap back before move out.
I’ve done this three times now and it takes maybe twenty minutes.
Totally worth it for the upgrade in between.
It’s one of my favorite cheap wins, hands down.
Layer Your Lighting Like You Mean It

Overhead lighting alone is kind of the enemy here, I’m just going to say it.
That flat, bright, everywhere-at-once glow makes even a beautiful room feel like a waiting room.
What actually reads as expensive is layered light, coming from different heights and different warmths.
A floor lamp in the corner.
A small table lamp on a shelf.
Maybe a plug in sconce near your reading chair.
When I switched my living room over to lamp light only in the evenings, the whole mood shifted.
It felt cozy, warm, kind of like a hotel lobby that actually wants you there.
And the best part is you can build this slowly, one thrifted lamp at a time.
I found two of my favorite lamps at a estate sale for six dollars each.
Rewired the cords myself with a cheap kit, took twenty minutes total.
My tip is to stick to warm bulbs, nothing above twenty seven hundred kelvin, so the light glows instead of glares.
Cool white bulbs are sort of the silent villain of budget spaces.
They make everything look a little clinical, a little cheap, even when the furniture itself is nice.
Warm light forgives a lot.
It really does.
Choose One Hero Piece and Let Everything Else Be Quiet

You don’t need every item in a room to be expensive.
You need one piece that anchors it.
For me it was a vintage wood dining table I found on a local listing app for eighty dollars.
Everything else in that room is honestly kind of humble.
But because the table has real presence, real weight, real history, the whole room borrows its confidence.
This is the concept I come back to over and over in every space I decorate.
Pick your hero.
A great mirror, a substantial rug, one really good chair.
Then let your other pieces support it instead of competing with it.
If I had a tiny studio apartment right now, this is exactly what I’d do first.
I’d skip the matching furniture set entirely and save up for one gorgeous, slightly oversized piece instead.
Scale matters more than price here, truly.
A bigger, bolder item makes a small budget room feel curated rather than sparse.
Smaller, scattered purchases tend to feel like you’re still figuring things out.
One strong piece says you already know exactly what you want.
That’s the energy we’re going for.
Style in Odd Numbers, Every Single Time

This sounds so small but it isn’t.
Groupings of three, five, or seven objects read as intentional to our brains in a way that pairs just don’t.
I noticed this first on my bookshelf, actually.
I had books and frames everywhere, all lined up in twos, and it looked kind of chaotic.
I regrouped everything into little clusters of three.
A stack of books, a small vase, one framed photo.
Instantly calmer, instantly more like something you’d see in a boutique hotel.
Try this on your coffee table, your mantel, even your bathroom counter.
Vary the heights within each grouping too, that’s the part people forget.
Tall, medium, short, always some variation.
A flat row of same-height objects looks like a display shelf at a store.
A varied cluster looks like a life, lived in and curated slowly.
My little hack is to actually stand back ten feet and squint at the arrangement.
Squinting blurs out the details and shows you the shape, and shape is what your brain reads first.
If the shape feels balanced, you’re done.
If it feels lopsided, keep adjusting.
I do this in every room, it’s basically muscle memory now.
Reach for Texture Before You Reach for Pattern

Pattern is fun, I love a good pattern.
But texture is what actually makes a space feel rich.
Linen, raw wood, woven baskets, nubby throw blankets, a chunky knit pouf.
These things catch shadow and light in a way that flat, smooth, printed fabric just doesn’t.
When I added a woven jute rug to my bedroom, the whole room suddenly felt grounded and warm.
Before that it was a cute room.
After, it was a room I actually wanted to sit on the floor in.
My favorite budget move is thrifting textured throws and pillow covers, since they’re everywhere secondhand and almost always underpriced.
Wash them, maybe iron them, and they look brand new again.
Mix a few textures together too, don’t just stick to one.
A smooth ceramic vase next to a rough linen runner next to a soft knit blanket.
That contrast is what your eye reads as layered and expensive.
All one texture, even a nice one, starts to feel a little flat after a while.
I learned this the hard way in my first apartment, where everything was smooth cotton and it just felt kind of blah.
Texture fixed it completely.
Give it a try, I promise you’ll feel the difference immediately.
Pick a Quiet Palette, Then Let One Color Be Loud

Expensive spaces are almost never busy with color.
They’re usually calm, neutral, tonal, and then one thing breaks the rule on purpose.
A single emerald green pillow.
A rust colored throw blanket.
One bold piece of art in an otherwise soft, beige, cream, and white room.
That contrast reads as confident, like someone made a choice rather than just accumulating stuff over time.
When every color in the room is fighting for attention, it starts to feel like a garage sale, even with nice individual pieces.
I keep my base layer, walls, big furniture, rugs, pretty neutral, and then rotate my loud color seasonally through pillows and small decor.
It’s cheap to change and it keeps the space feeling fresh without a full redo.
Right now mine is a deep terracotta, and honestly I’m a little obsessed.
My tip is to pick your loud color from something you already love wearing.
If you gravitate toward a certain lipstick or sweater color, it’s probably your instinct already.
Trust that instinct in your home too.
It usually works better than whatever’s trending that particular season.
Your gut knows more than you think it does here.
Frame Things Properly, Even Cheap Things

Bare walls or thumbtacked posters are one of the fastest ways a space reads as unfinished.
But here’s the secret, the art itself doesn’t need to be expensive.
The frame does the work.
I’ve framed printable art, old postcards, even pages torn carefully from a thrifted coffee table book.
Once they’re behind glass in a real frame, nobody questions it.
My go to move is buying a few matching frames in bulk, then filling them with a mix of real photos, free printable prints, and the occasional splurge piece.
Consistency in framing style ties the whole gallery wall together, even if the content inside varies wildly in price.
Hang everything at eye level too, that’s a detail people skip constantly.
Too high and it feels like it’s floating away from you, disconnected from the furniture below.
I measure sixty inches from the floor to the center of the piece, every time, no exceptions.
It’s a small rule but it makes a real difference in how grounded a room feels.
If you’re short on frames, thrift stores are goldmines, you just swap out whatever ugly print came inside.
I’ve never paid more than four dollars for a solid wood frame this way.
Worth every penny, truly.
Edit Your Surfaces Until They Breathe

This one costs nothing, which is kind of beautiful.
Clear counters, clear nightstands, clear coffee tables read as expensive purely because of restraint.
Cluttered surfaces, even with nice individual objects, read as chaotic no matter the price tag involved.
When I did a ruthless edit of my kitchen counters last fall, I kept exactly three things out.
A wooden bowl, a small plant, my favorite mug.
Everything else went into cabinets or drawers.
The kitchen instantly looked bigger, calmer, and honestly more expensive, without me buying a single new thing.
My tip is to pick a number, three or five, and force every surface in your home to stick to it.
It sounds restrictive but it actually feels like relief once you get used to it.
Negative space is doing real work here, it lets your eye rest.
A packed surface gives your eye nowhere to land, so everything feels a little frantic.
I do a seasonal edit now, going surface by surface and asking what actually deserves to stay out.
Most things don’t, if I’m being honest with myself.
Try it this weekend, just one surface.
I think you’ll be surprised how much calmer the whole room feels after.
Bring in Something Alive

A little greenery changes a room more than people expect.
It doesn’t need to be fancy or rare.
A grocery store bunch of eucalyptus in a simple vase does more work than you’d think.
Living things, even simple ones, signal care.
They say someone tends to this space regularly, which is exactly the feeling expensive rooms give off.
I keep a rotating rule in my own place, always one plant, always one fresh bloom if I can swing it.
Sometimes that’s a fifteen dollar bouquet from the grocery store, sometimes it’s a few clippings from my neighbor’s overgrown rosemary bush.
Either way, it works.
If you don’t trust yourself with real plants, and no judgment, a really good faux stem can work too.
Just avoid the shiny, obviously plastic ones, and look for the more textured, matte varieties instead.
My favorite budget hack is buying one real plant and letting it get big and full over time, rather than a bunch of small sad ones scattered around.
One thriving plant beats five struggling ones, every time.
It just does.
Put it somewhere with actual light too, that part matters more than the pot you choose.
I learned that one the hard way.
Hang Your Curtains High and Wide

This is maybe my favorite trick on this entire list.
Most people hang curtain rods right above the window frame, snug and tight.
It’s a natural instinct, but it makes ceilings look shorter and windows look smaller.
Instead, hang your rod as close to the ceiling as you can, and extend it several inches past the window on each side.
Suddenly your window looks enormous, your ceiling looks taller, and the whole room feels grander.
I did this in my first tiny rental and my landlord actually asked if I’d raised the ceiling somehow.
I hadn’t, obviously.
It was an eight dollar curtain rod hung about ten inches higher than it needed to be.
My tip is to choose curtains that puddle slightly on the floor or just barely graze it, never ones that stop short and hover awkwardly above the ground.
Floor length, or even a touch longer, reads as intentional and luxurious.
Short, hovering curtains read as an afterthought, even in a beautifully decorated room.
Budget curtains from anywhere can look genuinely expensive with the right hanging technique.
The trick really is all in the height and width, not the price of the fabric itself.
Try it in one room first.
You’ll probably redo every window in your house after that.
Mix In Something Old, Even Just One Thing

Brand new, matching everything is actually kind of the tell that a room was decorated quickly and cheaply, even when the individual pieces cost a lot.
Genuinely expensive-feeling spaces almost always have something with age to it.
A worn leather stool.
A slightly imperfect ceramic vase.
A brass candlestick with real patina.
These things carry a story, and stories are what make a space feel collected instead of purchased all at once.
My favorite source for this is estate sales, and honestly, thrift stores on a good day.
I’ve found genuinely gorgeous vintage pieces for less than a new mass produced version would cost.
The nightstand next to my bed right now is a scuffed up little vintage find, and I love it more than anything else in that room.
It has dents, it has a slightly uneven drawer, and somehow that’s exactly why it works.
My tip is to start small if antique shopping feels intimidating, just one object, a candlestick or a small bowl.
Let it sit next to your newer pieces and watch how it changes the whole feel of the shelf.
Old and new together reads as gathered over time.
All new reads as one single shopping trip.
One is a home, the other is a showroom.
I know which one I’d rather live in.
Related read: Things I Wish I Knew Before I Decorated My First Home — Instant PDF + Kindle download. Secure checkout by Stripe