
You want a rug tufting idea you can actually finish, and honestly, the design decides that more than the gun does.
A tufting machine punches yarn through a cloth stretched on a frame.
Same for every rug here.
What changes is how many colors you switch between, how many curves you steer around and how much fiddly detail you trim at the end.
So I gave each of these 13 ideas a beginner rating.
Easy means one or two colors with straight lines or one simple curve.
Medium adds curves, a gradient or a repeat you have to measure.
Hard means lots of colors, lots of small shapes or both.
Start Here: What Makes a Tufting Design Easy or Hard

In this one, a round cream shag with one wide black swirl sits under a cream armchair with a coral pillow.
A patterned rug hangs on the wall behind it.
Look how little the floor rug’s design needs.
One swirl.
Two colors.
Cut Pile or Loop Pile
Craftinglove, a tufting shop that runs beginner workshops, puts the difference in one line each.
Cut pile gives you “soft, fluffy surfaces,” great for bold shapes and gradients.
Loop pile “creates clean lines and structured patterns,” which suits graphic designs.
You’ll see me lean on that split all the way down the list.
Your First Machine
Cut pile machines are “widely regarded as the best for beginners,” says Handmayk, a tufting shop in Dubai.
Its guide says they’re lighter than the other kinds, simple to use and easier to fix.
The AK-I is the classic example.
Craftinglove calls it “the perfect machine for beginners,” with a pile height it lists as adjustable from 7 to 18 mm.
Its machines ship at the highest setting, though, and lowering it takes tools and a tutorial.
Nick Rowan at Tiny Workshops warns that guns doing both cut and loop pile can be tricky to use and cost more.
A beginner is best off with something easy at first, he says.
Even so, the Duo is the one he recommends most.
It does both, it’s quite affordable, he says, and switching takes some learning, but you don’t have to switch at all.
Pneumatic guns are “far too pricey for beginners,” he says, and they need a compressor on top.
Craftinglove’s pneumatic AK-III does loop and cut piles up to 60 mm.
It also wants a constant 8 bar of pressure from that compressor, which is kinda the point where a hobby turns into a workshop.
Size It Small, and Remember the Flip
Start small.
Les Affûtés, a craft studio in Montreal, runs a beginner class where your design can’t go over 20 by 20 inches.
It uses a 24-inch frame and saves a 4-inch border for practice.
The whole rug gets made in two 3-hour sessions on a single day.
Handmayk suggests a 70 cm frame to start (about 27½ inches).
Most primary fabric, the cloth you tuft into, is sold by the meter, it explains, so a meter of it overhangs that frame and is easier to stretch.
If you’re planning a full-size floor rug later, the cloth and yarn you buy grow with every foot.
Our calculator’s quick answer for most living rooms is an 8 by 10, with about 18 inches of bare floor left at the walls.
Before you order, run your room through the free rug size calculator. It gives the standard size that fits.
Now the flip.
You tuft from the back of the cloth, so whatever you draw comes out reversed on the front.
Both Handmayk and Les Affûtés warn about it, and Les Affûtés tells you to write any lettering backwards on your paper.
I’d totally be the one who forgets and tufts a name in mirror writing.
To get the drawing onto the cloth, Handmayk says you can draw straight onto the back with a marker or project the image onto it.
Stay Comfortable and Safe
Fair warning, it’s loud.
Handmayk’s guide compares the machine to a loud sewing machine and suggests earplugs or noise-cancelling headphones.
Yarn sheds as it runs through the gun, so it recommends a mask while you tuft.
For the glue, it says to work in a well-ventilated area with a mask and gloves on, because some adhesives “can pose a respiratory threat” in its words.
If your wrists, feet or back start to ache, take a break and stretch.
And always unplug the machine before you check or fix anything.
Glue for a Floor Rug or a Wall Piece
Tiny Workshops’ glue guide sorts it out by where the rug ends up.
A latex glue such as Roberts 3095 stays flexible, so it’s the pick for a floor rug.
It can still feel a bit tacky after a full day of drying, though.
Roberts 6700 smells a little less, though the guide says you’ll still want to ventilate.
A rug glued with it won’t be completely dry for at least 48 hours, it adds, but it’s workable after 24.
Both Roberts glues contain VOCs, which the guide calls toxic chemicals.
Elmer’s Glue-All is the opposite.
It dries in about 8 to 10 hours, depending on your yarn, with virtually no odor.
But it’s “far more rigid when dry,” fine for a wall rug and not so great on the floor.
For a latex glue, Handmayk says to leave the piece stretched on the frame until the adhesive has finished drying, which can take up to 24 hours in its guide.
Tiny Workshops also recommends waiting 24 hours before taking a rug off the frame, even though some glues take up to two days to dry completely.
So yes, patience.
1. Striped Rug (Easy)

Straight stripes are where I’d start if a plain rug bores you.
This illustration shows a long, flat rug in gray and cream stripes in a white room.
Each stripe is one straight run in one color, so you only change yarn at the edges.
Easy win.
I’d tuft it in loop pile, the kind Craftinglove credits with clean lines and structured patterns.
Keep the gun’s foot leading the way as you go.
Handmayk says the foot must always lead, and you should never backtrack or drag the machine.

Stripes don’t have to be straight, either.
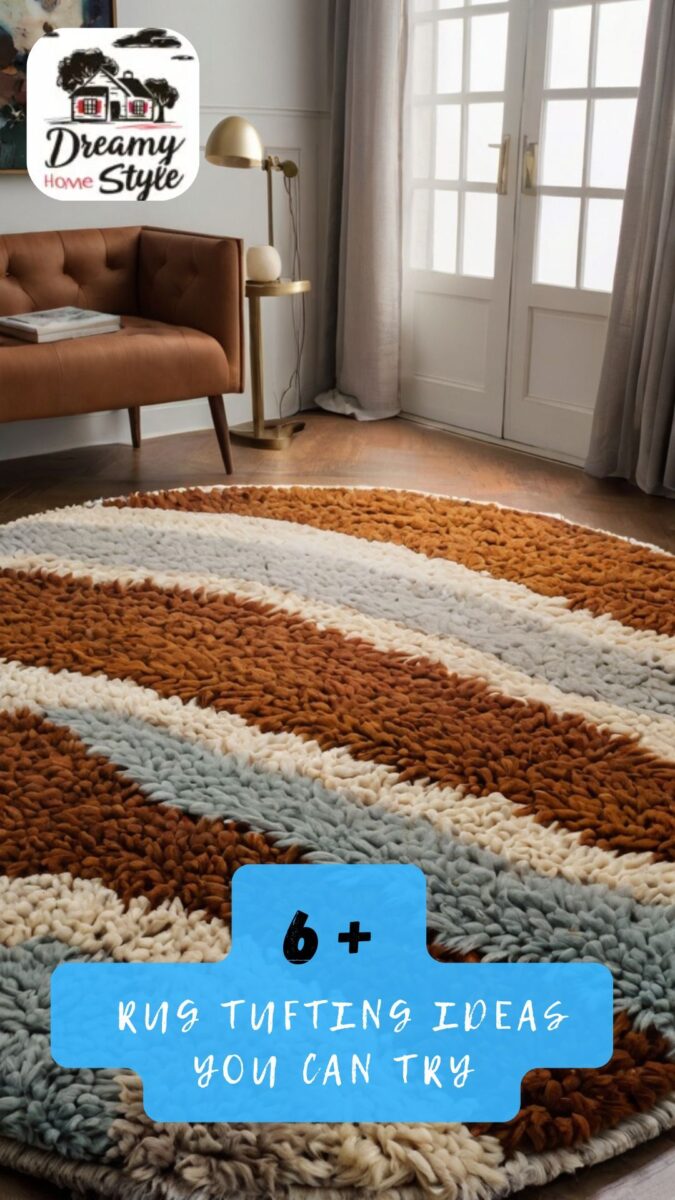
Here a round shaggy rug has wavy bands of rust and cream plus a soft blue-gray, with a brown leather chair and a gold lamp beside it.
Those waves are the first real curves on this list.
TheSmartLocal’s writer tried a beginner class at Tuft Club in Singapore back in 2021, a 4.5-hour session.
As first-timers, they were advised to “pick simple designs and avoid intricate details,” and I think that holds for anyone.
Precise lines and curves were tough at first, the writer found, and the round design felt a little ambitious.
Turns out most of the group still finished tufting with plenty of time to spare.
Then the studio’s experts touched up the gaps, and the rugs were neatened, sheared and glued before being delivered 2 to 3 weeks later.
Before you settle on a size, sketch the room in our free 2D room planner so you know where the rug will sit.
2. Geometric Diamond Rug (Easy to Medium)

A diamond lattice is still all straight lines, just on the diagonal.
In this one, thin charcoal lines cross a big cream rug in front of a gray sofa.
Two colors keep it simple.
Measuring is the medium part, because a repeat looks off the moment one diamond is bigger than its neighbor.
Primary tufting cloth “generally features guidelines to help you space things out,” Tiny Workshops says, and that’s handy here.
Handmayk wants the cloth tight enough to give a firm, almost drum-like resistance when you flick it.
Loose cloth makes wobbly lines, so I’d check that before drawing a single diamond.

This version goes shaggy, with brown diamonds on a cream shag and a fluffy edge, next to a gray sofa and a knit pouf.
Shag hides a little wobble.
It also blurs your lines, and JUBI’s tool guide explains why.
With a cut pile machine, it says, the threads on the front may vary slightly in height, so the design may not look as crisp as you expected.
Its fix is to even them out with shears, clippers or a rug trimmer.
JUBI rates the 500-watt sheep shears in its list for trimming large areas and “not for detailing,” so I’d keep them off the fine lines.
3. Solid Shag Rug in One Color (The Easiest)

Honestly, this is the one I’d tuft first.
It’s a plain olive-green shag rectangle in a white living room, with no pattern at all.
One color means no yarn changes.
The only skill is a steady, even pass, and that’s a weekend of practice well spent.
Yarn is the cheap part, honestly.
Tiny Workshops calls the gun the most significant investment and yarn inexpensive, though it’s the supply you’ll need the most.
So on a budget, the gun is where the money goes.
Tiny Workshops calls acrylic the most cost-effective but least soft, and wool the hardest wearing but most expensive.
Cotton sits in between.
Handmayk says wool is best for rugs because it’s the most resilient, while acrylic tends to pill and fray on a tufted rug.
It also points out that some people are allergic to wool.
With a worsted weight yarn, its general advice is 2 strands, and more if the yarn is thinner, depending on how dense you want the pile.
For the cloth, Tiny Workshops calls primary tufting cloth, a cotton and polyester blend, the most beginner-friendly.
Burlap is cheaper and “perfect for practice rugs,” it says, though it may tear.
Craftinglove’s supply list wants special tufting cloth instead (“not Monk’s Cloth!” it says), while Tiny Workshops counts monk’s cloth as a fair middle option.
So the experts don’t all agree.
Pretty normal for a craft this new.
4. Ombre Ring Rug (Medium)

This round rug is made of rings, navy at the edge fading through teal to white in the middle.
A matching round piece hangs on the white brick wall behind a wooden pedestal table.
They’re rings, not a spiral, so each one is a single closed curve.
Cut pile is the one for gradients, Craftinglove says.
Handmayk says you can thread more than one strand at once, and that mixing colors in the gun adds depth.
I’d use that to soften the step between two rings, with one navy and one teal strand together in the band between them.
The wall piece doesn’t need floor glue, so that’s where the rigid Elmer’s fits.

A plain round shag is the easier way into the shape.
Here a round cream one sits at the foot of a bed with a faux fur throw and tan pillows.
It’s one color, with one curve at the edge.
If you’re pairing a fluffy rug with throws and pillows, our cozy textile layering guide has the rest of that idea.
5. Sun Mask Medallion Rug (Hard)

This one is a big face inside a ring of rays in orange and red with navy, on a mottled ochre and green ground.
You see it from above, between gray sofas.
Lots of colors and lots of small shapes (eyes, teeth, every single ray) put it firmly in hard.
Handmayk has good news for a design like this: while you’re still tufting, mistakes aren’t permanent.
You can pull the yarn back out of the cloth and tuft that spot again.
Once the piece is sealed and dried, though, it warns that yarn is challenging to remove.
For the tiny parts, like the eyes, it lists a thread cutter or tweezers for finer details.
I’d want a big coffee before starting this one.
6. Unicorn Line Drawing Rug (Medium)

A unicorn drawn in outline, with a rainbow mane, sits on a cream rug here, above a patch of brick-like pattern.
The room has white sofas and gray paneling.
By Craftinglove’s split, outlines are loop pile territory.
For a character like this, Tiny Workshops says an art projector might help you make it exact, so you don’t have to freehand it.
Remember the flip, though.
A unicorn facing left on your drawing faces right on the finished rug, so turn the image around before you trace it if the direction matters.
7. Leafy Vine Rug (Medium)

A branching vine winds across a cream rug, with leaves in dark green and blue-gray.
Each branch is a curve you can follow, and each leaf is a small closed shape.
This is a nice one to carve.
A carving machine is “for 3D finishing and sculpting details,” in Craftinglove’s supply list.
JUBI describes electric carving scissors with one curved blade, so you can cut fibers close to the fabric without cutting the fabric.
They give you 3D sculpting and defined lines, it says, which is basically what a leaf edge wants.
The TN-40E rug carver in its list has 250 watts of input power and works very well with wool and acrylic, but not cotton.
Good to know before you buy yarn.
Craftinglove also has a tutorial for shortening the AK-I’s cut height by 7 mm, for a three-dimensional effect.
That way the leaves can stand taller than the background.
8. Rose Bouquet Rug (Hard)

Roses are hard.
Seriously.
This square cream rug has traditional pink and red roses inside a set of borders.
Each rose needs several shades to read as a rose, and the petals are small.
The straight lines that frame the borders are the easy part, so I’d tuft those first and build some confidence before the flowers.
If you love the look but not the work, a simpler version keeps one big rose in the middle and leaves the rest cream.
9. Faded Medallion Rug (Medium to Hard)

Medallions in coral and ochre, with touches of teal, are scattered across a cream rug here, with branching coral shapes between them.
A pinkish sofa and a knit pouf sit at the edge.
The colors look soft and worn, as if the rug had faded in the sun.
Each medallion has stepped edges, which means lots of short straight runs with color changes.
That’s why I’d call it medium to hard.
The good part is the flip barely matters here.
A medallion that’s symmetrical side to side comes out the same reversed, so it’s only the branches you’d check.
10. Starry Night Rug (Hard)

Van Gogh’s The Starry Night is an oil painting from June 1889, in the Museum of Modern Art’s collection in New York since 1941.
This rug borrows it: blue swirls, yellow stars and a moon, with a dark cypress shape on the left.
A gray sofa and a tripod lamp sit by a window full of city lights.
It’s hard because nearly the whole sky is curves.
Wikipedia’s article notes that analysis found ultramarine and cobalt blue in the sky, with Indian yellow and zinc yellow for the stars and moon.
That’s a handy yarn list: 2 blues, 2 yellows and a dark shade for the cypress.
Cut pile is the one for the swirling gradients.
And flip your printout before you trace it, or the cypress ends up on the wrong side.
11. Heart Rug (Easy to Medium)

This heart-shaped rug is made of color blocks in pink and blush, with cream and pale yellow.
Big blocks and one simple outline make it a cute tufting idea for a beginner.
The shaped edge is the medium part.
JUBI suggests twill tape around the border to block and protect the raw edges left by gluing and backing.
Handmayk says some people cover the edges of the back with twill tape to hide any flaws.
For the back itself, JUBI keeps felt for wall pieces, because it isn’t non-slip or durable enough for a rug.
On a rug it recommends a final backing cloth or a non-slip rug pad, though it notes the plain backing cloth isn’t non-slip.
A small rug like this also slides around on a bare floor.
Tiny Workshops calls a non-slip secondary backing optional, but it does help keep your rug in place.
The CDC’s fall prevention checklist for older adults says to remove throw rugs or use double-sided tape or a non-slip backing so they won’t slip.
12. Pumpkin Patch Rug (Medium)

Rows of pumpkins in orange and red, with cream and mauve ones mixed in, cover this rectangular rug.
It’s one simple shape repeated, which is good practice.
Every pumpkin is a color change, though, so I’d plan the yarn order before starting.
All that trimming makes fluff.
Handmayk says to keep a portable vacuum handy and clear your work area as you finish, or it gets messy.
A seasonal rug also works on top of a bigger plain one.
Our guide to layering rugs has a rule for an 8 by 10, 9 by 12 or 10 by 14 base: make the top rug 2 feet narrower and 2 feet shorter.
On an 8 by 10, that’s a 6 by 8.
That’s a big tufting project, though, well past a first rug.
13. Cherry Blossom Tree Rug (Medium to Hard)

A brown trunk branches across a cream rug, covered in pink blossoms and green leaves.
The trunk is easy, just a few thick lines.
The blossoms are lots of small dots of color, and that’s where the time goes.
If you want my honest order for a first few rugs, it’s the solid shag, then stripes, then the heart, then a diamond grid.
Save the roses and the Starry Night for when your curves are steady.
Oh, and take your progress photos by a window, because you know how I feel about overhead lighting.