here’s a specific kind of defeat that comes from staring at a massive, painfully blank wall with a lukewarm cup of coffee going cold in your hand.
I had tried framed prints.
I had tried gallery walls.
Nothing felt me.
And then I wrapped a piece of vintage linen around a driftwood branch I found on a walk, hung it up, and literally teared up a little.
That was the moment I became completely obsessed with handmade textile wall art.
It’s warm, it’s textured, it’s personal — and it tells a story that a poster from a big-box store simply never could.
If your walls feel cold and forgettable right now, I think my ideas are about to change everything for you.
💭 Ever wondered what your room would actually look like rearranged?
I built a free tool that lets you drag furniture around a 2D floor plan. No signup, no catch.
See the Room Planner →My Go-To: The Classic Macramé Wall Hanging

Okay, I know macramé has been having a moment for a while now, but honestly?
I don’t care if it’s trendy.
I care that every single time I make one, it turns out differently and I love it more each time.
When I tackled my first macramé piece for my cramped little hallway, I used the simplest square knot pattern — nothing fancy — and it completely transformed that forgotten corner into my favorite spot in the house.
You only need a wooden dowel, some natural cotton rope, and a pair of scissors.
That’s it.
I’d suggest starting with a 3mm or 5mm single-strand cotton cord if you’re a beginner — it’s forgiving, soft, and gives you that dreamy boho texture without a fight.
My personal hack: add a few dried pampas grass stems between the knots before you finish the fringe.
It adds this wispy, romantic softness that makes people think you spent way more time on it than you did.
And if you want a modern twist, try dyeing portions of the rope with a gentle tea stain for a warm, gradient effect.
Tap to Explore These Beauties
See my ideas in action 👇 Tap any image to explore full details.
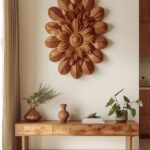
Weaving on a Branch: The Easiest Organic Art You’ll Ever Make

This one is so underrated, and I genuinely think it’s the most beginner-friendly textile art you can make at home.
You find a beautiful fallen branch on a walk — the more naturally twisted and interesting the shape, the better.
Then you simply weave strips of fabric, yarn, or ribbon back and forth across the bottom portion of the branch.
When I made my first branch weaving, I used leftover fabric scraps from old scarves, a chunky cream yarn I had in my craft bin, and even a few strips of burlap.
The result was this gorgeous, layered, earthy piece that looked like something from a high-end boutique.
I hung it with a simple piece of twine and it lived above my reading nook for over a year.
The trick to making it look intentional and not just like a messy tangle of stuff is to vary your textures and keep your color palette tight.
Pick three shades that love each other — like ivory, dusty blush, and warm tan — and let them do all the talking.
You don’t need a loom.
You don’t need lessons.
You just need a little patience and a willingness to play.
Fabric Tapestry Panels: When You Want Something Big and Bold

If you have a large, intimidating wall — the kind that swallows small art whole — fabric tapestry panels are my absolute answer.
I’m obsessed with the way a large textile piece can anchor an entire room.
You can find beautiful vintage or artisan fabrics at thrift stores, markets, or fabric shops and simply stretch them over a simple wooden canvas frame.
No sewing required if you use a good staple gun.
When I redid my guest room last fall, I stretched a piece of deep indigo block-print fabric over a large frame I built from cheap pine strips I picked up at the hardware store.
The cost was almost nothing.
The impact was everything.
It gave the room this moody, collected-from-travels energy that guests always comment on.
My tip: choose fabric with a pattern that has movement — ikat, batik, block print, or even a beautiful textured linen.
Solid fabrics can feel flat on a large scale.
But a pattern?
It breathes.
It moves.
It fills the room with personality.
Optional variation: lean the panel against the wall instead of hanging it for an effortlessly casual, lived-in look.
Find Your Room’s Color Palette
Tap a vibe — get a curated 5-color palette with hex codes you can copy ✨
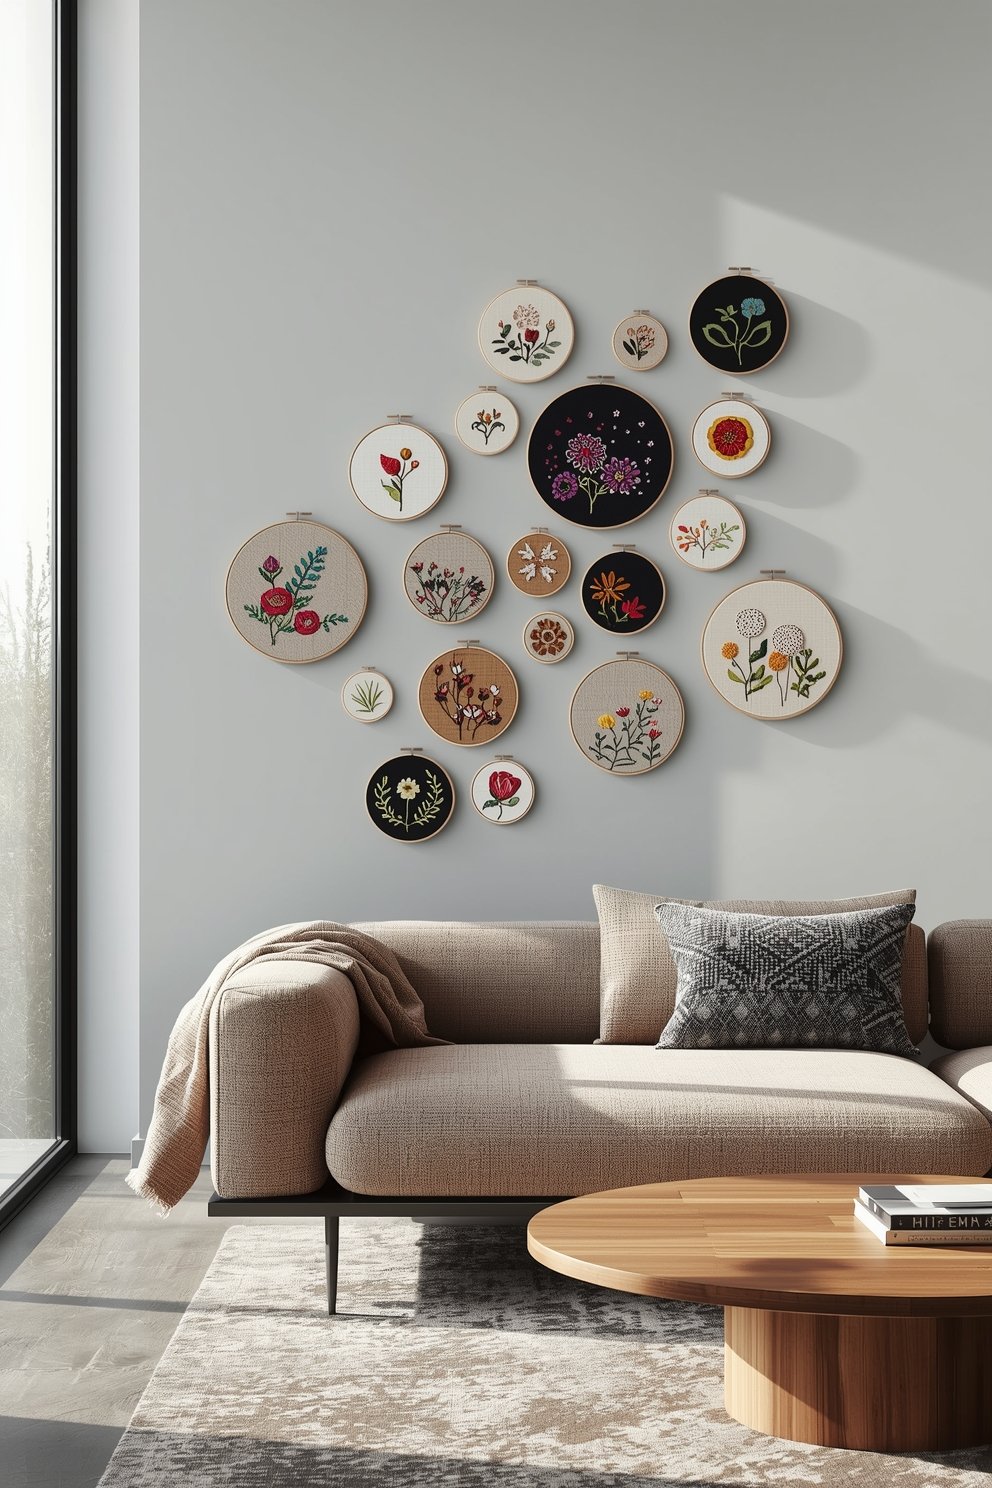
Embroidery Hoops as Wall Art Clusters

Okay, this one makes me so happy because it turns a super old-fashioned craft into something incredibly modern and chic.
Embroidery hoops — you know, those little circular wooden frames — become absolute wall art magic when you cluster them together in a grouping.
You can stretch different fabrics inside each hoop: a piece of linen, a velvet swatch, a floral cotton print, even a sheer organza.
You don’t even have to embroider anything on them if you don’t want to.
The fabric alone, tightened inside the hoop and trimmed neatly, looks completely intentional and lovely.
But if you do want to add stitching — even just a few simple lazy daisy flowers or a tiny botanical sketch — it elevates the whole thing to something truly special.

💭 I Wrote a Book About My Biggest Decorating Mistakes!
When I decorated my first home, I thought I knew what I was doing. Spoiler: I didn’t. 😅
💸 I bought a sofa way too big for my living room. Paint colors that looked amazing in the store but terrible on my walls.
I created a cluster of seven hoops in varying sizes for my bathroom wall, mixing a soft sage linen, a blush floral cotton, and a cream textured weave.
It turned a very ordinary bathroom into something that feels like a little boutique spa.
The trick is to arrange them in an organic, slightly asymmetrical cluster before you hang anything.
Lay them out on the floor first and play with the spacing until it feels natural, not rigid.
Yarn Wall Art: The Texture You Didn’t Know You Needed

Yarn is one of those craft materials that people sort of underestimate as a wall art medium.
And I get it — it sounds very craft fair, circa decades ago.
But here’s what changed my mind completely.
I was making a yarn wall piece for my daughter’s room — just loops of chunky, oversized yarn in cream and soft terracotta, secured to a wooden rod — and when I stepped back, I genuinely gasped.
It looked like something from a designer’s portfolio.
The secret is in the scale and the texture of the yarn itself.
Go chunky.
Go oversized.
A merino wool roving or a chunky arm-knit yarn gives you this incredible depth and dimension that thin yarn simply can’t replicate.
You can cut the loops to create a shaggy, fringe effect, or leave them as loops for a more graphic, geometric look.
My personal favorite: alternate between two textures — a smooth cotton and a fluffy boucle yarn — in the same neutral color family.
The tonal contrast keeps it sophisticated while the texture variation makes it incredibly rich and interesting.
And honestly, it takes about an afternoon to make something truly stunning.
What’s Your Decor Personality?
5 questions · 30 seconds · Instant style match 🏡
Felt Wall Art: Soft, Modern, and Wildly Underused

I feel like felt gets a bad reputation as the material of kindergarten projects, and I am here to fully defend it.
Modern felt — especially the thick, wool-blend variety — is incredibly versatile and creates wall art that is simultaneously clean, modern, and wonderfully soft.
One of my favorite techniques is to cut felt into geometric shapes — circles, long rectangles, or abstract organic forms — and arrange them in a layered composition directly on the wall using small pins or adhesive strips.
It’s like painting with fabric.
When I created a felt installation in my home office — a cluster of overlapping circles in dusty mauve, warm white, and camel — it completely changed the energy of the room.
It felt calm, intentional, and genuinely artistic.
And the beauty is that it’s totally rearrangeable.
You can shift the composition whenever the mood strikes you, which I love.
Another variation I’m obsessed with: cut felt into long, tapered leaf shapes and create a botanical wall hanging by stitching them onto a length of ribbon or a slim wooden dowel.
It gives you this beautiful, flowing, nature-inspired piece that brings the outdoors inside without a single fresh flower.

Quilted Textile Panels: Heirloom Energy on Your Walls

There’s something about a quilted textile piece on a wall that makes a home feel like it has history.
Like it has been loved and lived in for generations.
I first tried this when I inherited a collection of old fabric scraps from my grandmother — mismatched prints, worn flannels, faded calicoes — and I couldn’t bear to do nothing with them.
I hand-stitched them together into a simple patchwork panel, backed it with a piece of muslin, and hung it in my kitchen.
Now it’s genuinely one of my most prized possessions in the whole house.
You don’t need to be a quilter to do this.
Even a simple layout of square patches stitched together in a grid — no complex pattern, no fancy technique — looks completely intentional and deeply personal.
The emotional reason this works is that textiles carry memory.
Even if the fabrics aren’t personally meaningful to you, the handmade quality of a quilted piece tells the story of time, care, and intention.
And that’s exactly the energy you want your home to radiate.
My tip: choose a color story first — maybe all warm earth tones, or all faded pastels — and then gather fabrics within that palette so the final result feels cohesive even when the patterns are wildly different.
This or That?
Pick your fave — see what other readers chose! 👀
Fringe and Tassel Panels: When You Want Drama Without the Commitment

I am a sucker for a good fringe moment.
There’s something about those long, swaying strands of fabric or thread that makes a space feel just a little bit luxurious and a little bit playful at the same time.
A fringe panel is essentially a backing fabric — usually linen, cotton canvas, or burlap — onto which you attach rows and rows of tassel trim, fringe, or hand-cut fabric strips.
It sounds simple because it is, kindda.
But the result is this incredibly rich, textural piece that moves gently with the air and catches light in the most beautiful way.
When I made a large fringe panel for my bedroom in soft creams and warm beiges, hanging it behind my bedside lamp turned into a nightly ritual of watching the light glow through those strands.
It’s just the coziest thing.
My variation idea: mix materials in your fringe — combine silk ribbon, cotton rope, velvet trim, and natural jute for a mixed-media effect that is genuinely one-of-a-kind.
Personal tip: stagger the lengths of each row of fringe so the finished panel has a graduated, flowing silhouette rather than a blunt, flat bottom.
It makes the whole thing look much more intentional and designer-made.
Dyeing and Painting Fabric for Custom One-of-a-Kind Art

If you want your wall art to be truly yours — colors that match your room exactly, a mood that is 100% personal — then dyeing or painting your own fabric before you hang it is the move.
I tried this for the first time when I couldn’t find a tapestry in exactly the dusty sage-green that my living room was calling for.
So I bought a yard of natural cotton muslin, mixed up a soft sage watercolor paint wash, and applied it in loose, organic strokes with a wide brush.
I let it dry, added a second layer in an even softer tone, and the result was this gorgeous, airy, painterly piece that looked like it cost a fortune.
The technique I love most is the wet-on-wet watercolor approach: dampen the fabric first with clean water, then drop in your paint colors and let them bloom and bleed naturally.
You get these incredible organic gradients that you genuinely cannot replicate any other way.
And because you’re working with fabric instead of paper, the texture gives the final piece this beautiful depth.
My personal tip: heat-set your paint with an iron once it’s dry so it doesn’t fade or bleed over time.
And always wash the fabric first to remove any sizing that might resist the dye or paint.
Displaying Your Textile Art: The Details That Make It Look Intentional

Creating beautiful textile art is one thing.
Hanging it in a way that makes it look intentional and elevated?
That’s the part that most people rush through, and I think it matters just as much as the art itself.
The hanging hardware you choose becomes part of the piece.
A beautifully weathered copper pipe, a thick handmade ceramic bead, a slice of raw-edge wood — these things frame your textile and give it context.
When I’m choosing a hanging method, I think about whether the hardware feels honest to the piece.
A chunky macramé panel deserves a natural driftwood branch or an unfinished wooden dowel.
A refined felt panel might call for a slim brass rod.
A fringe tapestry can live beautifully on a vintage curtain rod with ornate finials.
Beyond hardware, consider the wall behind your piece.
Textile art on a white wall is clean and modern.
The same piece on a warm terracotta or sage-painted wall becomes something incredibly moody and rich.
My tip: always hang textile art slightly higher than you think you should.
It draws the eye up, makes ceilings feel taller, and gives your piece the breathing room it deserves to truly shine.
Quick Design Dilemma
Cast your vote — see what other readers think! 🤔
💭 I Wrote a Book About My Biggest Decorating Mistakes!
When I decorated my first home, I thought I knew what I was doing. Spoiler: I didn’t. 😅
💸 I bought a sofa way too big for my living room. Paint colors that looked amazing in the store but terrible on my walls.
Caring for Your Textile Wall Art So It Stays Beautiful

I know this isn’t the most glamorous section, but genuinely — taking care of your handmade textile pieces is an act of love, and I think it’s worth talking about.
Fabric attracts dust, and over time that can make even the most beautiful piece look flat and tired.
My routine is simple: every few weeks, I take my handheld garment steamer and gently steam my textile wall pieces from a distance of about six inches.
It refreshes the fibers, removes any light dust, and brings back that beautiful soft loft that made you fall in love with the piece in the first place.
For more stubborn dust — especially on thicker macramé or woven pieces — a soft bristle brush or even a clean paintbrush works beautifully for getting into the crevices.
Avoid direct sunlight on fabric art for extended periods, especially if your piece contains natural dyes or delicate fibers.
Even indirect bright light can fade textiles over time.
My solution: I rotate my textile pieces seasonally.
A piece that lives in my sunny living room gets moved to my hallway for part of the year, and I swap in something more fade-resistant for the sunny spot.
It keeps everything looking fresh, and honestly, it’s a wonderful excuse to redecorate a little every few months.
And if your handmade piece gets a little misshapen?
Just re-block it gently with the steamer and reshape while damp.
It works every single time.