
here’s something about a broken or ugly outdoor staircase that kind of ruins the whole vibe of your yard.
You could have the most beautiful garden, the coziest string lights, the prettiest patio furniture — and those sad, crumbling steps will pull focus every single time.
I kept getting quotes from contractors, and every single one made me want to cry a little.
For what felt like a very straightforward project, the numbers were genuinely shocking.
So I did what any determined homebody does.
I watched a lot of videos, read a lot of forums, asked a lot of questions, and then I just… started.
And I want to be really honest with you here — I am not a contractor.
I do not have a garage full of tools.
I had a drill, a circular saw I’d used maybe twice, and a very patient partner who held things while I figured stuff out.
If I can do this, you really, truly can too.
The whole process felt overwhelming at first, but once I broke it down into small, manageable steps, it sort of became one of the most satisfying projects I’ve ever tackled.
💭 Ever wondered what your room would actually look like rearranged?
I built a free tool that lets you drag furniture around a 2D floor plan. No signup, no catch.
See the Room Planner →Planning My Stair Layout Before Touching a Single Board

This is the part I almost skipped, and I’m so glad I didn’t.
Before you buy a single thing or pick up a single tool, you need to sit down and really think through your layout.
How many steps do you need?
Where does the bottom of the staircase land?
Is there enough room for a comfortable walking width?
I grabbed a notepad and a measuring tape and spent an entire afternoon just measuring.
The total rise — that’s the vertical distance from the ground to the top of your deck or porch — is your starting point.
For mine, that was about 48 inches.
Most comfortable outdoor steps have a rise of around 6 to 7.5 inches per step, and a tread depth (the part your foot actually lands on) of about 10 to 12 inches.
So with a 48-inch total rise at 6 inches per step, I needed 8 steps.
Write it all down.
Draw a little sketch, even if it looks like a kindergartner did it.
Mine absolutely did, and it still worked perfectly as a reference throughout the build.
Trust me — the planning phase saves you from so many “wait, this doesn’t fit” moments later on.
Tap to Explore These Beauties
See my ideas in action 👇 Tap any image to explore full details.
The Materials I Chose (And What I’d Honestly Skip Next Time)

Okay, let’s talk materials, because this is where things get fun — and also where it’s easy to overspend.
For my stairs, I went with pressure-treated lumber for the structural parts (the stringers and frame) and composite decking boards for the actual treads.
The pressure-treated wood is essential for anything that’s going to sit close to the ground or be exposed to moisture consistently.
It resists rot and insects, and it’s genuinely what gives your stairs their longevity.
For the treads, composite was a splurge, but one I do not regret.
No splinters, no annual sealing required, and it still looks gorgeous years later.
If budget is a concern, pressure-treated wood treads work beautifully too — you’ll just want to seal and stain them once a year.
What I’d skip?
The fancy pre-cut stringer kits from the big box store.
They looked tempting and easy, but the sizing didn’t match my exact measurements, which meant I ended up cutting them anyway.
Save the money and cut your own.
You’ll also need exterior-grade screws (I used coated deck screws), joist hangers if you’re attaching to an existing structure, and concrete or gravel for your base — more on that soon.
Make a detailed list before you shop.
Walking the lumber aisle without a plan is a great way to spend twice as much as you meant to.
Measuring and Marking — The Part Everyone Rushes

Here’s where I made my first mistake on this project, and I want to save you from it.
I rushed the measuring.
I thought I had it, moved on, and then had to redo an entire stringer because my cuts were off by half an inch.
Half an inch doesn’t sound like much until you’re trying to stack eight steps and they’re all slightly tilted.
So.
Take your time here.
Your two key numbers are your unit rise (how tall each step is) and your unit run (how deep each step is).
To find your unit rise, measure the total rise of your staircase and divide by the number of steps you want.
To lay these out on your stringer, use your framing square.
The framing square has two arms — a longer blade and a shorter tongue.
You set the rise measurement on the tongue and the run measurement on the blade, then trace along both arms to mark your step cuts.
Work your way down the stringer, marking each step, then double-check every single one before you cut.
A little tip I learned: some people clip stair gauges onto the framing square to lock in the measurements so they don’t shift as you work.
I used little rubber bands at first, which is very much a Madison solution, and it sorta worked but the gauges are worth the few dollars.
Psst… Check This Out
Hanging Basket Ideas That Make Every Porch Look Like a Garden Dream Take Me There →Find Your Room’s Color Palette
Tap a vibe — get a curated 5-color palette with hex codes you can copy ✨
Cutting Your Stringers (This Is Easier Than It Sounds)

The stringers are the diagonal side pieces that support your steps — they’re basically the backbone of the whole staircase.
And cutting them sounds really intimidating until you’ve done it once and realized it’s mostly just careful, slow work with a circular saw.
After you’ve marked all your step cuts on the stringer board, it’s time to cut.
Set your circular saw blade depth slightly deeper than the thickness of your board.
Cut along your layout lines, stopping just before the corner where the two cuts meet.
You finish those corners with a handsaw or jigsaw — your circular saw blade will overcut if you try to push it all the way, which weakens the stringer.
This is a detail I did not know until I watched someone more experienced than me wince when I described my first attempt.
After cutting one stringer, use it as a template for the others.
Trace it onto your next board and cut the same way.
For a standard-width staircase (around 36 inches), you’ll need three stringers — two on the outside and one in the middle.
Lay all three side by side before installing and compare them.
They should match almost perfectly.
If one is slightly off, now is the time to notice, not after everything is assembled.

💭 I Wrote a Book About My Biggest Decorating Mistakes!
When I decorated my first home, I thought I knew what I was doing. Spoiler: I didn’t. 😅
💸 I bought a sofa way too big for my living room. Paint colors that looked amazing in the store but terrible on my walls.
Setting the Foundation So Your Stairs Don’t Move

This step feels less glamorous but it is honestly one of the most important ones.
Your outdoor stairs need a solid, stable base at the bottom — otherwise, they’ll shift with the ground through freeze-thaw cycles, which is not a cozy feeling.
For my stairs, I poured a small concrete pad at the base.
I used a premixed bag concrete (the kind where you just add water), formed it with a simple wooden frame, and let it cure for a couple of days before moving on.
If your climate is mild or you’re building over existing hardscape like a patio or concrete walkway, you might be able to skip this step and just use concrete blocks or adjustable post bases.
But in climates that get cold winters?
A proper footer or pad makes such a difference in keeping everything level over the years.
I also used a post base anchor embedded in the concrete to secure the bottom of my outer stringers.
It keeps the wood from sitting directly on the ground (which would accelerate rot) and holds everything firmly in place.
The top of the stringers attaches to the existing deck frame using joist hangers and structural screws.
Measure twice, level everything, and take photos as you go.
Those photos become incredibly useful when you forget how something went together three steps later.

What’s Your Decor Personality?
5 questions · 30 seconds · Instant style match 🏡
Attaching the Treads — Where It Finally Starts Looking Like Stairs

This is my favorite part.
This is where the thing that has lived in your head and on your notepad suddenly becomes real and three-dimensional and you feel genuinely proud of yourself.
Once your stringers are set and level, attaching the treads is pretty straightforward.
Cut each tread board to your desired width — I left about a half-inch overhang on each side of the outer stringers for a finished look.
Pre-drill your holes to prevent splitting, then drive your deck screws through the tread into each stringer.
Use two screws per stringer connection — so six screws per tread if you have three stringers.
I left a small gap (about an eighth of an inch) between tread boards to allow for water drainage and wood expansion.

A small spacer or even a few pennies slid between boards as you work keeps the gaps consistent.
Stand back and look after every couple of treads.
It might sound fussy, but checking your work as you go catches small alignment issues before they compound.
Also: make sure your first tread sits at the right height relative to your deck surface.
The step from the deck down to the first tread should feel the same as every other step.
When that’s off, you feel it in your body every single time you use the stairs.
Railing Options That Actually Look Gorgeous

Not every outdoor staircase needs a railing, but if your stairs are taller than three steps, most building codes require one — and honestly, they just look more finished and intentional.
I went with a simple horizontal rail design using pressure-treated 4×4 posts and 2×4 rails, and I am absolutely obsessed with how clean it looks.
But there are so many gorgeous options depending on your aesthetic.
Cable railing gives a modern, open feel that lets your landscaping be the star.
Wrought iron balusters feel timeless and a little romantic.
Simple wood balusters painted white feel fresh and classic — that’s actually the direction I almost went.
For a farmhouse or cottage look, horizontal rails with wider spacing feel super cozy and intentional.
Whatever you choose, your posts need to be anchored super solidly.
Wobbly railings are not just annoying — they’re a safety issue.
Post anchors bolted through the stringer and header board are your best bet for a solid, non-wiggling result.
Space your balusters no more than four inches apart if you have small children or pets.
And personally?
I’d always choose a finish that complements your house trim color.
It makes the staircase feel like it belongs there, not like an afterthought.
Staining, Sealing, and Painting for That Polished, Finished Look

Okay this is where I get really excited because this is where the project goes from “project” to “wow, did you hire someone for that?”
If you used pressure-treated wood treads and stringers, you’ll want to let the wood dry out for a few weeks before staining or sealing.
Fresh pressure-treated lumber holds a lot of moisture and the finish won’t absorb properly if you rush it.
I know.
Waiting is the worst.
But it’s worth it.
Once it’s ready, I used a semi-transparent exterior wood stain in a warm cedar tone, and it made the whole staircase look so warm and intentional against the green of my yard.
Semi-transparent lets a little of the wood grain show through, which I find so much more beautiful than a flat, opaque look.
Apply with a brush rather than a roller for better penetration into the grain.
Work with the grain direction, not against it.
Two thin coats beat one thick coat every time — thick coats peel.
If you went with composite treads like I did, just rinse them occasionally and call it a day.
No sealing needed, which honestly feels like a little gift every spring.
For painted railings, use a bonding primer first, then a high-quality exterior paint.
Satin or semi-gloss finishes hold up so much better than flat paint in outdoor conditions.
This or That?
Pick your fave — see what other readers chose! 👀
Adding Lighting for That Magical Evening Glow
This is the detail I almost skipped because I thought it seemed “extra,” and now it is my single favorite thing about my outdoor stairs.

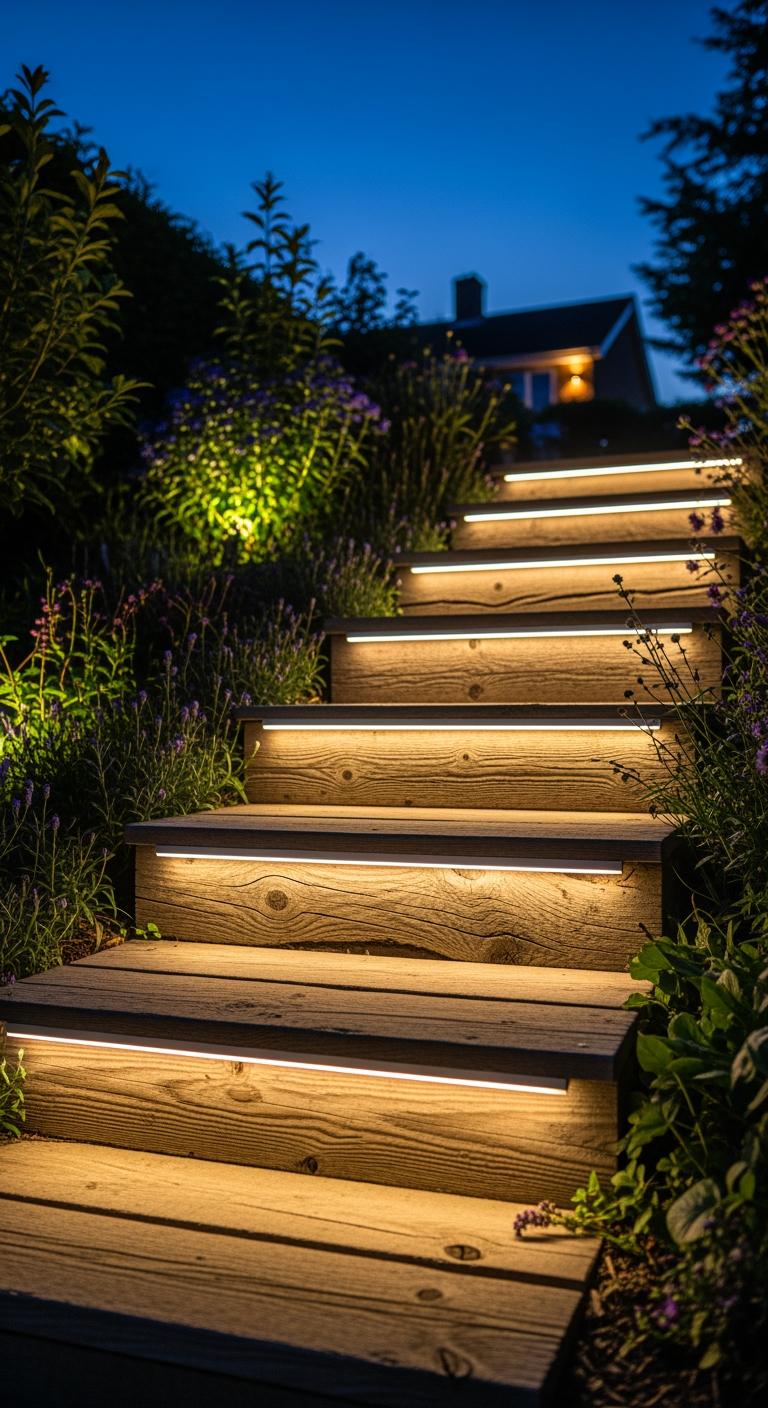
Step lighting makes your staircase look elevated, intentional, and cozy all at once.
And it makes it genuinely safer to navigate in the dark, which is the practical bonus.
There are a few easy options here.
Solar step lights that mount right into the riser (the vertical face of each step) are the simplest — no wiring required.
They charge during the day and turn on automatically at dusk.
They’re not the brightest option, but for a soft, ambient glow?
Absolutely gorgeous.
Low-voltage wired step lights are brighter and more reliable, but they do require running a wire from a transformer.
If you already have landscape lighting, you can often tap into that existing system.
I used a combination — solar lights on the risers and a small lantern-style post light at the top of the staircase.
The layered light feels so warm in the evening, especially in summer when we’re out after dinner.
If budget is really tight, even a string of outdoor-rated Edison lights draped along a railing creates the most cozy, magical effect.
It’s one of those details that costs almost nothing but completely transforms how a space feels after dark.
My Honest Mistakes (So You Can Skip Them Entirely)

I believe in telling the whole truth when I share a project, because the pretty photos don’t always show the moments where things went sideways.
Mistake one: I didn’t check whether my project needed a permit.
In many areas, stair structures over a certain height do require a building permit.
Check with your local municipality before you start — it takes one phone call and can save you from having to redo work later.
Mistake two: I underestimated how much the concrete would shrink my budget for other things.
Make a detailed material list and add 15% for waste and unexpected needs.
Lumber warps, boards crack, you cut something wrong — it happens.
Mistake three: I used the wrong screws.
Regular screws will rust and stain your wood with those ugly orange streaks.
Use coated deck screws or stainless steel specifically rated for exterior use.
Mistake four: I forgot to account for the ledger connection at the top and had to make an extra hardware run on day two.
Day two hardware runs are a rite of passage, honestly, but save yourself the time by planning carefully upfront.
And mistake five — the one that cost me a whole afternoon — was not checking that my stringers were perfectly parallel before attaching anything.
They weren’t.
I caught it.
But I could have caught it sooner.
Quick Design Dilemma
Cast your vote — see what other readers think! 🤔
💭 I Wrote a Book About My Biggest Decorating Mistakes!
When I decorated my first home, I thought I knew what I was doing. Spoiler: I didn’t. 😅
💸 I bought a sofa way too big for my living room. Paint colors that looked amazing in the store but terrible on my walls.
Making Your Stairs Feel Completely Yours

Here’s the thing I love most about building something yourself.
You get to make it completely, unapologetically yours.
It doesn’t have to look like a stock photo.
It can look like you.
I added a small recessed planter box right alongside the bottom step, and in the summer it overflows with trailing sweet potato vine and white petunias.
It makes the whole staircase feel like a garden feature, not just a functional structure.
You could paint the risers (the vertical face of each step) a contrasting color for a really playful, intentional look.
Navy risers with white treads?
Absolutely stunning.
A terracotta or sage green?
So charming.
Adding a small hook or bracket to the railing post for a hanging lantern or a little basket of plants is such an easy touch.
If I had a really wide staircase, I’d line the edges with potted herbs — rosemary, thyme, lavender — so you get that incredible scent every time you walk past.
Outdoor rugs designed for steps are also a thing, and they add both warmth and a little extra grip in wet weather.
The bones of a good DIY project are the structure and the safety.
But the soul of it?
That’s all you.
And that, to me, is the most cozy, satisfying feeling in the world.