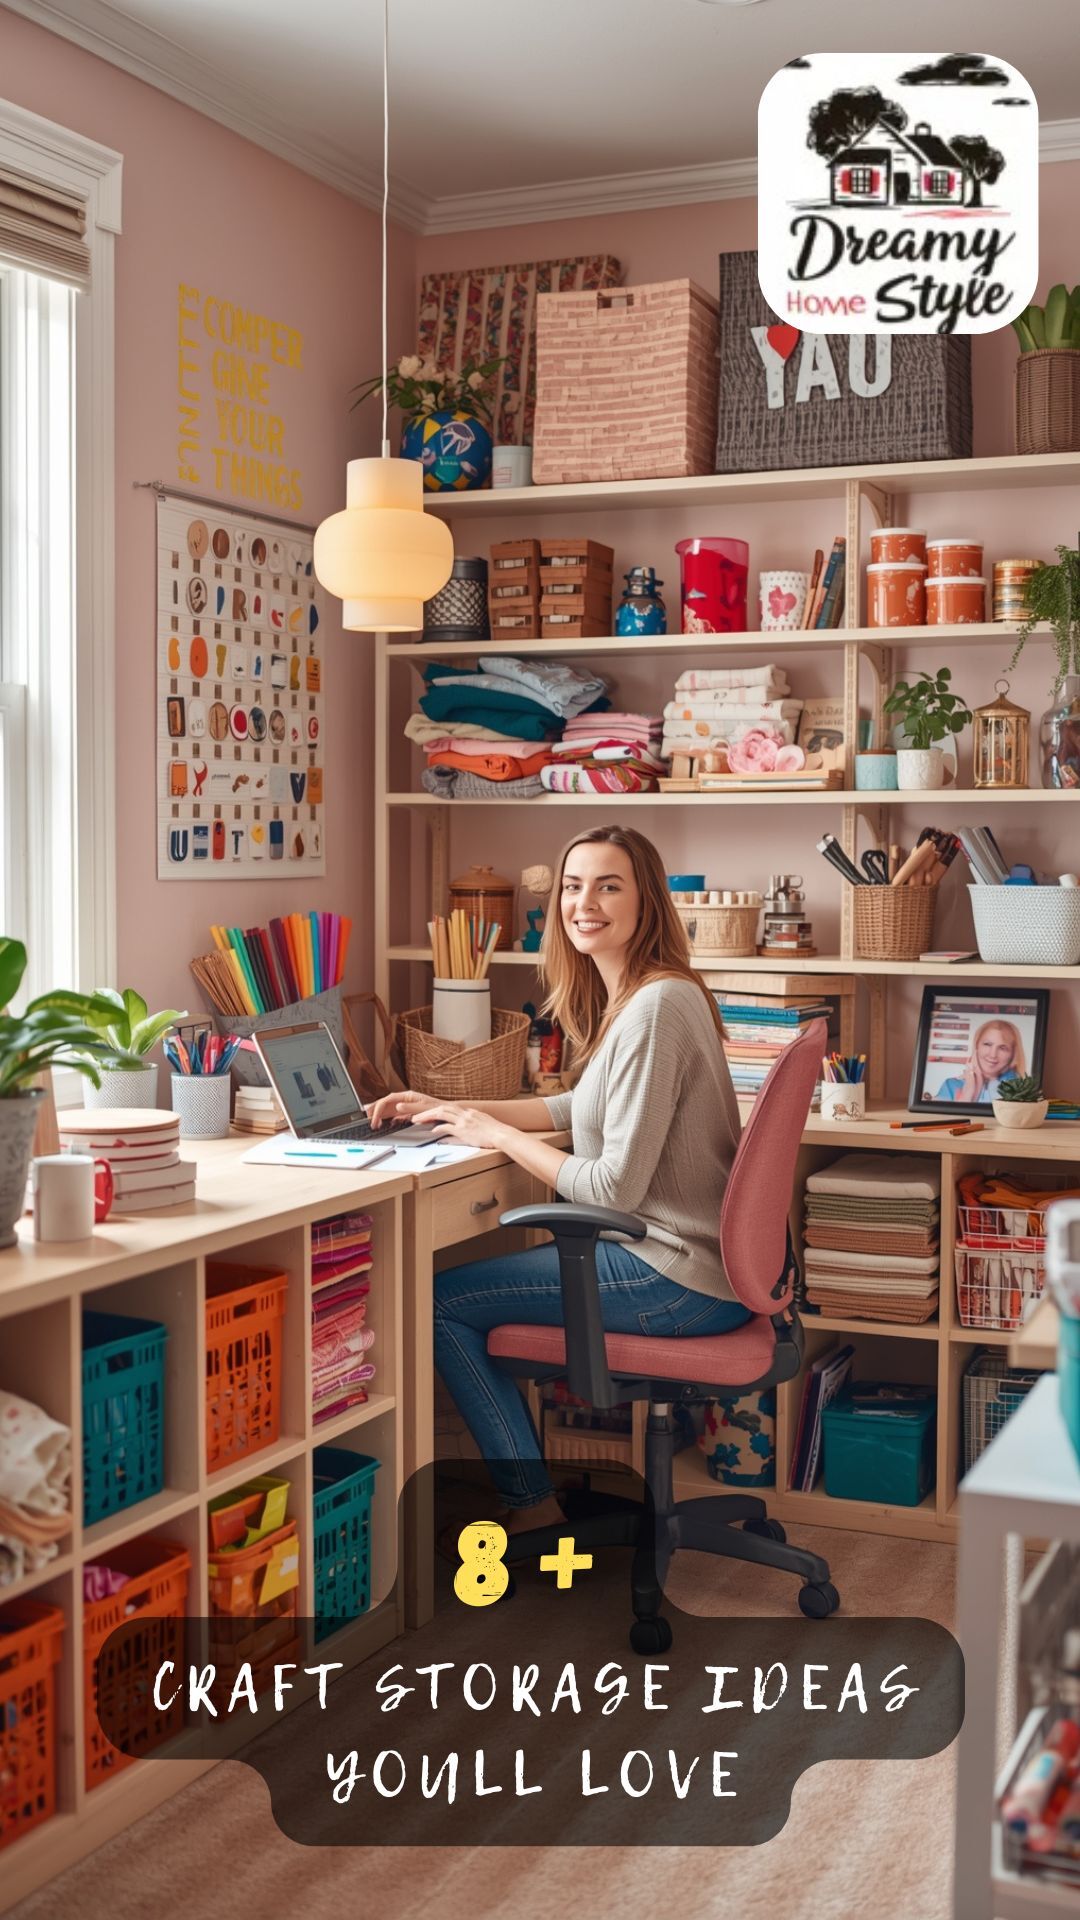
here was a Sunday afternoon where I sat down to make a simple card — just a birthday card — and forty-five minutes later I was still digging through a tangled bin of ribbon, dried-out markers, and about a hundred mystery buttons I don’t even remember buying.
I never actually made the card.
I just sat there, surrounded by the beautiful, chaotic wreckage of a craft stash that had completely outgrown me.
If that sounds familiar, I want you to know you are not alone.
And honestly?
Getting my craft storage sorted changed not just my workspace — it changed how often I actually create.
When things have a home, you show up more.
Let me walk you through everything I’ve tried, loved, and genuinely can’t stop recommending.


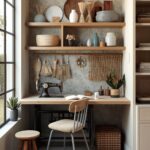
The Pegboard Wall That Completely Changed My Mornings


I’ll be honest — I used to roll my eyes at pegboards.
They felt so… hardware store.
But when I finally installed one in my craft nook, I stood back and genuinely teared up a little.
Everything I reach for every single day — my scissors, my washi tape collection, my ruler — was right there, at eye level, visible and gorgeous.
There’s something about seeing your tools displayed like they matter that makes you want to use them more.
I painted mine a soft sage green before mounting it, and added a mix of hooks, small baskets, and little wooden shelves.
The whole thing cost me less than a dinner out.
If I had a tiny apartment craft corner, this is the very first thing I would do.
The visual clarity alone is worth it.
You stop wasting time searching and start actually making things.
And that, honestly, is the whole point.
Tap to Explore These Beauties
See my ideas in action 👇 Tap any image to explore full details.
Clear Bins Are My Love Language (No, Really)


Okay so I know this sounds so simple.
But hear me out.
Switching from opaque, mismatched containers to uniform clear bins was sort of a revelation for me.
I could suddenly see everything.
My embroidery floss organized by color family.
My stamp collection lined up like little soldiers.
My glitter jars — yes, I have a lot of them — sparkling from across the room like tiny disco balls.
There’s a warm, almost cozy satisfaction in looking at a shelf full of clear, labeled bins.
It feels like your supplies are saying I’m ready when you are.
I like to use a mix of sizes — deeper bins for bulkier things like foam sheets and fabric scraps, and slim ones for things like pens, punches, and adhesives.
Label everything.
Even if you think you’ll remember.
You won’t.
My personal hack?
Use a chalk label so you can update them as your stash evolves.
Because it will evolve.
That’s the joy of crafting.
The Rolling Cart Obsession I Did Not See Coming

I genuinely did not think I needed a rolling cart.
And then I got one, and now I have three.
The beauty of a rolling cart — especially in a craft space — is that your supplies can travel with you.
Working at the kitchen table today?
Roll it over.
Moved to the sunroom because the light is better?
It comes with you.
I dedicate each cart to a different craft category.
One is purely paper crafting — cardstock, dies, embossing supplies.
One is for my sewing notions.
And one, my absolute favorite, is my “current project” cart, where everything for whatever I’m making right now lives together.
It’s such a kindda game-changing concept — a portable creative headquarters.
The drawers keep things tidy without demanding a full organizational overhaul.
And honestly, the aesthetic of a pretty cart loaded with colorful supplies just makes the whole room feel more alive.
Find Your Room’s Color Palette
Tap a vibe — get a curated 5-color palette with hex codes you can copy ✨
Vertical Space Is the Most Underused Real Estate in Any Craft Room

When I first set up my craft space, I only thought horizontally.
Flat surfaces, table space, floor bins.
And I ran out of room almost immediately.
The moment I started looking up, everything changed.
Floating shelves along a wall gave me so much more storage without taking up a single inch of floor space.
I stacked my paper collections in clear magazine holders — sorted by color — along one shelf.
On another, I lined up my paint bottles in descending height order, and you know what?
It looks like a tiny, gorgeous art installation.
I added a few small plants and a candle, and suddenly my storage wall was also my favorite thing to look at in the whole room.
Vertical storage isn’t just practical.
It’s actually beautiful when you do it thoughtfully.
Think about your wall as a canvas — not just a place to hang things, but a space to curate them.

💭 I Wrote a Book About My Biggest Decorating Mistakes!
When I decorated my first home, I thought I knew what I was doing. Spoiler: I didn’t. 😅
💸 I bought a sofa way too big for my living room. Paint colors that looked amazing in the store but terrible on my walls.
Repurposing Kitchen Organizers Is a Whole Craft Storage Hack

Nobody talks about this enough.
Some of my very favorite craft storage solutions came straight from the kitchen aisle.
Spice racks?
Perfect for storing small ink pads, bottles of glue, or tiny paint pots.
Utensil holders?
Incredible for holding scissors, bone folders, styluses, and pens upright.
Tiered fruit stands?
I use one to display my washi tape rolls, and it looks like something from a stationery boutique.
The key thing — and I say this from trial and error — is to look past the intended use and ask yourself what shape the product is.
Tall and narrow?
Could hold markers.
Wide and shallow with compartments?
Hello, embellishment organizer.
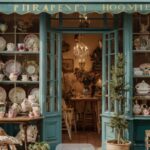
Kitchen stores are genuinely one of my favorite places to hunt for craft storage, and it’s usually way more affordable than anything in the official “craft” aisle.
What’s Your Decor Personality?
5 questions · 30 seconds · Instant style match 🏡
Labeling Is a Love Letter to Your Future Self

I used to skip labeling because it felt like extra work.
And every single time, I regretted it.
There is nothing more frustrating than knowing you have a specific shade of cardstock somewhere and spending twenty minutes hunting for it.
Labeling your storage — even loosely — is honestly one of the kindest things you can do for yourself.
I use a combination of methods depending on the container.
Printed labels for my permanent bins.
Chalk labels for bins that change often.
And little hand-lettered tags tied with twine for my fabric and ribbon bundles.
The hand-lettered ones especially give the whole space this warm, handmade feeling that I’m completely obsessed with.
It doesn’t have to be perfect.
It just has to be clear enough that future-you — probably mid-project, probably running on coffee — can find what she needs in under ten seconds.
That’s the whole goal.
Drawer Dividers Turn Chaos Into Calm


Open a craft drawer without dividers.
Now open one with them.
The difference is genuinely emotional.
I don’t know why it hits so hard, but a neatly divided drawer full of organized supplies feels like a deep breath.
I use small acrylic dividers in my flat drawers to separate things like adhesive tapes, scoring tools, eyelets, and brads.
In my wider drawers, I use little wooden trays — the kind you find at craft stores in the unfinished wood section — and I painted mine white to match my space.
The thing about drawer dividers is that they force you to decide where things live.
And once something has a designated spot, it’s so much easier to put it back there.
That’s where so many craft spaces fall apart — not in the organizing, but in the returning.
When the home for something is clear and easy, you actually use it.
Mason Jars Are Timeless and I Will Never Stop Using Them

I know.
I know.
Mason jars have been a craft storage staple forever, and maybe that feels a little expected.
But I genuinely believe they remain popular because they genuinely work.
They’re clear, they’re beautiful, they come in multiple sizes, and they display your supplies like little collections worth showing off.
I have a row of them on a wooden ledge above my desk.
One holds my most-used pens and markers.
One holds buttons sorted by color.
One holds silk ribbon wound into soft little coils.
Just looking at them makes me want to create something.
And I think that’s the secret superpower of good craft storage — it should inspire you, not just contain things.
When your supplies are displayed with care, they feel precious.
And when things feel precious, you take care of them and actually use them.
A small personal hack: spray paint the lids a single metallic color for a cohesive, intentional look.
It’s such a tiny thing and it makes such a difference.
This or That?
Pick your fave — see what other readers chose! 👀
The “One In, One Out” Rule That Saved My Sanity

Okay, real talk.
No storage system in the world will save you if you just keep accumulating without editing.
I learned this the hard way after I had my most beautiful, organized craft room ever — and then slowly, over a season, let it get swallowed again by impulse buys and half-finished project supplies.
The rule I live by now is simple: when something new comes in, something old goes out.
New pack of paper?
Old one that’s mostly scraps goes into a “use it up” basket.
New set of markers?
The dried-out ones leave immediately.
This isn’t about being rigid.
It’s about being honest with yourself.
Craft supplies have this magical way of multiplying while you’re not looking.
And a little regular editing keeps your storage working for you instead of against you.
I do a quick “audit” of my supplies every season, and every single time I feel lighter after.

A Dedicated “In Progress” Zone Is a Total Game Changer

This is one of my most personal tips and I feel like it doesn’t get talked about nearly enough.
Having a specific spot for your current, in-progress projects is huge.
Not everything goes back to its permanent home mid-project — and that’s fine.
What you need is a landing zone.
Mine is a wide, shallow basket that sits right on my craft table.
When I’m in the middle of a card set, a scrapbook layout, or a wreath project, everything related to it lives in that basket until it’s done.
This means the rest of my storage stays intact and organized.
I’m not pulling everything apart every time I sit down to create.
And when I come back to a project — even days later — it’s all right there waiting for me, sort of like a little creative nest I left for myself.
It sounds small.
But it’s transformed how I move through projects from start to finish.
Quick Design Dilemma
Cast your vote — see what other readers think! 🤔
💭 I Wrote a Book About My Biggest Decorating Mistakes!
When I decorated my first home, I thought I knew what I was doing. Spoiler: I didn’t. 😅
💸 I bought a sofa way too big for my living room. Paint colors that looked amazing in the store but terrible on my walls.
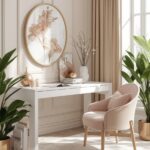
Pretty Storage Is Absolutely Worth It

I want to gently push back on the idea that storage should only be practical.
Your craft space should feel good to be in.
When I invested in a few storage pieces that were not just functional but genuinely beautiful — a rattan basket here, a ceramic jar there, a pretty wooden caddy — the whole energy of my room shifted.
I wanted to be in there more.
I sat down to craft more often, even when I didn’t have a specific project in mind.
Because the space felt inviting.
It felt like mine.
There is a real emotional reason that beautiful organization works better than purely utilitarian organization — it raises the stakes in the loveliest way.
When your supplies are stored in something you love looking at, you treat them more carefully.
You keep the space tidier.
You feel more creative and more at home in your craft zone.
It’s not frivolous to want your storage to be pretty.
It’s actually smart.
✦ You Might Love This
Don't Miss Out On These Incredible Sauna Aesthetic Ideas For Your Home! Keep Reading →