used to avoid my craft room.
Like, fully avoid it.
I’d stand at the doorway, stare at the avalanche of ribbon spools and half-empty paint tubes, and just… close the door.
It felt overwhelming and a little bit sad, honestly — because I love crafting, but the chaos was stealing all my joy.
Then I started experimenting with shelving in a way I never had before.
Not just “put stuff on a shelf” shelving.
Real, thoughtful, kind of obsessive shelving.
And everything changed.

💭 Ever wondered what your room would actually look like rearranged?
I built a free tool that lets you drag furniture around a 2D floor plan. No signup, no catch.
See the Room Planner →The Open Shelving Mindset Shift I Needed First

Before I touched a single bracket or bin, I had to change how I thought about shelving.
I used to think shelving was just storage.
But in a craft room, shelving is actually part of the creative environment.
When your supplies are visible, organized, and pretty — you want to use them.
It’s a psychological thing, and once I understood it, I stopped hiding everything behind cabinet doors.
Open shelving lets your craft room breathe.
It makes the space feel like a studio instead of a supply closet.
If I had to start all over again from scratch, this mental shift would be the very first thing I’d do.
Don’t just think “where do I put this stuff.”
Think “how do I want to feel when I walk in here every single morning.”
That question honestly changed everything for me.
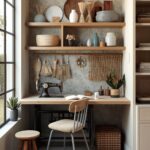
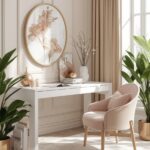
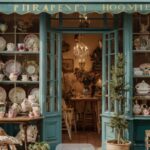
Tap to Explore These Beauties
See my ideas in action 👇 Tap any image to explore full details.
My Pegboard Wall Obsession (And Why It Works So Well)

Okay, so pegboards.
I know, I know — they’ve been around forever.
But hear me out, because I use mine in a way that sort of transformed my whole wall.
I painted my pegboard a soft dusty sage before mounting it, and now it looks like actual wall decor.
I’m obsessed with how it turned out.
The hooks hold scissors, rulers, tape dispensers, and my most-used tools right at eye level.
No digging through drawers.
No “where did I put that bone folder” panic.
Everything just… hangs there, ready for me.
The best part is how flexible it is — I rearrange the hooks every few months as my workflow changes.
And because it’s vertical, it doesn’t eat up any of my precious counter space.
If I had a tiny craft room, a pegboard wall would honestly be the first thing I’d install.
It does so much heavy lifting in so little square footage.
Warm tip: add small wooden shelves to your pegboard pegs for even more dimension and storage variety.
Floating Shelves at Different Heights — My Personal Hack

This one feels so simple, but it made such a huge difference in my space.
I stopped installing shelves at the same height and started staggering them intentionally.
Tall items — like rolls of wrapping paper and dowel rods — get their own taller-gap shelf.
Short items — like washi tape stacks and ink pad collections — sit on shelves spaced more closely together.
When I finally matched shelf height to item height, I reclaimed so much wasted vertical air space.
It sounds kinda obvious when you say it out loud, right?
But most of us just install shelves evenly and then wonder why nothing fits right.
I used simple white floating shelves from a hardware store — nothing fancy at all.
What made them look elevated was the intentional spacing and the little details I added, like small LED strip lights underneath.
The warm glow underneath each shelf makes my craft room look like something out of a dreamy design magazine.
And it makes working in there at night feel so cozy.
Trust me on the lighting — it’s a total vibe.
Ready to Master the Kallax?
Transform your IKEA cube storage into custom furniture. Get my complete guide with 100+ projects, material lists, and pro tips.
“The IKEA Kallax Bible: 100+ Ways to Transform Cube Storage”
Find Your Room’s Color Palette
Tap a vibe — get a curated 5-color palette with hex codes you can copy ✨
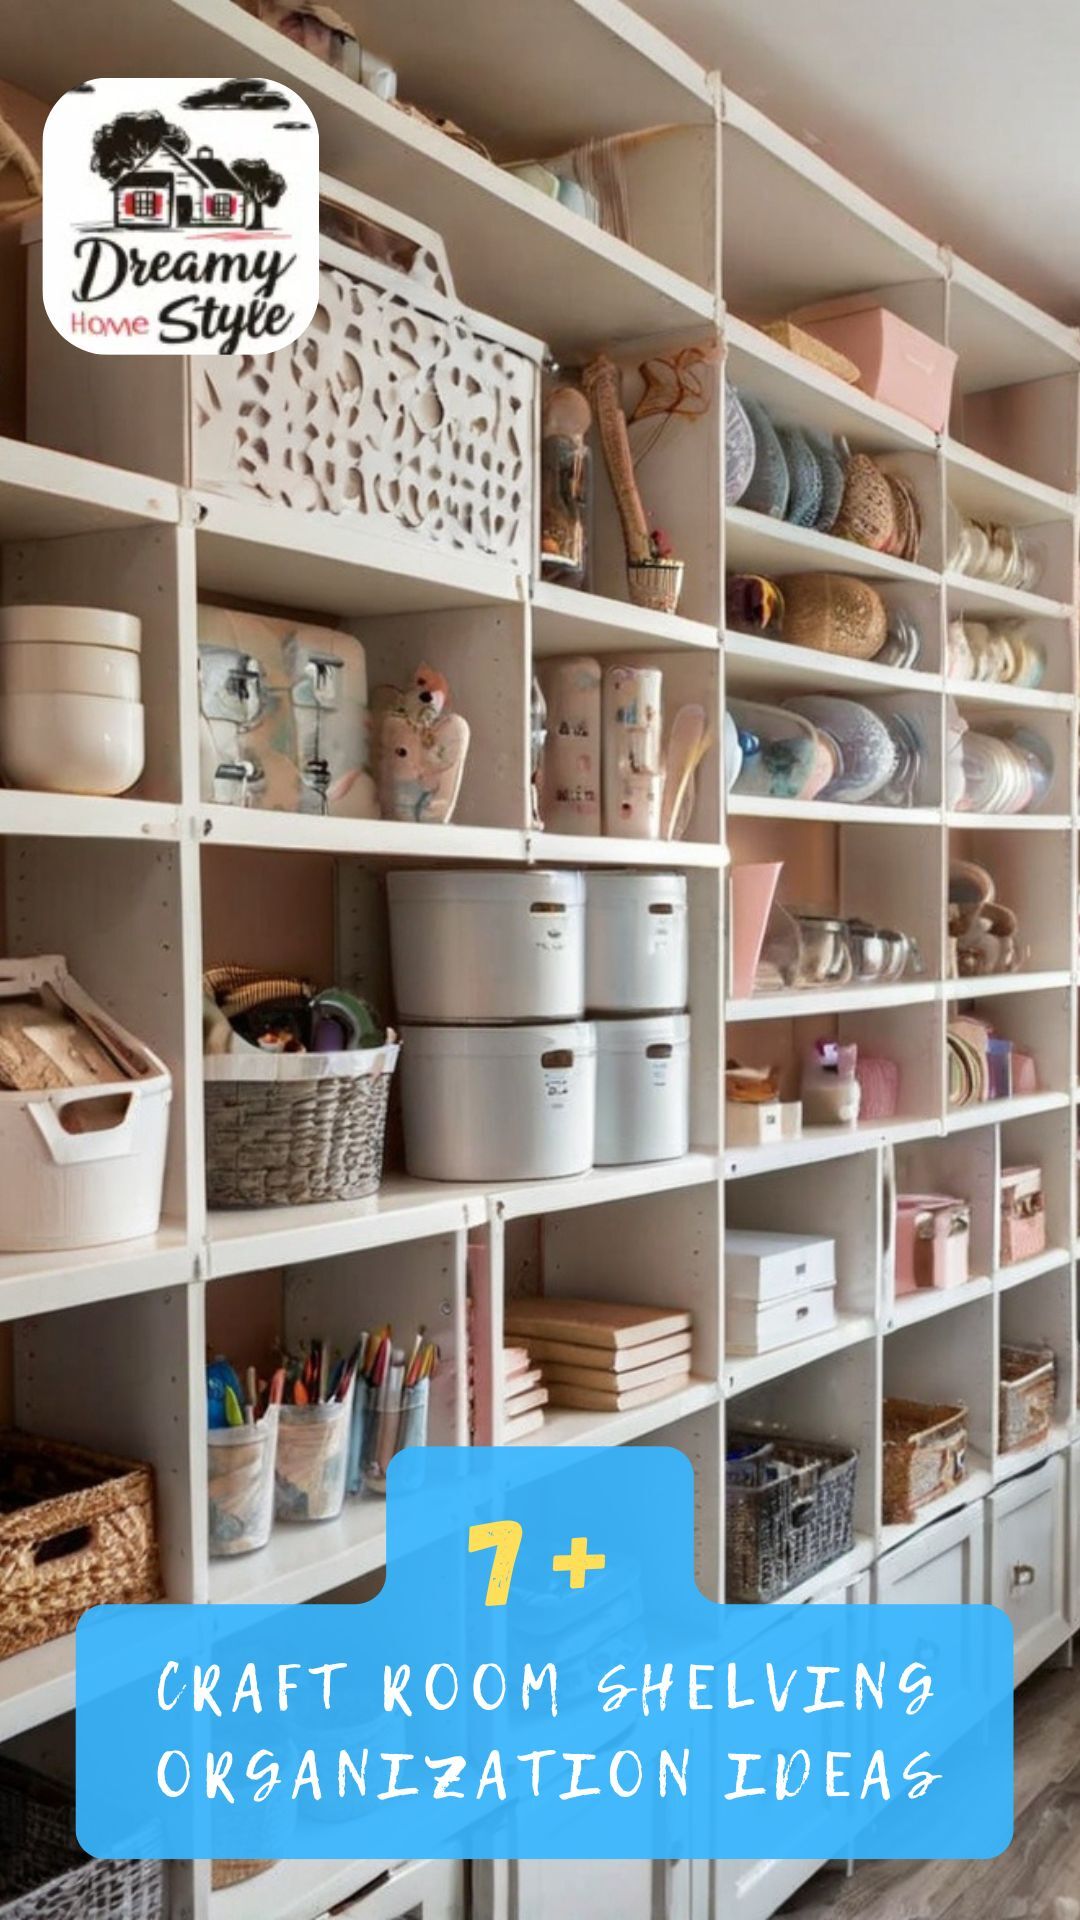
The Clear Bin + Label System That Actually Stuck


I have tried every organization system on the planet.
Fabric bins, wicker baskets, color-coded boxes — you name it, I’ve done it.
But the only system that has actually stuck for me?
Clear acrylic bins with printed labels.
I can see exactly what’s inside without touching anything.
My embellishments, buttons, brads, and glitter jars all live in identical clear bins on my shelves.
And because they’re all the same size, the shelves look so clean and cohesive.
There’s something deeply satisfying about a shelf where everything matches.
It feels intentional, you know?
For the labels, I use a simple label maker and keep the font consistent — all caps, same size.
When everything is labeled the same way, it creates this visual calm that actually makes me want to put things back where they belong.
That’s the real magic.
Organization only works if maintaining it feels easy.
And clear bins with labels make it so effortless that I actually enjoy tidying up.
My Corner Shelf Hack for Dead Space I Was Totally Ignoring

Corners are the most underused real estate in any craft room.
I used to just pile things in the corner and feel vaguely guilty about it.
Then I installed a set of corner floating shelves — those little triangular ones that tuck right into the angle of the wall — and suddenly I had a whole new display area.
I use my corner shelves for things that are beautiful and functional at the same time.
My favorite ribbon collection lives there, wound neatly on wooden dowels in a little display jar.
My prettiest washi tape rolls are stacked in a clear riser.
It feels like a little styled vignette — something you’d see in a boutique craft studio.
And it cost me almost nothing.
If I had a small hallway craft nook, honestly, corner shelves would be my first move.
They’re quiet little workhorses that nobody talks about enough.
Don’t let your corners just collect clutter.
Give them a purpose and make them pretty.
Tension Rods Inside Shelves for Vertical Dividers

Okay, this is one of my sneaky little hacks that I genuinely love sharing.
Tension rods — the kind you’d use inside a cabinet — installed vertically inside shelf cubbies?
Life.
Changing.
They create instant vertical dividers so I can store cutting mats, foam sheets, cardstock, and paper pads all standing upright.
Before this hack, flat paper items were always in chaotic stacks where I’d have to pull everything out to find what I needed.
Now I just flip through them like files.
It’s so organized it almost makes me emotional.
Tension rods are cheap, completely removable, and leave zero damage on your shelves.
You can reposition them whenever your storage needs shift.
I use them in multiple cubbies throughout my craft room now.
For anyone who stores a lot of flat paper goods or boards — this hack is genuinely a must.
Warm tip: wrap the ends of your tension rods with a tiny bit of felt to protect painted shelf surfaces.
Ready to Master the Kallax?
Transform your IKEA cube storage into custom furniture. Get my complete guide with 100+ projects, material lists, and pro tips.
“The IKEA Kallax Bible: 100+ Ways to Transform Cube Storage”
What’s Your Decor Personality?
5 questions · 30 seconds · Instant style match 🏡
The Rolling Cart That Became My Secret Weapon

I never thought of a rolling cart as a shelving hack.
But in a craft room, a rolling cart IS mobile shelving — and that changes everything.
Mine lives next to my main workspace, and I’ve loaded it with my most actively-used supplies.
Adhesives on the top shelf.
Cutting tools on the middle shelf.
Works-in-progress on the bottom.
When I’m done for the day, I roll it into a corner and my whole desk clears instantly.
✦ You Might Love This
Living Room Corner Ideas That Create The Most Charming Little Spots Keep Reading →It’s sort of like having a reset button for my workspace.
I styled mine by adding small adhesive wallpaper inside the shelves — a tiny floral pattern — so it looks intentional and cute rather than purely utilitarian.
The rolling cart is especially brilliant if your craft room doubles as another room, like a guest room or home office.
You can tuck it out of sight without disrupting your whole organization system.
If I could go back, I’d have bought one of these on day one.
How I Used Bookshelves to Create Dedicated Zones

Regular bookshelves — the tall kind, with adjustable shelves — are completely underrated in craft rooms.
I have two matching ones on the same wall, and I use them to create what I think of as “zones.”
One bookshelf is entirely my paper and card stock zone.
The other is my tools, machines, and adhesives zone.
Having dedicated zones means I never have to hunt for things.
Everything in its category lives in its bookshelf — and that’s it.
No mixing.
I adjusted the shelf heights to suit each category perfectly, which is the adjustable-shelf magic nobody talks about enough.
I added small wicker baskets on the lower shelves for supplies I don’t need to see constantly, like spare packaging and holiday-themed crafting supplies.
And the top shelves?
Pure styling.
Trailing plants, a little quote sign, my prettiest craft books.
It makes the whole wall look designed, not just stored.
This or That?
Pick your fave — see what other readers chose! 👀
Magnetic Spice Rack Rails for Small Supply Organization

This one sounds a little unexpected, but stay with me.
Magnetic spice rack rails — the kind meant for kitchen walls — are genuinely brilliant in a craft room.
I mounted two of them near my desk, and I use magnetic tins to hold all my tiny supplies.
Brads, eyelets, mini clothespins, tiny buttons, seed beads.
All those fiddly little things that normally disappear into the abyss of a junk drawer.
Now they’re right there in front of me, visible and accessible.
The tins snap onto the rail so satisfyingly — I kind of love rearranging them.
It’s fully magnetic, so I can move tins around based on what project I’m working on.
This system is so cheap it’s almost funny.
And it looks kind of industrial-chic on the wall, which I didn’t expect but absolutely love.
If you’re a detail-crafter — scrapbooker, card maker, jewelry maker — this rail system is going to change your small-supply life dramatically.
Ready to Master the Kallax?
Transform your IKEA cube storage into custom furniture. Get my complete guide with 100+ projects, material lists, and pro tips.
“The IKEA Kallax Bible: 100+ Ways to Transform Cube Storage”
The Shelf Styling Rules I Follow to Keep It Looking Beautiful

Here’s the thing nobody tells you: a well-organized craft room can still look messy if it’s not styled well.
So I follow a few soft rules for my shelves that keep everything looking intentional.
I always group by color within each category.
My yarn stash, for example, moves from warm tones on the left to cool tones on the right.
It looks like a rainbow gradient, and honestly every time I see it I feel a little happy.
I mix textures intentionally — a wicker basket next to a clear bin next to a small wooden box.
Repetition creates calm, but a little texture variation creates warmth.

I also leave some white space.
Not every inch of shelf needs to be filled.
A small empty gap here and there makes the whole space breathe.
And I always add at least one non-functional beautiful thing per shelf — a tiny succulent, a little ceramic dish, a pinecone.
Shelves that are only functional feel cold.
Shelves with one beautiful thing feel like yours.
Over-Door Shelving for the Space You Forgot You Had

The back of your craft room door is basically a free bonus wall.
And I am so glad I finally started treating it that way.
I installed an over-door organizer — the kind with multiple clear pockets and a few small shelves — and now it holds an entire category of supplies I used to scramble to find.
Stamps on one row.
Ink pads on another.
Stencils in the big pocket.
Spare adhesive in the bottom slot.

It’s like a whole extra shelving unit that costs almost nothing and takes up zero floor or wall space.
For small craft rooms especially, over-door storage is kind of essential.
I didn’t think much about it before, but now I can’t imagine going back to an unorganized door.
The one I use has a slight matte black finish that looks sleek and purposeful on my white door.
Even functional storage can look beautiful with the right finish.
Little details like that really matter when you spend hours in a space.
Quick Design Dilemma
Cast your vote — see what other readers think! 🤔
The Wrapping Paper + Roll Storage Hack I’m Lowkey Proud Of

Storing rolls of wrapping paper, kraft paper, and vinyl is one of those problems that nobody talks about enough.
They’re awkward and long and they just don’t fit anywhere easily.
My solution?
A wooden wine rack.
Horizontal, sitting on a low shelf, with each roll tucked into a wine slot.
I’m kind of lowkey proud of this one because it looks absolutely adorable, costs almost nothing, and actually works perfectly.
Each roll has its own slot, so nothing gets crushed or tangled.
I can see the pattern or color at the end of each roll without pulling it out.
Optional variation: use a tall laundry hamper with a wide mouth as an upright roll storage solution — it works great if you have floor space near a shelf unit.
I’ve also seen people use tall vases or decorative buckets for a more boho-studio vibe.
The point is — rolls deserve a system, not just a corner.
Give them one and your whole craft room will thank you.
Ready to Master the Kallax?
Transform your IKEA cube storage into custom furniture. Get my complete guide with 100+ projects, material lists, and pro tips.
“The IKEA Kallax Bible: 100+ Ways to Transform Cube Storage”