
Skip the same old plastic tree this year and create something that’ll have your guests asking “Where did you get that?”
My modern wooden Christmas tree designs prove that holiday decor doesn’t have to follow the rules, and the best part is you can build every single one with basic tools and a weekend’s worth of effort.

Design Your Dream Room in Minutes! – By Madison
🏡 Start Creating FREE →Floating Shelf Christmas Tree

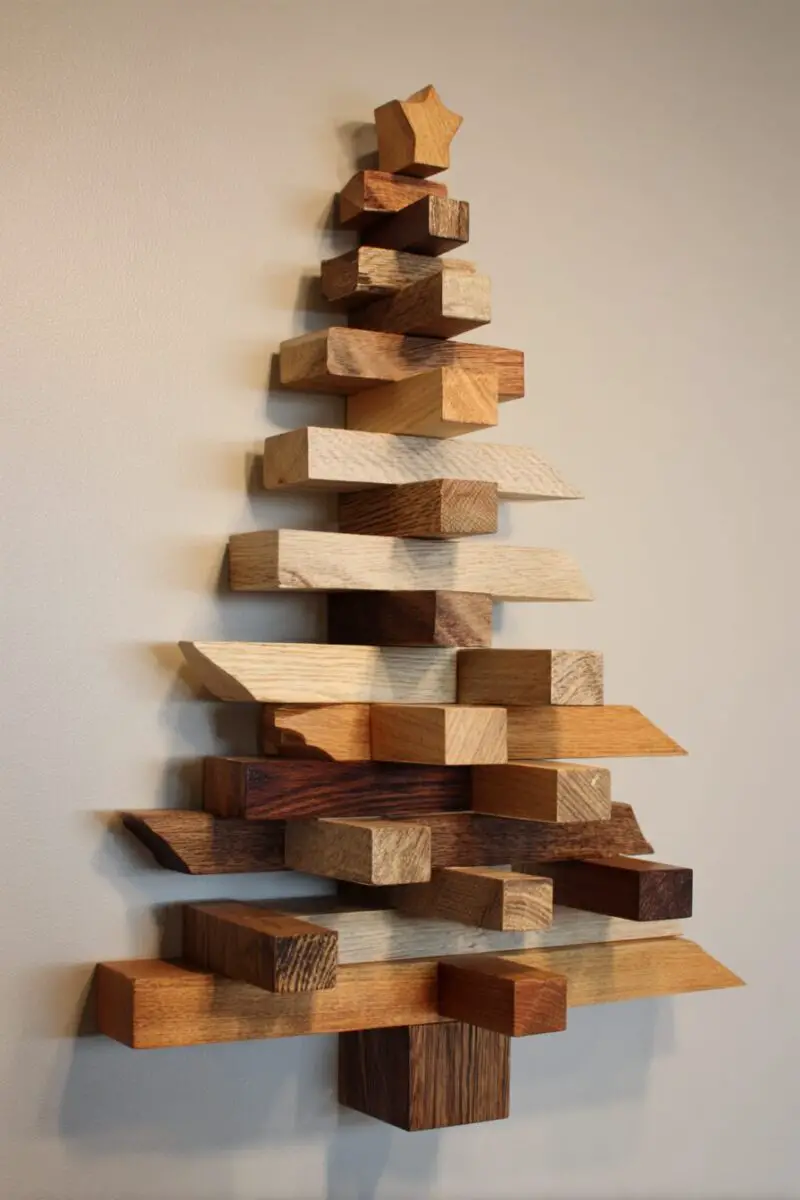
Picture walking into your living room and seeing a Christmas tree that literally defies gravity, appearing to float against your wall like holiday magic.
This floating shelf tree uses hidden brackets and progressively shorter wooden planks to create the illusion that your tree is suspended in mid-air.
Start with a 2×8 inch board for the bottom tier, cutting it to about 4 feet long, then work your way up with boards that are 6 inches shorter than the previous one.
The secret lies in mounting heavy-duty floating shelf brackets directly into your wall studs, ensuring each level can support the weight of decorations without sagging.
Sand each board to a smooth finish and apply a rich walnut stain that’ll make the grain pop against your wall color.
Mount the longest board first at about 2 feet from the floor, then space each subsequent shelf 8 inches apart as you work your way up.
The genius of this design is how the negative space between shelves creates the classic triangle shape while giving you multiple surfaces for displaying ornaments, small plants, or LED string lights.
You can style each shelf differently – maybe succulents on the bottom tier, vintage ornaments in the middle, and a minimalist star on top.
The floating effect works best against a light-colored wall where the shadows cast by each shelf enhance the illusion of the tree hovering in space.
Adding battery-operated LED strips underneath each shelf creates a warm glow that makes the entire tree appear to emit its own light.
Geometric Pallet Wood Tree
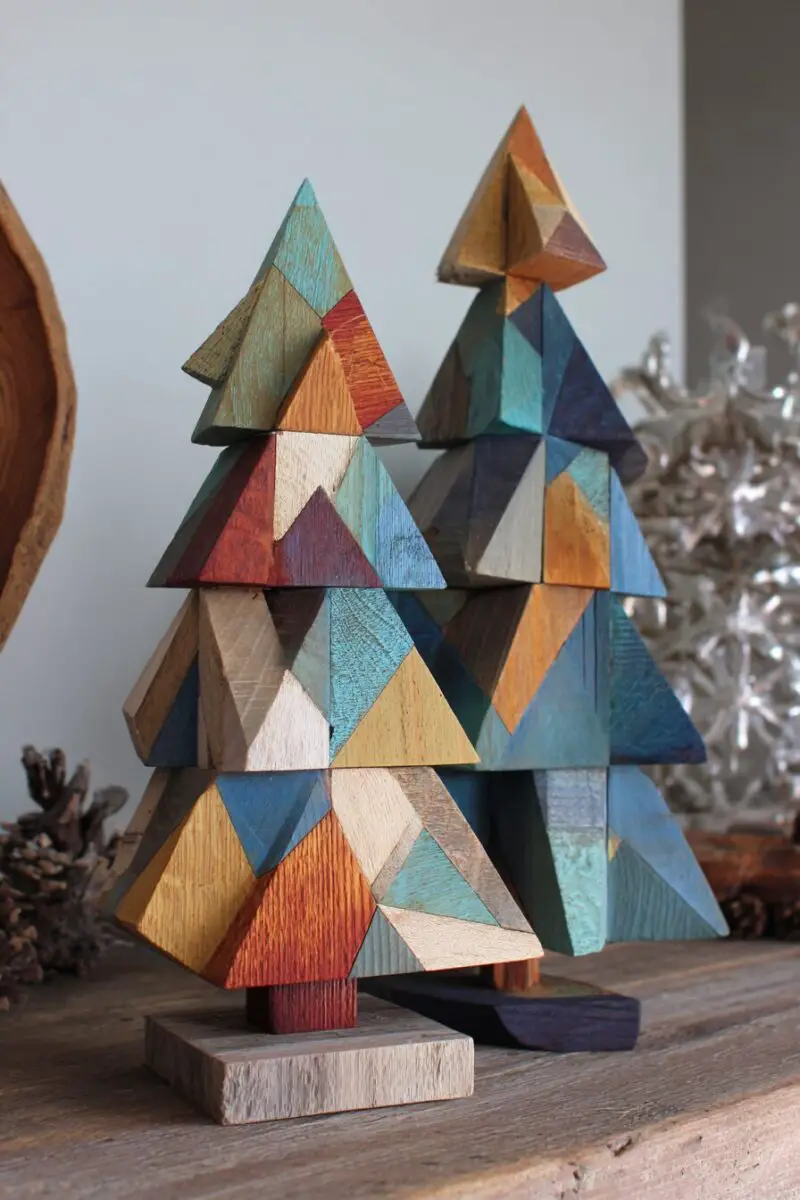
Transform those free pallets from behind the hardware store into a show-stopping geometric masterpiece that screams modern farmhouse chic.
This isn’t your typical rustic pallet project – you’ll be creating clean, angular sections that fit together like a beautiful wooden puzzle.
Break down two or three pallets carefully, keeping the longest boards intact while removing all nails and staples with a pry bar and some serious elbow grease.
Sort your reclaimed boards by length and thickness, as you’ll need pieces ranging from 6 inches to 4 feet to create the layered geometric effect.
The magic happens when you cut your boards at 30-degree angles on both ends, creating diamond and triangle shapes that interlock to form the tree’s silhouette.
Start with your longest boards as the base layer, arranging them in a wide V-shape, then build upward with progressively shorter pieces.
Each layer should overlap the previous one by about 2 inches, creating depth and shadow lines that make the geometric pattern pop.
Use wood glue and 2-inch screws driven from the back to secure each piece, ensuring your tree can handle being moved or adjusted.
The weathered texture of pallet wood gives this tree instant character, but you can also sand everything smooth and apply a modern gray or white wash for a more contemporary look.
Position your geometric sections so they create interesting negative spaces – these gaps become perfect spots for hanging delicate ornaments or weaving in fairy lights.
The beauty of this design lies in its imperfection; slight variations in board width and the natural character marks in reclaimed wood add authentic charm you can’t buy in stores.
Mount the finished tree to a piece of plywood backing, then lean it against the wall or hang it as a dramatic focal point that’ll have everyone asking about your carpentry skills.
Driftwood Branch Christmas Tree


Bring the serene beauty of the seashore into your holiday decor with a tree that looks like it was sculpted by ocean waves and salt air.
This organic creation starts with a collection trip to your nearest beach, lake, or river where you’ll hunt for branches that have been naturally smoothed and bleached by water and time.
Look for pieces ranging from 6 inches to 3 feet long, focusing on branches with interesting curves and natural character rather than perfectly straight pieces.
The key to this design is arranging your driftwood pieces in order of size, with the longest branches forming the base and shorter pieces creating the tapered top.
Drill pilot holes through each branch and secure them to a central mounting board using wood screws, spacing each branch about 4 inches apart vertically.
The natural gray and white tones of weathered driftwood create an instantly calming, coastal vibe that works year-round, not just during the holidays.
Each branch tells its own story through unique wear patterns, knots, and smooth sections that make your tree completely one-of-a-kind.
You can enhance the beachy feel by incorporating seashells, starfish, or glass fishing floats as ornaments that complement the driftwood’s organic texture.
The irregular shapes and varying thicknesses of driftwood branches create beautiful negative spaces perfect for showcasing special ornaments or letting string lights peek through.
This tree works especially well in coastal homes, beach houses, or any space where you want to evoke that relaxed, vacation-at-the-shore feeling.
Leave the driftwood completely natural for maximum authenticity, or lightly brush on some white paint to enhance the weathered look while maintaining the wood’s organic texture.
The finished tree becomes a piece of functional art that captures the peaceful essence of shoreline walks and reminds you of ocean breezes every time you look at it.

💭 I Wrote a Book About My BIGGEST Decorating Mistakes!
When I decorated my first home, I thought I knew what I was doing. Spoiler alert: I DIDN’T. 😅
💸 I bought a sofa that was WAY TOO BIG for my living room. I chose paint colors that looked amazing in the store but terrible on my walls. I spent THOUSANDS on pieces that didn’t work together. Sound familiar?
“Things I Wish I Knew Before I Decorated My First Home” is your shortcut to avoiding ALL my costly mistakes. ✨ Inside, you’ll find practical, NO-NONSENSE advice that will save you time, money, and a whole lot of decorating regret. 🏡
Design Your Dream Room in Minutes! – By Madison
🏡 Start Creating FREE →Minimalist Plywood Christmas Tree

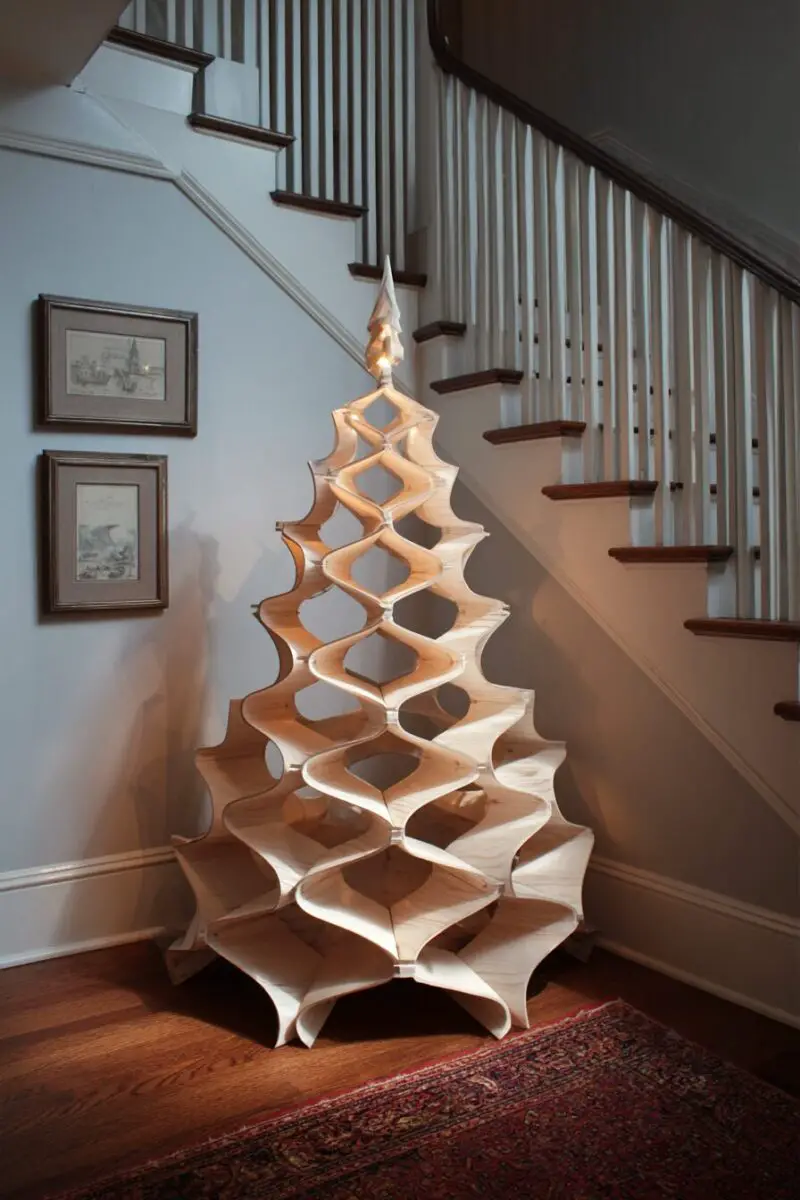
Sometimes the most striking designs come from embracing simplicity, and this sleek plywood tree proves that less really can be more.
Cut a series of increasingly smaller triangles from high-quality birch plywood, starting with a base triangle that’s 4 feet wide and working up to a tiny triangle just 6 inches across for the top.
The beauty lies in the precision – use a circular saw with a fine-tooth blade to ensure perfectly clean edges that showcase the smooth plywood surface.
Stack these triangles with spacers between each layer, creating a modern sculptural effect that looks like it belongs in a high-end design magazine.
Use 1-inch wooden dowels as spacers, drilling precise holes in each triangle so the dowels slide through cleanly and hold everything in perfect alignment.
Sand each triangle starting with 120-grit paper and finishing with 220-grit for a surface so smooth it practically glows under your lighting.
Apply three coats of clear polyurethane to protect the wood while maintaining that clean, natural plywood edge that’s become so popular in modern design.
The layered effect creates interesting shadows and depth while maintaining the clean lines that make this tree a perfect fit for contemporary homes.
Each triangle can rotate independently on the dowel system, letting you adjust the angles for different looks or to accommodate specific ornament arrangements.
This design works beautifully with minimal decorations – think single ornaments placed strategically on each level or simple white LED lights wrapped around the dowels.
The neutral wood tone complements any color scheme, and the geometric form looks stunning whether you place it on a side table or mount it on the wall.
This tree embodies the Scandinavian design principle that beautiful objects should be functional, simple, and crafted from quality materials that age gracefully over time.
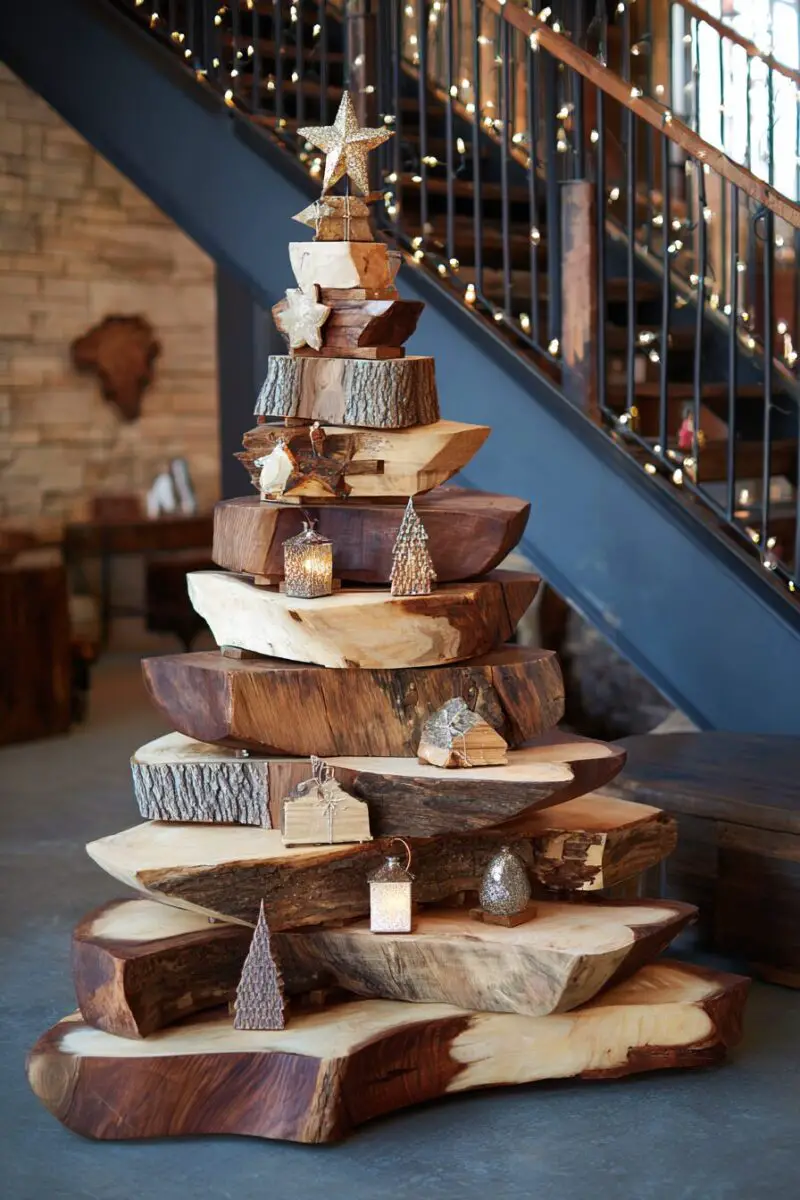
Rustic Log Stack Christmas Tree


Channel your inner lumberjack with a tree that celebrates the raw, natural beauty of freshly cut logs arranged in a stunning pyramid formation.
Start by sourcing logs of varying diameters from tree trimmers, lumber yards, or your own property if you’re lucky enough to have mature trees.
Cut your logs into lengths ranging from 6 inches for the top pieces to 18 inches for the base, using a chainsaw or miter saw to ensure perfectly square ends.
The rustic charm comes from leaving the bark intact on most pieces, though you might want to remove loose sections that could flake off over time.
Arrange your logs in layers, with the thickest pieces forming the base and progressively smaller logs building up to create the classic Christmas tree silhouette.
The natural variation in bark patterns, wood grain, and log diameter creates visual interest that makes each tree completely unique and impossible to replicate exactly.
This design celebrates the raw materials in their most natural state, showcasing the beauty of wood grain, natural splits, and the organic textures that machine processing removes.
Tuck battery-operated string lights between the logs to create a warm glow that highlights the bark texture and creates cozy shadows throughout the stack.
The substantial weight and presence of this tree makes it perfect for large spaces like great rooms, covered porches, or anywhere you want to make a bold natural statement.
You can enhance the rustic appeal by adding pinecones, dried berries, or burlap ribbon that complements the outdoor, cabin-in-the-woods aesthetic.
This tree brings the forest indoors and creates that perfect blend of wild natural beauty with thoughtful design that defines the best rustic decor.
Modern Triangular Frame Tree

Create a striking contemporary statement piece with clean lines and negative space that’ll make minimalist design lovers swoon.
This project starts with selecting high-quality 2×2 inch lumber that you’ll rip down to create perfectly square posts with sharp, clean edges.
Cut your lumber into pieces ranging from 2 feet for the base triangle to 6 inches for the small triangle at the top, planning for 5-7 triangular frames of decreasing size.
The magic happens at the corner joints where you’ll use precise miter cuts and high-quality wood glue to create seamless connections that look professionally crafted.
Sand every surface starting with 150-grit paper and finishing with 220-grit until the wood feels silk-smooth under your fingertips.
Apply a modern finish like ebony stain for dramatic contrast, or keep it natural with clear satin polyurethane that enhances the wood grain without adding color.
Stack your triangular frames using hidden spacer blocks that maintain perfect alignment while creating the illusion that each frame floats independently.
The negative space within and between frames becomes part of the design, creating opportunities to showcase special ornaments or let wall color show through.
This tree works beautifully as a wall-mounted piece where lighting from different angles creates interesting shadow patterns throughout the day.
The geometric precision appeals to people who appreciate clean, uncluttered design and want their holiday decor to reflect contemporary aesthetic values.
You can customize the size to fit any space, from a small tabletop version using 1×1 inch lumber to a dramatic floor-to-ceiling installation that becomes the room’s focal point.
This design proves that Christmas trees don’t need to be traditional green triangles – sometimes the most beautiful solutions come from reimagining familiar forms through a modern lens.
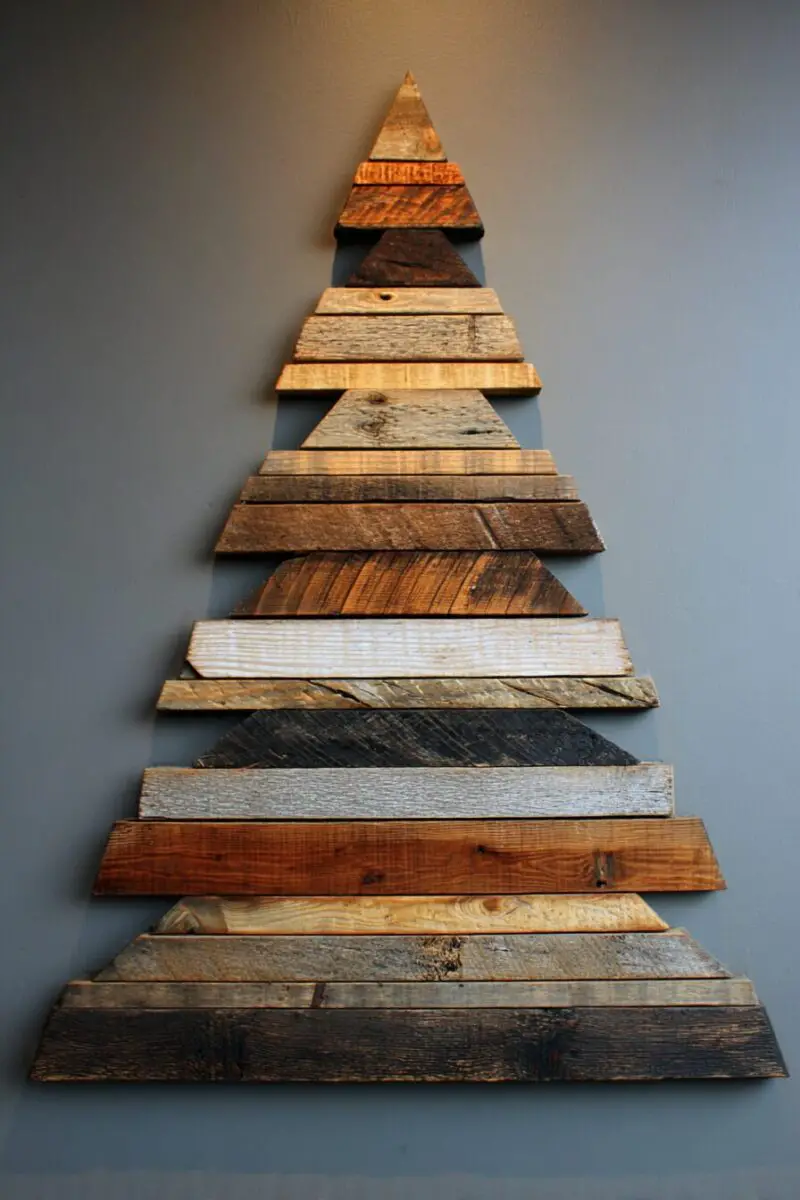
Reclaimed Wood Wall Tree

Transform your wall into a stunning focal point with a tree made from weathered barn wood that tells stories of decades past.
Hunt for reclaimed materials at architectural salvage yards, old barns, or demolition sites where you can find boards with authentic character marks and natural patina.
Look for pieces with interesting wear patterns, nail holes, and color variations that machine-distressed lumber simply can’t replicate.
Clean your reclaimed boards thoroughly, removing dirt and loose material while preserving the weathered character that makes each piece special.
Arrange boards in a tree pattern directly on your wall, starting with the longest piece at the bottom and working up with progressively shorter boards.
The irregular widths and lengths of reclaimed lumber create an organic, asymmetrical tree that feels natural and unforced.
Use a stud finder to locate wall studs, then secure each board with 3-inch screws driven into solid framing for a installation that’ll last for years.
The varied colors and textures of weathered wood create visual depth that makes this tree interesting to look at from different angles and lighting conditions.
Leave gaps between boards to create negative space where you can hang ornaments or showcase the wall color behind the tree.
This design works especially well in farmhouse, industrial, or rustic modern interiors where the authentic character of old wood enhances the existing aesthetic.
Add vintage-style Edison bulb string lights woven between the boards to emphasize the rustic character while providing warm, ambient lighting.
The finished tree becomes a permanent art installation that looks beautiful year-round, with the option to add seasonal decorations during the holidays.
Design Your Dream Room in Minutes! – By Madison
🏡 Start Creating FREE →Dowel Rod Christmas Tree

Embrace the beauty of simple materials and precise geometry with a tree that showcases the elegant potential of basic wooden dowels.
Purchase varying lengths of hardwood dowels from 1/2 inch to 1 inch in diameter, focusing on maple or oak for strength and attractive grain patterns.
Cut your dowels into lengths ranging from 4 feet for the base to 6 inches for the top, creating 8-10 horizontal tiers that form the tree’s triangular outline.
The engineering challenge lies in creating a central support system that holds each dowel securely while maintaining the clean, minimalist aesthetic.
Drill precise holes in a vertical support post, spacing them 6 inches apart and ensuring each hole is perfectly perpendicular to create level tiers.
Sand each dowel to a smooth finish and apply your choice of stain or paint – natural wood shows off the grain, while white paint creates a Scandinavian vibe.
The beauty of this design comes from the rhythmic repetition of horizontal lines and the way light filters through the spaces between dowels.
Thread your dowels through the support post, securing each one with a small amount of wood glue to prevent rotation while allowing for easy disassembly.
This tree design celebrates the inherent beauty of wood in its simplest form while creating multiple surfaces for hanging lightweight ornaments or small decorative objects.
The open structure lets you see completely through the tree, making it perfect for smaller spaces where a solid tree might feel overwhelming.
Wrap warm white LED lights around each dowel to create a magical floating effect that makes the entire structure appear to glow from within.
Live Edge Wood Tree

Celebrate the natural boundary between tree and forest with a design that preserves the organic edge where bark meets air.
Source live edge slabs from local sawmills or woodworking shops, looking for pieces that showcase dramatic grain patterns and natural edge variations.
Choose boards that still retain some bark for authentic character, but make sure the bark is firmly attached and won’t flake off with handling.
Cut your live edge pieces into varying lengths while preserving as much of the natural edge as possible – this organic boundary becomes the tree’s defining feature.
The random curves and undulations of natural wood edges create a tree that looks like it grew into its triangular shape rather than being forced into it.
Sand the flat surfaces while leaving the live edges relatively untouched to maintain the contrast between refined interior surfaces and wild natural boundaries.
Apply a clear finish that penetrates the wood without obscuring the natural color variations and grain patterns that make live edge lumber so appealing.
Stack your pieces with the live edges facing outward, creating an asymmetrical silhouette that captures the unpredictable beauty of natural tree growth.
The substantial thickness of live edge slabs gives this tree impressive presence and weight that commands attention in any room.
This design works particularly well in modern rustic interiors where the contrast between refined design and natural materials creates visual tension.
Highlight the live edges with carefully placed lighting that emphasizes the natural curves and creates dramatic shadows that change throughout the day.
Each live edge tree becomes a unique sculpture that celebrates the specific characteristics of the tree it came from, making your holiday decor truly one-of-a-kind.
💭 I Wrote a Book About My BIGGEST Decorating Mistakes!
When I decorated my first home, I thought I knew what I was doing. Spoiler alert: I DIDN’T. 😅
💸 I bought a sofa that was WAY TOO BIG for my living room. I chose paint colors that looked amazing in the store but terrible on my walls. I spent THOUSANDS on pieces that didn’t work together. Sound familiar?
“Things I Wish I Knew Before I Decorated My First Home” is your shortcut to avoiding ALL my costly mistakes. ✨ Inside, you’ll find practical, NO-NONSENSE advice that will save you time, money, and a whole lot of decorating regret. 🏡
Industrial Pipe and Wood Tree

Combine the warmth of natural wood with the edgy appeal of black iron pipe for a tree that bridges rustic and industrial design styles.
This hybrid approach uses black iron pipe fittings as structural connectors that hold wooden planks in a modern framework that’s both functional and striking.
Start with 1-inch black iron pipe and standard plumbing fittings, planning a design where T-joints and elbows create the structural skeleton for your wooden elements.
Cut cedar or pine planks to fit between pipe sections, creating horizontal shelves that serve as both structural elements and display surfaces for decorations.
The contrast between warm wood tones and matte black metal creates visual interest while giving you flexibility to adjust shelf positions by simply unscrewing connections.
Sand your wooden elements to highlight the grain while leaving the pipe fittings in their natural black finish for maximum contrast.
Apply a clear satin finish to the wood that protects the surface while maintaining the natural color that complements the industrial pipe framework.
This modular design lets you disassemble the entire tree for storage, making it perfect for people who move frequently or have limited storage space.