Halloween is the one night of the year when you can transform your home into a house of horrors without anyone questioning your sanity.
These decoration ideas will turn your ordinary party space into a nightmare that your guests will never forget.
Create a Haunted Graveyard Entrance
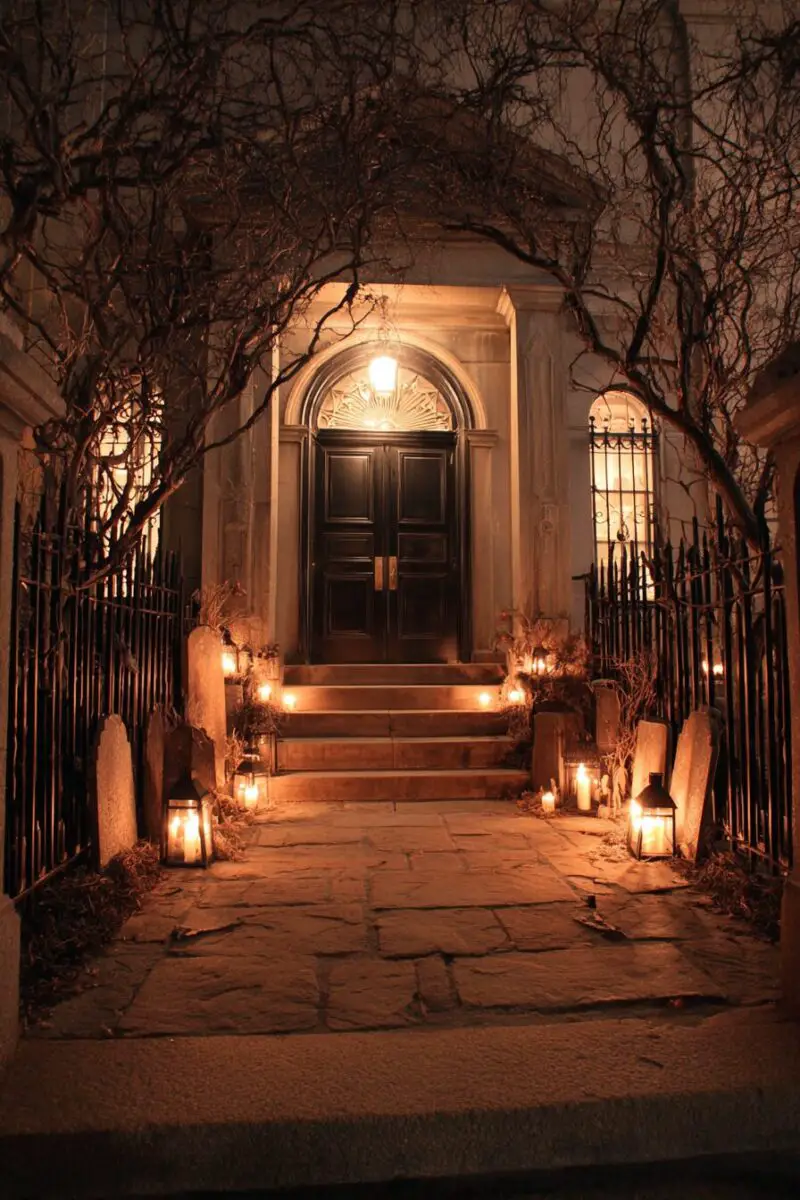
Your front yard becomes the gateway to terror when you transform it into a spine-tingling cemetery that makes guests question if they should ring the doorbell or run.
Start by scattering foam tombstones across your lawn, positioning them at odd angles to create an authentic weathered graveyard look.
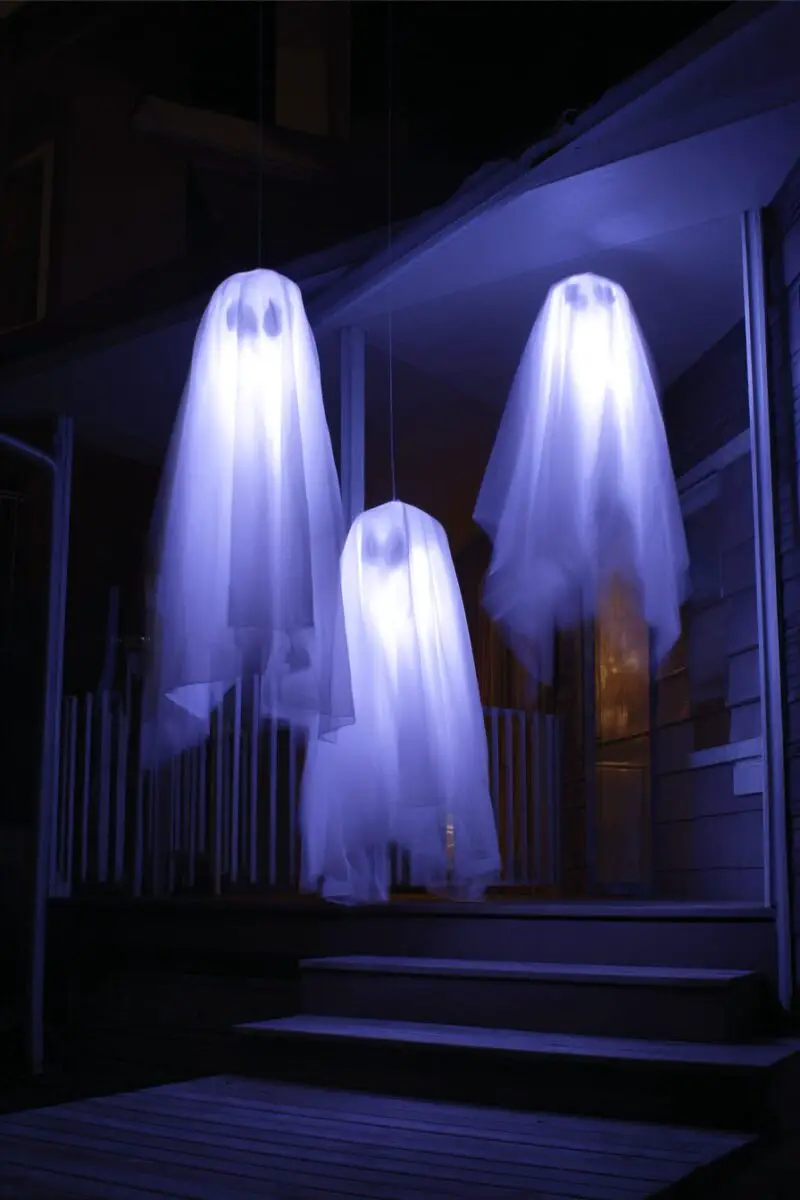
Drape cheesecloth or old sheets over wire frames to create ghostly figures that seem to rise from the graves when the wind catches them.
Add battery-powered LED lights inside the fabric to make your ghosts glow eerily in the darkness.
Scatter fake bones, skulls, and skeleton hands around the tombstones, letting some appear to be clawing their way out of the earth.
Create a winding pathway using solar-powered stake lights or luminarias to guide guests through your makeshift cemetery.
Position a skeleton in a chair near your front door, dressed in tattered clothes and holding a “Welcome to Your Doom” sign.
Hang Spanish moss from tree branches to add an extra layer of creepiness that sways ominously in the breeze.
Set up a motion-activated skeleton or zombie that pops up when guests walk by, guaranteed to make even the bravest visitors jump.
Use a fog machine strategically placed behind tombstones to create low-lying mist that rolls across the ground like something straight out of a horror movie.
Add creepy sound effects through hidden Bluetooth speakers, featuring distant moans, rattling chains, and the occasional wolf howl.
String orange and purple lights throughout the scene to cast an otherworldly glow that makes everything look supernatural.
Place “Beware” and “Enter at Your Own Risk” signs along the pathway to build anticipation and dread.
The final touch involves positioning a few crows or ravens (fake ones work perfectly) on the tombstones and fence posts to complete the ominous atmosphere.
Madison’s Current Obsessions
7+ DIY Outdoor Halloween Decorations to Spookify Your YardInstall Floating Ghost Projections
Nothing says supernatural like translucent spirits that appear to float through your walls and dance across your ceilings without any visible support.
Digital projectors have revolutionized Halloween decorating by allowing you to create moving ghostly apparitions that seem to glide effortlessly through your party space.
Purchase or download high-quality ghost projection videos that feature wispy, translucent figures moving in slow, ethereal motions.
Position your projector in a central location where it can cast images onto multiple surfaces like walls, ceilings, and even sheer curtains hung strategically throughout the room.
The key to realistic ghost projections lies in using surfaces that allow the light to show through while maintaining the translucent quality that makes spirits so haunting.
White or light-colored walls work best for vivid projections, but you can also project onto thin fabric screens to create the illusion of ghosts passing through solid objects.
Dim all other lights in the room to make your floating spirits the main focal point that captures everyone’s attention.
Sync your ghost projections with spooky sound effects like whispered voices, chains rattling, and doors creaking to create a fully immersive supernatural experience.
Move the projector occasionally during the party to make it seem like the ghosts are traveling from room to room, following your guests around the house.
Layer multiple projections by using several devices to create a whole family of spirits that interact with each other in your space.
Set your projections to random intervals so guests never know when a new ghost will appear, keeping everyone on edge throughout the night.
Combine your floating ghosts with physical elements like hanging cheesecloth that moves with air circulation to blur the line between digital and real.
The beauty of ghost projections is their versatility – you can project them onto trees outside, garage doors, or even the side of your house for maximum neighborhood impact.
Design Your Dream Room in Minutes!
🏡 Start Creating FREE →Madison’s Current Obsessions
7+ Spooky Yet Elegant Halloween Mantle DecorationsDesign a Blood-Dripping Chandelier
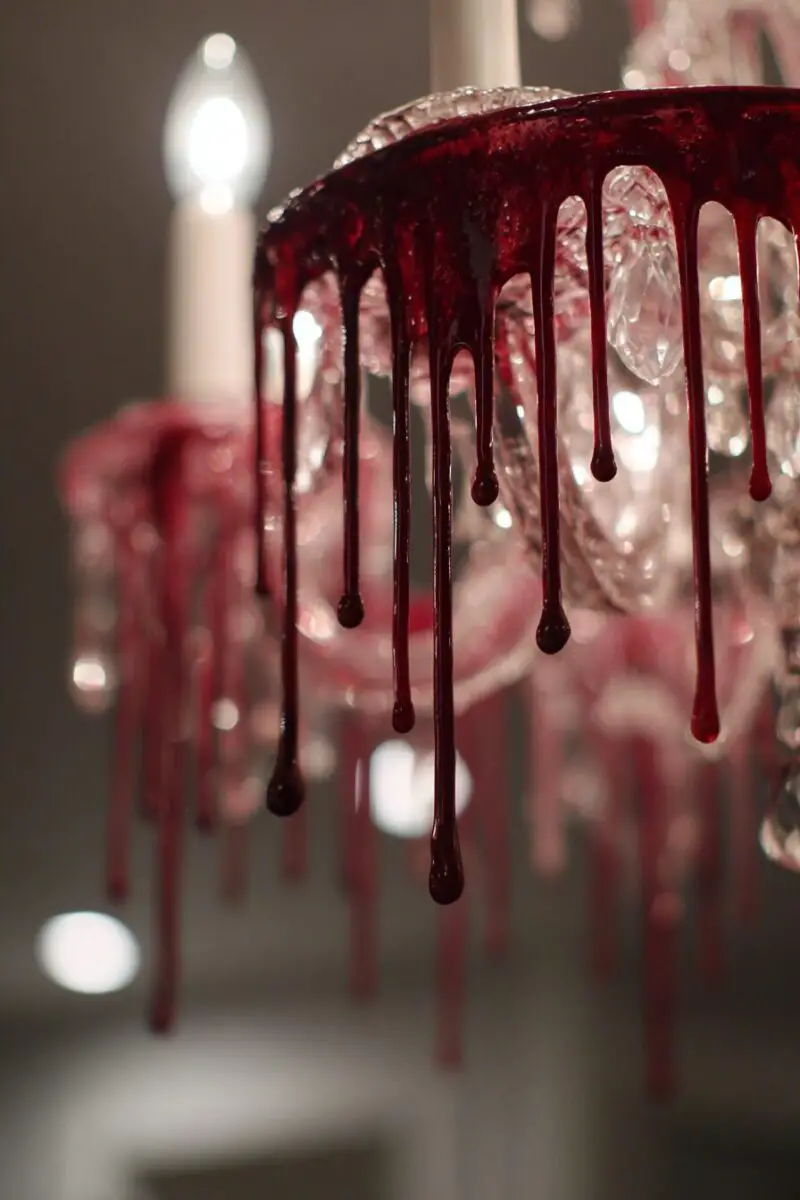
Your dining room chandelier transforms into a gruesome centerpiece that makes guests wonder if they’re dining in Dracula’s castle or a crime scene.
Start with an existing chandelier or create one using a wire frame, then wrap it entirely in black fabric or dark plastic to give it an ominous base.
Attach long strips of red fabric or crepe paper that have been treated with liquid latex and red food coloring to create realistic-looking blood drips.
The strips should hang at varying lengths to simulate fresh blood that’s still actively dripping from the fixture above.
Use a combination of bright red and dark burgundy colors to create depth and make the blood appear both fresh and old.
Install battery-powered red LED lights inside the chandelier to cast an eerie crimson glow throughout the dining area.
Add plastic spiders, bats, and other creepy crawlies to the chandelier arms to suggest that this fixture has been abandoned for ages.
Hang additional blood-soaked fabric from the ceiling around the chandelier to create the impression of a massacre that happened directly overhead.
Position buckets or cauldrons under the chandelier to catch the “dripping blood” and add to the overall gore factor.
Scatter fake body parts like severed hands and plastic eyeballs around the base of the chandelier to complete the crime scene aesthetic.
Use a humidifier or small fog machine nearby to create a misty atmosphere that makes the whole scene appear more mysterious and otherworldly.
Add the sound of dripping water or blood through hidden speakers to enhance the sensory experience of your gruesome creation.
String barbed wire (plastic, for safety) around the chandelier base to suggest that this area is dangerous and off-limits.
The final detail involves adding a few drops of corn syrup mixed with red food coloring to actually drip occasionally, making guests do double-takes.
Madison’s Current Obsessions
9+ Spooky Halloween Bedroom Aesthetics to TryBuild a Creepy Crawly Spider Infestation
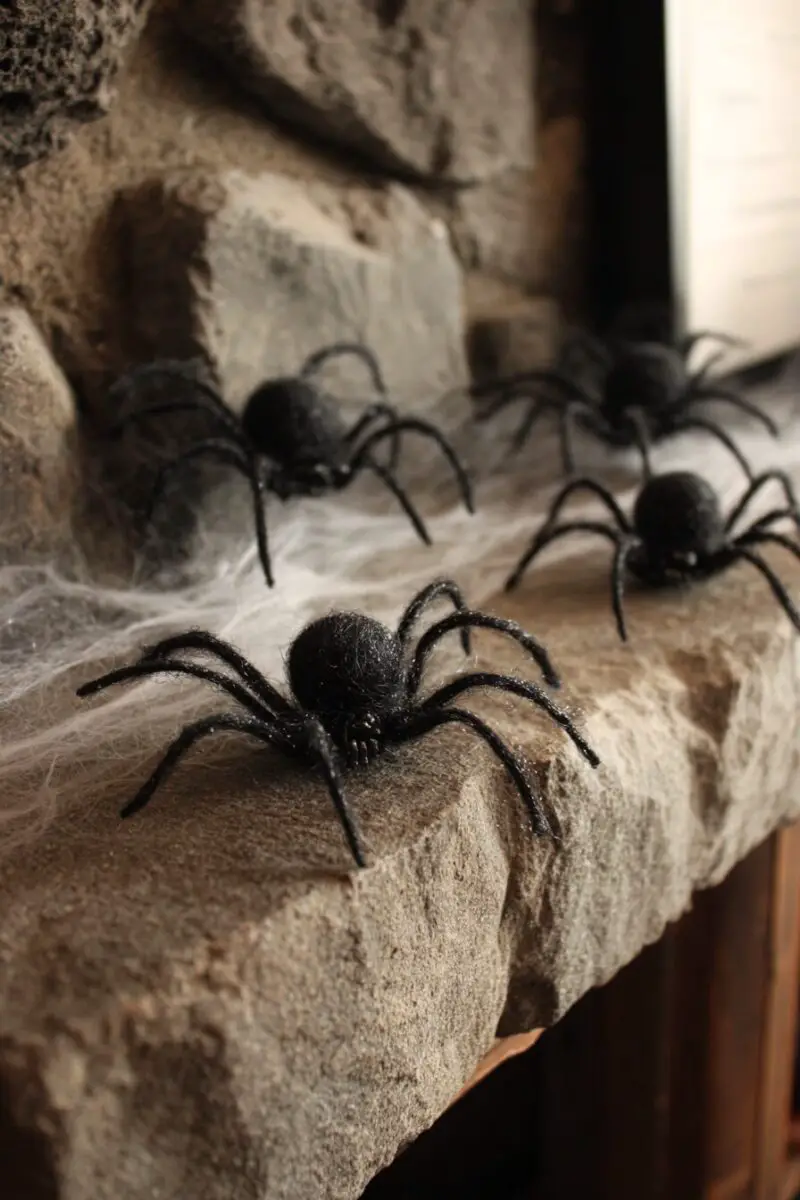
Your home becomes overrun with an army of eight-legged terrors that seem to have claimed every corner, crevice, and surface as their own territory.
Purchase spiders in various sizes from tiny ones that fit in your palm to massive tarantula-sized creatures that could easily be mistaken for small pets.
Start by webbing every doorway, corner, and window with fake spider webs that stretch across openings like nature’s own security system.
Position your largest spiders in prominent locations where guests will definitely notice them – on the mantelpiece, hanging above doorways, or crawling up walls.
Create spider nests in unexpected places like inside lampshades, peeking out of picture frames, or emerging from flower arrangements.
Use fishing line to hang spiders at eye level throughout hallways and rooms, creating the illusion that they’re descending from the ceiling.
Scatter smaller spiders throughout your space, placing them on furniture, in corners, and even inside the refrigerator for an extra surprise.
Add glow-in-the-dark paint to some spider eyes so they gleam menacingly when the lights are dimmed.
Create a spider feeding area by placing fake flies, moths, and other insects caught in webs near your largest spider displays.
Position motion-activated jumping spiders in strategic locations where they’ll surprise unsuspecting guests who get too close.
Layer your spider infestation with sound effects like skittering and clicking noises that suggest movement all around the room.
Use black lights to make white webs glow eerily while keeping the spiders themselves in shadow for maximum creep factor.
Add a few rubber snakes among your spiders to create confusion and make guests unsure what creatures they’re actually dealing with.
The crowning touch involves creating a giant spider mother with an egg sac that appears ready to release hundreds of baby spiders into your party space.
Madison’s Current Obsessions
11+ Pink Halloween Wallpaper Designs For A Spooky ChicSet Up a Witch’s Potion Station
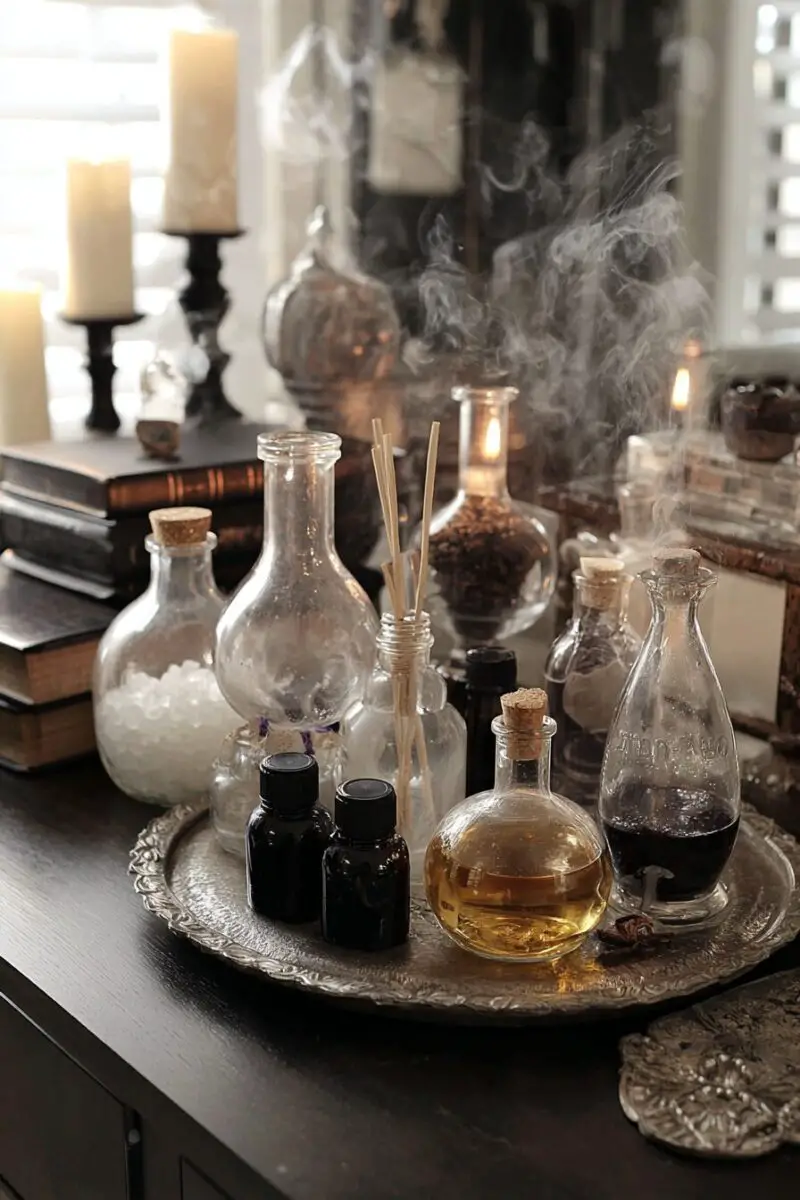
Your kitchen or bar area transforms into a mystical laboratory where dark magic bubbles and mysterious ingredients combine to create spine-tingling concoctions.
Cover your workspace with aged burlap or dark fabric to create the appearance of an ancient witch’s brewing table that’s seen centuries of magical experiments.
Gather various sized glass containers, beakers, test tubes, and old bottles to hold your mysterious potions and magical ingredients.
Fill containers with colored water, dry ice for smoking effects, and floating objects like plastic eyeballs or rubber insects to create authentically disturbing brews.
Label each container with spooky names like “Zombie Brain Juice,” “Vampire’s Blood,” “Werewolf Tears,” and “Ghost Essence” written in an old-fashioned script.
Add dried herbs, colored sand, glitter, and fake specimen jars filled with “pickled” items like plastic organs or creepy creatures.
Install colored lights under glass containers to make your potions glow from within, creating an otherworldly laboratory atmosphere.
Position a cauldron as your centerpiece, complete with dry ice to create bubbling, smoking effects that suggest active magical brewing.
Hang dried herbs, fake bat wings, and mysterious ingredients from hooks above your potion station to complete the witch’s workshop aesthetic.
Provide guests with small containers so they can create their own magical mixtures using safe ingredients you’ve provided.
Add ancient-looking spell books, scrolls, and magical artifacts around your brewing station to suggest this is a working witch’s laboratory.
Use a black tablecloth with silver stars and moons to enhance the magical theme and tie everything together visually.
Position a realistic witch’s hat, broomstick, and crystal ball nearby to reinforce the mystical atmosphere you’re creating.
Complete the scene with eerie sound effects like bubbling cauldrons, crackling fires, and mysterious incantations playing softly in the background.
Madison’s Current Obsessions
Pink Halloween Decorations To Sweeten Your SpookyTransform Your Dining Room into a Zombie Apocalypse Scene
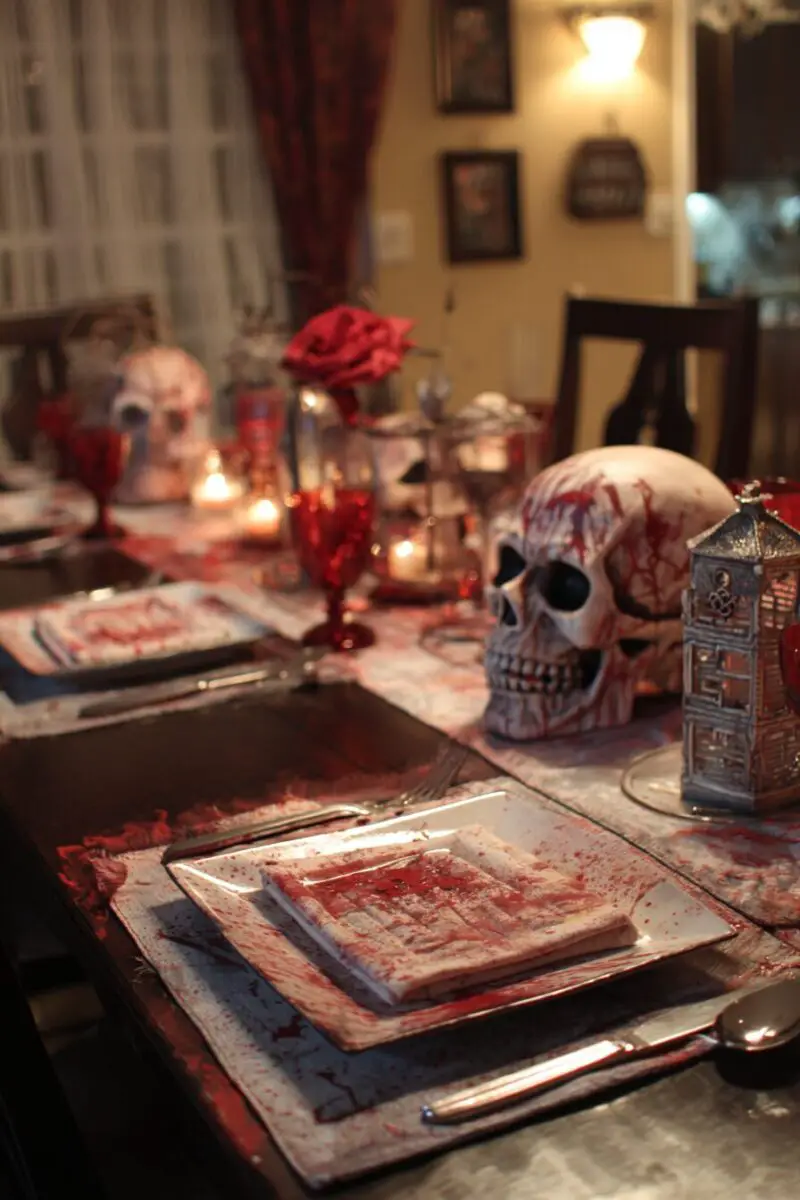
Your dining area becomes ground zero for the undead invasion, where survivors once made their last stand against the walking dead.
Cover your dining table with a torn, bloody tablecloth and scatter fake weapons like plastic machetes, toy guns, and makeshift clubs across the surface.
Position mannequins or life-sized skeletons around the table as if they’re the remains of people who didn’t escape the zombie outbreak.
Dress your seated figures in tattered clothing with fake blood stains and bite marks to suggest they fell victim to the undead.
Create barricaded windows using plywood, caution tape, and “KEEP OUT” signs to show how desperately people tried to keep the zombies away.
Scatter empty food containers, water bottles, and medical supplies around the room to suggest this was a survival shelter.
Add fake blood splatter to walls, floors, and furniture using washable paint or removable decals that won’t damage your home.
Position zombie hands breaking through walls or reaching under doors to show that the undead are still trying to get inside.
Create a medical triage area in one corner with bloody bandages, empty pill bottles, and medical equipment scattered about.
Hang emergency evacuation notices, missing person posters, and government warnings on the walls to build the apocalypse narrative.
Use flickering LED candles instead of regular lighting to suggest that power has been cut off during the chaos.
Scatter newspapers with headlines about the zombie outbreak and emergency broadcasts to add authentic post-apocalyptic details.
Position overturned chairs and furniture to show evidence of the struggle that took place in this room.
Add the sound of distant screams, helicopter rotors, and emergency broadcasts playing quietly through hidden speakers.
Madison’s Current Obsessions
8+ Pumpkin Floral Arrangements To Try This FallCreate a Haunted Mirror Maze
Your hallways and rooms become a disorienting labyrinth where guests can’t tell what’s real and what’s reflection in this psychological nightmare.
Purchase or borrow multiple mirrors of different sizes and position them at angles throughout your space to create confusing pathways and dead ends.
Use two-way mirrors or windows with reflective film to create surfaces where guests see their reflection but can’t tell what’s behind them.
Install LED strip lights behind some mirrors to create an otherworldly glow that makes reflections appear supernatural.
Position costumed actors or mannequins behind one-way mirrors so they appear suddenly when guests least expect them.
Add cracked mirror effects using removable vinyl decals or washable paint to suggest that something has damaged these mystical portals.
Create false doorways using mirrors positioned to look like openings that guests try to walk through but can’t.
Install motion sensors that trigger lights, sounds, or moving objects when guests approach certain mirrors in your maze.
Use smoke machines or fog to partially obscure mirrors, making it harder for guests to navigate and adding to the mysterious atmosphere.
Position identical decorations on both sides of mirrors to create infinite reflection effects that make spaces seem larger and more confusing.
Add vintage or ornate mirror frames to enhance the haunted mansion aesthetic and make each mirror feel like a portal to another world.
Install speakers behind mirrors that whisper messages or make strange noises when guests get close to specific reflections.
Create a central mirror room where guests are surrounded by their reflections from every angle, making them feel trapped in their own image.
Use blacklights and glow-in-the-dark paint on mirror frames to create effects that only appear when regular lights are dimmed.
Madison’s Current Obsessions
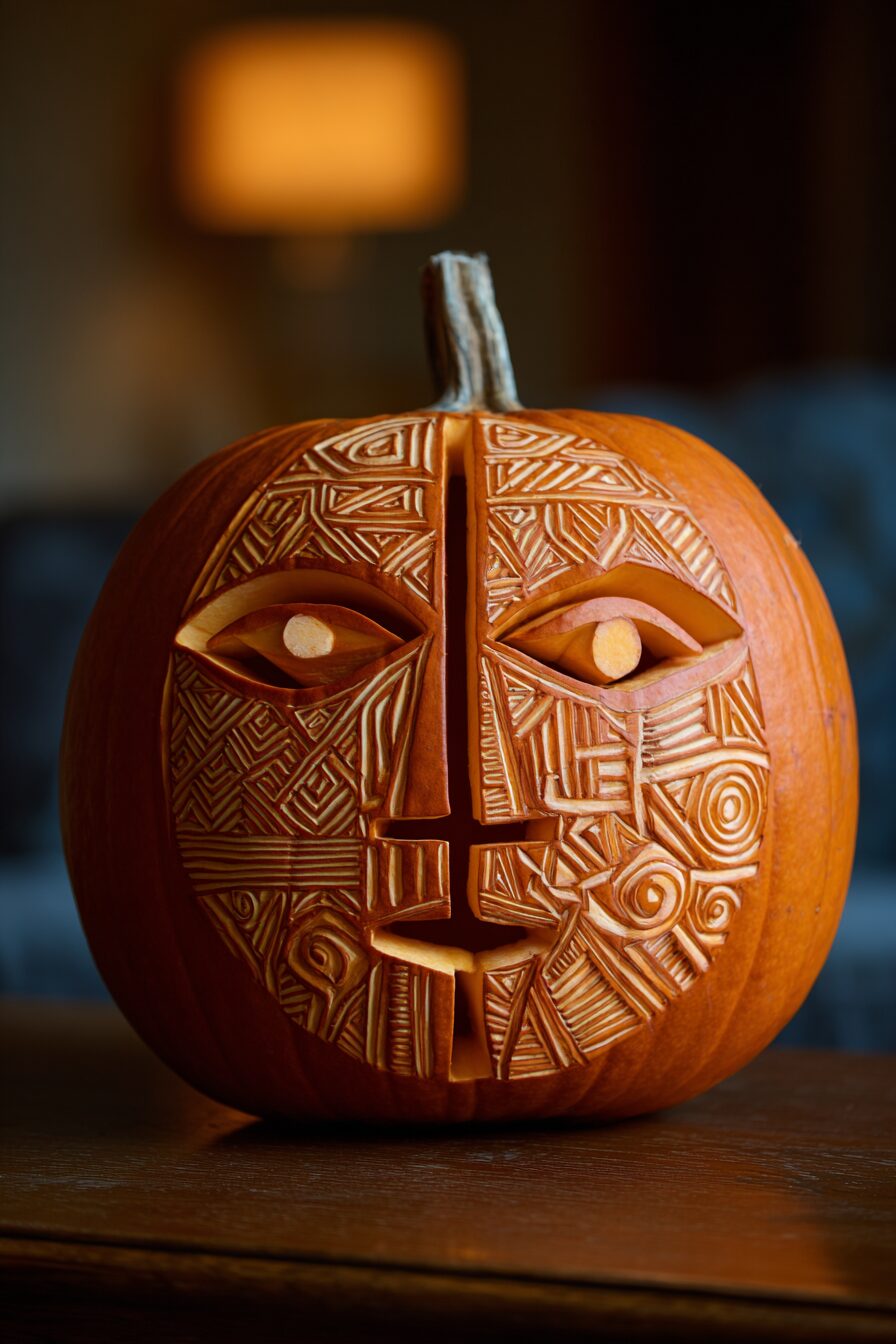
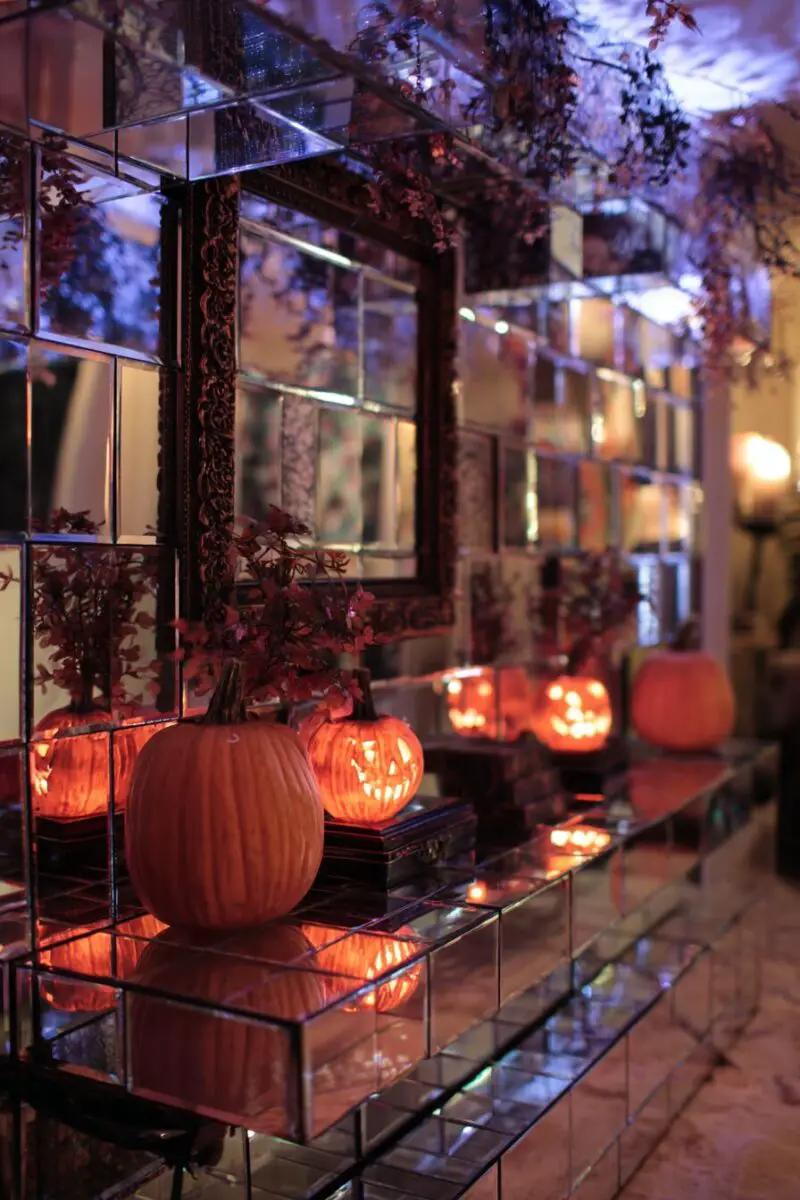
Spooktacular Boo Basket Ideas for Halloween FunDesign Pumpkin Carving Masterpieces

Your jack-o’-lanterns become works of art that showcase intricate designs far beyond traditional triangle eyes and jagged smiles.
Start with pumpkins of various sizes and shapes to create a diverse display that includes everything from tiny gourds to massive carving pumpkins.
Plan your designs on paper first, creating templates for complex patterns like haunted houses, skeletal faces, spider webs, or intricate geometric designs.
Use specialized carving tools instead of kitchen knives to achieve clean lines and detailed work that makes your pumpkins true masterpieces.
Create depth in your carvings by removing different amounts of pumpkin flesh to allow varying levels of light to shine through.
Experiment with techniques like etching, where you scrape away only the outer skin to create subtle gradients and shading effects.
Install colored LED lights inside your pumpkins instead of candles for safer, longer-lasting illumination that won’t flicker or blow out.
Carve interconnected scenes across multiple pumpkins to tell a story or create a panoramic Halloween landscape when displayed together.
Add texture to your designs by using different carving depths and techniques that create shadows and highlights in your illuminated pumpkins.
Preserve your carved pumpkins longer by treating cut edges with petroleum jelly or commercial pumpkin preservatives.
Create pumpkin dioramas by carving large openings and building miniature Halloween scenes inside with tiny figures and decorations.
Use pumpkins as planters by carving wide openings and filling them with fall flowers, corn stalks, or other seasonal plants.
Position your carved pumpkins at different heights using stumps, boxes, or pedestals to create visual interest and dimension.
Add dry ice to water inside your pumpkins for smoking jack-o’-lanterns that seem to breathe fog into the night air.
Madison’s Current Obsessions
Stylish Fall Halloween Decor Ideas For YouInstall Professional Fog Machine Cemetery Effects
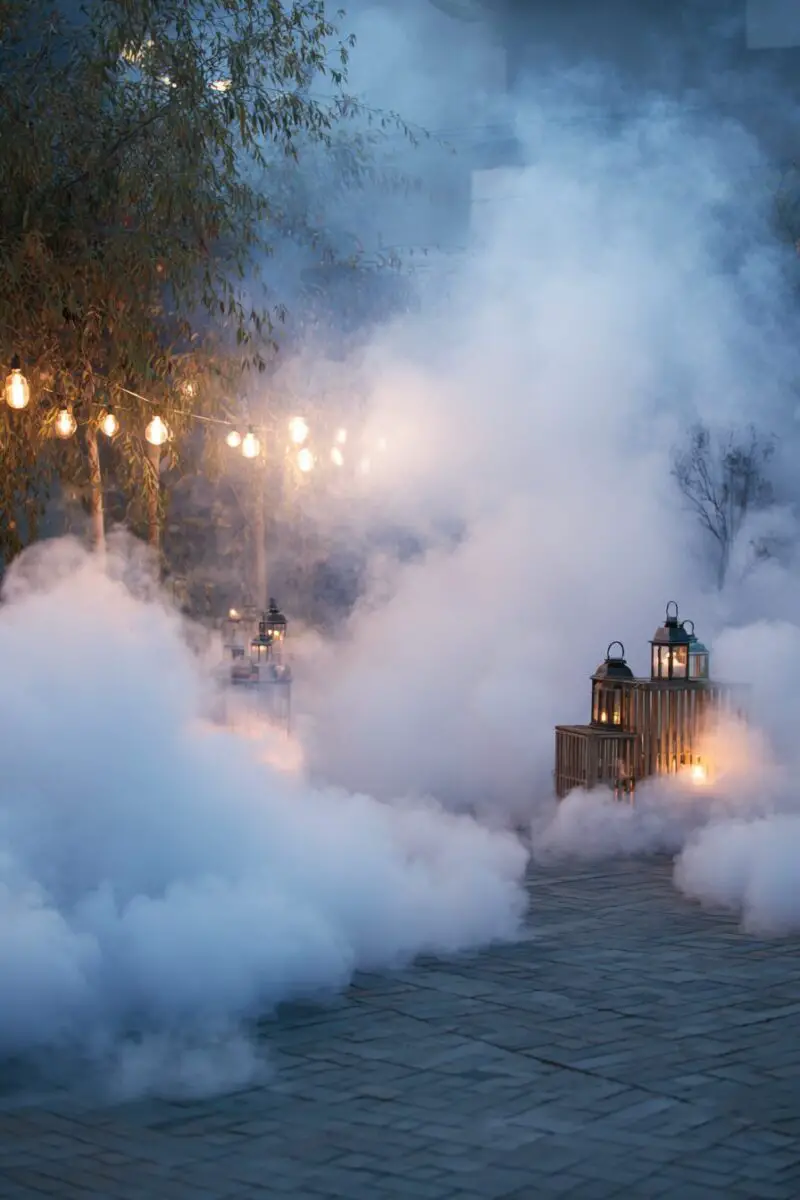
Your yard transforms into a misty graveyard where fog rolls dramatically across the ground like souls rising from their eternal rest.
Rent or purchase a professional-grade fog machine that produces thick, low-lying fog that hugs the ground instead of dissipating into the air.
Position your fog machine behind landscaping or decorations so the source remains hidden while fog appears to emerge naturally from the ground.
Use multiple smaller fog machines throughout your yard to create consistent coverage that doesn’t leave dead spots where the effect breaks down.
Add dry ice to water-filled containers for additional fog effects that sink to the ground and create supernatural pools of mist.
Time your fog production to coincide with guest arrivals and key party moments for maximum dramatic impact.
Create fog channels using PVC pipes or gutters to direct the mist along specific pathways and around particular decorations.
Combine fog effects with colored lights that shine through the mist to create an otherworldly atmosphere with purple, green, or orange hues.
Use fans strategically placed to control fog direction and prevent it from becoming too thick or obscuring important safety areas.
Add scented oils to your fog machines to create mysterious aromas like musty earth, autumn leaves, or mysterious potions.
Position fog machines near your most impressive decorations to enhance their visibility and make them appear to emerge from the supernatural mist.
Create fog bursts using timer controls that release dramatic clouds of mist at random intervals throughout your party.
Layer your fog effects with sound by positioning speakers near fog sources to create the illusion that spirits are speaking from within the mist.
Maintain your fog machines throughout the party by refilling fog juice and checking that heating elements stay at optimal temperature for consistent production.
Madison’s Current Obsessions
Unique Indoor Halloween Decorations You Must TryArrange Gothic Candle Arrangements
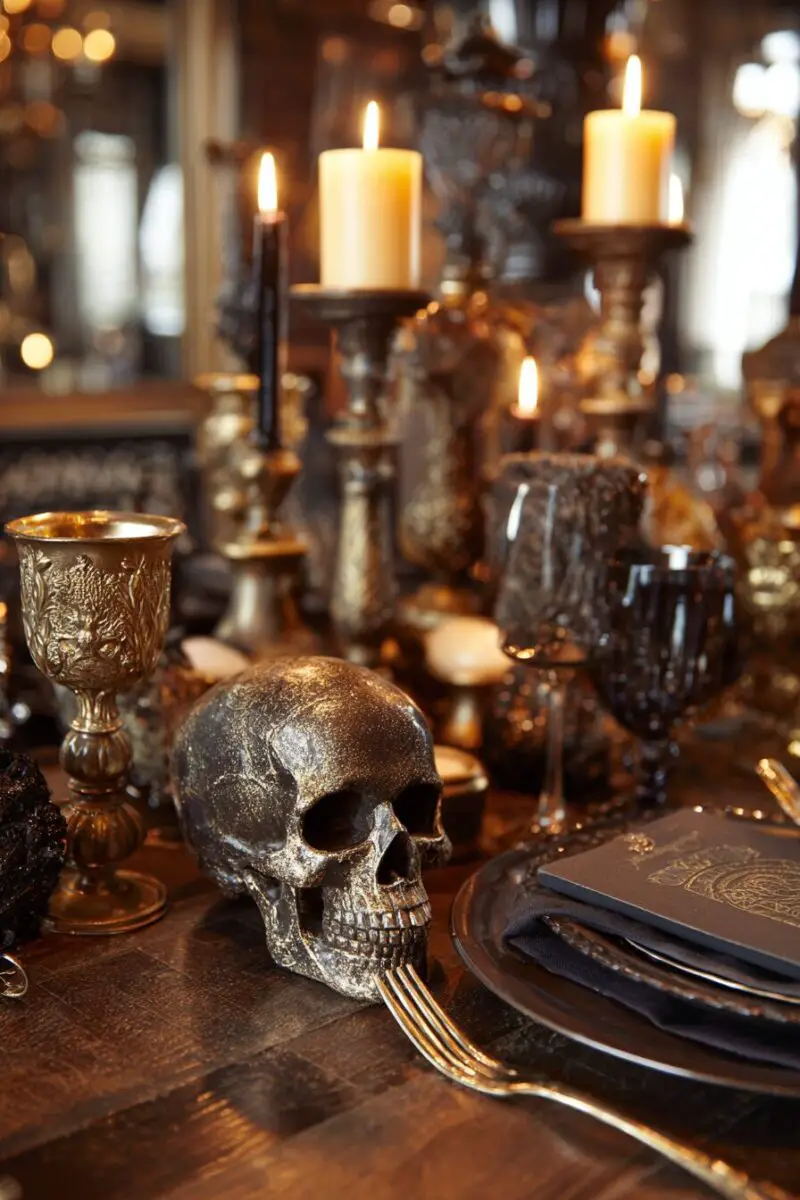
Your lighting scheme creates an atmosphere straight from a Victorian Gothic novel where shadows dance and mysterious illumination sets the perfect mood.
Replace all modern lighting with arrangements of candles in various heights, sizes, and holders to create dramatic pools of flickering light.
Use black, deep red, and dark purple candles instead of traditional white ones to maintain your spooky color scheme throughout the space.
Position candles in antique holders, wrought iron candelabras, and vintage lanterns to enhance the old-world Gothic atmosphere you’re creating.
Create candle clusters at different heights using books, boxes, or pedestals to add visual interest and prevent your arrangements from looking flat.
Drip wax from colored candles onto holders and surfaces to create the appearance of candles that have been burning for centuries.
Add battery-powered LED candles in areas where real flames might be unsafe, but choose ones that flicker realistically to maintain the authentic effect.
Surround your candle arrangements with Gothic elements like plastic ravens, aged books, antique keys, and mysterious bottles.
Use mirrors behind candle groupings to reflect and multiply the flickering light, creating the illusion of more candles than you actually have.
Position candles inside glass hurricanes or lanterns to protect flames from air circulation while maintaining the dramatic lighting effect.
Create pathways of luminarias using paper bags filled with sand and battery-operated candles for safe outdoor lighting that guides guests.
Add scented candles with mysterious fragrances like sandalwood, patchouli, or “haunted forest” to enhance the sensory experience.
Layer your candlelight with subtle colored lighting that enhances rather than competes with the warm glow of your candle arrangements.
Position your most dramatic candle displays near mirrors, windows, or reflective surfaces to maximize their impact and create depth in your lighting design.
Halloween decorating is all about creating an atmosphere that transports your guests into another world entirely.
These ideas give you the tools to transform your home into a haunted masterpiece that will be the talk of the neighborhood long after October ends.
