Halloween is right around the corner, which means it’s time to start preparing your outdoor decor to set the spooky mood.

Decorating the outside of your home is a great way to get in the spirit of the season and show off your creativity.
With a little imagination and some DIY projects, you can easily transform your yard into a creepy wonderland that will impress trick-or-treaters.
Even if you don’t consider yourself particularly crafty, these no-carpentry needed ideas are fun, easy, and budget-friendly.
✨Click to Get My 101 FREE Designer Room Ideas
Creepy Hanging Candles

These eerie dangling candles are sure to give your yard an enchanting ambiance.
They are super easy to make using just a few supplies.
What you’ll need:
– Glass jars or containers
– Tea lights
– Fishing line, thread, or twine
– Scissors
– Hot glue gun
First, thoroughly clean and dry the glass jars or containers.
Make sure to remove any labels.
Tea light candles come in metal tins that are perfect sizes for filling your containers.
Place a tea light in each glass jar.
Then, tie your fishing line, thread, or twine around the mouth of each jar, securing with a tight knot.
Make the hanging strings long enough to achieve the desired hanging height.
8-12 inches is ideal.
Use a hot glue gun to secure the knotted string on the underside of the lid.
Trim off any excess fishing line so the knot and glue are not visible.
To hang, simply tie the other end of the string to tree branches, the eaves of your home, your patio, or anywhere you want the candles to hang.
For an even creepier effect, use putty or adhesive to attach creepy crawlies like plastic spiders or bugs to the jars.
The glowing candles surrounded by faux creatures will create a spooky scene.
Monster Wreath
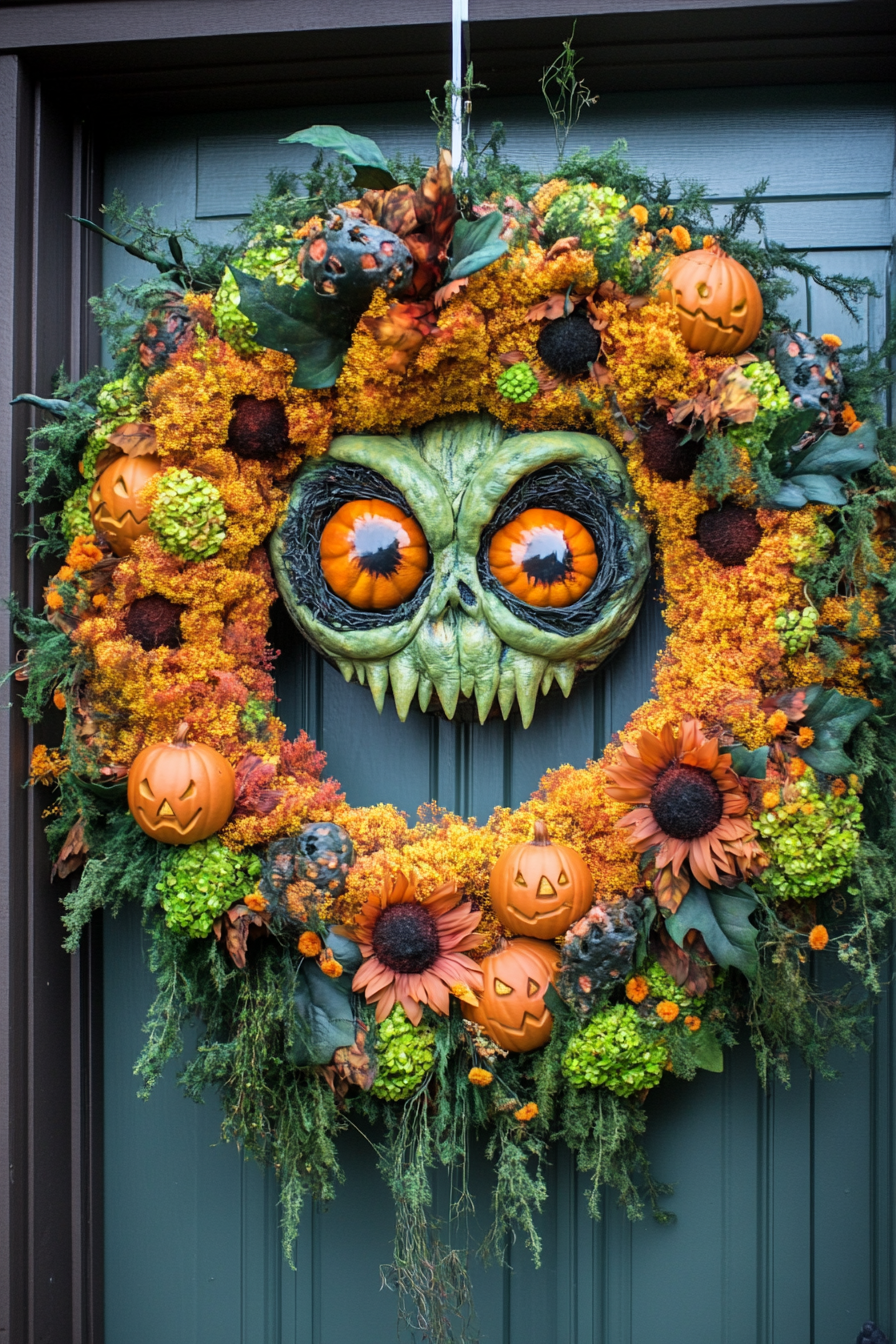
Give your front door a frightening flair with a monster-themed wreath.
This ghastly greeter only requires a few supplies.
What you’ll need:
– Monster-themed decorations (eyes, teeth, creepy cloth, etc.)
– Hot glue gun
– Wreath form (grapevine or styrofoam)
– Decorative ribbon
Start with a basic wreath form, either grapevine or styrofoam.
Attach strips of creepy cloth all around the wreath with hot glue to give it a tattered, spooky look.
Next, let your creativity run wild picking out scary embellishments.
Plastic eyes, monster mouths, and creepy crawly creatures like snakes and spiders make fun additions.
Use hot glue to attach your monstrous trinkets wherever you’d like on the wreath form.
Finish it off by tying or gluing an eerie ribbon along the bottom edge.
Black, purple, or orange mesh ribbon with Halloween motifs works perfectly.
Add a hanger to the back and display your frightening masterpiece prominently on your front door or elsewhere outside.
Mummy Candles

These clever mummy candles are almost too cute to be creepy!
Dress up plain white pillar candles with just a few simple steps.
What you’ll need:
– White pillar candles
– Cheesecloth
– Scissors
– Hot glue gun
– Decorative ribbon (optional)
Cut cheesecloth into long strips, about 2-3 inches wide.
The number of strips needed will vary based on the size and number of candles.
For average 3 x 6 inch candles, 20-30 strips per candle is sufficient.
Starting at the bottom of the candle, adhere the end of the cheesecloth strip with hot glue, allowing 1-2 inches to drape onto your work surface.
Firmly press the strip against the wax while glue sets.
Slowly begin wrapping the strip around the candle, applying glue as you go and allowing a slight overlap between rotations.
Continue wrapping until you reach the top of the candle.
Use the hot glue to adhere the end of the strip.Trim off any excess cheesecloth.
For added flair, tie on creepy cloth or ribbon bows.
Display the mummy candles on shelves, windowsills, or outdoor tables for a cute and creepy touch.
The flickering flames will make the cheesecloth dance and create creepy shadows.
Glowing Ghost Luminaries
These homemade luminaries feature ghostly faces that glow to create a hauntingly delightful display.
Illuminate your walkway, trees, or patio with an eerie aura.
What you’ll need:
– White lunch bags
– LED tealight candles
– Black construction paper
– Scissors
– Double-sided tape or glue stick
Start by inserting the LED candles into plain white paper lunch bags.
Position the candle toward the bottom half of the bag.
Next, cut out circles from black construction paper for the ghost eyes.
Adhere them to the upper half of the lunch bag using double-sided tape or a glue stick.
Use scissors to cut a wavy pattern along the bottom edge of the black paper eyes to resemble wispy ghost eyes.
Apply double-sided tape or glue above the eyes and adhere a crumpled piece of tracing paper to create a puffy ghost head.
Finally, display the luminaries along your sidewalk, in trees, or wherever you want to create an eerie glow.
The cute ghostly faces will greet trick-or-treaters with a ghostly glare.
✨Click to Get My 101 FREE Designer Room Ideas
Creepy Trees

Turn ordinary trees into creepy silhouettes by transforming their branches into grasping hands.
This outdoor decoration is low-effort but high-impact.
What you’ll need:
– Black landscape fabric or plastic tablecloth
– Rope or twist ties
– Scissors (optional)
Select an outdoor tree with branching limbs to drape your landscape fabric or plastic over.
A maple tree works perfectly, but pines and bushes can also create a creepy effect.
Drape your solid black fabric or plastic over the tree, using individual branches to mimic freakishly long fingers and hands.
Tie securely to the branches using rope, twist ties, or zip ties.
Allow the ends to flow freely to imitate wispy, grabbing hands.
Use scissors to modify the plastic or fabric into claw-like shapes at the ends if desired.
This simple yet eerie trick turns an ordinary tree into a creepy creature.
Pair it with a strobe light or spotlight to create dancing shadows that seem to move before your eyes.
Creepy Coffin

Make your yard the neighborhood graveyard with an easy homemade coffin that even looks great unoccupied.
This is one of the most classic outdoor Halloween decorations.
What you’ll need:
– Wood boards or plywood
– Wood glue and nails
– Black spray paint
– Cheesecloth
– Creepy cloth
Construct a basic box shape by cutting plywood or boards into rectangle shapes for the top, bottom, and sides.
Make it whatever size you desire.
Glue and nail the pieces together, using scrap wood to brace the inside corners.
Once assembled, spray paint the entire coffin black and allow to dry fully.
You can also use black primer if you want a more worn and weathered look.
Drape creepy cloth and ripped cheesecloth over the coffin to give it a decrepit, abandoned look.
Use hot glue underneath to adhere the tattered fabric pieces before draping them.
For added stability, drive two wooden stakes into the ground on either side of the coffin and prop the sides against them.
Place your empty coffin prominently in the yard or against the house and wait for the compliments to start pouring in!
Glowing Jack-O’-Lantern Fence

Line your sidewalk or yard with a trail of glowing jack-o’-lanterns by turning orange pumpkin pails into mini luminaries.
What you’ll need:
– Small orange pumpkin buckets, pails, or baskets
– Battery operated tea lights
– Black paint (optional)
– Pumpkin carving tools (optional)
Place battery-operated tea lights inside regular small orange pumpkin trick-or-treat buckets or other container.
Position toward the back to allow the light to glow through the front.
If desired, use black paint or permanent marker to create jack-o’-lantern faces on the exterior.
Get creative with triangle eyes, nose holes, and jagged mouths.
You can also carve traditional faces using a pumpkin carving kit for a sculpted 3D look.
Arrange the glowing carved pumpkins along your sidewalk, porch steps, or yard.
The trail of jack-o’-lanterns provides a cute and spooky guiding light for trick-or-treaters on Halloween night.
Spider Infestation

Unleash an army of creepy crawlies on your trees and bushes with homemade spiders of various shapes and sizes.
Wrap trees, shrubs, and banisters with fake spiders to create a skin-crawling spectacle.
What you’ll need:
– Assorted plastic toy spiders
– Fishing line, thread, or twine
– Scissors
– Adhesive putty or hot glue (optional)
Start by gathering plastic spider decor in a range of shapes, sizes, and colors.
Look for fake spiders, snake, and bugs at dollar stores and discount retailers.
Or get crafty and make your own by sculpting spider bodies out of Styrofoam balls and pipe cleaners.
Use fishing line, thread, or twine to secure your faux creepy crawlies on trees, shrubs, railings, rooflines, and anywhere else you want to unleash your arachnid army.
Wrap trees and posts to make it appear spiders are crawling straight up the trunk and through branches.
Hang spiders at varying heights for added dimension.
For added security, use a small dab of adhesive putty or hot glue to fully adhere larger spiders to surfaces.
Then encase the attached point in a web blanket for a natural presentation.
Repeat all around the yard to terrify trick-or-treaters with your homemade spider swarm!
✨Click to Get My 101 FREE Designer Room Ideas
Pumpkin Patch

Bring the colors of the season wherever you’d like by cultivating a fake pumpkin patch.
Groupings of colorful pumpkins can be clustered anywhere in your yard with minimal effort.
What you’ll need:
– Artificial pumpkins in assorted sizes and colors
– Hay bales (optional)
– Miniature fencing (optional)
Collect an assortment of artificial and craft pumpkins to create the bounty of your pumpkin patch.
Focus on fall shades like orange, white, green, yellow and include a variety of shapes and sizes.
Look for plastic and fabric pumpkins at craft stores and big box retailers.
Place your pumpkin collection in a pile on your lawn, walkway, porch, or steps.
Top with a few mini or decorative hay bales for added effect.
Surround your pumpkin patch with a small decorative fence or chicken wire to define the space and contain your pumpkins.
This fence can be left plain or decorated with corn stalks, flowers, and other embellishments.
Your artificial pumpkin patch offers seasonal cheer without the hassle of real vegetables rotting.
Display all season long and reuse for years to come.
Add a stuffed scarecrow for the perfect finishing touch!
Monster Hands Graveyard


Create a spooky graveyard scene with homemade tombstones marked by monster hands reaching up from the dirt.
It’s sure to give your yard an extra terrifying touch.
What you’ll need:
– Foam tombstones
– Green spray paint
– Large plastic gloves
– Chicken wire (optional)
– Fake bones, limbs, or zombies (optional)
Make or purchase several foam tombstones and position in your yard as you would for a graveyard display.
Stand upright or tilt slightly for a decrepit aesthetic.
Spray paint the tombstones green and allow to dry fully.
This gives an eerie mossy look.
Cut the fingers off the ends of large plastic gloves.
Dig holes in the dirt surrounding the tombstone bases just large enough to accommodate the glove fingers.
Position the green fingers sticking straight up from the ground around each tombstone.
Cover the wrist end that attaches the hand if needed to look like its emerging from the dirt.
For added effect, add chicken wire to outline graves, use full zombie hands and arms, or place small plastic bones scattered around the haunted cemetery.
Your lawn will look like the dead are rising straight from below the headstones!
Creepy Crawly Welcome Mat


Give guests a fright before they even reach your front door.
A creepy doormat adorned with spiders and webs sets the mood for your haunted home.
What you’ll need:
– Basic doormat
– Assorted plastic spiders and bugs
– Fake spiderwebs
– Hot glue gun
Start with a basic natural fiber doormat.
These tend to work best for adhering decor.
Burlap material mats are ideal for creating a spooky vibe.
Use a hot glue gun to attach various plastic spiders, centipedes, cockroaches and other creepy crawlies scattered around the mat.
Apply extra glue underneath larger decor pieces for added stability.
Finish off your frightening mat by covering it in a layer of fake spiderwebs.
Drape, twist, and wrap the webbing generously over the entire mat, allowing spiders to peek through.
Add a messaging like “Trick or Treat” or your family name in more webbing.
Place your completed creepy crawly mat in front of your door or at the start of your driveway to warn visitors of the eerie escapades to come!
Shake it out occasionally to remove leaves and debris throughout the season.
Skeleton Squad

What’s more terrifying than a skeleton?
An entire squad of skeletons!
Give your yard its own skeleton army using a collection of plastic skeletal remains.
What you’ll need:
– Plastic skeletons
– Old clothing
– Cheesecloth
– Decorative accessories
– Chair, ladder, etc
Build your skeleton crew by purchasing a variety of skeletal Halloween props, from life-size standing decorations to hanging props to smaller tabletop bones.
Look for affordable skeletons and skeletal elements at discount stores.
Dress up your boney friends with tattered rags and cheesecloth to resemble decrepit mummies and zombies.
Cut and shred old oversized clothing and sheets to wrap around skeletons.
Top with decorative hats, wigs, masks, chains, and other accessories to create creepy characters.
Position your decorated skeletons sitting in chairs or mounted on ladders, bikes, or hobby horses.
Place them peeking through bushes or partially buried in leaves.
Scatter small skeletons and bones peeking out from dirt piles and gravel walkways.
With just a little creativity, you can stage an entire skeleton squad ready to spook and delight all your Halloween visitors.
Keep adding to the gang each year!
✨Click to Get My 101 FREE Designer Room Ideas
Eerie Silhouettes

Create ghostly shadows across your home using these easy DIY window silhouettes.
The transparent shapes cast haunting scenes for trick or treaters passing by your house.
What you’ll need:
– Halloween stencils
– Window Markers
– Painter’s or masking tape (optional)
Pick spooky yet simple Halloween stencil designs that will translate well into shadow silhouettes.
Motifs like ghosts, bats, haunted houses, cats, and skeletons work perfectly.
Look for stencils at craft stores or print your own templates from free printables online.
Tape your stencils to windows, carefully positioning the template where desired.
Use removable painter’s tape or masking tape to keep it secure on the glass without leaving residue.
Make sure the exterior light source won’t be blocked.
Trace the stencil shapes using special window marking pens, easily found at most retailers.
Remove the stencil and your ghostly scene will now decorate the window.
The markers easily wipe off at the end of the season.
Apply window clings instead of drawing for reusable silhouette decorations.
Place scene setters inside to cast even more elaborate shadows on window curtains.
However you make them, creepy silhouettes create tone-setting shadows for Halloween.
With spooky season just around the corner, now is the time to turn your ordinary yard into a Halloween haven.
Decorating your outdoor space is one of the best ways to get in the spirit of the holiday and doesn’t have to take a lot of time or money.
Get inspired by these handmade decorations and embrace your creativity.
Before you know it, your home will be decked out in creepy-chic style sure to give your guests a frightfully fun holiday experience.
