Fall is the perfect time to get creative with pumpkin decorating!
As the leaves start to change color and the weather gets cooler, pumpkins are abundant and become a festive symbol of the season.
While traditional jack-o-lanterns carved with triangles for eyes and nose are a classic, there are so many more innovative ways to decorate pumpkins that will impress your family, friends and neighbors:
Ombre Gradient Pumpkin

Ombre designs that gradually fade from dark to light are very on-trend.
The faded color effect is easy to achieve on a pumpkin and makes a gorgeous statement piece.
Supplies Needed:
– Pumpkin, mini or full-sized
– Acrylic paint in 3-5 complementary colors
– Paintbrushes
– Large bowl of water for cleaning brushes
– Paper towels for drying
Steps:
1.
Clean and dry your pumpkin thoroughly before starting.
2.
Decide on your color palette.
For fall, oranges, reds, greens, browns and yellows are festive.
Choose 3-5 colors in analogous shades that complement each other.
3.
Set out your paints in order from darkest to lightest color.
You’ll apply the dark color first and blend down to the lightest color.
4.
Paint the top of the pumpkin with the darkest color using long, smooth brushstrokes.
Rinse and dry brush between colors.
5.
Gradually blend in the second darkest color below the first, overlapping the strokes and creating a fade.
6.
Continue painting in lighter colors towards the bottom of the pumpkin, softly diffusing the strokes to create a seamless ombre effect.
7.
Let dry completely before displaying your ombre pumpkin!
The key is applying the paint with gentle, overlapped layers to create a natural blended look.
Glaze over any hard edges between colors to smooth them out.
Your pumpkin will look professionally hand-painted.
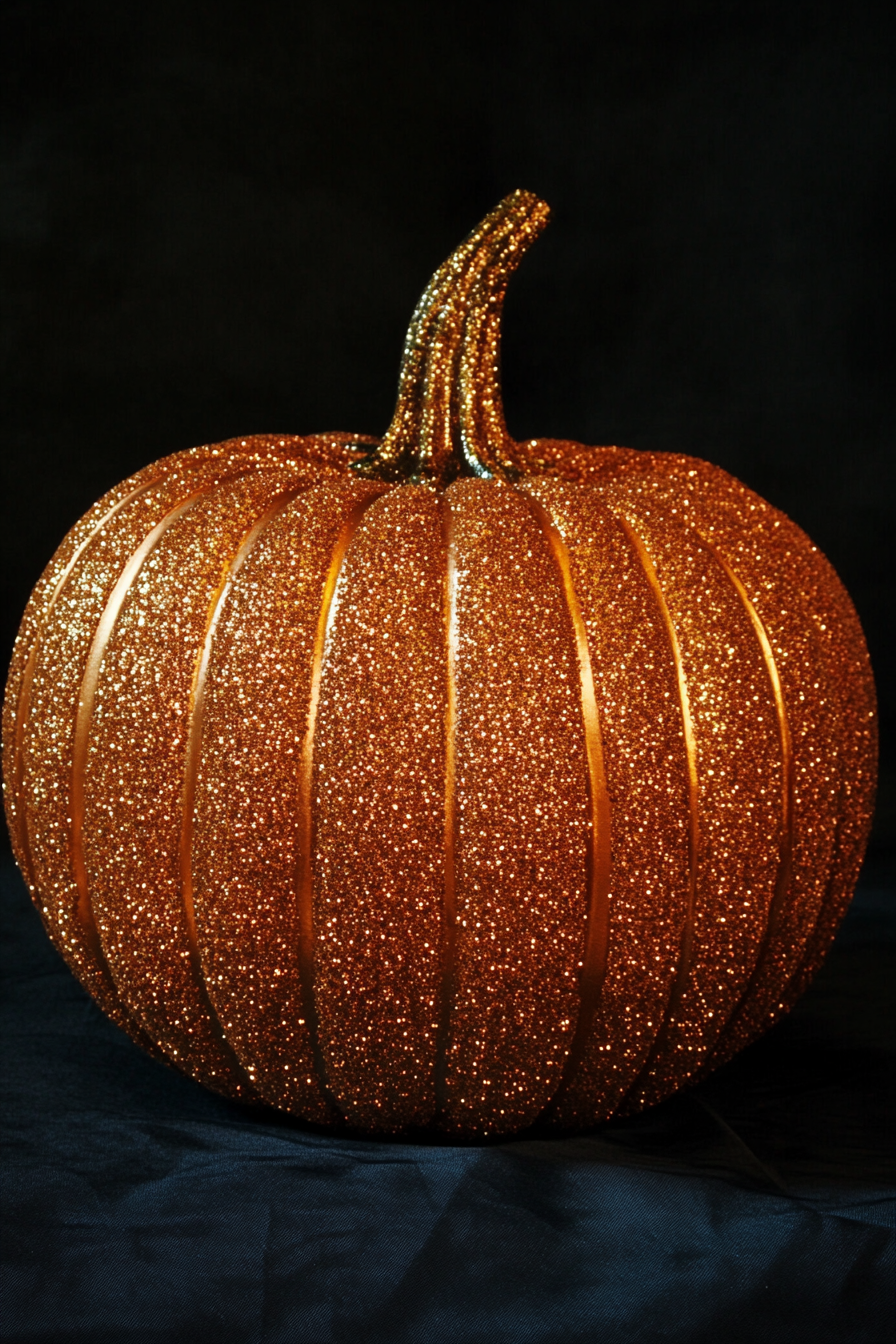
Glittered Pumpkin


For some shimmer and shine, paint your pumpkin with glitter paint or add glitter over regular acrylics.
This pumpkin makes a sparkling statement on your front porch or as a table centerpiece.
Here are two options
for creating a glittered finish:Supplies Needed:
– Pumpkin
– Acrylic paint in color(s) of your choice
– Paintbrush
– Glitter paint (optional)
– All-purpose glitter or craft glitter
– Mod Podge
Glitter Paint Option:
1.
Paint your pumpkin with glitter paint, following the manufacturer’s directions.
Apply two coats for good coverage.
2.
Let the glitter paint dry fully before displaying.
The shimmering flecks of glitter will catch the light beautifully!
Glitter Over Acrylic Option:
1.
Paint your pumpkin with 1-2 coats of acrylic paint in your color(s) of choice.
Let dry fully.
2.
Brush a layer of Mod Podge over the acrylic paint.
Adhere glitter generously over the wet glue.
3.
Let the Mod Podge dry fully, then brush on a second layer to seal in the glitter.
4.
Your pumpkin will sparkle with the added glitter!
Polka Dot Pumpkin

This playful polka dot pumpkin is a cheery way to decorate for fall.
Kids will love helping paint the dots for a fun project!
Here’s how to make your own:
Supplies Needed:
– Pumpkin
– White acrylic paint
– Paintbrushes
– 1/4 inch round stencil or circle cutter
– Orange, yellow and rust acrylic paints
Steps:
1.
Paint your pumpkin white and let dry fully.
2.
Use the round stencil or circle cutter as a guide to paint orange polka dots all over the pumpkin.
3.
Once dry, add a second layer of yellow dots around the orange dots.
4.
Finally, use the circle guide to paint rust colored dots in any open space around the other dots.
5.
Let the painted polka dot pumpkin dry completely before displaying.
So cute!
You can paint the dots freehand for a more abstract look too.
Spacing the dots close together makes a striking pattern.
Striped Pumpkin

Simple Black and White striped pumpkins look classically fall-inspired on your front steps or centerpiece.
Create bold stripes with painter’s tape.
Supplies Needed:
– Pumpkin
– Painter’s tape
– Black and white acrylic paint
– Paintbrushes
Steps:
1.
Start by painting the entire pumpkin white and letting dry.
2.
Apply strips of painter’s tape horizontally around the circumference of the pumpkin, spacing evenly apart.
3.
Paint between the tape stripes with black acrylic paint.
Remove the tape strips.
4.
Once dry, repeat the process making vertical white stripes over the black paint using the tape strips.
5.
Remove the tape to reveal crisp black and white stripes!
Customize your striped pumpkin with other paint color combinations like orange and navy or purple and green.
Etched Pumpkin

Get inspired by traditional etched glass techniques to create an elegantly etched pattern on your pumpkin’s surface.
Supplies Needed:
– Pumpkin
– Acrylic paint in contrasting colors
– Paintbrushes
– Toothpick or skewer for etching
Steps:
1.
Paint your pumpkin with a base coat of one color and let fully dry.
2.
Use a contrasting paint color to paint a pattern over the base layer – try geometric shapes, leaves, vines or silhouetted pumpkins.
Let dry.
3.
Use a toothpick to scratch away some of the top layer of paint to reveal the base color underneath.
This creates an etched look.
4.
Continue etching lines and details to build up your intricate etched pattern.
5.
Finish by outlining your etched design with contrast paint to make it pop.
Etching through paint is an easy way to create elegant designs.
Look up etching references online or create your own pattern for a custom etched pumpkin!
Decoupage Pumpkin

This fall-inspired decoupage pumpkin project uses cutouts from books, napkins, or scrapbook paper to create a collaged look.
Supplies Needed:
– Pumpkin
– Assorted paper for cutouts
– Mod Podge
– Foam brushes
– Scissors or craft knife
Steps:
1.
Cut your paper into fall shapes and designs – leaves, pumpkins, gingham prints, etc.
2.
Clean and dry your pumpkin thoroughly.
Brush a layer of Mod Podge onto an area of the pumpkin.
3.
Apply your cutouts onto the wet Mod Podge.
Press out any air bubbles with your fingers.
4.
Use foam brush to coat over the cutouts with another layer of Mod Podge to seal edges.
5.
Continue decoupaging cutouts all over the pumpkin, overlapping pieces and varying sizes.
6.
Apply a final layer of Mod Podge over the entire surface.
Let dry fully before displaying.
Try using pages from children’s books, fall-colored scrapbook paper or napkins to decoupage.
The possibilities are endless for creating your own decoupage autumn design!
Acrylic Paint Pouring

For an abstract effect, pour thinned acrylic paints over your pumpkin for a fluid, modern look.
Here are some tips:
Supplies Needed:
– Pumpkin
– Assorted acrylic paint colors
– Cups or buckets for pouring paint
– Water to thin paints
Steps:
1.
Mix acrylic paints with water in separate containers – about 2 parts paint to 1 part water.
2.
Layer the thinned paint colors in cups from lightest to darkest.
3.
Hold cups 3-4 inches above your pumpkin and pour the paints over the surface.
Layer colors.
4.
Tilt and turn the pumpkin to direct the pouring paints and encourage blending.
5.
For more fluid effects, spray pumpkin with water before pouring and between color layers.
6.
Let the acrylic pouring paint fully dry before displaying your pumpkin.
Experiment by blowing through a straw over wet poured paint to create unique patterns.
Try a gloss varnish over the dried paint for a shiny look.
Let your creativity flow!
Stenciled Pumpkin

Get intricate with your pumpkin painting by using stencils to create patterns.
Arrows, florals and geometric shapes make stunning designs.
Supplies Needed:
– Pumpkin
– Stencil(s) of your choice
– Acrylic paint in contrasting colors
– Paintbrushes
– Paint palette or plate
Steps:
1.
Place your stencil on the pumpkin and hold in position.
Use painter’s tape if needed.
2.
Use a brush or foam pouncer to apply a thin layer of paint over the stencil openings.
3.
Carefully lift stencil straight up to reveal the design.
4.
Repeat across the pumpkin with different stencil designs and color combinations.
5.
For added dimension, try layering some stencil designs on top of each other, rotating the alignment slightly.
6.
Finish by outlining or detailing if desired.
Try arrows, botanicals, lattice, harlequin diamonds or other patterns.
Stenciling with paint is more forgiving than a permanent project – if you make a mistake, just paint over it!
Dipped Pumpkin

The dipped pumpkin trend creates an ombre effect with a bright pop of color on top fading into white on the bottom.
Follow these steps:
Supplies Needed:
– Pumpkin
– Acrylic paint in your choice of vivid color – pink, orange, blue, etc.
– White acrylic paint
– Large containers for dipping
– Paintbrushes
– Gloves for dipping
Steps:
1.
Paint the bottom third of your pumpkin white and let fully dry.
2.
Fill a container larger than your pumpkin with water and mix in acrylic paint in your chosen shade.
Stir well so color is evenly dispersed.
3.
Hold the pumpkin by the stem wearing gloves and dip it upside down into the paint mixture, submerging up to the white paint line.
4.
Hold over container to let excess paint drip off.
Use a brush to smooth any drips on the surface.
5.
Let the dipped pumpkin dry fully before displaying.
6.
To enhance the ombre effect, use white paint to highlight the edges along the top color gradient.
The key is getting a defined line between the painted dip color and white bottom.
Do this freehand or use painter’s tape.
Dipped pumpkins make a vivid statement!
Chevron Striped Pumpkin
Zigzag striped chevron pumpkins are all about clever paint application using basic tools – no special brushes needed!
Supplies Needed:
– Pumpkin
– Ruler
– Pencil
– Painter’s tape
– 2 colors acrylic paint
– Paintbrushes
– Paper plate
Steps:
1.
Lightly draw chevron stripe guidelines on your pumpkin using a ruler and pencil.
2.
Place pieces of painter’s tape along the pencil line edges to create the stripe shapes.
3.
Paint the exposed chevron sections in your first color using an angled brush.
Remove tape.
4.
Repeat process using the opposite angles for your second color.
5.
Outline stripes again over dry paint.
Remove all tape.
6.
Voila!
Bold beautiful chevrons.
Make them stand out more by choosing highly contrasting paint colors like navy and white.
Chevron stripes look dynamic on pumpkins and are easier to paint than they appear!
Watercolored Pumpkin

Create a soft watercolor effect on your pumpkin using thinned acrylics and wet-on-wet blending techniques.
Supplies:
– Pumpkin
– Acrylic paints
– Water
– Paintbrushes
– Container for water
Steps:
1.
Thin your acrylic paint colors with lots of water – at least a 2:1 ratio.
They should flow easily off the brush.
2.
Wet the surface of your pumpkin completely using a clean damp brush.
3.
Load your brush with a thinned paint and apply to the wet pumpkin surface, letting colors bleed and blend.
4.
Quickly layer and mix other colors before the paint dries.
5.
Tilt the pumpkin as you paint to guide drip effects if desired.
6.
Soften edges by brushing clean water over them.
Let dry between layers.
7.
Continue layering washes of color to build up depth until you achieve your desired watercolored look.
Any areas that are too dark or muddy looking can be lightened by wetting and wiping away some color.
Varying the consistency of thinned paints will also create interesting effects.
Metallic Pumpkin

For a glam take on pumpkin decor, cover your pumpkin in metallic paint.
This gold pumpkin is perfect for Thanksgiving centerpieces and dazzles under lights.
Supplies Needed:
– Pumpkin
– Metallic gold acrylic paint
– Foam brush or wide brush for coverage
Steps:
1.
For best results, start with a smooth-skinned pumpkin variety that has good contrast with the gold paint.
2.
Cover the pumpkin completely with a layer of metallic gold paint using smooth, overlapping strokes.
3.
For full opaque coverage, apply 2-3 coats.
Let dry thoroughly between coats.
4.
Outline any ridges or textures in the pumpkin with a darker paint shade for dimensions if desired.
5.
Seal with a finish like polyurethane for shine and durability.
6.
Display your golden pumpkin prominently!
Try other metallic colors like bronze, silver or copper too.
Metallic pumpkins make stunning holiday accents and centerpieces to liven up Thanksgiving decor.
Stamped Pumpkin

For a fun, graphic look, stamp patterns and images directly onto your pumpkin.
Kids can help with this simple decorating technique.
Supplies Needed:
– Pumpkin
– Acrylic paint
– Foam brush
– Stampers – potatoes, rubber stamps, sponges, corks, etc.
Steps:
1.
Cut shapes into potatoes, sponges or corks to make custom stampers.
Collect fun shape rubber stamps.
2.
Paint your stamper with acrylic paint and test out patterns on paper.
3.
When you have your design, press the stamper gently onto your pumpkin to transfer the painted image.
4.
Repeat, rotating stamp or layering different stamps as desired.
5.
For large, solid images, load your stamper with paint and stamp directly onto the pumpkin.
6.
Let dry fully before displaying your stamped pumpkin.
Get creative making geometric stampers or carving shapes into erasers.
Stamped pumpkins are so much fun to decorate!
I hope these detailed instructions have inspired you to take pumpkin painting in creative new directions this fall!
Paint poured, glittered, metallic and stenciled pumpkins to display with pride.
Look for smooth, brightly colored pumpkins at a farmers market or pumpkin patch to use as your fall canvas.


