I still remember the first time I built floating shelves in my living room.
My hands were shaky, I doubted every measurement, and I was convinced they’d fall right off the wall.
But when I stepped back and saw those beautiful shelves holding my favorite books and plants, something clicked.
I realized that creating something with your own hands brings a kind of magic to your home that nothing store-bought ever could.
Floating shelves aren’t just storage—they’re little stages for your life’s favorite moments.
Love This Post? You’ll Love My Book!
I wasted THOUSANDS on decorating mistakes you can EASILY AVOID. ✨ My book shares every lesson I learned the hard way—so you can create a home you LOVE without the costly trial and error. 🏡
Get the Book NowThe Classic Wooden Plank Shelf for Beginners
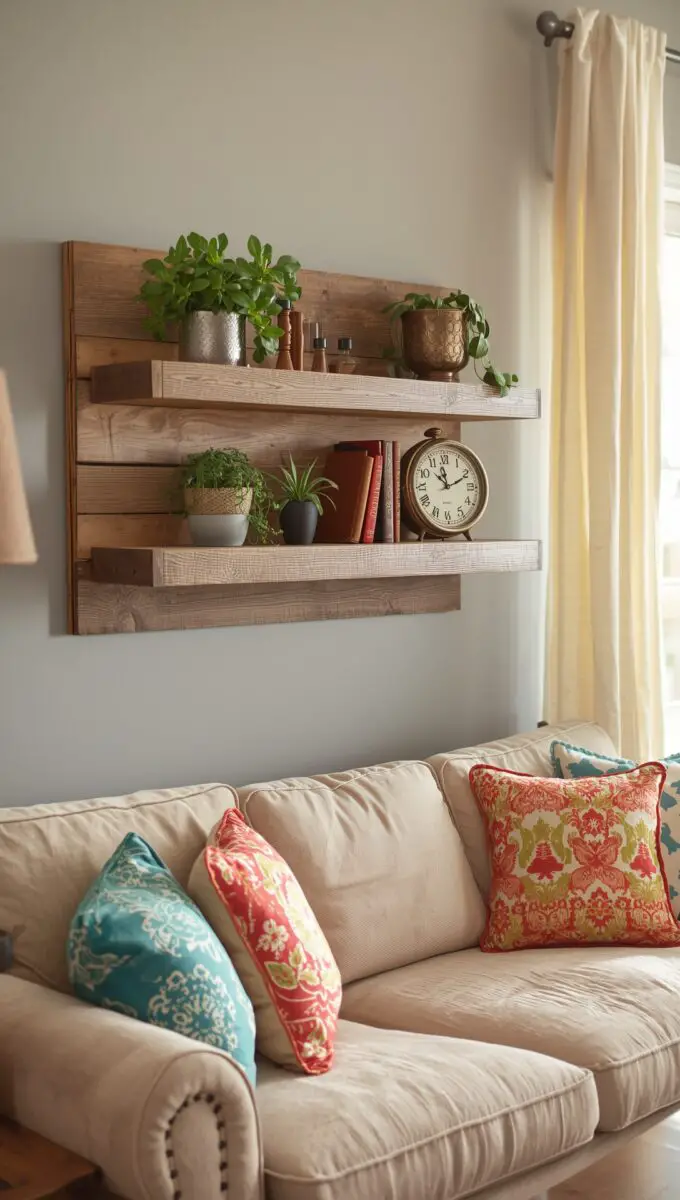

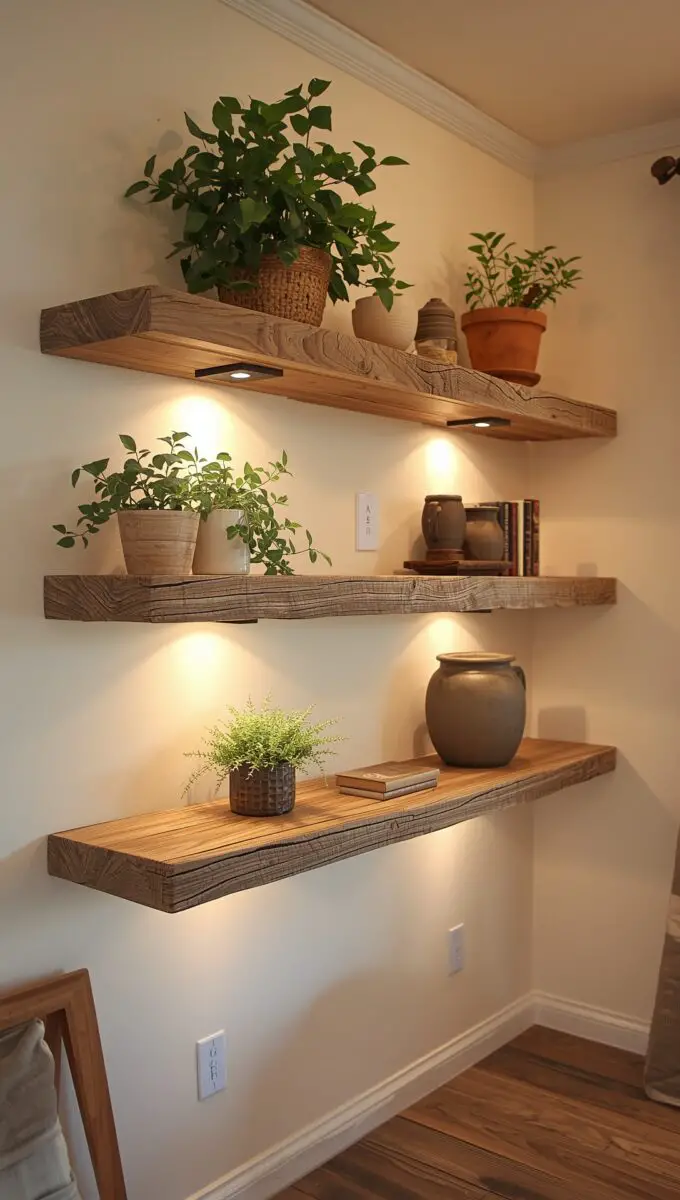
If you’ve never built anything before, this is where I’d start.
A simple wooden plank with hidden brackets is honestly all you need to create something beautiful.
I love using pine or poplar wood because they’re affordable and easy to work with.
You can find pre-cut boards at any hardware store, which saves you time and stress.
The beauty of this project is in its simplicity.
Sand the wood until it feels smooth under your fingertips, then choose a stain that makes your heart happy.
I’m obsessed with warm walnut tones, but a soft weathered gray is gorgeous too.
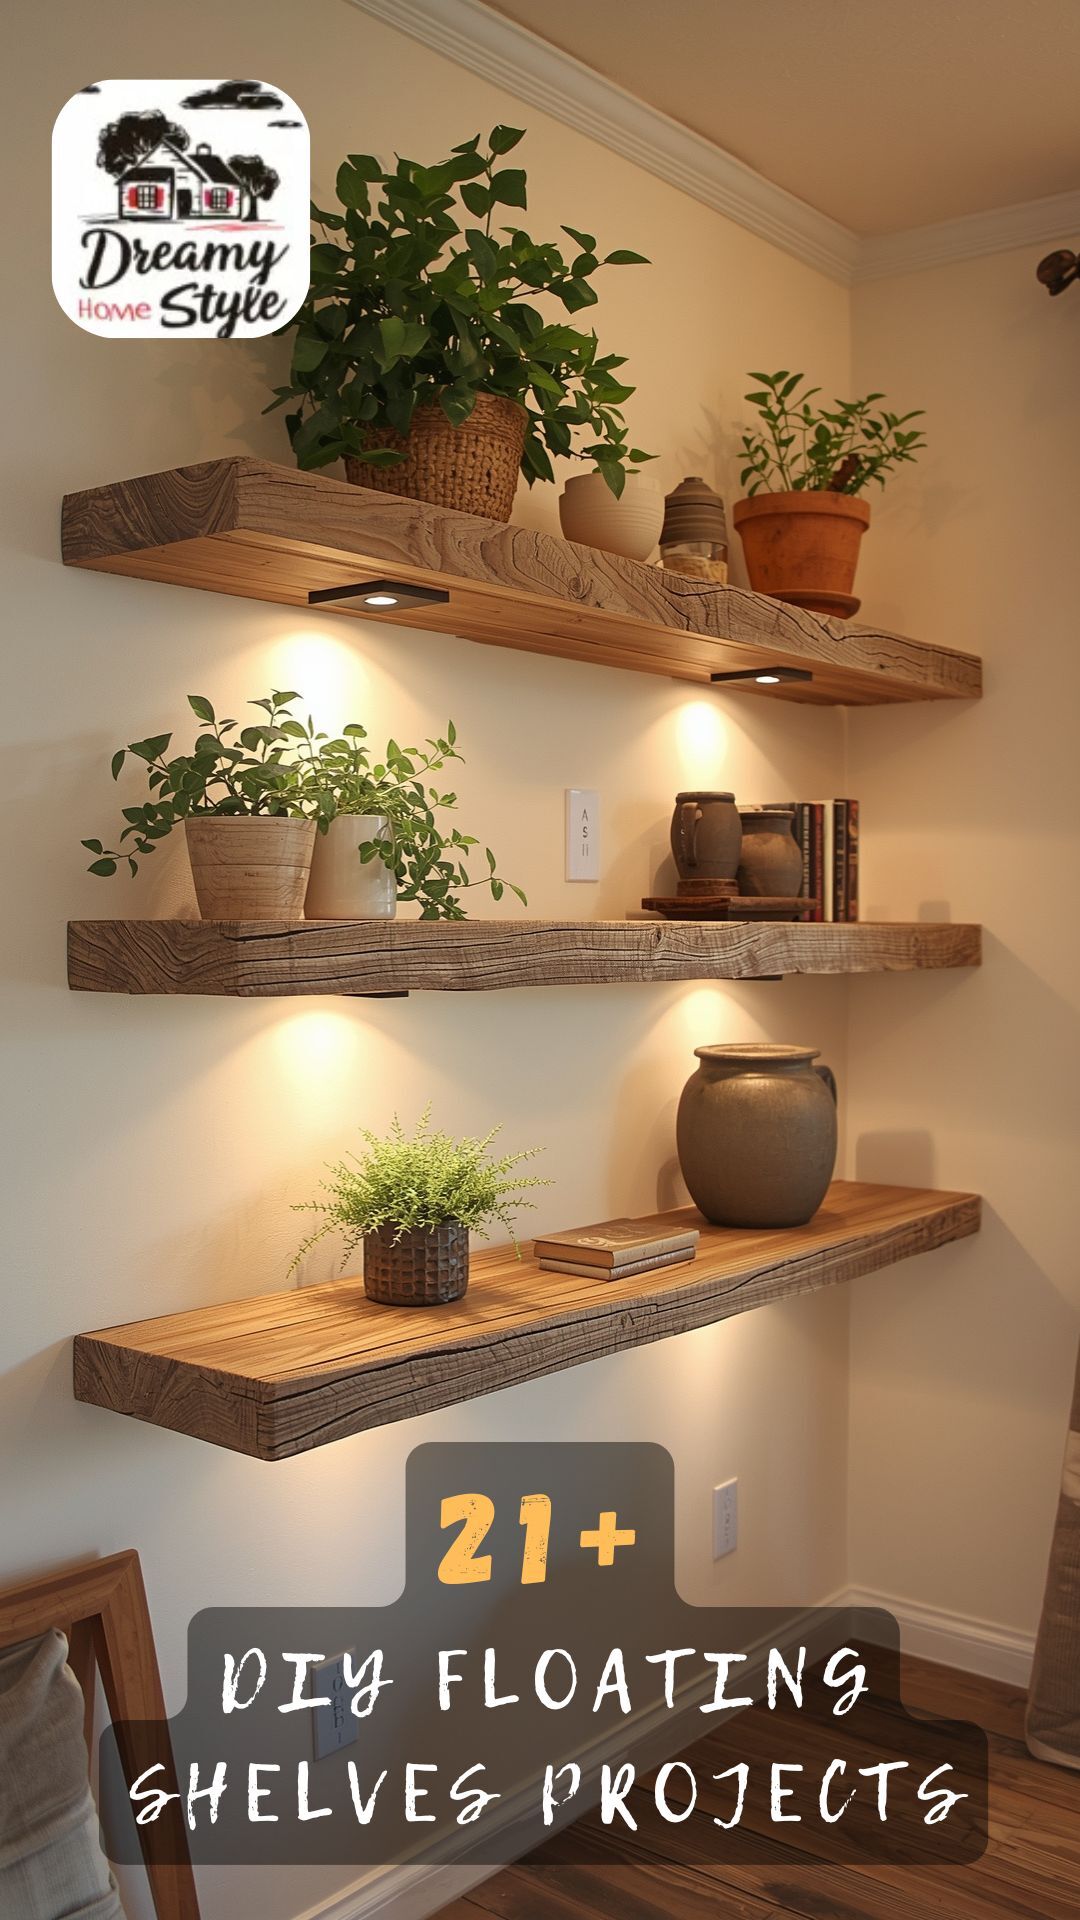
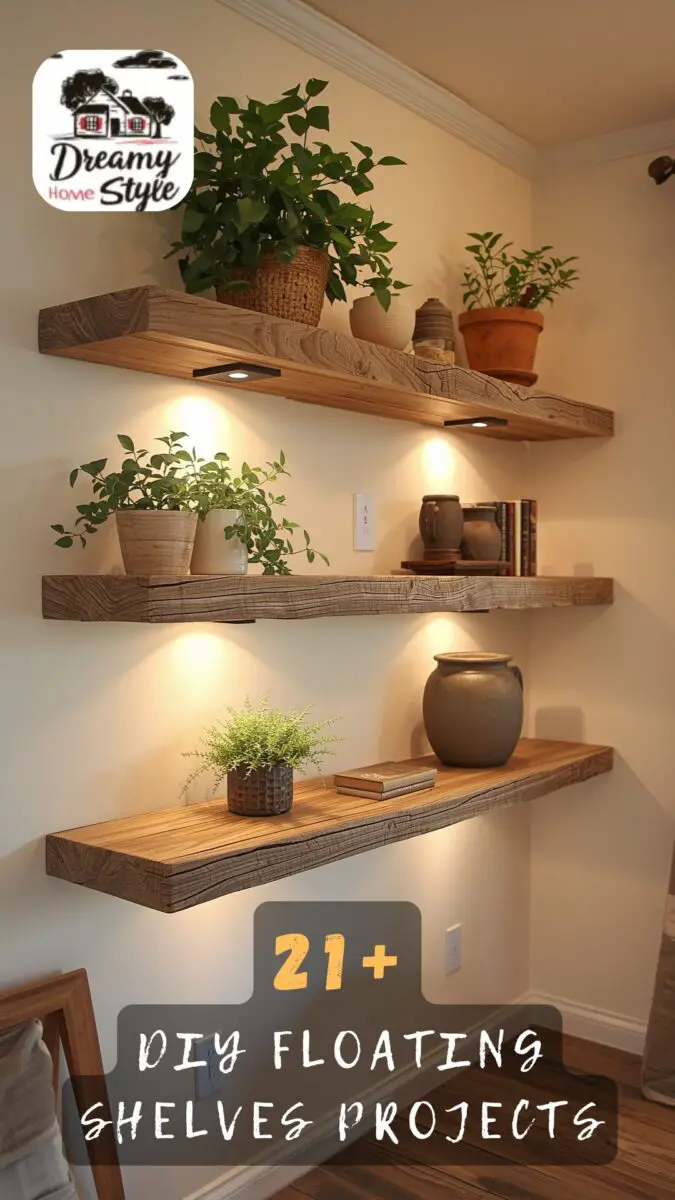
The hidden bracket system is what makes these shelves look like they’re floating magically on your wall.
You’ll mount metal brackets directly into the wall studs, then slide the hollow shelf over them.
It creates such a clean, modern look that elevates any room instantly.
Personal tip: measure three times before drilling anything.
I learned this the hard way when I had to patch holes in my wall because I rushed.
These shelves work perfectly in bathrooms for holding towels and cute jars of cotton balls.
They’re also stunning in kitchens for displaying your prettiest dishes or coffee mug collection.
The emotional payoff when you finish is incredible.
You’ll walk past your creation all day and think “I made that,” and honestly, that feeling never gets old.
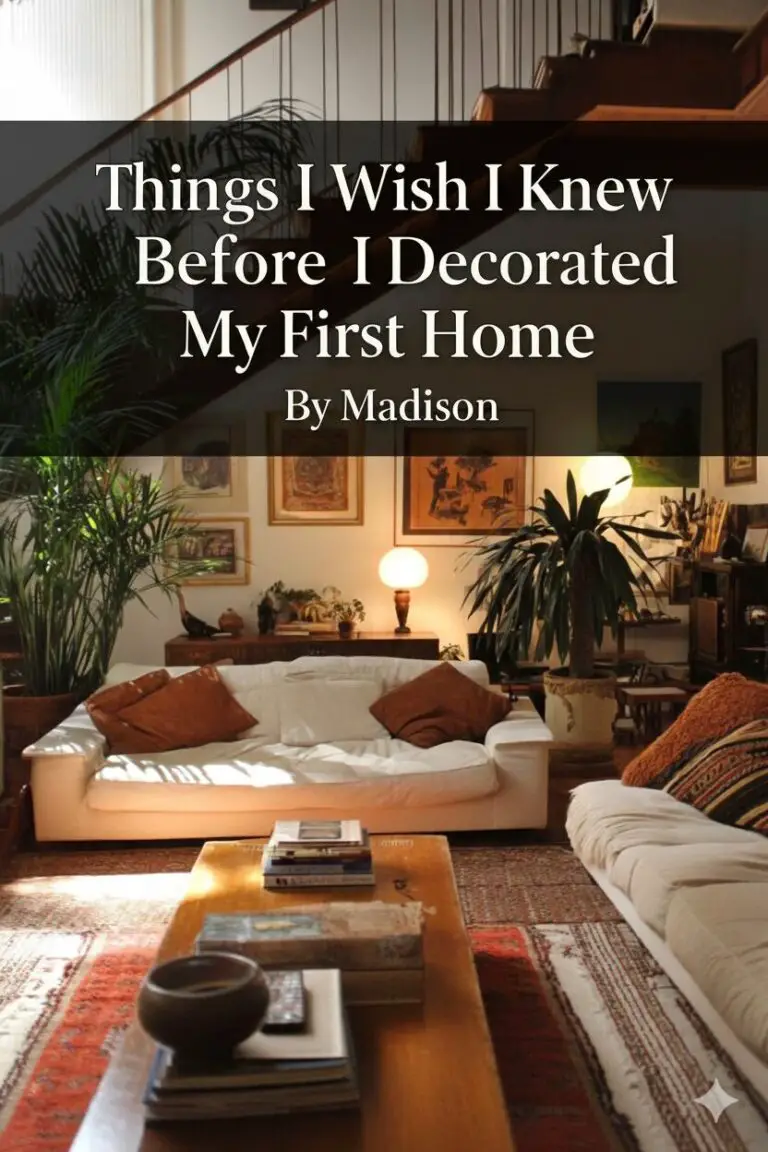
💭 I Wrote a Book About My BIGGEST Decorating Mistakes!
When I decorated my first home, I thought I knew what I was doing. Spoiler alert: I DIDN’T. 😅
💸 I bought a sofa that was WAY TOO BIG for my living room. I chose paint colors that looked amazing in the store but terrible on my walls. I spent THOUSANDS on pieces that didn’t work together. Sound familiar?
“Things I Wish I Knew Before I Decorated My First Home” is your shortcut to avoiding ALL my costly mistakes. ✨ Inside, you’ll find practical, NO-NONSENSE advice that will save you time, money, and a whole lot of decorating regret. 🏡
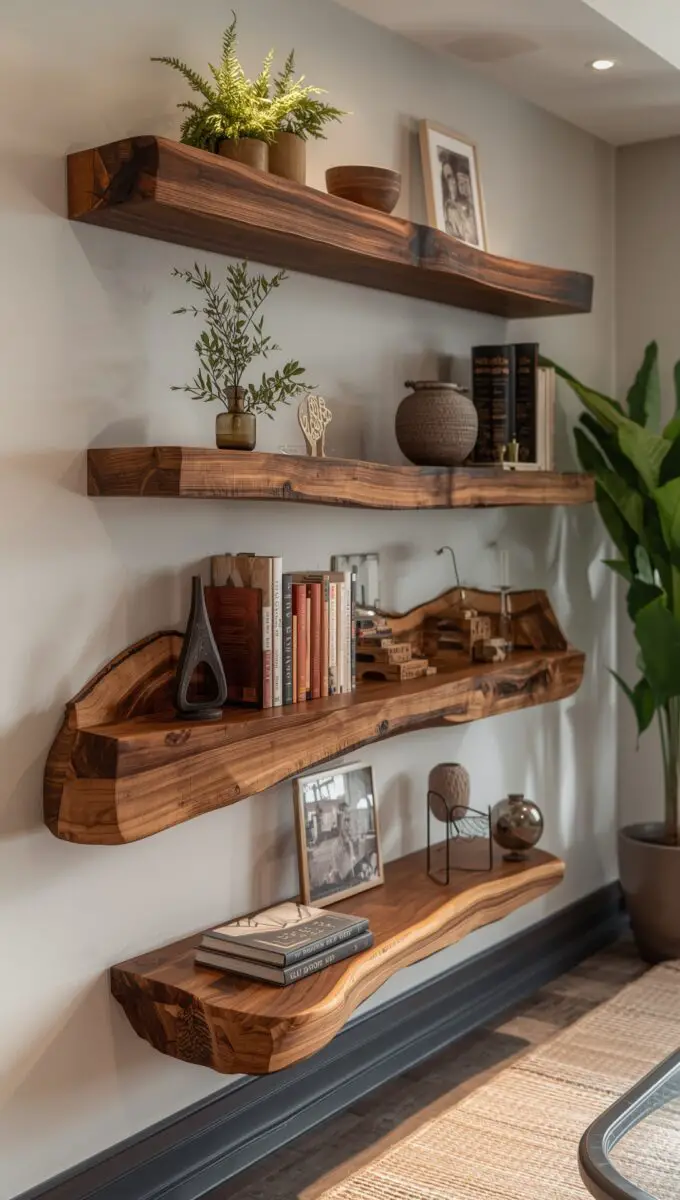
🎯 Grab Your Copy Now!Rustic Reclaimed Wood Shelves with Raw Edges
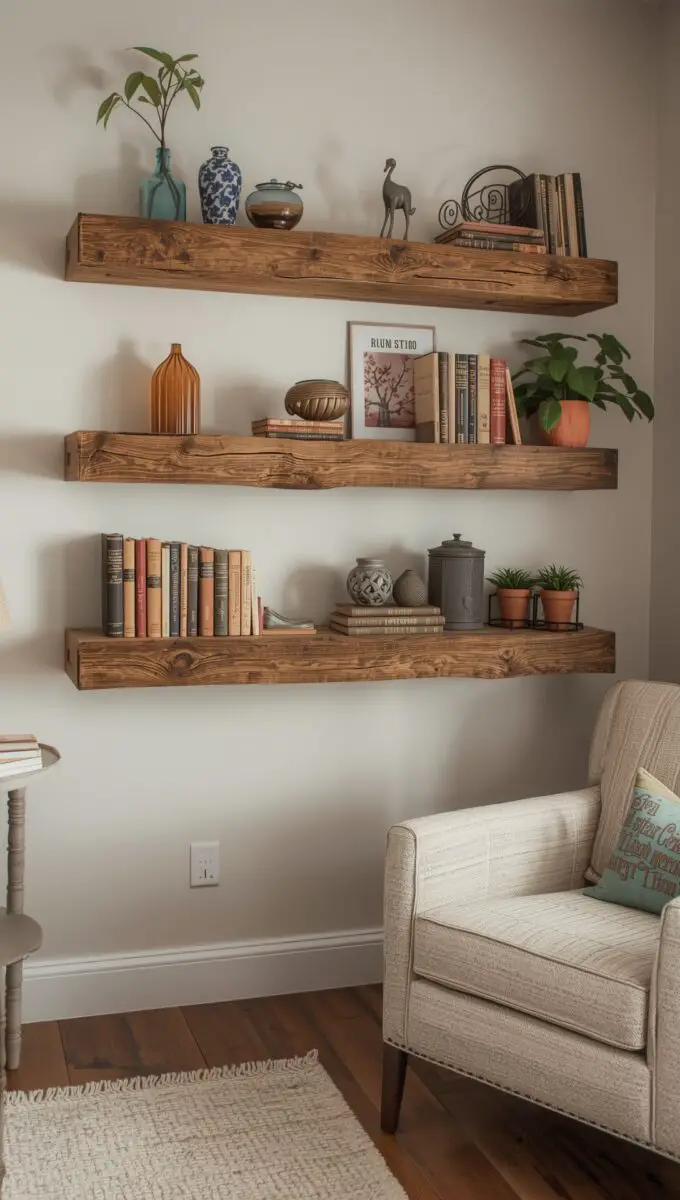
There’s something deeply grounding about bringing old wood back to life.
Reclaimed wood carries stories in every crack and imperfection.
I hunt for old barn wood at salvage yards and estate sales.
Sometimes I find weathered fence posts or pallets that people are throwing away.
The character in reclaimed wood is unmatched by anything you can buy new.
Each piece has natural color variations, nail holes, and unique grain patterns that tell a history.
You don’t need to do much prep work, which I absolutely love.
A light sanding to remove splinters is usually enough, and I skip staining completely.
The raw, natural finish is the whole point of this look.
I keep the live edges intact because those irregular borders add so much personality.
When you mount these shelves, they instantly make a space feel cozy and collected.
They work beautifully in farmhouse-style homes or even modern spaces that need warmth.
I use these in my bedroom to display vintage books and small potted succulents.
The contrast between the rough wood and delicate plants is absolutely stunning.
One hack I learned: seal the wood with a matte polyurethane to protect it without losing that authentic rustic vibe.
This keeps dust from settling into all those beautiful cracks and crevices.
The emotional impact of reclaimed wood is real.
It reminds us that beautiful things can have imperfections, and that’s honestly a message I need in my home.
Design Your Dream Room in Minutes! – By Madison
🏡 Start Creating FREE →Pipe and Wood Industrial Shelves
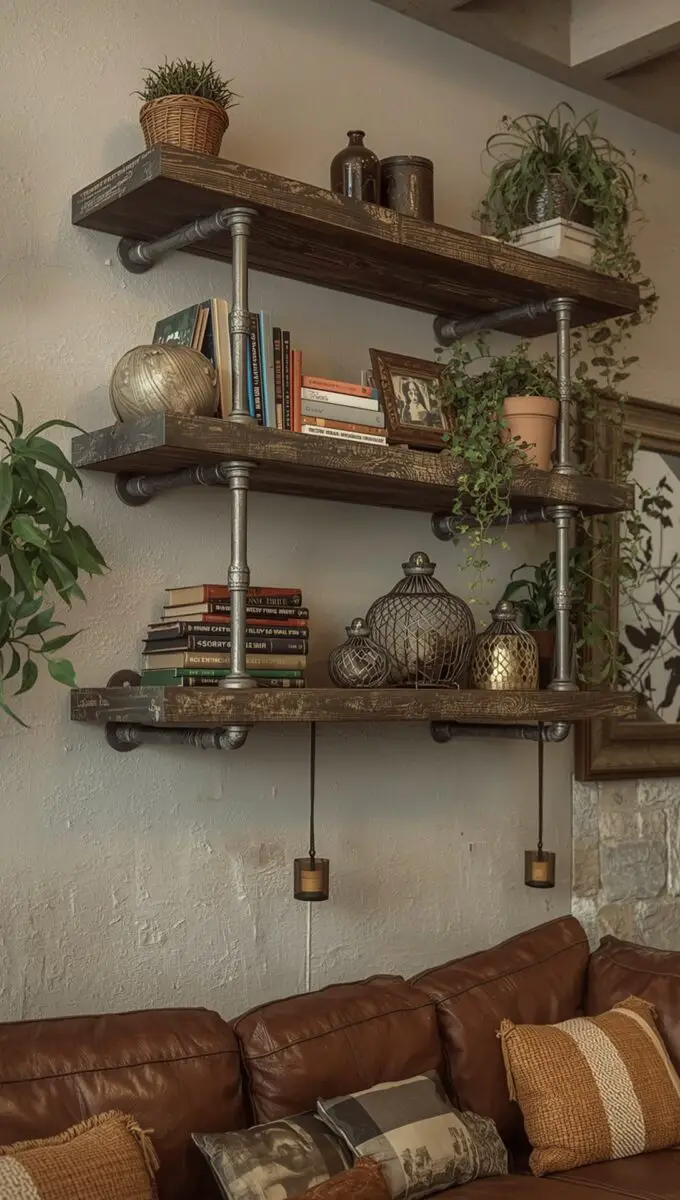
If industrial style makes your heart race, these shelves are calling your name.
The combination of raw metal pipes and solid wood creates such an edgy, urban feel.
I buy black iron pipes and fittings from the plumbing section at hardware stores.
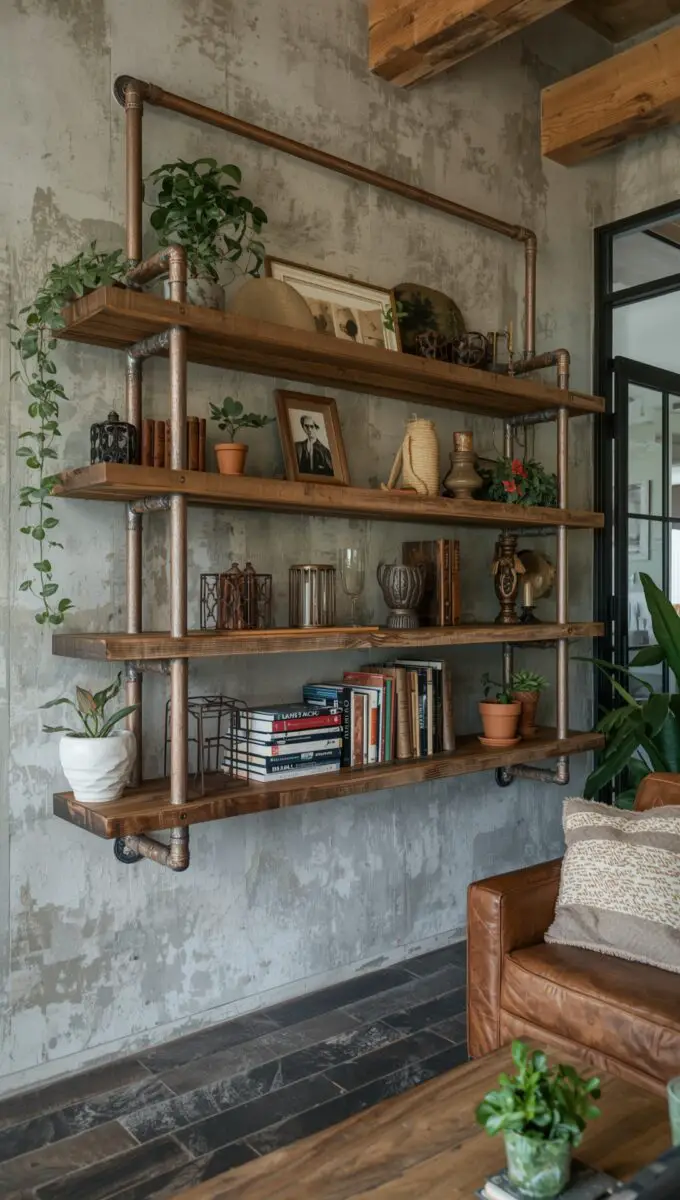
You can create custom configurations by choosing different pipe lengths and elbow joints.
The process is surprisingly straightforward and requires zero welding.
Everything screws together by hand, though I recommend using a pipe wrench for tighter connections.
I love how customizable this design is.
You can build a single shelf or create an entire wall unit with multiple levels.
The industrial aesthetic works incredibly well in home offices and man caves.
But honestly, I’ve seen these look stunning in bright, feminine spaces too when paired with soft textiles.
My personal approach is mixing warm wood tones with the cool black metal.
A rich cherry or mahogany stain against matte black pipes is absolutely gorgeous.
These shelves are super sturdy, which means you can load them up with heavy books or equipment.
I have one in my garage workspace holding power tools and paint supplies without any sagging.
Assembly tip: lay everything out on the floor first before mounting to the wall.
This lets you visualize the final look and make adjustments without creating extra wall holes.
The masculine-meets-functional vibe of these shelves brings such cool energy to a room.
They make a statement that says you’re confident and a little bit bold.
Love This Post? You’ll Love My Book!
I wasted THOUSANDS on decorating mistakes you can EASILY AVOID. ✨ My book shares every lesson I learned the hard way—so you can create a home you LOVE without the costly trial and error. 🏡
Get the Book NowCorner Floating Shelves for Awkward Spaces
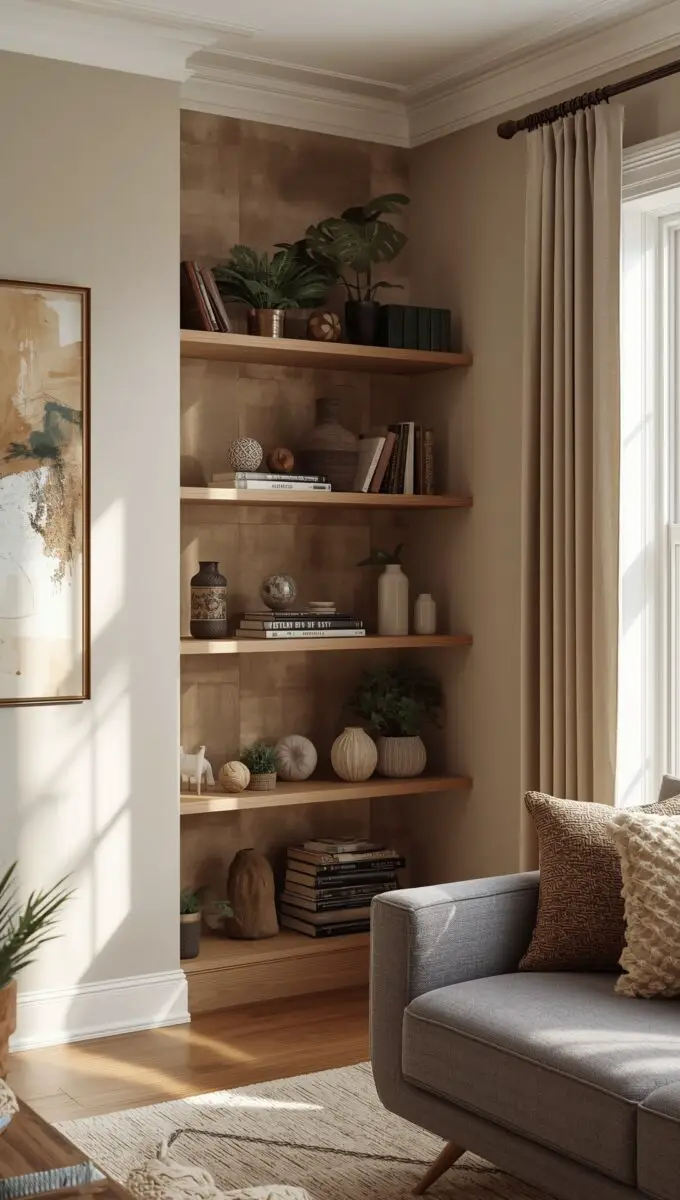
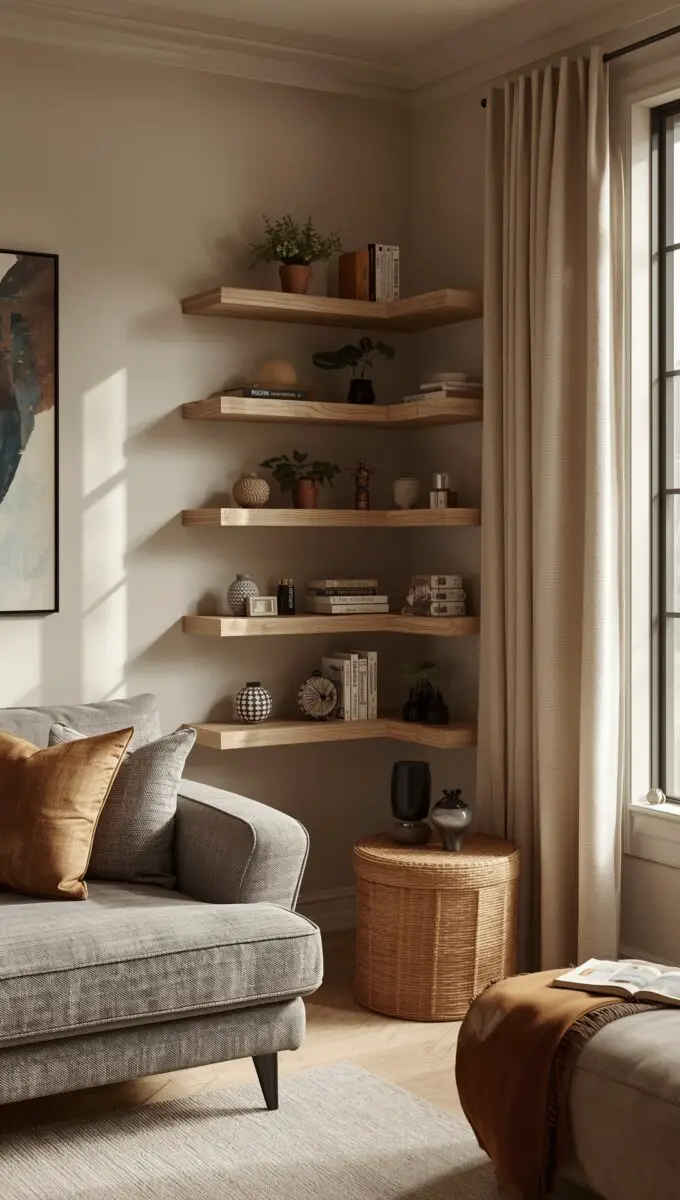
Corners are the forgotten spaces in our homes, and I’m on a mission to change that.
Corner floating shelves turn dead space into functional beauty.
I’ve installed these in every awkward corner of my house, and each time I’m amazed at the transformation.
They’re perfect for small apartments where every inch of space matters.
The triangular shape fits snugly into corners, creating display space that doesn’t protrude into the room.
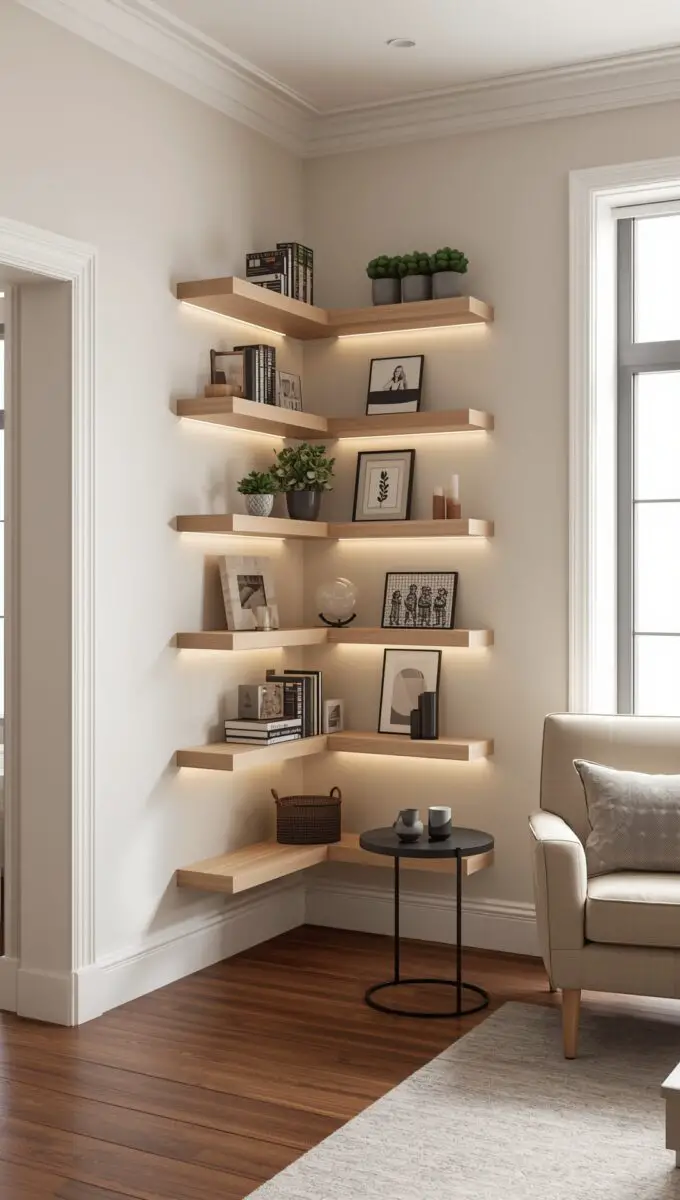
You can stack multiple corner shelves vertically for a stunning spiral effect.
My favorite placement is in the bathroom corner above the toilet.
This spot is usually wasted space, but a few corner shelves turn it into a spa-like display area.
Building these requires cutting wood at 45-degree angles, which sounds scary but isn’t bad with a miter saw.
If you don’t own a saw, most hardware stores will make these cuts for you when you purchase the wood.
I like using lighter wood for corner shelves because they already occupy visual space.
A white-painted finish or natural maple keeps things feeling airy and open.
Style them with small plants, candles, or your favorite decorative objects.
The key is not overcrowding them—these shelves work best with minimal, intentional styling.
Personal hack: install a small LED strip light underneath for ambiance.
This creates the most magical glow in corners that are usually dark and forgotten.
The emotional win here is reclaiming space you thought was useless.
It’s like finding money in your pocket—pure joy.
💭 I Wrote a Book About My BIGGEST Decorating Mistakes!
When I decorated my first home, I thought I knew what I was doing. Spoiler alert: I DIDN’T. 😅
💸 I bought a sofa that was WAY TOO BIG for my living room. I chose paint colors that looked amazing in the store but terrible on my walls. I spent THOUSANDS on pieces that didn’t work together. Sound familiar?
“Things I Wish I Knew Before I Decorated My First Home” is your shortcut to avoiding ALL my costly mistakes. ✨ Inside, you’ll find practical, NO-NONSENSE advice that will save you time, money, and a whole lot of decorating regret. 🏡
🎯 Grab Your Copy Now!Live Edge Slab Shelves for Statement Walls
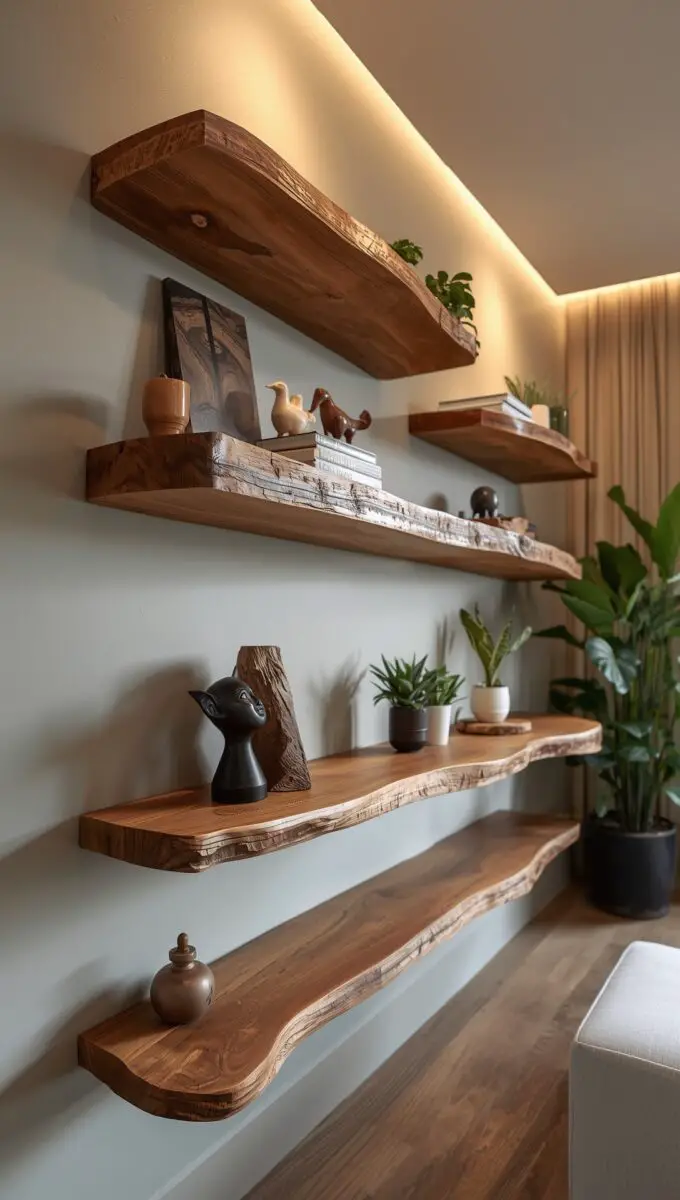
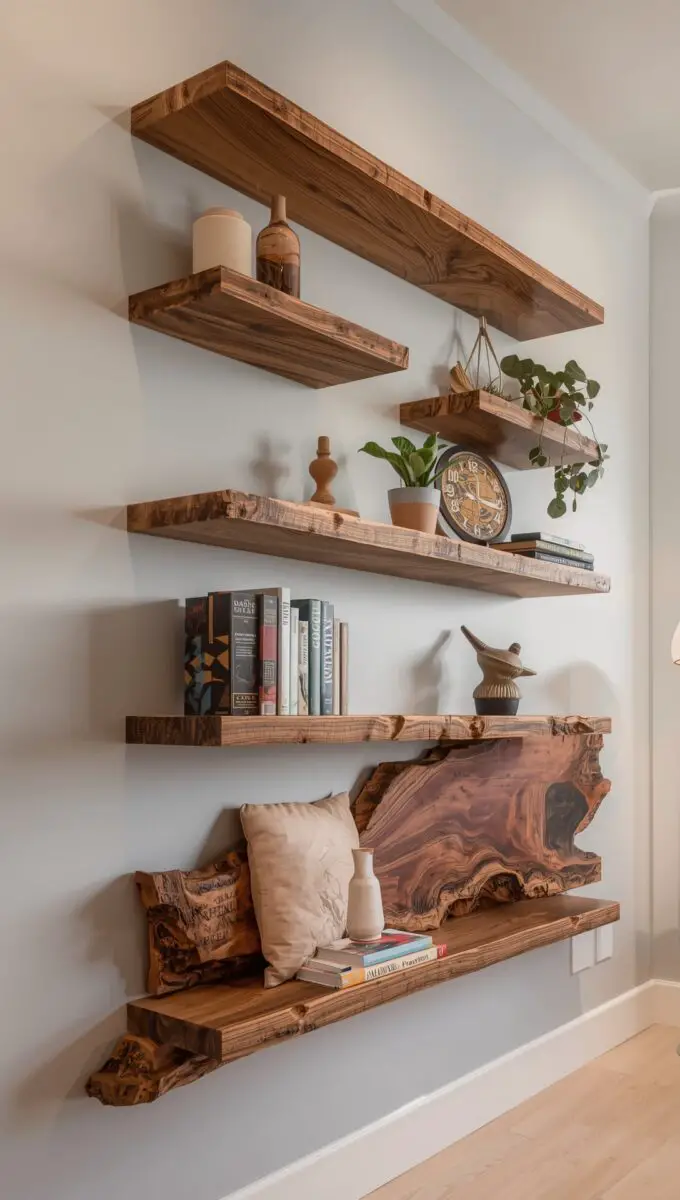
When I want to create serious drama in a room, I reach for live edge wood slabs.
These are thick cuts of wood that preserve the natural, irregular edge of the tree.
You can find live edge slabs at specialty lumber yards or online.
They’re pricier than regular boards, but one statement shelf is worth the investment.
The organic shape brings nature directly into your home in the most elegant way.
No two live edge slabs are identical, which means your shelf is truly one-of-a-kind.
I love the contrast of the rough, natural edge against the smooth, sanded top surface.
It’s wild and refined at the same time, which perfectly describes my design aesthetic.
These shelves work best as solo statement pieces rather than in groups.
One large live edge shelf above a console table or bed creates instant visual impact.
The wood is thick and heavy, so you’ll need serious wall anchors and support brackets.
I always mount these into studs because I’m paranoid about things falling off walls.
Finishing options range from clear epoxy for a glossy modern look to natural oil for earthy warmth.
I prefer tung oil because it enhances the wood grain without looking plastic.
Style these shelves with intention—they’re too beautiful to clutter.
A single sculptural vase or a few precious objects let the wood shine.
The emotional connection to live edge wood is about honoring nature.
Having a piece of a tree’s history in your home feels grounding and special.
Skinny Ledge Shelves for Art and Photos
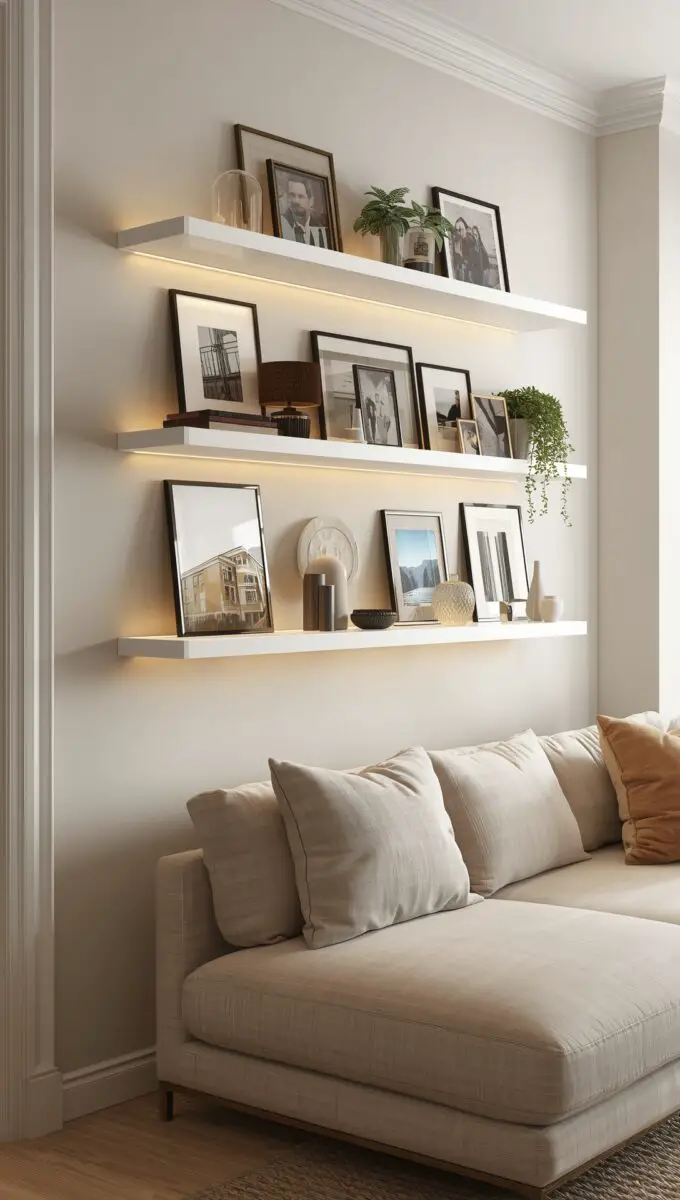
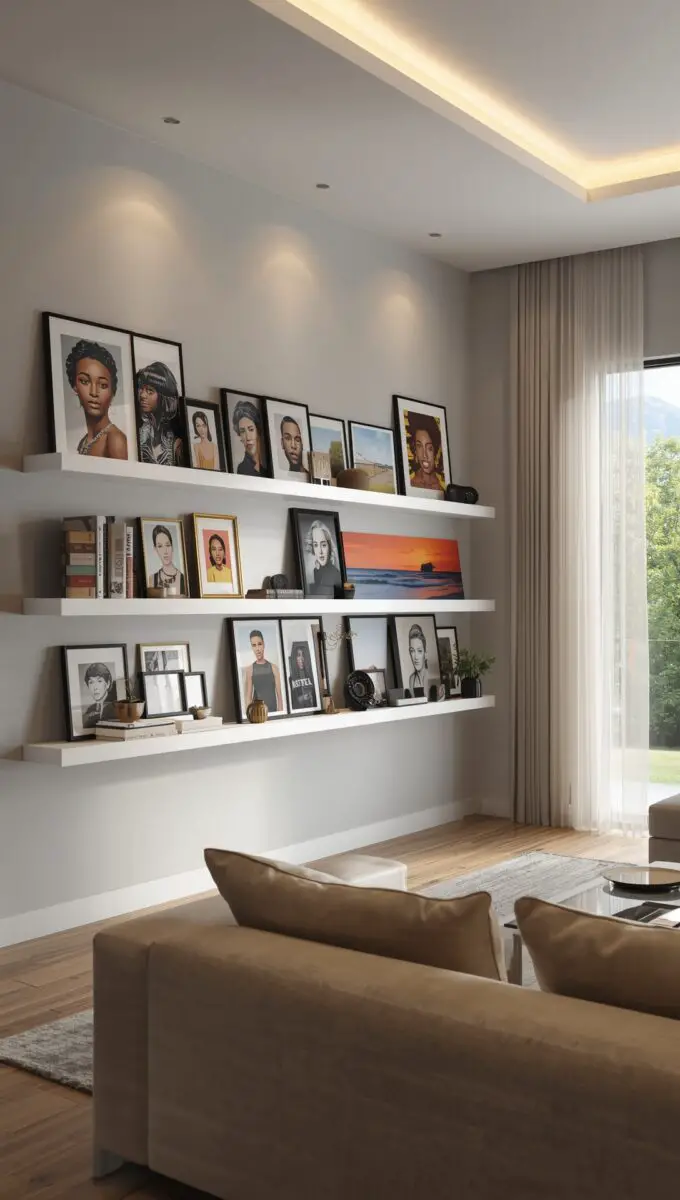
Picture ledges changed how I display art and photos in my home.
These skinny shelves have a small lip that holds frames upright without needing to hammer nails everywhere.
I build these using simple 1×2 or 1×3 boards with a small trim piece along the front.
The construction is so basic that I finished my first one in under an hour.
What I love most is the flexibility they provide.
You can swap out photos and art whenever your mood changes without creating new wall holes.
I run these ledges along hallways, above beds, and in my living room gallery wall.
The layered look of overlapping frames creates such a curated, designer feel.
Paint these shelves the same color as your wall for a seamless, built-in appearance.
Or choose a contrasting color to make the ledge itself part of the design.
The shallow depth means they don’t stick out far from the wall.
This makes them perfect for narrow hallways where deeper shelves would create obstacles.
I layer frames in different sizes on mine, propping smaller ones in front of larger ones.
Mixing in small plants or decorative objects between frames adds dimension and personality.
Pro tip: add felt pads to the bottom of frames so they don’t scratch the shelf when you’re rearranging.
This tiny detail saves your finish and makes swapping art super smooth.
The emotional benefit is that your walls become a living, changing gallery.
Your home grows with you instead of staying frozen in time.
Love This Post? You’ll Love My Book!
I wasted THOUSANDS on decorating mistakes you can EASILY AVOID. ✨ My book shares every lesson I learned the hard way—so you can create a home you LOVE without the costly trial and error. 🏡
Get the Book NowHexagon Honeycomb Shelf Clusters
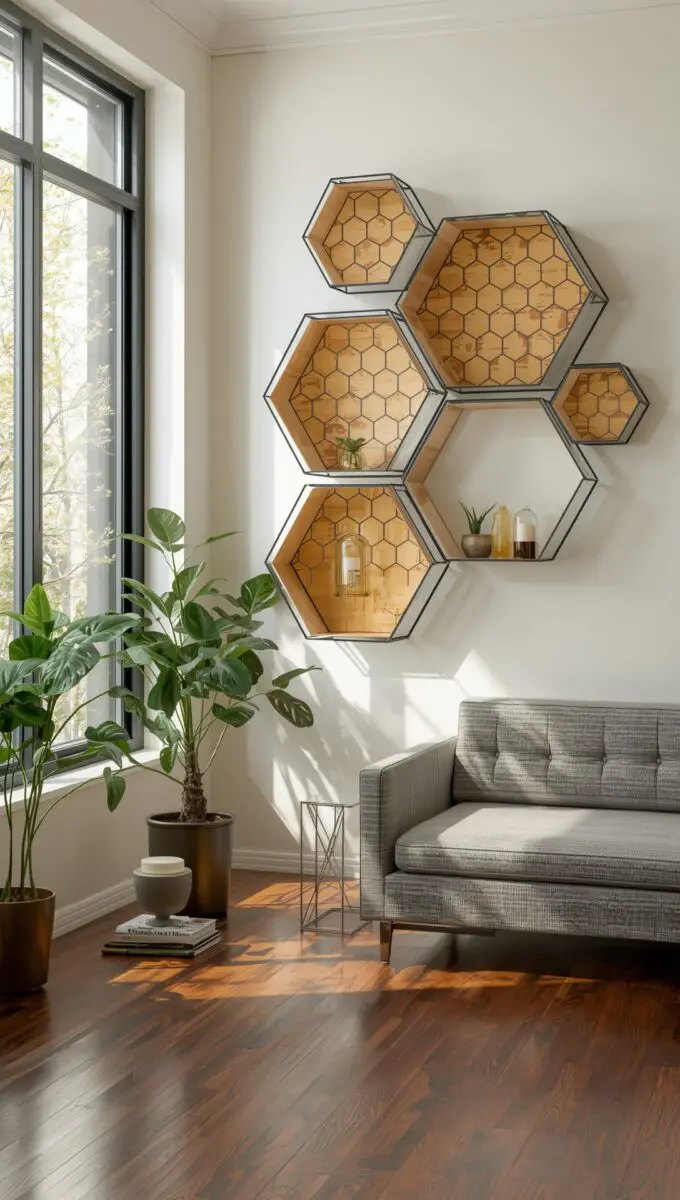
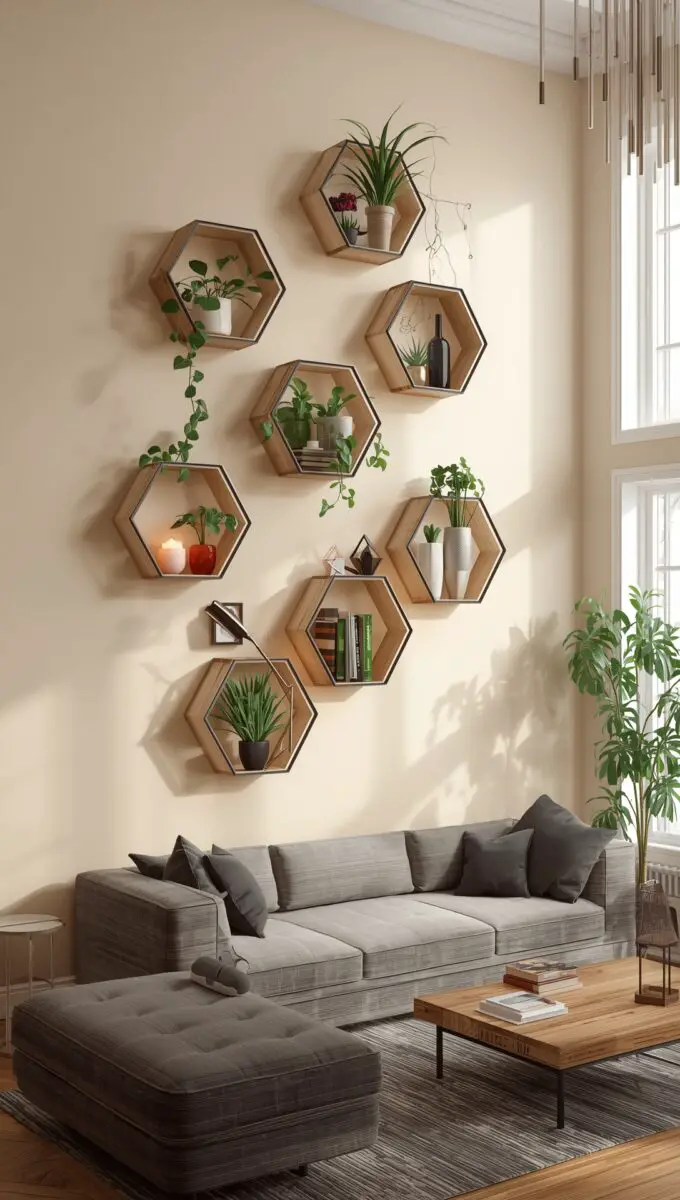
Geometric shapes bring such modern energy into spaces, and hexagons are my current obsession.
Building a cluster of hexagonal shelves creates a honeycomb pattern that’s absolutely eye-catching.
You’ll need a miter saw to cut the six 30-degree angles that form each hexagon.
It’s a bit more advanced than basic shelves, but the wow factor makes it worthwhile.
I like building different sized hexagons and arranging them in organic clusters.
Some touch at the edges while others float independently for a dynamic composition.
These shelves work beautifully in kids’ rooms, home offices, or modern living spaces.
The geometric pattern adds visual interest even when the shelves are empty.
Paint each hexagon a different color for a playful rainbow effect.
Or keep them all the same shade for a more sophisticated, cohesive look.
I use mine to display small potted plants, books turned with pages facing out, and favorite trinkets.
The compartmentalized nature of hexagons makes styling feel like a fun puzzle.
Installation requires careful planning so the overall composition feels balanced.
I lay them out on the floor first and take a photo to reference while mounting.
These shelves are conversation starters—everyone who visits asks about them.
There’s something about the geometric precision that feels fresh and creative.
Personal note: start with three hexagons before committing to a huge installation.
This lets you practice the angles and see if you love the look in your space.
Invisible Glass Shelves for Minimalists
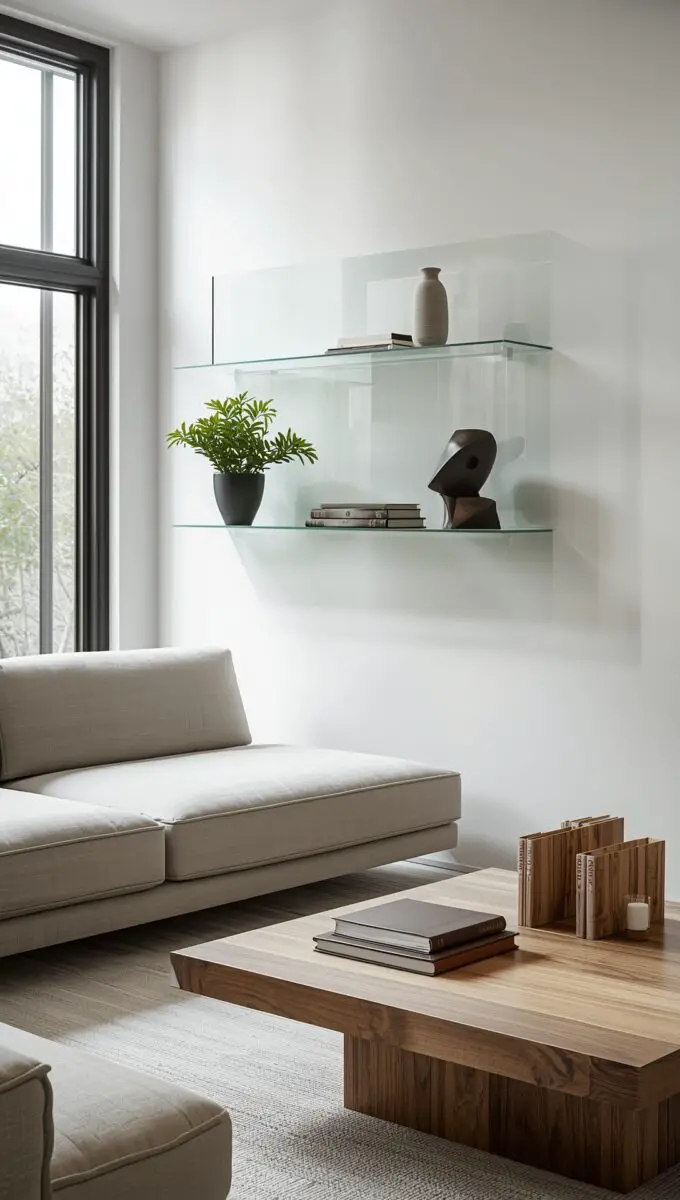
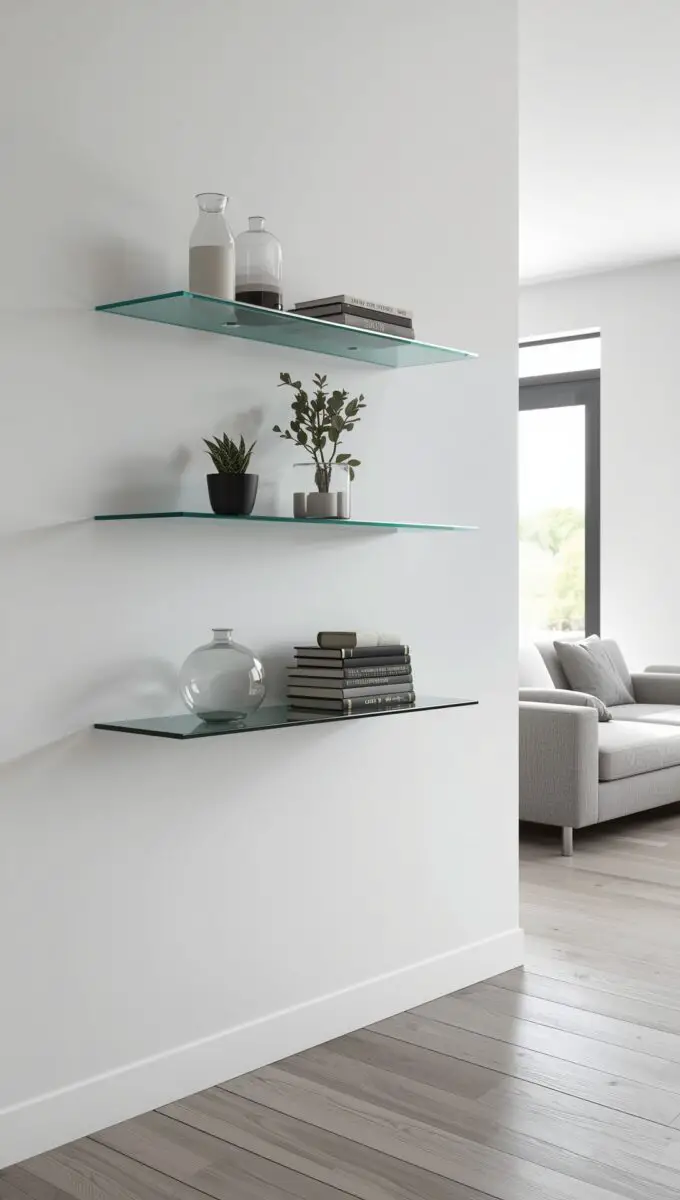
Sometimes you want storage to completely disappear, and that’s where glass shelving shines.
Thick tempered glass shelves with minimal brackets create the ultimate minimalist look.
I order custom-cut glass from local glass shops with polished edges for safety.
Going with tempered glass is essential because it’s much stronger than regular glass.
The completely transparent nature makes these perfect for small spaces.
They provide storage without adding any visual weight to the room.
I use glass shelves in bathrooms to display pretty perfume bottles and skincare products.
The light passes through everything, creating an airy, spa-like atmosphere.
Installation requires special brackets designed specifically for glass.
These usually have rubber grommets that grip the glass without cracking it.
One thing I learned: glass shows every fingerprint and dust particle.
You’ll need to commit to regular cleaning if you want them to maintain that invisible effect.
The weight limit on glass shelves is lower than wood, so these are best for lighter objects.
I display decorative items rather than heavy books or kitchen supplies.
Lighting makes a huge difference with glass shelves.
Backlighting or under-cabinet lights make the glass edges glow beautifully.
The emotional appeal is about creating breathing room in your space.
When your home feels visually quiet, your mind feels calmer too.
Rope and Wood Hanging Shelves

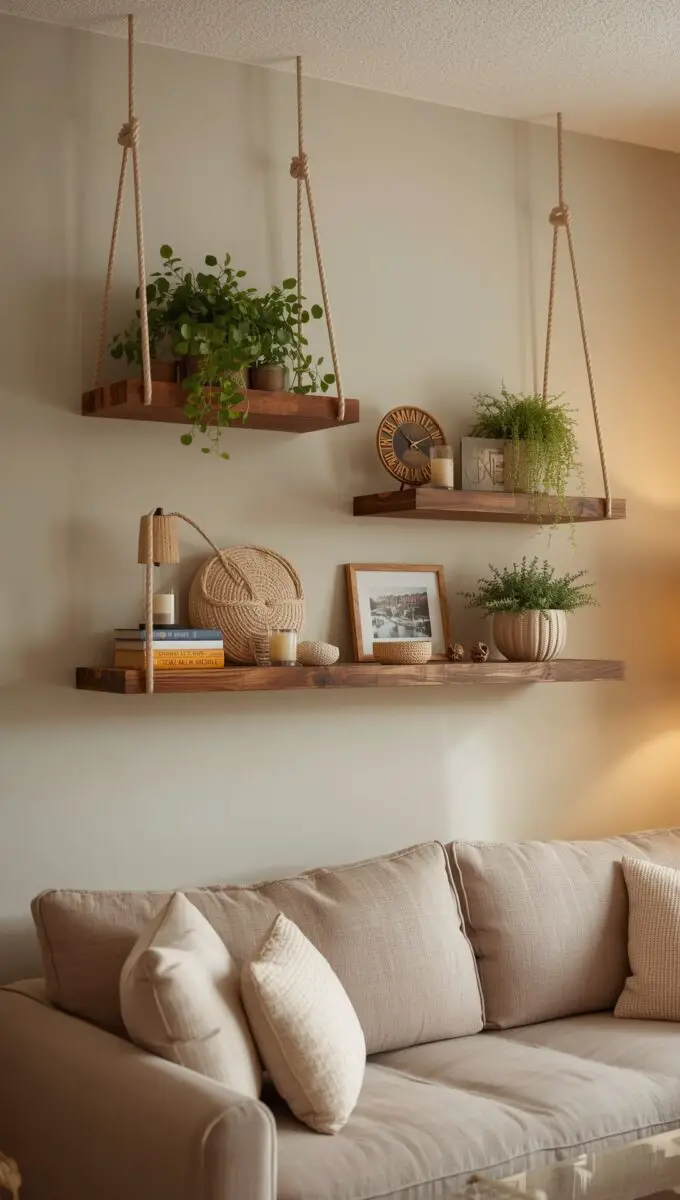
Hanging shelves suspended by rope bring such a bohemian, relaxed vibe to any room.
I’m completely charmed by how they sway slightly when you place something on them.
You’ll need thick rope—I prefer natural manila or soft cotton in neutral tones.
The rope threads through holes drilled in the corners of wooden shelf boards.
This project requires minimal wall mounting since you only need one or two ceiling hooks.
The vertical design saves wall space while creating interesting visual height.
I love these in reading nooks or next to windows where they can catch natural light.
The swaying movement feels alive, like your home is breathing.
You can create single hanging shelves or connect multiple boards vertically with rope.
I have a three-tier version in my bathroom holding rolled towels and plants.
The wood can be stained, painted, or left natural depending on your style.
I prefer lighter stains so the whole structure feels weightless and airy.
Knot-tying becomes a decorative element in this project.
I learned a few nautical knots that look intentional and beautiful rather than just functional.
These shelves work wonderfully in children’s rooms because they’re safe and playful.
There are no sharp metal brackets, and the gentle movement is soothing.
The emotional quality of hanging shelves is about adding softness to hard spaces.
They remind me of tree swings and lazy summer days.
Love This Post? You’ll Love My Book!
I wasted THOUSANDS on decorating mistakes you can EASILY AVOID. ✨ My book shares every lesson I learned the hard way—so you can create a home you LOVE without the costly trial and error. 🏡
Get the Book NowLadder Shelf with Floating Step Design
Ladder shelves lean against walls and require zero mounting, which makes my commitment-phobic heart happy.
But making them appear to float takes this concept to the next level.
I build these using two vertical support beams with shelves that attach with hidden joinery.
The shelves appear to float between the ladder sides without visible brackets.
The angled lean creates such an interesting visual line in a room.
It breaks up the vertical and horizontal dominance of walls and furniture.
These work perfectly in corners or against narrow wall spaces.
The footprint is small at the floor but provides multiple levels of storage.
I like using contrasting wood tones for the ladder sides and the shelf steps.
Dark walnut sides with light oak shelves create beautiful dimension.
The top shelf is perfect for items you don’t access frequently.
I style mine with decorative objects while keeping everyday items on the middle and lower shelves.
These ladder shelves are also portable, which I absolutely love.
When I rearrange my room or move, the shelf comes with me without leaving wall damage.
Stability comes from the angle and weight distribution rather than wall anchoring.
Make sure the lean angle isn’t too steep, or it can feel unstable.
I have one in my bedroom holding books, a small plant collection, and my favorite candles.
The open design keeps the space feeling airy instead of cramped.
Box Shelves in Staggered Patterns
Square or rectangular box shelves create such versatility in how you arrange them.
Mounting them in staggered, asymmetrical patterns turns storage into wall art.
Each box is essentially a simple five-sided cube that mounts to the wall.
I build these using basic butt joints and wood glue, making them beginner-friendly.
The fun is in the arrangement—you can create whatever pattern speaks to you.
I’ve done step patterns, random clusters, and geometric compositions that look architectural.
Different sized boxes add more visual interest than using identical cubes.
Mix small, medium, and large boxes for a dynamic, collected-over-time feel.
Paint the inside of each box a different color while keeping the outside uniform.
This creates gorgeous pops of color when you look at the wall straight-on.
I use these as both display and functional storage.
Some boxes hold books while others showcase plants, framed photos, or cherished objects.
Kids’ rooms are perfect for box shelves because each box can hold different types of toys.
The compartmentalized storage actually helps with organization and cleanup.
Installation is straightforward since each box mounts independently.
This also means you can add more boxes over time as your collection grows.
The emotional appeal is about creating order from chaos.
Everything has its own special compartment, which makes my organized heart so happy.
Floating Desk with Integrated Shelving
Combining a floating desk with shelving creates the ultimate space-saving workstation.
This project transforms a blank wall into a complete, functional office.
I build these using a long, sturdy board for the desk surface with smaller shelves mounted above.
The entire setup appears to float, creating clean lines and maximum floor space.
This design is perfect for small apartments or rooms that need to multitask.
Your office disappears into the wall rather than dominating the room with bulky furniture.
The desk portion needs serious structural support since you’ll be leaning on it.
I use heavy-duty floating shelf brackets rated for significant weight.
The integrated shelves above hold office supplies, books, and decorative items.
Everything you need is within arm’s reach without requiring a separate bookcase.
I love customizing the shelf arrangement based on what I actually use.
Taller shelves for binders, shorter ones for supplies, and narrow ledges for inspiration photos.
Paint the desk and shelves the same color as your wall for a seamless, built-in look.
Or choose a contrasting wood stain to make the workspace a focal point.
Cable management becomes easier with floating desks since you can run cords along the wall.
I use small adhesive clips to keep everything tidy and hidden.
The emotional benefit is reclaiming space in your home for creativity and productivity.
Having a dedicated workspace that doesn’t overwhelm your room feels incredibly empowering.
Love This Post? You’ll Love My Book!
I wasted THOUSANDS on decorating mistakes you can EASILY AVOID. ✨ My book shares every lesson I learned the hard way—so you can create a home you LOVE without the costly trial and error. 🏡
Get the Book NowIlluminated Shelves with Built-In LED Lighting
Adding lighting to floating shelves creates ambiance that transforms a room’s entire mood.
I’m obsessed with the soft glow that makes everything on the shelf look magical.
You can build shelves with routed channels for LED strip lights hidden underneath.
Or simply attach adhesive LED strips to the underside of existing shelves.
The warm glow highlights whatever you display while adding soft ambient lighting to the room.
This works beautifully in living rooms, bedrooms, or anywhere you want cozy atmosphere.
I use battery-operated LED strips for easier installation without dealing with electrical wiring.
The newer versions last months on a single charge and have remote controls for brightness.
Installing these in a home bar or coffee station creates such a sophisticated vibe.
Your glassware and bottles become illuminated displays that look professionally designed.
The color temperature of your LEDs matters more than you’d think.
Warm white creates cozy, intimate feelings while cool white feels modern and crisp.
I’ve also experimented with color-changing LEDs for playful, mood-based lighting.
Being able to shift from warm amber to soft blue depending on my energy is genuinely delightful.
These shelves work wonderfully as nightlights in hallways or children’s rooms.
The gentle illumination provides just enough light without being harsh or startling.
The emotional impact of lit shelves is about creating sanctuary in your home.
Soft lighting tells your nervous system that it’s time to relax and feel safe.
