Home improvement doesn’t have to break the bank or require professional help.
If you’re renting or owning, these top game-changing DIY projects will transform your space from basic to breathtaking without emptying your wallet.
Each idea is surprisingly simple but delivers maximum visual impact that’ll have your friends thinking you hired a designer.
Let’s look at these affordable transformations that’ll level up your home aesthetic instantly.
Painted Arch Accent Walls That Frame Your Space


Forget basic accent walls – curved arches are the designer secret that instantly elevates any room with architectural interest.
All you need is painter’s tape, your favorite paint color, and a piece of string to create the perfect curve.
The beauty of this project lies in its versatility – go bold with a contrasting color or subtle with a tone just slightly darker than your existing walls.
Try placing your arch behind a bed to create a built-in headboard effect that would normally cost hundreds at furniture stores.
For maximum impact, position the arch to frame a special piece of furniture or artwork, instantly drawing the eye and creating an intentional focal point.
Small spaces benefit enormously from this trick – a painted arch in a hallway or bathroom creates the illusion of higher ceilings and more square footage.
The curved shape introduces a softness that straight lines can’t achieve, bringing an organic, high-end feel to even the most basic box apartments.
Pro tip: For extra dimension, try using paint with different finishes – a matte wall with a semi-gloss arch creates subtle texture even in the same color.
The entire project costs less than $30 but delivers a custom look that appears professionally designed.
For a weekend project that delivers instant gratification, nothing beats the dramatic before-and-after of an arch accent wall that transforms a room’s entire personality.
Vintage Frame Gallery Walls With Modern Twists

Those outdated picture frames gathering dust at thrift stores are your secret weapon for creating expensive-looking wall art.
The trick is collecting frames in various sizes but painting them all one cohesive color – instant designer collection for pennies on the dollar.
White, black, or metallics work beautifully, but don’t be afraid to try unexpected hues like emerald green or navy blue for truly custom results.
Once painted, fill them with unexpected content – not just photos, but pressed leaves, vintage book pages, fabric scraps, or even empty frames arranged artfully.
Creating asymmetrical arrangements feels more organic and intentional than perfectly aligned rows, so play with different heights and spacing before committing.
For maximum impact, extend your gallery wall around corners or from wall to ceiling, creating an immersive art installation effect that looks straight out of a design magazine.
The beauty of this project is its flexibility – you can easily swap out frame contents seasonally or as your style evolves, without investing in all new art.
Most thrift stores sell frames for $1-5 each, making this entire wall transformation possible for under $50 total.
The contrast between vintage ornate frames and modern content creates that perfect tension designers are always talking about – the juxtaposition that makes spaces feel curated rather than decorated.
Your friends will never believe these gallery-worthy walls came from dusty secondhand shops and a can of spray paint.
Faux Concrete Finishes That Transform Basic Surfaces


Concrete is having a major design moment, but authentic concrete surfaces cost thousands to install professionally.
With simple DIY concrete overlay products, you can transform laminate countertops, ugly tile floors, or basic side tables into industrial-chic statement pieces.
The secret is in the application technique – using drywall trowels and sandpaper to create that perfectly imperfect texture that makes concrete so appealing.
For countertops, a thin layer of concrete overlay can completely disguise dated laminate without the massive expense and labor of replacement.
Bathroom vanities transform from builder-grade to boutique hotel with this technique, especially when paired with matte black hardware for contrast.
Even plastic plant pots become sculptural objects when given the concrete treatment – perfect for creating high-end looking indoor gardens without the designer price tag.
The subtle color variations in concrete create depth and dimension that flat surfaces lack, bringing visual interest to formerly boring spaces.
For truly custom results, experiment with adding subtle pigments to your concrete mix – warm terra cotta tones, cool grays, or even pale blues create unique finishes no one else will have.
Protection is key – after your concrete has cured, apply appropriate sealers based on the location (food-safe for kitchens, water-resistant for bathrooms).
This entire transformation runs about $100 for significant surfaces, compared to thousands for actual concrete installation, and can usually be completed in a weekend.
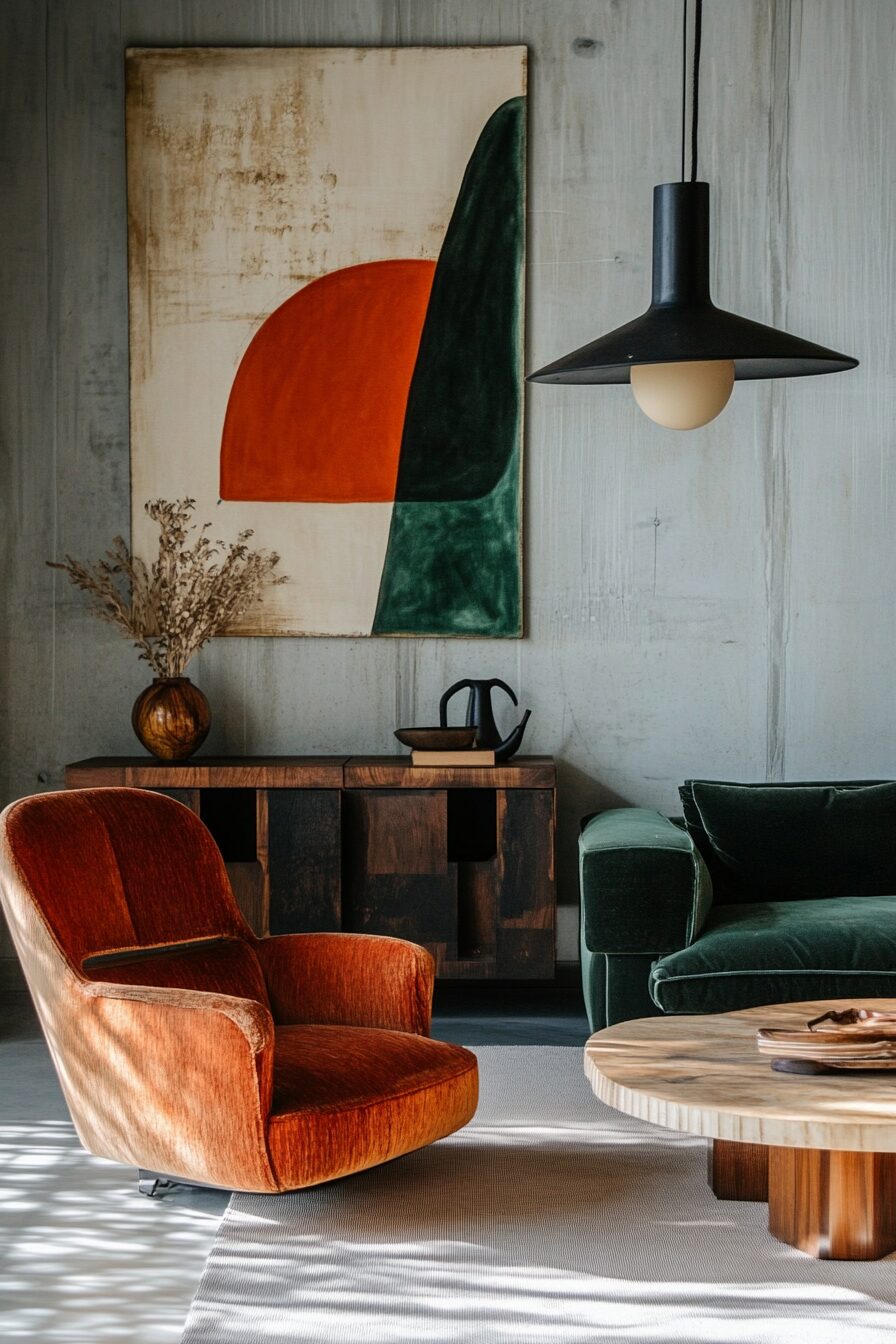
Statement Lighting From Unexpected Materials


Lighting makes or breaks a room, but designer fixtures often cost hundreds or even thousands.
The game-changing secret?
Almost anything can become a pendant light with the right electrical kit – basket, colanders, copper pipes, or even branches.
For instant visual impact, try clustering multiple simple pendants at different heights rather than investing in one expensive centerpiece fixture.
Woven pendants add texture and cast beautiful shadow patterns, but retail versions cost $200+ while DIY versions using thrifted baskets might cost $25 total.
Electrical kits with pre-wired pendants make this project surprisingly beginner-friendly – if you can screw in a lightbulb, you can make a custom light fixture.
For dining areas, suspend your DIY pendant lower than standard height (30-34 inches above the table) for an intimate, restaurant-quality atmosphere that transforms everyday meals.
Concrete lamp bases look identical to high-end designer versions but cost a fraction when made with simple forms like plastic containers or cardboard tubes.
Colored glass bottles can be transformed into stunning pendant lights that cast colored shadows when illuminated – an effect that looks like expensive art glass.
Remember scale matters – oversized lighting instantly makes spaces feel more luxurious and intentionally designed than standard-sized fixtures.
The transformation is dramatic not just visually but in atmosphere – custom lighting changes the entire mood of a space through both the fixture design and the quality of light it casts.
Luxury Wallpaper Alternative Using Paint Techniques


Designer wallpaper costs upwards of $300 per roll, but paint techniques can create identical effects for the price of sample pots and basic tools.
Terracotta texture effects are trending in high-end homes, but you can recreate the look with simple circular sponging techniques and two complementary paint colors.
For precision patterns like herringbone or geometric designs, use painter’s tape to mask off your design, then remove after painting for crisp, wallpaper-like results.
Line brushes can create hand-painted stripes that have more character and warmth than mass-produced wallpaper, especially when using slightly uneven pressure for organic variations.
The secret to realistic marble effects is in the feathering technique – dragging a dry brush through wet paint creates those distinctive veining patterns that look incredibly luxurious.
Color-washing, where you apply and partially wipe away translucent glazes, creates depth and texture that flat paint simply cannot achieve.
For dramatic impact, try painting just one accent wall with your special technique rather than an entire room – this creates a focal point while keeping the project manageable.
Custom stencils cut from contact paper allow you to create repeating patterns that perfectly match your color scheme instead of compromising with pre-made wallpaper designs.
The best part of paint versus wallpaper?
When you’re ready for a change, there’s no steaming and scraping required – just paint over it.
These techniques typically cost between $30-50 total but create effects that designers charge thousands to replicate professionally.
Furniture Transformation Through Strategic Upholstery


That basic IKEA armchair or thrift store find is just a few yards of fabric away from becoming your statement piece.
Strategic upholstery doesn’t mean completely rebuilding furniture – sometimes covering just the seat cushion in an unexpected fabric transforms the entire piece.
Vintage velvet in jewel tones instantly adds luxury to dining chairs, creating a high-end restaurant feel for your everyday meals.
For maximum impact with minimal effort, focus on reupholstering the furniture that gets the most visual attention – your sofa may be larger, but your accent chair might actually be more noticeable.
No-sew techniques using heavy-duty staple guns and fabric glue make this accessible even for those without sewing skills.
Mixing fabric textures creates designer-level interest – think leather with linen, velvet with cane, or wool with metallic threads.
Don’t overlook outdoor fabric for indoor furniture – modern performance textiles look identical to luxury fabrics but withstand pets, kids, and spills that would ruin silk or other delicate materials.
For high-impact transformation, try unexpected upholstery choices – outdoor furniture cushions in formal fabrics or dining chairs in outdoor patterns break rules in the best way.
Contrasting welting or piping (the cord-like trim along cushion edges) instantly makes DIY upholstery look professional and custom rather than homemade.
The best candidates for upholstery transformation are pieces with good bones but dated coverings – those solid wood frames with 1990s fabrics become instant focal points with updated textiles.
Faux Built-Ins Using Basic Bookcases and Crown Molding


Custom built-in shelving costs thousands from carpenters, but you can recreate the look with basic bookcases and strategic trim work.
The designer secret is connecting multiple inexpensive bookcases (IKEA BILLY is perfect) and adding crown molding and baseboards to create the appearance of expensive carpentry.
For truly built-in effects, remove the baseboards from your wall before installation, then add new ones across the front of your bookcases for seamless integration.
Backing your shelves with beadboard, textured wallpaper, or even painted plywood adds depth and custom detailing that basic bookcases lack.
Adding picture lights or puck lights to the tops of shelves creates that library ambiance that makes built-ins feel luxurious and intentional.
For maximum impact, paint your DIY built-ins a color different from your walls – deep navy, forest green, or even black creates dramatic focal points that draw the eye.
The transformative power comes from extending the bookcases all the way to the ceiling – that floor-to-ceiling effect is what separates basic furniture from architectural features.
Strategic shelf styling is equally important – leave at least 30% empty space rather than packing shelves full, and vary horizontal and vertical arrangements for designer-worthy displays.
For under $300 total (compared to $3000+ for custom carpentry), this transformation not only looks expensive but adds significant storage and visual interest to basic rooms.
The ultimate hack?
Adding cabinet doors to the bottom portions creates the look of custom cabinetry while hiding less attractive items like board games or office supplies.
Faux Architectural Details From Basic Molding


Older homes come with character-rich architectural details, but newer constructions often lack these distinctive features.
Creating faux wainscoting using simple picture frame molding and paint transforms flat, boring walls into textured, historic-looking surfaces.
The trick to convincing architectural illusions is in the preparation – measuring precisely and creating paper templates ensures your molding creates perfectly symmetrical patterns.
For maximum impact with minimal cost, focus these details in smaller spaces where they’ll make dramatic differences – powder rooms, entryways, or dining areas.
Applying molding in geometric patterns then painting everything one color creates subtle, textured walls that look like custom plasterwork in historic mansions.
Basic quarter-round molding costs less than $1 per foot but creates dramatic shadow lines that give walls dimensional character.
For truly high-end effects, layer different molding profiles – combining thin picture rail with wider chair rail creates the intricate detailing found in expensive homes.
The most convincing installations extend these details to unexpected places – carrying wainscoting up staircases or around corners rather than stopping abruptly.
Paint is your secret weapon – applying semi-gloss paint to moldings while keeping walls matte enhances the three-dimensional effect through subtle light reflection differences.
This entire transformation typically costs $100-200 for an average room but increases perceived home value significantly more than the investment.
Custom Textile Statements Beyond Basic Throw Pillows


Designer pillows often cost $100+ each, but creating your own textile collection transforms rooms for a fraction of that price.
The secret to professional-looking textile projects is selecting fabrics that coordinate without matching exactly – think complementary colors and varied textures rather than identical patterns.
Overdyed vintage rugs create stunning wall hangings that add texture and acoustic benefits – simply mount them on wooden dowels for instant tapestries that would cost hundreds retail.
No-sew fabric tricks include using hem tape on curtains and table runners, creating custom lengths without sewing machines or special skills.
For maximum impact with minimal effort, focus on oversized pieces – extra-large floor pillows, dramatic floor-to-ceiling curtains, or tablecloths that puddle generously on the floor.
Vintage scarves framed as art create textile moments that feel collected and personal rather than mass-produced.
Layering textiles creates dimensional interest – tablecloths under table runners, multiple throw blankets with varied textures, or cushions with contrasting piping.
Fabric dye transforms basic white linens into custom colors that perfectly match your scheme – especially effective with natural fibers like cotton or linen.
For truly personalized textiles, try block printing with carved potatoes or linoleum blocks – creating patterns that literally cannot be purchased anywhere.
The tactile quality of textiles affects how spaces feel emotionally – increasing comfort through layered fabrics makes rooms more inviting than any furniture upgrade could.
Strategic Mirror Placement That Doubles Visual Space


Designers charge consultation fees to reveal this simple truth: strategically placed mirrors create the illusion of doubled square footage.
The game-changing placement isn’t just on walls – try leaning oversized mirrors behind furniture, laying mirror tiles on trays, or creating mirrored backsplashes for space-expanding effects.
For maximum impact, position mirrors to reflect light sources or windows, effectively doubling the natural light in darker spaces.
Creating grid patterns with multiple identical mirrors costs far less than one large mirror but creates more dramatic visual impact through repetition.
Thrift stores and flea markets offer vintage mirrors at fraction of retail prices – and the ornate frames add character that new mirrors often lack.
For truly unique statements, try tinting plain mirrors with mirror antiquing solution – creating smoky, aged effects that look like expensive heirloom pieces.
Mirrored furniture pieces reflect light from all angles, making them space-expanding powerhouses in small rooms or dark corners.
Don’t overlook unexpected mirror locations – ceiling medallions, inside bookcase backs, or floor-level reflections all create unique spatial effects.
The transformative power works best when mirrors reflect something worth seeing – position them to capture your best decorative moments rather than blank walls.
This entire transformation can cost under $100 but creates thousands of dollars worth of perceived space expansion – the ultimate bang-for-buck upgrade in smaller homes.
The beauty of DIY home upgrades is the personal satisfaction that comes from creating custom spaces that perfectly reflect your style.
Start with just one project that speaks to your biggest pain point – that dated kitchen, boring bedroom wall, or uninspiring entryway.
Remember that the most impressive transformations often come from the simplest techniques applied consistently and with attention to detail.
Your home deserves to feel as special and unique as you are – so grab those supplies and start transforming your space into the designer showcase you’ve always wanted.


