dding a room divider is a great way to section off different zones in an open concept home or apartment.
Room dividers can help delineate spaces for sleeping, working, dining, etc without building permanent walls.
They are also an inexpensive option compared to major construction projects.
These projects use common household items like bed sheets, shower curtains, and cardboard in innovative ways.
With a little bit of handiwork, you can craft beautiful dividers that add personality to your home.
Fabric Hanging Room Divider

One of the easiest DIY room dividers is a hanging fabric screen.
This can be made using a wooden dowel or curtain rod and some fabric.
For an eclectic look, you can use mismatched scarves, tablecloths, or tapestries.
Or opt for a coordinated fabric that matches your room’s decor.
Gather your preferred fabric and cut it down to the size you want your divider to be.
Make sure to leave a few extra inches on the top and bottom to accommodate the dowel and hem.
Use hot glue, fabric glue or fabric tape to adhere the fabric to the dowel ends.
For the bottom, you can leave the edge raw or fold it over and stitch a hem.
Hang the dowel using heavy duty Command strips or hooks.
For wider dividers, use two dowels and hang fabric in between to create a billowy, layered effect.
Place your hanging divider in a doorway or across a room to delineate different zones.
The great thing about fabric dividers is you can change them out whenever you want to match your mood or decor.
Replace summery prints with cozy flannels in winter for seasonal appeal.
This is one of the simplest DIY room dividers, but it makes a big impact!
Tap to Explore These Beauties
See my ideas in action 👇 Tap any image to explore full details.
Beaded Curtain Room Divider

For a divider with a bit of sparkle and texture, create your own beaded curtain.
While these look fancy, they are surprisingly easy to make.
You just need string, beads, and two dowels.
Select bead colors and styles that go with your existing decor.
Opt for all one color or mix and match for an eclectic style.
Wooden beads can add warmth while glass crystal beads make more of a statement.
Include dangling beads for extra dimension.
Cut a piece of string about two feet longer than you want your finished curtain to be.
Leave extra length on each end to tie the dowels.
String on your beads in any pattern you desire.
Once finished stringing, tie each end of the string securely around the two dowels.
Hang your beaded curtain in a doorway using Command strips or decorative hooks.
The beads will add visual interest and make a beautiful sound when walked through.
This easy DIY room divider is sure to impress!
Hula Hoop Curtain Divider

For a divider that is fun and functional, turn a hula hoop into a hanging curtain.
All you need is a hula hoop, shower curtain, and some shower curtain rings.
Cut your plastic or fabric shower curtain to about 12 inches longer than the diameter of your hula hoop.
Along the top edge, sew or glue the shower curtain rings at evenly spaced intervals.
Slide the curtain onto the hula hoop through the rings.
Then use Command hooks to hang the hula hoop vertically.
The shower curtain will drape nicely within the hoop to create a pretty circular hanging divider.
The hula hoop curtain can divide a room or serve as a partition within a bathroom.
Choose a shower curtain that complements your space or make your own patterned curtain for a unique look.
This rotates easily so you can pull it open or closed whenever you wish.
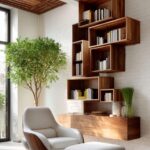
Shelf Room Divider

If you want your room divider to also double as storage space, install floating shelves.
You can buy ready-made floating shelves or make DIY floating shelves with brackets.
Place them in a row to divide a room, using the shelves in lieu of a vertical screen.
For irregularly shaped rooms, shelves can be staggered at different heights and widths to fit the space.
Mix in decor items, plants, baskets, or books between each shelf.
The divider will end up looking like an organized bookshelf built right into the room!
Make sure the shelves are very securely mounted to the wall, as they will be bearing weight.
Shelves should be mounted into wall studs whenever possible.
If you have high ceilings, tall ladder-style shelving units work as an eye-catching room divider.
Just be sure the shelves are sturdy and tip-proof.
The benefit of a shelf divider is the shelves provide tons of display space.
This is ideal for small homes without a lot of storage.
Use shelves to replace a bulky cabinet or to hide clutter.

Find Your Room’s Color Palette
Tap a vibe — get a curated 5-color palette with hex codes you can copy ✨
💭 I Wrote a Book About My Biggest Decorating Mistakes!
When I decorated my first home, I thought I knew what I was doing. Spoiler: I didn’t. 😅
💸 I bought a sofa way too big for my living room. Paint colors that looked amazing in the store but terrible on my walls.
Room Divider Screen


Three or four-panel divider screens make classic and elegant room dividers.
They have an Asian-inspired minimalist style that works in any decor.
You can buy ready-made folding screens, but they are also easy to DIY for a fraction of the cost.
To make your own divider screen, construct a simple wood frame using 1×2 boards.
Staple fabric or wallpaper over each frame.
For the stabilizing legs in back, attach hinges or removable caster wheels for a movable divider.
Add as many panels as you need to achieve your desired divider width.
Consider using wallpaper remnants on the screen to match other patterns in the room.
Or go bold with a floral print or abstract design.
For a more modern look, wrap the panels in rice paper, faux leather, or perforated metal sheeting.
Position the screen perpendicular to the wall or diagonally across a corner to carve out separate spaces.
The simple yet striking silhouette makes an impressive room divider for a refined, polished look.
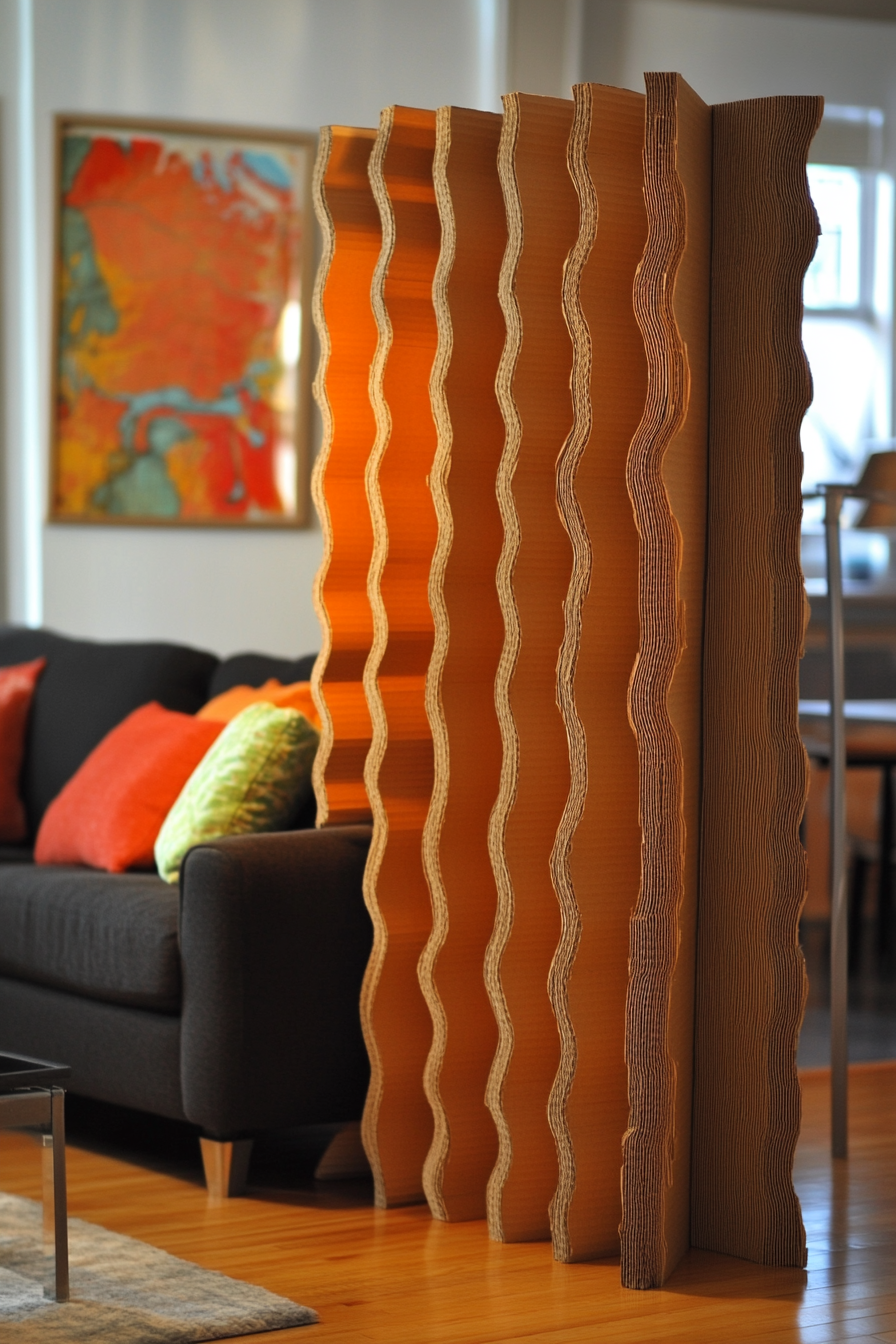
Cardboard Room Divider

If you want a temporary room divider or one you can easily change out, use cardboard!
Corrugated cardboard sheets are easy to cut, paint, and decorate to create customized dividers.
Start by mapping out the size and shape you want your divider to be.
Cut cardboard sheets to size.
For extra durability, reinforce edges with duct tape.
Adhere sheets together with hot glue to create wider dividers if desired.
Now comes the fun part – decorating!
Paint cardboard surfaces any color you like and add patterns with stencils or stamps.
You can mod podge scrapbook paper or fabric onto the cardboard for cool textures and prints.
Use washi tape, wallpaper, maps, photos – anything you want!
To display your cardboard creation, lean it against the wall or create a stand using more cardboard.
You can even make a portable folding screen by connecting sheets with duct tape hinges.
Change up the divider as often as you want – the possibilities are endless!
💭 Ever wondered what your room would actually look like rearranged?
I built a free tool that lets you drag furniture around a 2D floor plan. No signup, no catch.
See the Room Planner →What’s Your Decor Personality?
5 questions · 30 seconds · Instant style match 🏡
Pallet Wood Room Divider

Pallet wood makes for a rustic and affordable DIY room divider material.
You can often get used pallets for free or very cheap.
Just dismantle the pallet slats and put them to use!
Cut pallet wood boards down to your preferred height and width for divider panels.
Sand until smooth, then stain or paint the pallet wood your desired color.
Stack boards vertically and affix together by screwing in diagonal support pieces on the backside.
For a more polished divider, nail thin plywood or MDF to the front of the pallet wood frame.
This gives you a smooth surface to paint bold colors or apply wallpaper.
Top off your pallet wood divider with crown molding for a classy built-in look.
Pallet wood gives you a divider with lots of character.
The raw, natural wood tones pair perfectly in farmhouse, eclectic, or industrial rooms.
Layer in some textiles or shelving to soften the ruggedness.
Creating your own pallet wood divider saves money and repurposes scrap material.
Bookcase Room Divider

Bookcases easily pull double duty as both storage and a room divider.
Positioning tall bookcases back to back in the middle of a room creates a partition.
You can buy affordable bookcases or make your own basic version using boards and brackets.
Include closed cabinet storage on one side for hiding clutter.
Install shelves on the other side for displaying books, plants and decor.
For safety, make sure to anchor tall bookcases to the wall so they don’t tip over.

In lieu of bookcases, you can also install kitchen cabinets or media cabinets back to back.
Get creative with the cabinetry shape – semi-circle facing units make an oval divider.
Built-in cabinetry topped with molding gives the look of custom millwork without the expense.
With enclosed cabinet storage on one side and open shelving on the other, a bookcase divider makes smart use of floorspace
The shelves bring purpose and function to what would otherwise be dead empty space in the middle of a room.
Bamboo Room Divider

For an eco-friendly divider option, use bamboo sheets to create a rustic yet contemporary partition.
Bamboo can be cut down into slats or left in sheet form.
Choose bamboo with vertical grain for room dividers.
If using bamboo sheets, space out 2-3 sheets to achieve your desired divider width.
Edge glue panels together for stability.
For slatted bamboo, arrange boards horizontally and glue in place vertically on a plywood backing.
Sand lightly and apply clear sealant.
Mount the bamboo divider directly to wall studs for durability.
A floating divider has a light and airy effect.
For a more grounded look, prop the bamboo against the baseboard instead of mounting it flush to the ceiling.
Unfinished bamboo has beautiful natural grain patterns and color variations from blonde to caramel.
Or stain it darker for a dramatic look.
Bamboo is an eco-friendly choice that feels fresh yet organic in both modern and rustic rooms.
This or That?
Pick your fave — see what other readers chose! 👀
Reflective Metal Divider

A reflective metal divider is a dramatic choice that seems futuristic and glam.
Use this divider to define different zones with style.
Some reflective options for metal dividers include:
– Stainless steel sheet panels
– Aluminum composite boards like those used for highway signs
– Corrugated tin or aluminum
– Large sheet mirrors
Cut metal panels down to size and join together with brackets to create the divider width you need.
Lean against the wall, adhere directly, or install a freestanding frame.
If using lightweight materials like aluminum signs, adhere foam board or plywood first for stability.
The reflective surface will make your room appear larger while creating a focal point.
This ultra-modern divider is perfect for lofts, studios, and contemporary spaces.
For cost effectiveness, check local metal shops for scrap cuts and dents of aluminum or steel sheets.
Then upcycle into a custom divider on a budget.
💭 I Wrote a Book About My Biggest Decorating Mistakes!
When I decorated my first home, I thought I knew what I was doing. Spoiler: I didn’t. 😅
💸 I bought a sofa way too big for my living room. Paint colors that looked amazing in the store but terrible on my walls.
String Art Room Divider

Make a plastic canvas string art divider for a shabby chic, boho-style divider.
This lightweight wall hanging provides separation while displaying your own artwork.
To start, create a plywood or foam board panel slightly larger than your desired divider size.
Sketch out a geometric string art pattern on the board and hammer small nails along the pattern outlines.
Use embroidery floss or yarn to wrap back and forth across the nails, filling in your design.
Once the string art is complete, mount directly on the wall with adhesive strips for floating divider effect.
Or, build a lightweight wood frame around the perimeter to attach the string art panel to, then prop on the floor against the wall.
Consider framing with distressed wood for farmhouse appeal.
The colorful woven strings will add artful texture and dimension to any room.
Make string art dividers for kids’ rooms, above beds, in home offices – anywhere you want to introduce a handmade touch.
This project harnesses your creativity and costs only pennies to make.
Quick Design Dilemma
Cast your vote — see what other readers think! 🤔
Room Divider Trellis

If you want a room divider that looks like built-in millwork, consider making a fretwork trellis.
You can use all kinds of materials to create a trellis divider.
Lightweight lattice, plywood panels, PVC pipes, wood dowels, craft sticks, branches – anything that can be woven, layered, or positioned vertically into a lattice pattern.
Cut and assemble trellis pieces into a full panel sized for your space.
Paint or stain the trellis to blend into your room’s color scheme.
Lean against the wall between studs or create freestanding panels.
Add wheels or casters to trellis legs for easy repositioning.
In a narrow entryway, try two tall half circle trellis panels on either side.
Or install an accordion-style folding trellis screen to separate an eat-in kitchen from the living room.
The openness of a trellis adds architectural interest while still permitting light and visibility to pass through.
Hanging Glass Dividers

For the ultimate modern divider, hang panels of glass vertically to partition a room.
Glass is translucent, allowing light to filter through beautifully.
And the crisp edges lend contemporary appeal.
Search for old glass windowpanes, mirrors, shower doors, or tabletops at thrift stores, antique shops, and home salvage warehouses.
Have glass cut down to uniform rectangles, then drill holes for hanging.
Affix wire, chain, or metal rods at the top and bottom edges to suspend the glass across a room.
The glass will create glossy divider that defines space while still keeping areas open and connected.
For safety, use tempered glass or acrylic mirrors to prevent possible shattering.
Pad edges and hang securely.
Glass dividers work wonderfully in modern lofts, artsy studios, or to separate a dining space.
During the day, they allow light to pass through the space.
At night, glass dividers scattered with mini lights become luminous focal points.
Definitely a divider suited for sophisticated settings!
With a little creativity, some basic DIY skills, and thriftiness, you can craft room dividers that personalize your space on any budget.
Dividers made with common household materials cost very little to make.
Even if you are not naturally crafty, the ideas presented here mainly involve simple cutting, assembly, and decorating that anyone can tackle.
Transform an empty corner or oddly shaped area by sectioning it off with a unique handmade divider.
Use dividers to hide eyesores like clutter or messy pantries.
Or delineate special spaces for sleeping, relaxing, or working.