
Banquette seating isn’t just practical—it’s a game-changer for any dining area that needs style and function in equal measure.
Built-in seating saves space, creates cozy conversation spots, and gives your home that custom, high-end look without the custom, high-end price tag.
Love This Post? You’ll Love My Book!
I wasted THOUSANDS on decorating mistakes you can EASILY AVOID. ✨ My book shares every lesson I learned the hard way—so you can create a home you LOVE without the costly trial and error. 🏡
Get the Book NowThe Corner Breakfast Nook Revolution
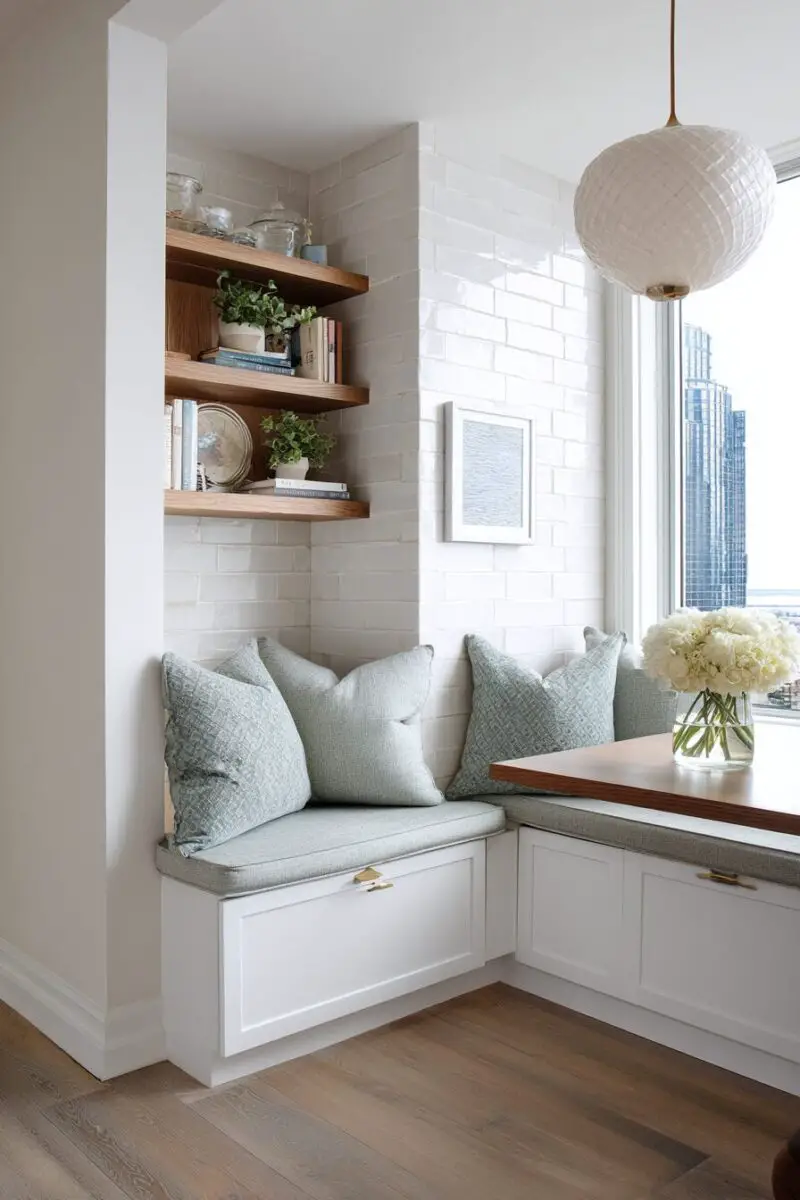
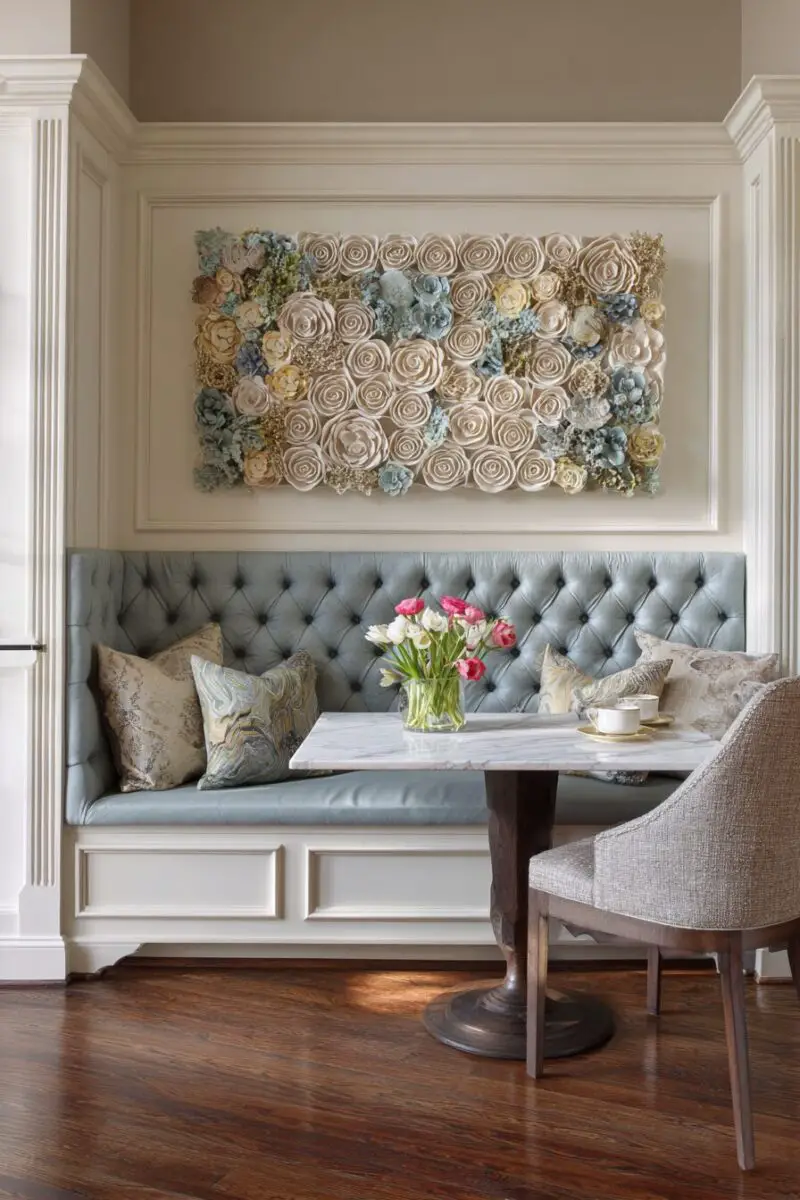
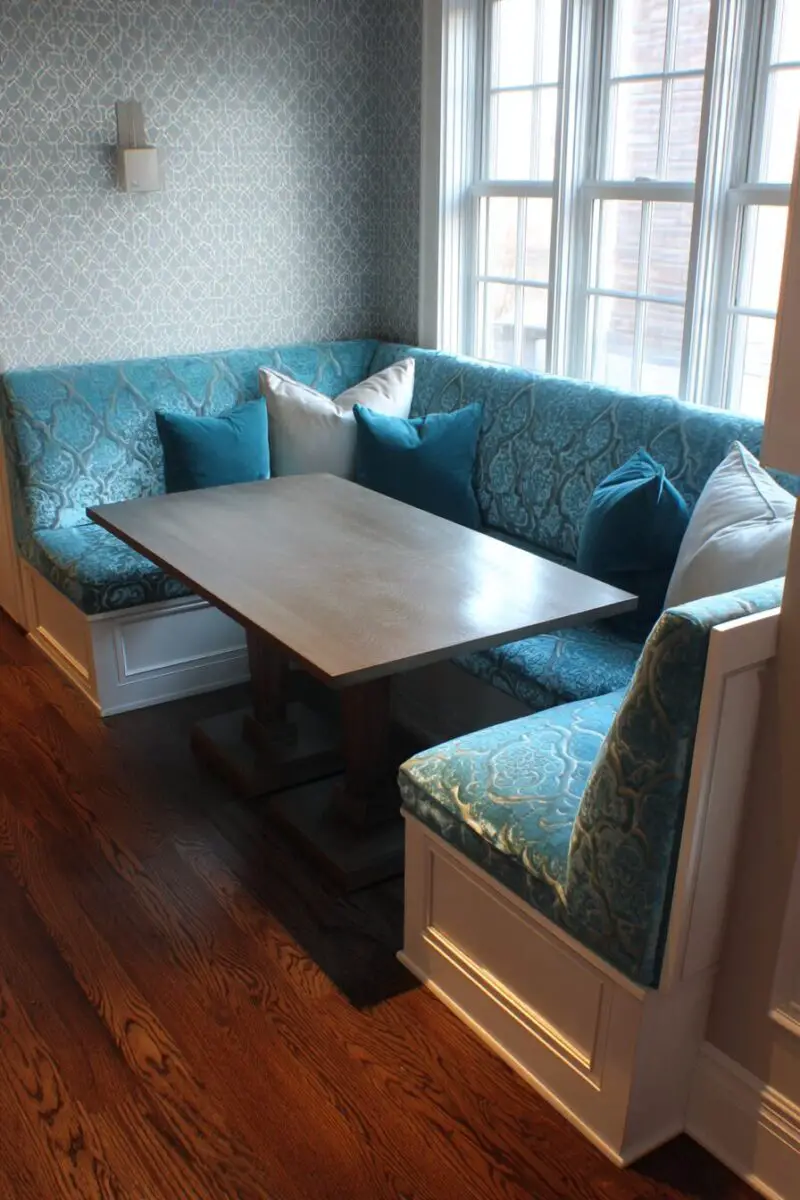
Imagine walking into your kitchen each morning and sliding into a sun-drenched corner nook that feels like your favorite café.
This L-shaped corner banquette design maximizes dead space while creating the perfect spot for morning coffee or family meals.
Start with a simple frame built from 2×4s attached to wall studs for maximum stability—this is not the place to skimp on structural integrity.
For the perfect height, build your seating platform at 18 inches tall, which provides ideal comfort when paired with a standard-height table.
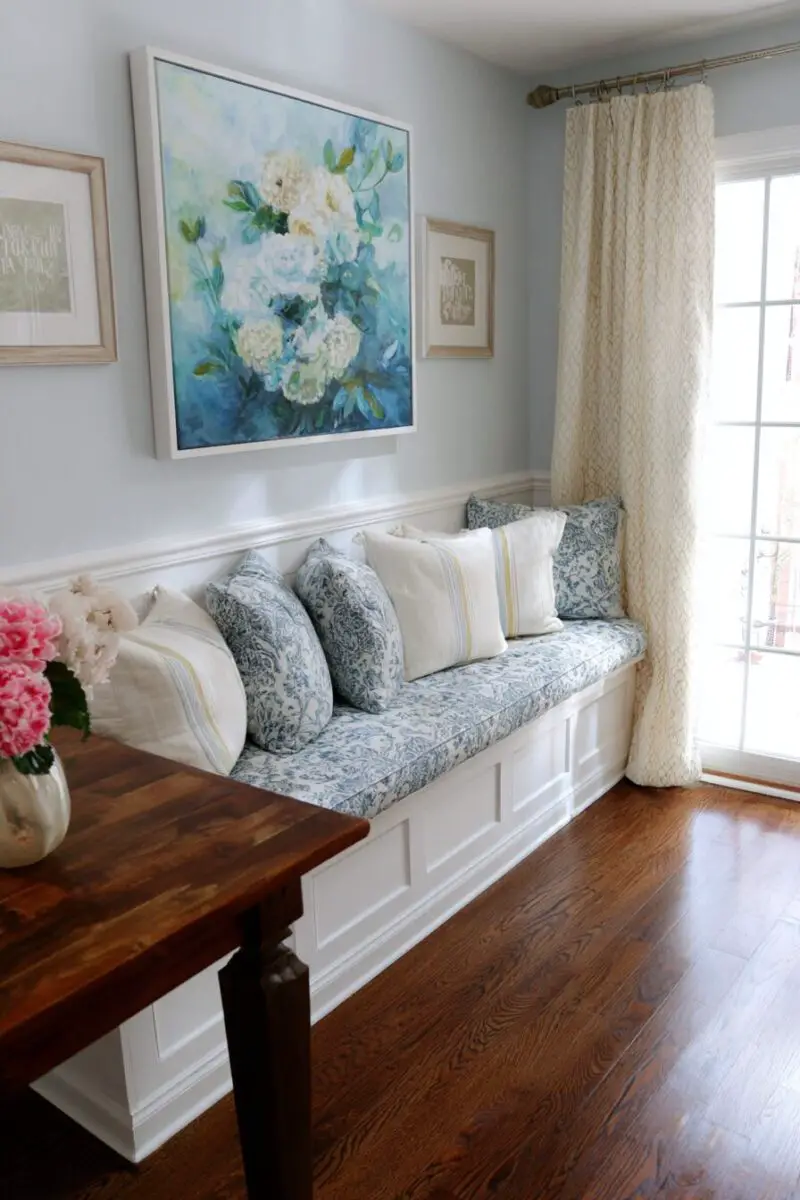
Add hinged tops to your bench seats for hidden storage that can hold everything from seasonal table linens to kids’ art supplies.
Memory foam cushions wrapped in washable, spill-resistant fabric will make this spot irresistible to everyone in the house.
Choose indoor-outdoor fabrics in vibrant patterns for busy households where spills and stains are inevitable.
Install shallow drawers beneath the seating for items that would otherwise get lost in deeper storage spaces.
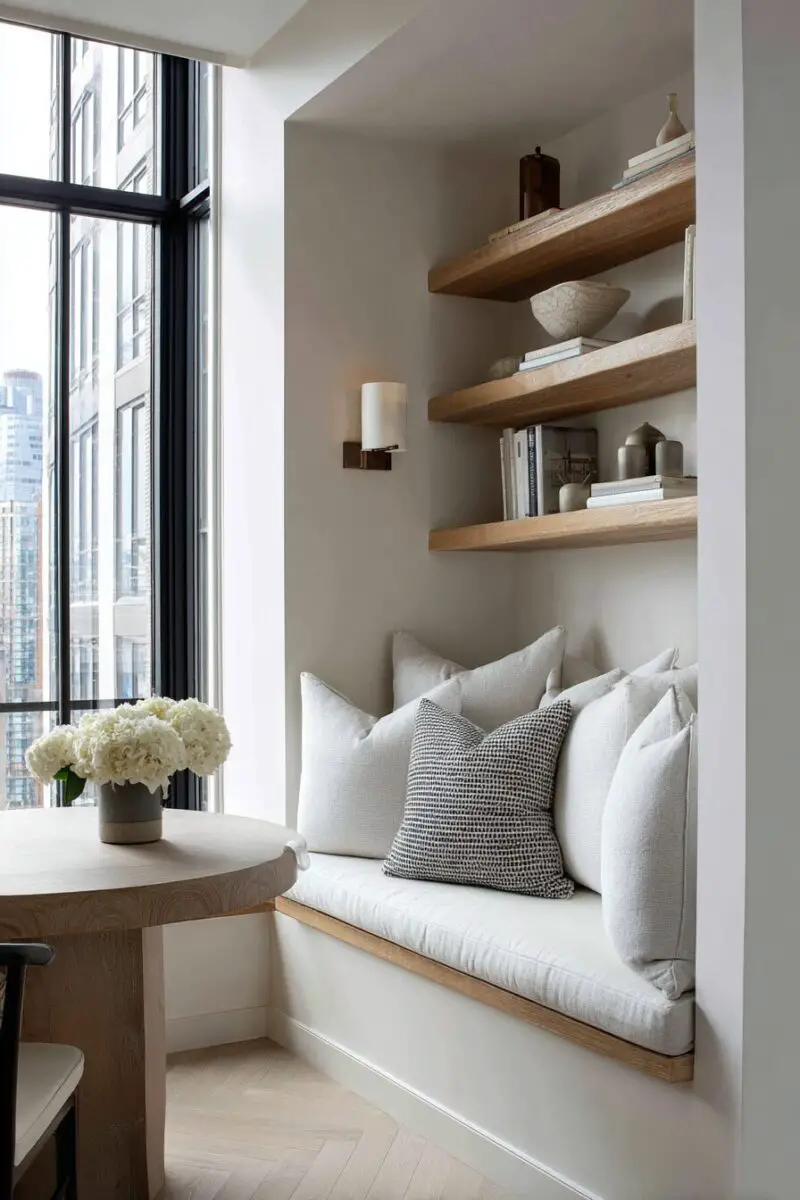
Add wall sconces above the banquette to create ambiance without taking up valuable table space with lamps.
Floating shelves installed above the banquette provide the perfect spot for displaying plants, coffee mugs, or cookbooks, adding personality to your nook.
💭 I Wrote a Book About My BIGGEST Decorating Mistakes!
When I decorated my first home, I thought I knew what I was doing. Spoiler alert: I DIDN’T. 😅
💸 I bought a sofa that was WAY TOO BIG for my living room. I chose paint colors that looked amazing in the store but terrible on my walls. I spent THOUSANDS on pieces that didn’t work together. Sound familiar?
“Things I Wish I Knew Before I Decorated My First Home” is your shortcut to avoiding ALL my costly mistakes. ✨ Inside, you’ll find practical, NO-NONSENSE advice that will save you time, money, and a whole lot of decorating regret. 🏡
🎯 Grab Your Copy Now!Window Bay Transformation
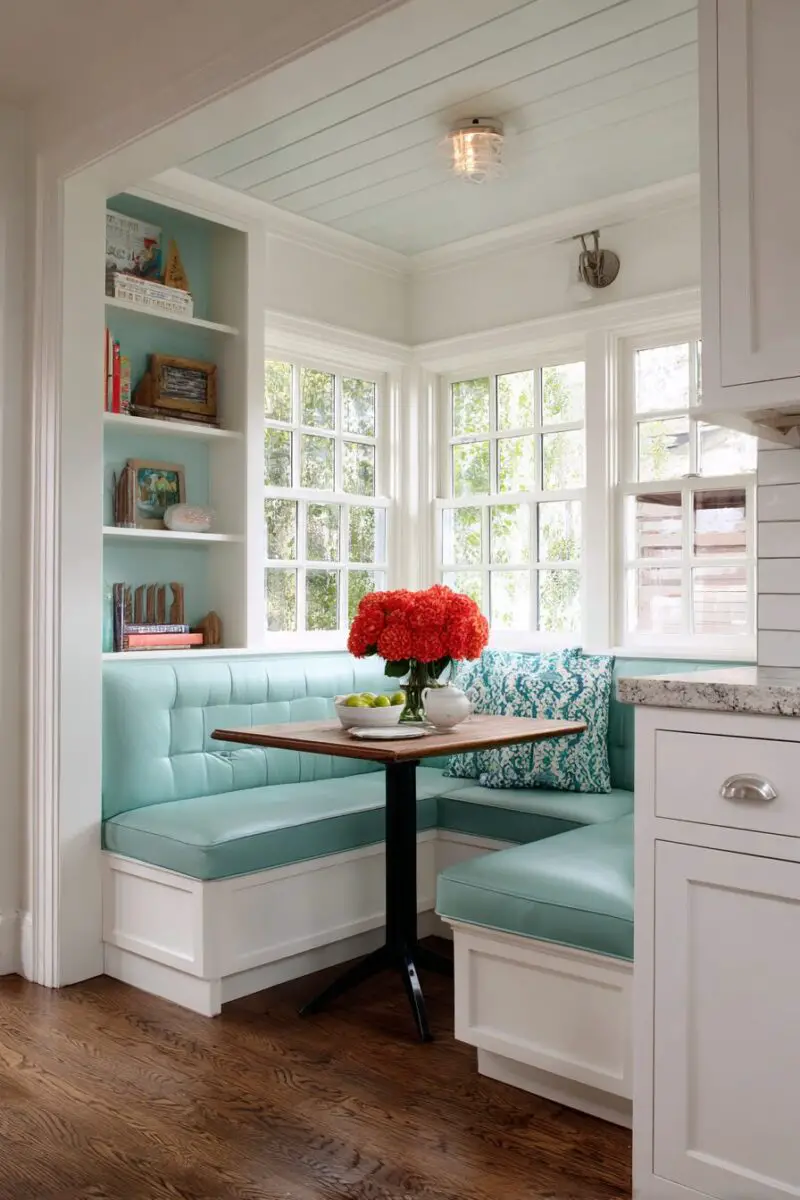
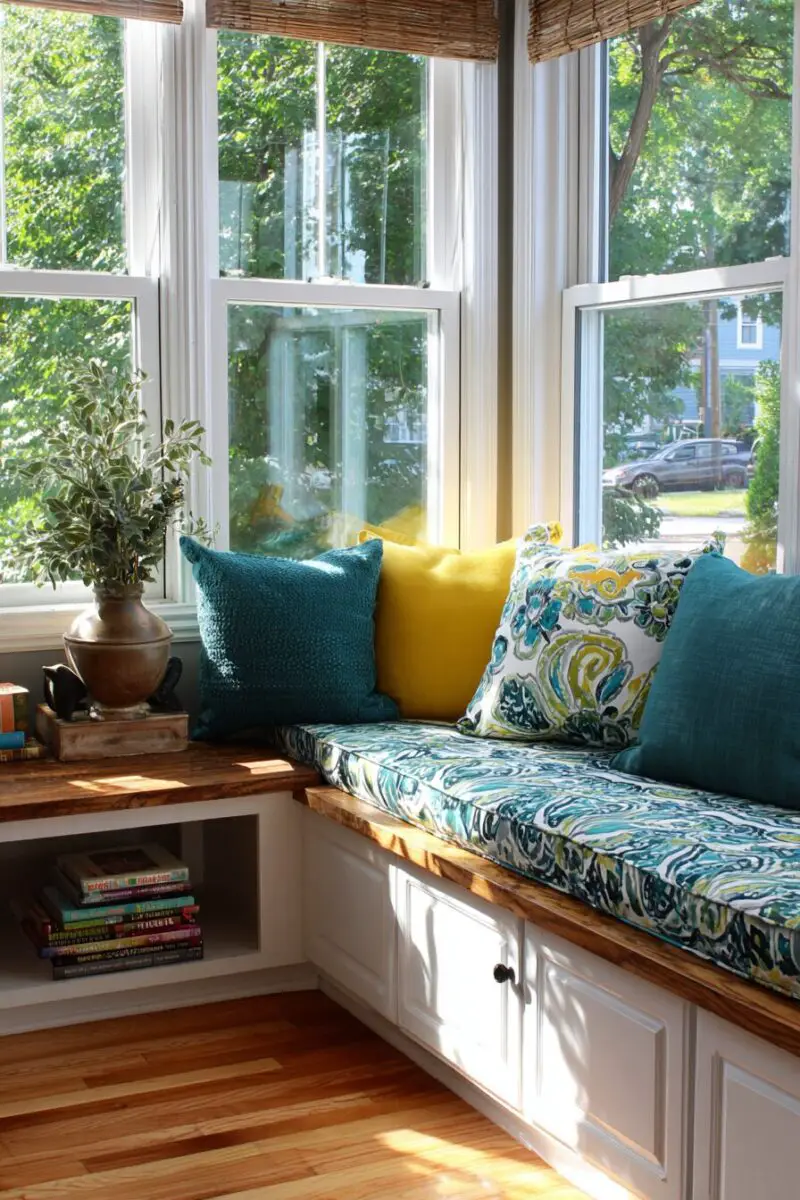
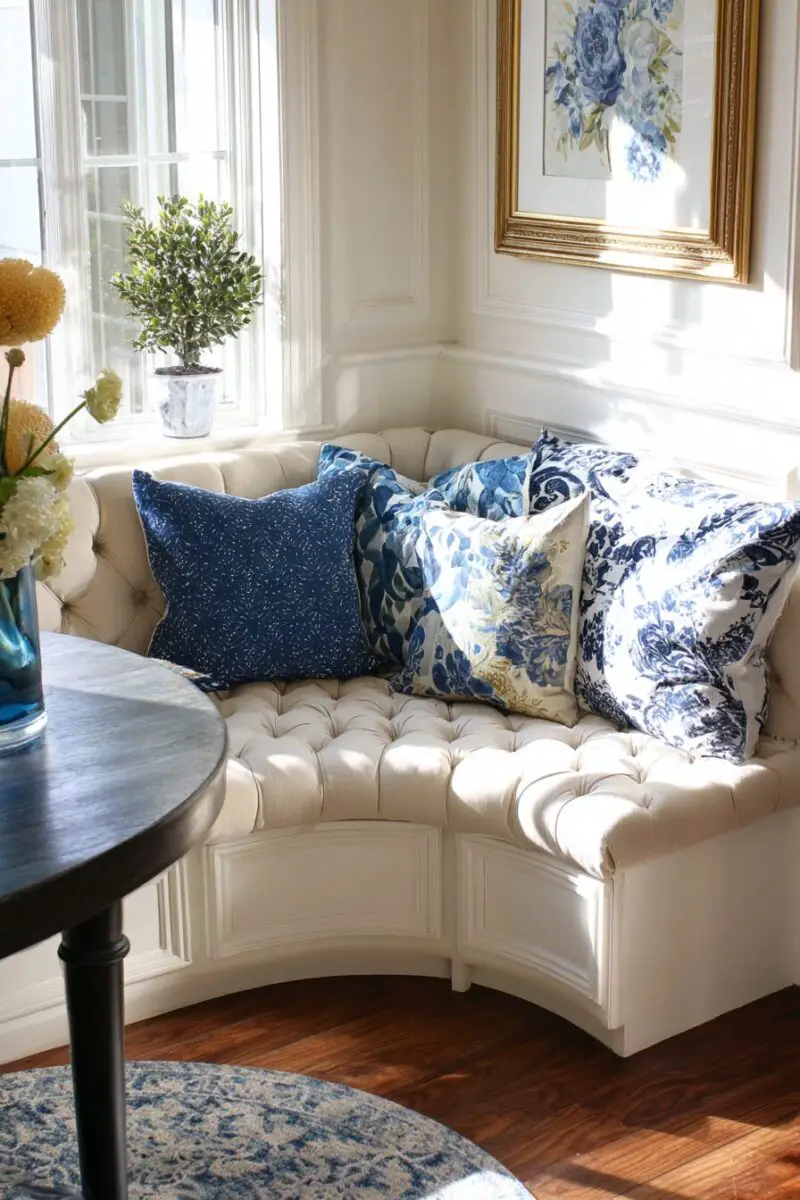
That awkward bay window that’s been collecting houseplants is actually prime real estate for the dreamiest banquette in town.
Following the natural curve or angles of your bay window creates an organic seating area that feels like it was always meant to be there.
Begin by measuring your bay window’s dimensions carefully, accounting for any heating vents or electrical outlets that need to remain accessible.
Create a template using cardboard before cutting any expensive materials—bay windows rarely have perfect angles, and this step saves costly mistakes.
Build a frame using pressure-treated lumber if your bay window gets significant sun exposure, as this prevents warping over time.
Add extra insulation behind your seating to prevent heat loss through the window area during colder months.
Install a series of cabinet-grade plywood boxes as the foundation, which provides both structure and built-in storage compartments.
Top with 3-inch foam cushions wrapped in a batting layer before adding your chosen fabric, secured with a professional-grade staple gun.
Extend your cushions slightly beyond the edge of the bench for a softer, more inviting profile that encourages lingering conversations.
Add throw pillows in complementary colors to soften the angles and create a layered, designer look without breaking your budget.
Design Your Dream Room in Minutes! – By Madison
🏡 Start Creating FREE →Storage-Smart Banquette
Storage-starved kitchens, meet your new best friend: a banquette that swallows everything from holiday platters to small appliances.
This clever design incorporates deep drawers, cabinets, and even pull-out pantry storage while providing comfortable seating for your daily meals.
Start with a base of kitchen cabinets—either new or repurposed—arranged in your desired seating configuration.
Standard base cabinets measure 24 inches deep, which provides ample storage while creating a bench depth that works perfectly for comfortable seating.
Secure the cabinets to both the floor and wall for safety, especially if you’re creating a longer banquette where multiple people will sit.
Add a plywood top that extends about 2 inches beyond the cabinet fronts, creating a slight overhang that makes seating more comfortable.
Install soft-close drawer slides to prevent little fingers from getting pinched and to give your DIY project a high-end feel.
Create custom drawer dividers for storing table linens, placemats, and napkin rings in organized compartments.
Add electrical outlets inside one cabinet for charging stations, keeping unsightly cords off your dining table.
Incorporate slim pull-out pantry shelves in 6-inch gaps between wider cabinets, perfect for storing spices or narrow items that get lost in deeper spaces.
Love This Post? You’ll Love My Book!
I wasted THOUSANDS on decorating mistakes you can EASILY AVOID. ✨ My book shares every lesson I learned the hard way—so you can create a home you LOVE without the costly trial and error. 🏡
Get the Book NowUpcycled Furniture Banquette
That Facebook Marketplace score or thrift store find isn’t just furniture—it’s your next statement banquette waiting to happen.
Transform old dressers, bookshelves, or even vintage doors into a one-of-a-kind seating area that tells a story while serving a purpose.
Hunt for solid wood pieces with good bones rather than particle board furniture that won’t hold up to daily use as seating.
Remove any drawers from dressers but keep the drawer fronts attached to maintain the piece’s character while creating open storage cubbies.
Strip and sand any dated finishes, giving yourself a blank canvas for paint colors that complement your existing décor.
Connect multiple furniture pieces using metal brackets and wood screws, ensuring everything is secured as one stable unit.
Cut a piece of 3/4-inch plywood to create a level seating surface across the top of your upcycled furniture pieces.
Add high-density foam cut to size, with an extra inch overhanging the front edge for comfort behind the knees.
Choose a durable upholstery fabric like cotton duck, denim, or wool blends that can withstand the rigors of daily use.
Install casters on the bottom of your banquette if you want the flexibility to move it for cleaning or to reconfigure your space for parties.
💭 I Wrote a Book About My BIGGEST Decorating Mistakes!
When I decorated my first home, I thought I knew what I was doing. Spoiler alert: I DIDN’T. 😅
💸 I bought a sofa that was WAY TOO BIG for my living room. I chose paint colors that looked amazing in the store but terrible on my walls. I spent THOUSANDS on pieces that didn’t work together. Sound familiar?
“Things I Wish I Knew Before I Decorated My First Home” is your shortcut to avoiding ALL my costly mistakes. ✨ Inside, you’ll find practical, NO-NONSENSE advice that will save you time, money, and a whole lot of decorating regret. 🏡
🎯 Grab Your Copy Now!Outdoor Living Banquette
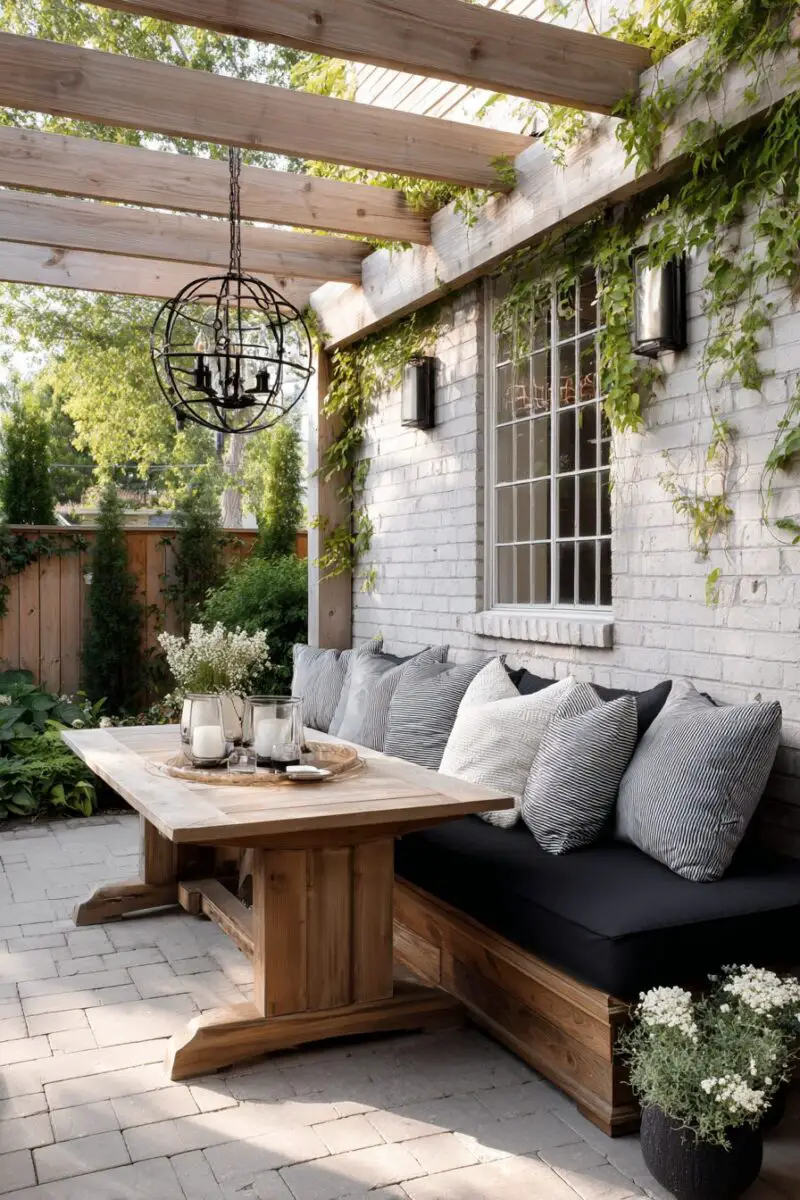
Backyard entertaining reaches new heights with a weather-resistant banquette that turns an ordinary patio into an outdoor dining paradise.
This project uses concrete blocks as the base structure, creating a virtually indestructible foundation for years of outdoor enjoyment.
Begin with a level surface, using sand to create a stable base if your patio or yard has slight variations in height.
Arrange concrete blocks in your desired configuration, using construction adhesive between layers for added stability.
Create a frame of pressure-treated 2×4s across the top of your concrete block structure to support your seating surface.
Add cedar or other weather-resistant decking boards across the frame, leaving 1/8-inch gaps between boards to allow for water drainage.
Seal all wood with multiple coats of exterior sealant, paying special attention to end grains where moisture can easily penetrate.
Choose quick-dry foam designed for outdoor use, available at most marine supply stores, for cushions that won’t remain soggy after rain.
Cover cushions with Sunbrella or similar outdoor fabric that resists fading, mildew, and water damage, justifying its higher price tag with years of durability.
Install solar-powered rope lights along the base of your banquette for ambient lighting that extends your outdoor entertaining into the evening hours.
Rustic Farmhouse Hideaway
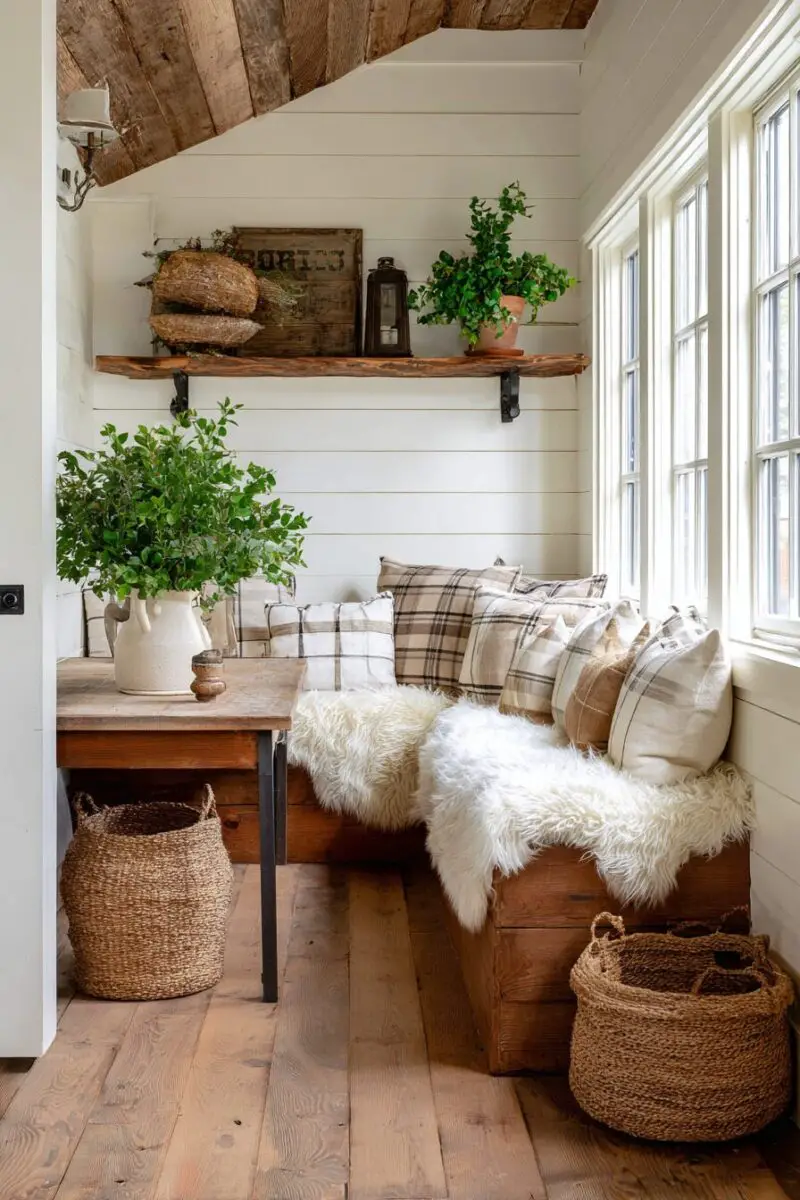
Channel your inner Joanna Gaines with a banquette that brings farmhouse charm to your breakfast area through reclaimed wood and vintage-inspired details.
This design intentionally embraces imperfections, making it perfect for DIYers who appreciate character over perfection.
Source reclaimed barn wood or pallet boards, cleaning thoroughly but preserving the weathered patina that gives this style its authentic charm.
Create a simple box frame using new 2×4s for structural integrity, reserving the reclaimed wood for exterior facing and seating surfaces.
Sand any splintery areas while leaving other distressed details intact—safety trumps aesthetics when it comes to surfaces you’ll actually sit on.
Apply a clear polyurethane coating to seal the wood without hiding its natural character and to prevent further splintering over time.
Add metal pipe fittings as decorative brackets for a touch of industrial flair that complements the rustic wood elements.
Install vintage crates underneath for storage that enhances rather than detracts from the farmhouse aesthetic.
Create cushions using grain sack fabric, ticking stripe, or humble tea towels sewn together for an unpretentious, collected-over-time look.
Add vintage railroad lanterns or mason jar lights above your banquette for period-appropriate lighting that enhances the cozy farmhouse feel.
Love This Post? You’ll Love My Book!
I wasted THOUSANDS on decorating mistakes you can EASILY AVOID. ✨ My book shares every lesson I learned the hard way—so you can create a home you LOVE without the costly trial and error. 🏡
Get the Book NowMid-Century Modern Marvel
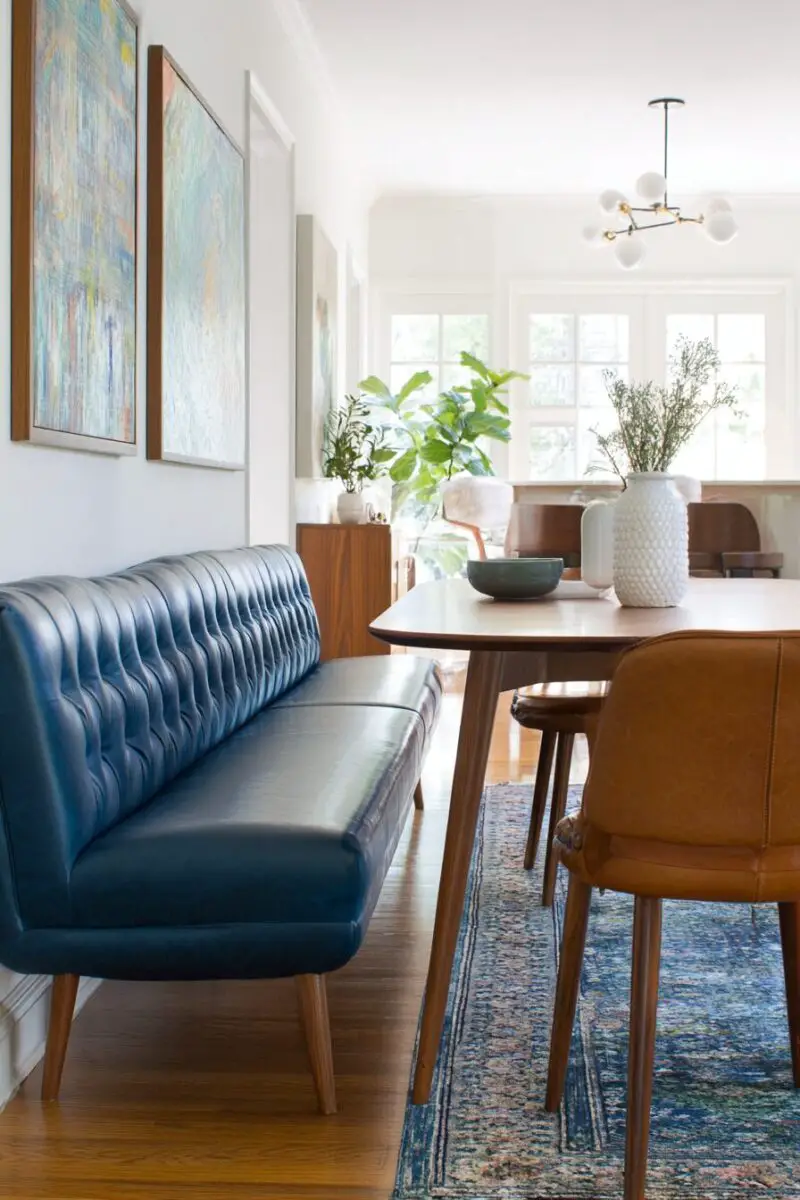
Bring some serious Mad Men vibes to your dining area with a sleek, angled banquette that pays homage to mid-century design principles.
This streamlined beauty features tapered legs, minimal cushioning, and clean lines that let the wood grain take center stage.
Select walnut, teak, or ash wood for authentic mid-century appeal, focusing on pieces with prominent, beautiful grain patterns.
Create a simple bench with angled legs set at the distinctive 15-degree splay that defines mid-century furniture.
Keep the profile low and lean, with a seat height of 16-17 inches that’s slightly lower than standard dining height for a lounge-like feel.
Add a slight angle to the backrest—about 5 degrees from vertical—for comfort that doesn’t compromise the clean aesthetic.
Choose thin cushions—no more than 2 inches—covered in period-appropriate fabrics like wool bouclé or textured solid colors.
Incorporate a floating shelf along the back of the banquette to hold cocktails or small plates, eliminating the need for side tables.
Install hairpin legs or carved wooden legs with brass feet for authentic mid-century details that elevate your DIY project.
Finish your wood with Danish oil rather than polyurethane for a warm, hand-rubbed look that develops a beautiful patina over time.
Floating Illusion Banquette
Prepare to blow minds with a banquette that appears to float magically along your wall, concealing clever support systems and integrated lighting.
This contemporary design creates a striking architectural feature while providing practical seating that doesn’t visually weigh down your space.
Begin with a French cleat system anchored securely to wall studs, capable of supporting at least 500 pounds of weight.
Build your bench structure from lightweight but strong materials like aluminum framing or reinforced plywood to minimize the load on your supports.
Install recessed LED strip lighting underneath the bench to create the floating illusion, using warm white lights for a subtle glow.
Add a second lighting zone behind the backrest to create a halo effect that makes the entire structure appear to hover in space.
Keep the design minimalist with straight lines and hidden fasteners that don’t interrupt the clean visual flow.
Choose upholstery fabric in a color that either blends with your wall for maximum floating effect or creates dramatic contrast for a bolder statement.
Install touch-activated switches concealed underneath the seating edge for controlling your integrated lighting without visible switches.
Paint the wall behind your banquette in a slightly darker shade than surrounding walls to enhance the three-dimensional floating effect.
Convertible Murphy Banquette
Apartment dwellers and small-space enthusiasts, prepare to have your minds blown by a banquette that literally disappears when not in use.
This genius Murphy bed-inspired design folds flat against the wall, transforming from dining space to practically invisible in under a minute.
Start with a sturdy wall-mounted frame using heavy-duty hinges rated for at least 300 pounds, ensuring your fold-down mechanism can support the weight of multiple diners.
Create a lightweight but strong bench structure using hollow-core doors reinforced with an interior frame of 1×3 lumber for the perfect balance of strength and manageable weight.
Design your seating to fold up flat, with cushions that compress or detach entirely when the unit is stowed against the wall.
Add gas pistons similar to those used in car trunks to help control the motion and make lowering and raising your banquette nearly effortless.
Install a simple locking mechanism that keeps your banquette securely closed when not in use, preventing accidental openings.
Mount a large piece of artwork or a decorative panel to the underside of your bench, which becomes the visible surface when the banquette is folded up.
Choose a slim profile design with a depth of no more than 8 inches when folded up, ensuring your banquette doesn’t protrude awkwardly into the room when stowed.
Add magnetic catches to secure cushions in place when the banquette is folded down, preventing them from sliding during use.
Love This Post? You’ll Love My Book!
I wasted THOUSANDS on decorating mistakes you can EASILY AVOID. ✨ My book shares every lesson I learned the hard way—so you can create a home you LOVE without the costly trial and error. 🏡
Get the Book NowKitchen Island Extension
Why choose between an island and banquette when you can have both in one spectacular space-maximizing design?
This clever configuration attaches banquette seating directly to one side of your kitchen island, creating an eat-in kitchen without sacrificing floor space.
Begin with a standard kitchen island or modify an existing one, ensuring it’s securely anchored to the floor to support the added weight of seating.
Extend the countertop overhang to 12-15 inches on the seating side, providing adequate knee space for comfortable dining.
Build a half-height wall along the back of the seating area that connects to your island base, creating both support and a backrest.
Install a slim storage shelf within this half-wall for cookbooks or frequently used items that benefit from being within arm’s reach.
Choose counter-height seating (36 inches) rather than standard dining height for a casual, conversation-friendly eating space.
Add footrests at the base of your island using metal plumbing pipe or wooden dowels for comfortable seating, especially for shorter family members.
Select upholstery fabrics that coordinate with but don’t exactly match your kitchen color scheme for a designed-not-decorated look.
Use stain-resistant, wipeable materials for both the cushions and the island base, acknowledging that kitchen spills are inevitable.
Remember that the beauty of DIY is making these designs your own—mix elements from different ideas, adapt the dimensions to your space, and choose colors and fabrics that speak to your personal style.
Your perfect banquette is waiting to become the heart of your home—where will you start?
