That dark wood paneling making your rooms feel like a 70s basement?
Don’t tear it out just yet!
With a few cans of paint and the right techniques, you can transform outdated paneling into a gorgeous feature that looks totally custom.
I learned this firsthand when my living room went from dark and dated to bright and beautiful in a single weekend.
The secret isn’t just slapping paint on wood – it’s knowing the pro tricks that prevent peeling, streaking, and that amateur “obviously painted paneling” look.
These expert tips will walk you through transforming your paneling like a professional, saving thousands in renovation costs while creating a space you’ll be proud to show off.
Prep Like Your Results Depend On It (Because They Do)


Nothing screams “amateur paint job” like dust particles, grease, or bubbling paint.
Professional painters know that proper preparation is what separates a stunning finish from a disappointing one.
Before even thinking about picking up a paintbrush, you’ll need to thoroughly clean the paneling with a TSP (trisodium phosphate) solution.
This powerful cleaner removes years of built-up grime, smoke residue, and greasy fingerprints that regular household cleaners might miss.
After cleaning, sand the entire surface with 120-grit sandpaper to create texture that helps the primer bond properly.
Don’t skip this step even if your paneling appears relatively smooth – the glossy factory finish on most wood paneling actively repels paint.
For genuine wood paneling, pay special attention to the grain and knots, as these areas may require extra sanding to ensure a uniform base.
If your paneling has deep grooves, decide now whether you want to fill them for a smooth look or leave them for character.
Filling grooves requires a specialized vinyl spackling compound and additional sanding time, but creates a more contemporary flat-wall appearance.
Remember to vacuum all sanding dust completely before moving forward, then wipe down walls with a tack cloth to catch any remaining particles.
Cover nearby furniture with canvas drop cloths rather than plastic, as plastic can become slippery and dangerous when paint drips occur.
Use painter’s tape with edge-lock technology to protect trim, ceiling edges, and any areas you don’t want painted.
For optimal results, seal the edge of the tape by running a plastic putty knife along it to prevent paint from bleeding underneath.
Take photos of your space before beginning, as you’ll be amazed at the transformation and might want to create impressive before-and-after comparisons.
Prime With Purpose: Selecting the Perfect Primer for Wood Paneling


Walking into the paint store without knowing exactly which primer you need is setting yourself up for failure when painting wood paneling.
Not all primers are created equal, and wood paneling has specific requirements that make primer selection crucial to your success.
For most wood paneling situations, you’ll want to select a high-quality oil-based or shellac-based primer designed specifically to block tannins and stains.
Tannins are natural compounds in wood that can bleed through water-based primers and paints, creating unsightly yellowish or brownish stains on your finished surface.
KILZ Original or Zinsser B-I-N shellac-based primers are excellent choices that create a bulletproof barrier between your paneling and your topcoat.
While oil-based primers have a stronger odor and require mineral spirits for cleanup, they provide superior adhesion to slick surfaces and better stain-blocking capabilities.
Water-based primers are improving all the time, and some newer formulations specifically designed for paneling can work well while offering easier cleanup with just soap and water.
When dealing with fake wood paneling (laminate or vinyl), look for primers specifically formulated for non-porous surfaces to ensure proper adhesion.
Apply primer with a high-quality synthetic bristle brush for oil-based products or a nylon/polyester brush for water-based primers.
Work the primer deep into grooves first using a brush, then use a 1/4-inch nap roller for the flat surfaces to ensure complete, even coverage.
Allow the primer to dry completely according to the manufacturer’s instructions – rushing this step can cause adhesion problems later.
In extremely dark paneling situations, applying two coats of primer will provide better coverage and require fewer coats of paint.
Test your primer’s stain-blocking ability on a small section first, particularly if your paneling has water stains, smoke damage, or is made of woods known for heavy tannin content like pine or oak.
For eco-conscious homeowners, look for low-VOC primer options that will minimize odor and harmful emissions while still providing adequate stain-blocking properties.
Paint Selection: Choosing the Formula That Will Make Your Paneling Pop


The paint you select will make or break your wood paneling transformation project.
Most homeowners make the mistake of grabbing whatever paint is on sale, but professionals know that specific formulations work best on paneling.
For most wood paneling projects, a semi-gloss or satin finish provides the ideal balance of wipeability and sophistication.
Flat paint, while trendy for walls, is a poor choice for paneling as it shows every fingerprint and can’t be cleaned easily without removing some of the paint.
High-gloss finishes, on the other hand, will highlight every imperfection in your paneling and application technique, making them suitable only for perfectly smooth surfaces.
100% acrylic paint formulations offer superior adhesion, durability, and coverage compared to vinyl-acrylic blends, making them worth the slightly higher price point.
Cabinet and door paints, which are formulated to create harder, more scuff-resistant surfaces, work exceptionally well on wood paneling that will see heavy use.
When selecting colors, remember that lighter shades will make your space feel larger and more open, while darker colors can make paneling look intentionally sophisticated rather than outdated.
Testing is non-negotiable: purchase sample sizes of your top color choices and paint 2′ x 2′ sections on different walls to see how the color looks throughout the day in changing light conditions.
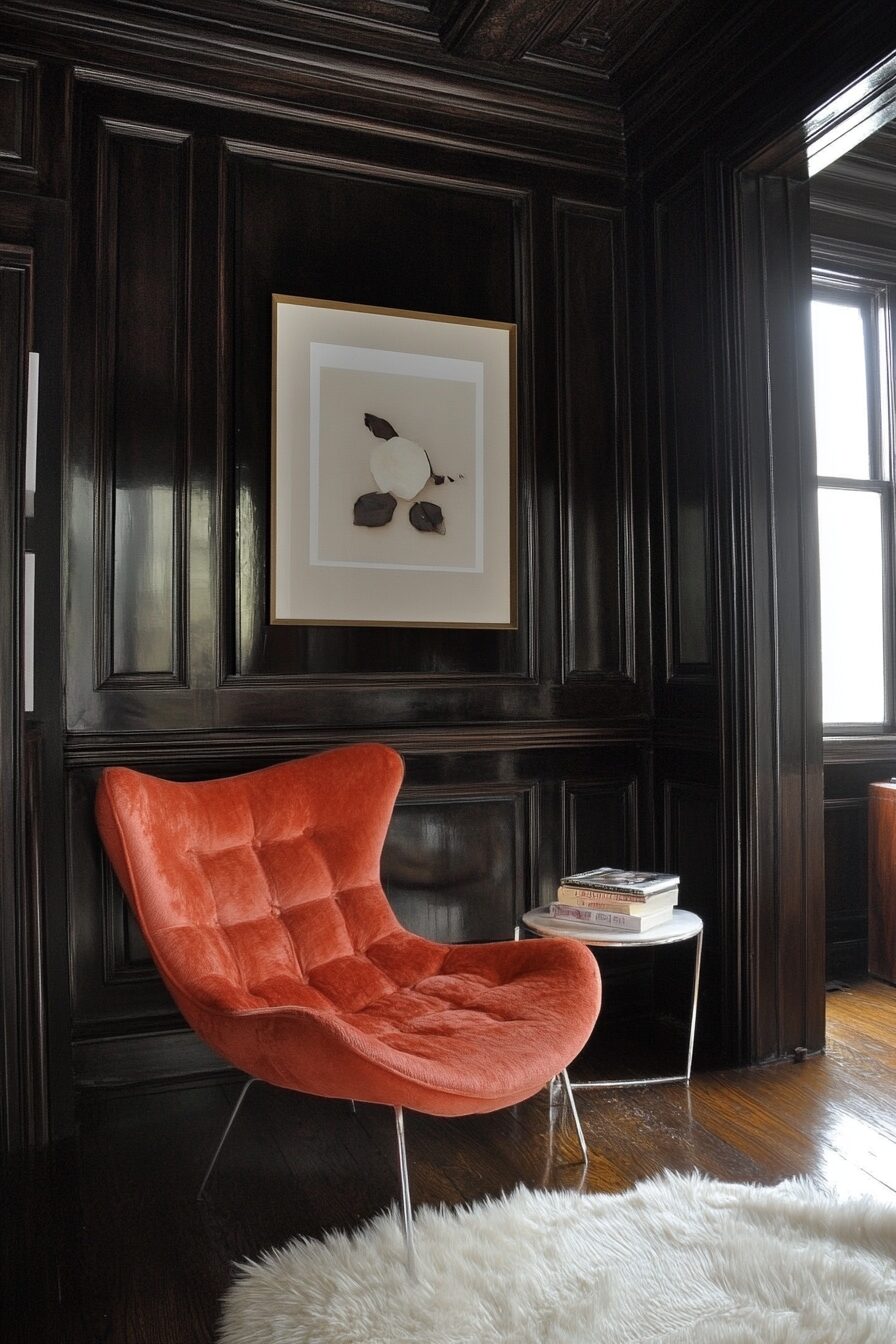
Don’t be afraid to go bold if that suits your style – painted paneling in navy blue, forest green, or even black can look incredibly chic and intentional.
If your paneling covers an entire room, consider using the “fifth wall” approach by painting the ceiling a complementary color rather than standard white.
For spaces with limited natural light, paint with a higher LRV (Light Reflectance Value) will help maximize the brightness of your room.
Premium paints containing ceramic microspheres provide exceptional durability and a smoother finish, which is particularly beneficial for the textured surface of wood paneling.
When calculating how much paint to buy, remember that textured surfaces like paneling require approximately 20% more paint than smooth drywall.
Tool Talk: Professional Equipment That Makes All The Difference


Professional painters don’t just have better technique – they have better tools that elevate their results far above DIY attempts.
Investing in quality tools might seem expensive initially, but the superior finish and time saved will make you thankful you didn’t cheap out.
For cutting in around edges and painting panel grooves, a 2-inch angled sash brush with synthetic bristles provides the precision and control you need.
The classic mistake of buying cheap brushes leads to bristle loss, streaky application, and frustration – instead, invest in Purdy or Wooster brushes that professionals swear by.
For rolling the flat sections between grooves, a microfiber roller cover in 1/4-inch nap provides the perfect balance of smooth application and adequate coverage.
Foam rollers, while inexpensive, often create bubbles and an orange-peel texture that’s difficult to correct once dry.
Extension poles for your roller eliminate the need for constantly climbing up and down ladders and help maintain a consistent angle for more even application.
A paint grid used with a 5-gallon bucket is vastly superior to roller trays, allowing better paint loading, less mess, and eliminating the risk of stepping in or kicking over a tray.
For cutting in along ceilings and trim, a paint shield or Accubrush edge-painting tool can help maintain straight lines even with unsteady hands.
Small detail brushes (1/2-inch width) help reach into tight corners and narrow panel grooves that larger brushes might miss.
A quality painter’s tape with edge-lock technology prevents bleed-through and removes cleanly without damaging your freshly painted surface.
Canvas drop cloths rather than plastic sheeting provide better protection as they stay in place and absorb drips rather than creating slippery hazards.
A portable work light with adjustable positioning illuminates areas as you work, helping you spot missed spots, drips, or imperfections before they dry.
Paint conditioners like Floetrol can be added to your paint to improve flow and leveling, reducing brush marks and extending your working time in hot or dry conditions.
For large paneling projects, a paint sprayer delivers the most even and efficient coverage, though it requires more extensive masking and preparation.
The humble wooden paint stirrer should be replaced with a drill attachment paint mixer for thoroughly blending paint and ensuring consistent color throughout your project.
Groove Strategy: Tackling The Trickiest Part Of Paneled Walls

The grooves in wood paneling present the single biggest challenge to achieving a professional-looking paint job.
Deciding whether to fill these grooves or accentuate them is your first crucial decision that will dramatically impact both the process and final look.
If you choose to keep the grooves, you’ll need to master the technique of “cutting in” with a brush before rolling the flat surfaces.
Start by using a 1-inch angled brush to paint about 2-3 inches into each groove, working in manageable 3-4 foot sections.
The common mistake of painting all grooves in the room first creates problems when the paint dries before you can blend it with the rolled sections.
For the deepest part of each groove, slightly thin your paint (about 10% water for latex paint) to help it flow better into these narrow channels.
Professional painters often use artist’s brushes or specialized groove brushes with longer bristles to reach the depth of each channel without creating build-up on the edges.
If you’re experiencing brush marks in the grooves, try a detail foam brush which applies paint more smoothly in tight spaces, though you may need to make multiple passes.
When grooves intersect, always paint in the direction of the longest groove first, then cross over with the intersecting groove to avoid build-up at junction points.
For those choosing to fill grooves for a smooth wall appearance, use a flexible spackling compound specifically designed for paneling rather than standard drywall compound.
Apply the spackling with a flexible putty knife wider than your groove, then scrape excess flush with the surface.
After the first coat of spackling dries, you’ll inevitably notice shrinkage – apply a second coat, allowing complete drying between applications.
Sand the filled grooves with 220-grit sandpaper wrapped around a sanding block, being careful not to sand through to the original paneling.
If your paneling has very deep grooves, consider using drywall tape over the spackling to prevent cracking along these seams over time.
For paneling with extremely wide grooves, professional installers sometimes use special V-groove fillers that match the exact profile of your panels.
Remember that filling grooves is significantly more labor-intensive but creates a more contemporary look that many homeowners prefer for modern interiors.
Application Technique: Laying It On Like A True Professional

Professional painters don’t just slap paint on walls – they follow specific application methods that ensure even coverage and a flawless finish.
The cardinal rule when painting paneling is to maintain a “wet edge” at all times, meaning you should always be applying new paint alongside paint that’s still wet.
Start at the top corner of your wall furthest from the entry door, working in 3-4 foot sections from ceiling to floor before moving laterally.
For rooms with multiple paneled walls, complete one entire wall before moving to the next to avoid creating visible stop/start lines.
The proper motion for rolling is a gentle “W” or “M” pattern followed by filling in with vertical strokes, which distributes paint evenly without creating roller marks.
Apply moderate pressure to your roller – pressing too hard causes paint to squeeze out around the edges of the roller, creating uneven texture and visible lines.
When painting grooves with a brush, always follow the direction of the wood grain rather than painting perpendicular to it.
The “two coat minimum” rule is non-negotiable with paneling – professionals know that one coat never provides adequate coverage, regardless of what the paint can promises.
Allow proper drying time between coats according to the manufacturer’s instructions – rushing this process is the leading cause of peeling and adhesion problems.
Temperature and humidity dramatically affect drying times – ideal conditions are 65-85°F with 40-50% humidity for most latex paints.
For oil-based paints, use natural bristle brushes and maintain a consistent application thickness to prevent drips and sags on vertical surfaces.
The proper loading of a brush involves dipping only the first third of the bristle length into the paint, then tapping (not wiping) against the side of the container.
For roller application, use the “screen method” rather than the “dip method” – roll the roller against a paint screen in a bucket rather than submerging it in a tray.
Between coats, wrap brushes and rollers tightly in plastic wrap and store in the refrigerator rather than washing them, which saves time and prevents bristle damage.
For a truly professional finish, consider “back-brushing” – immediately following roller application with light brush strokes to eliminate any roller stipple and create a smoother appearance.
When painting around outlets and switches, remove the cover plates rather than taping them – this small step creates cleaner lines and a more professional result.
Banishing Brush Marks And Roller Stipple For A Flawless Finish


Nothing screams “amateur paint job” louder than visible brush marks and roller texture on your freshly painted paneling.
Professional painters have developed specific techniques to eliminate these telltale signs of DIY work.
The quality of your paint plays a crucial role in achieving a smooth finish – higher-end paints contain flow and leveling agents that help minimize brush marks.
Adding a paint conditioner like Floetrol (for latex) or Penetrol (for oil-based paints) dramatically improves self-leveling and extends drying time for a smoother result.
The speed of your brush strokes matters significantly – moving too quickly creates air bubbles in the paint, while moving too slowly creates drag marks as the paint begins to dry.
Follow the “load and feather” technique by applying paint with moderate pressure, then using progressively lighter pressure on final strokes to feather out the edges.
For flat areas between grooves, use a foam roller with rounded edges rather than one with sharp edges to prevent those annoying roller lines.
The temperature of your paint affects its viscosity – slightly warmer paint (around 70-75°F) flows better and levels more effectively than cold paint straight from a basement or garage.
Avoid painting in direct sunlight or with heating/cooling vents blowing directly on your work area, as these cause the paint to dry too quickly before it can properly level.
For exceptionally smooth results, consider sanding lightly with 320-grit sandpaper between coats, being careful to remove all dust before applying the next coat.
When working with deep colors, use a tinted primer that matches your final color to achieve better coverage and a more uniform appearance.
The angle at which you hold your brush affects results – maintain a 45-degree angle rather than perpendicular to the surface for smoother application.
“Boxing” your paint (combining all cans in a larger container and mixing thoroughly) ensures color consistency throughout your project and eliminates the potential for noticeable color shifts.
Synthetic bristle brushes generally create fewer brush marks with latex paint than natural bristle alternatives, which are better reserved for oil-based applications.
For extremely smooth finishes on paneling, some professionals switch to spray application for the final coat after brush and rolling the primer and first coat.
The last strokes in any section should always be in the same direction and with the lightest pressure to eliminate lap marks where wet paint meets partially dried areas.
Creating Dimension: Color Tricks That Elevate Painted Paneling

Painted paneling doesn’t have to be a single flat color – professional designers use clever color techniques to add incredible dimension and interest.
The two-tone approach of painting grooves a slightly darker shade than the raised panels creates architectural interest that honors the original paneling while looking thoroughly modern.
Consider the color temperature of your space – north-facing rooms benefit from warmer tones while south-facing rooms can handle cooler shades without feeling cold or sterile.
The sheen variation technique involves using the same color but different finishes – perhaps satin on the panels with semi-gloss in the grooves – creating subtle dimension through light reflection.
Don’t forget that trim color selection dramatically impacts your paneling – white trim against colored paneling creates a framed effect, while matching trim creates a more seamless, expansive feeling.
For truly dramatic results, the ombré technique uses progressively lighter shades of the same color from bottom to top, making ceilings feel higher and spaces more airy.
The color you choose impacts perceived temperature – cool blues and greens make spaces feel up to 7 degrees cooler, while warm reds and yellows create a cozier atmosphere.
Applying a glaze over painted paneling highlights the texture and grooves, creating depth that flat paint alone cannot achieve.
For small spaces with paneling, like powder rooms or hallways, don’t shy away from dark, rich colors – they can make the space feel intentionally cozy rather than cramped.
The “painted ceiling” technique, where the ceiling matches the wall color rather than remaining white, creates a cohesive, enveloping feel particularly effective in rooms with low ceilings.
Historical color palettes from manufacturers like Sherwin Williams or Benjamin Moore offer authentic period colors that complement the era when your paneling was installed.
The “color drenching” technique of using the same color on walls, trim, and ceiling creates a sophisticated, immersive environment that’s gaining popularity in designer showcases.
For a subtle dimensional effect, try a paint with mica or metallic particles that change appearance slightly as light conditions shift throughout the day.
Remember that color perception varies dramatically based on adjacent colors – that perfect gray from the paint store might look lavender when placed against certain wood tones or flooring.
Troubleshooting Like A Pro: Fixing Common Paneling Paint Problems


Even experienced painters encounter challenges with paneling projects, but knowing how to address these issues separates professionals from frustrated DIYers.
Bleed-through of wood tannins appears as yellowish or pinkish stains on your painted surface and requires spot-priming with a shellac-based primer before continuing.
Peeling paint usually indicates inadequate surface preparation – sand back to a stable edge, clean thoroughly, apply primer to the bare spots, and repaint the entire section to blend.
Visible brush marks that have already dried can be saved by lightly sanding with 320-grit sandpaper, wiping clean with a tack cloth, and applying a new coat with proper technique and/or paint conditioner.
Roller stipple (orange peel texture) can be minimized by switching to a microfiber roller cover, properly loading the roller, and using paint conditioner to improve flow.
For paint that won’t adhere to particularly slick paneling, sand the entire surface with 120-grit sandpaper and apply a bonding primer specifically formulated for glossy surfaces before repainting.
Cracking along groove lines usually indicates movement in the paneling and requires flexible caulk rather than spackling for filling before priming and painting again.
Uneven sheen or flashing (shiny spots in an otherwise matte finish) often results from inconsistent paint application or improper surface preparation and requires another full coat applied evenly.
Roped or curtaining edges along grooves happen when too much paint accumulates – immediately smooth these areas while wet or sand when dry before recoating with a less-loaded brush.
Bubbling or blistering paint signals moisture problems behind the paneling that must be addressed before any cosmetic fixes will last.
For visible seams where paneling sheets meet, apply mesh drywall tape and several thin coats of joint compound, feathering the edges widely before priming and painting.
Color inconsistency between sections often occurs when painting is stopped and started over multiple days – boxing your paint and completing entire wall sections in one session prevents this issue.
Wrinkling paint typically occurs from applying a second coat before the first is completely dry – sand the affected area smooth and reapply paint after ensuring proper drying time.
For glossy paint that won’t cover properly, degloss the entire surface with a liquid deglosser or fine sandpaper before applying subsequent coats.
Drips and sags should be addressed immediately while wet by brushing them out, or if discovered when dry, wait for complete curing, sand smooth, and touch up with fresh paint.
If your painted paneling looks great in some lighting but shows flaws in others, consider a paint with light-diffusing properties that minimize the visibility of surface imperfections.
The Finishing Touch: Protecting Your Newly Painted Paneling Investment

After investing significant time and money into your paneling transformation, proper protection ensures your results last for years rather than months.
Allow paint to fully cure before hanging artwork or placing furniture against paneled walls – most latex paints need 30 days to reach maximum hardness and durability.
Avoid cleaning newly painted paneling for at least two weeks, then use only mild soap solutions with a soft cloth rather than abrasive cleaners or scrubbing tools.
Install subtle corner guards on external corners of paneling in high-traffic areas to prevent chipping and damage from furniture moves or vacuum cleaner collisions.
For painted paneling in humid areas like bathrooms, using a paint with antimicrobial additives helps prevent mold and mildew growth in the grooves and textures.
Touch-up kits containing small amounts of your exact paint color, primer, and appropriate brushes should be created and stored for inevitable future scuffs and marks.
Document your exact paint colors, sheens, and brands (including formula numbers) in a home maintenance file for perfect matching years later when touch-ups are needed.
Seasonal inspection of your painted paneling helps catch small issues before they become major problems – look for cracking at seams, moisture damage, or color changes.
Apply felt pads to furniture that might contact painted paneling, preventing rub marks and preserving your finish, especially with darker paint colors that show wear more readily.
Direct sunlight causes even the best paints to fade over time – use UV-filtering window films or appropriate window treatments to protect your color investment.
Maintain consistent indoor humidity levels between 30-50% to prevent paneling from expanding and contracting, which can cause paint to crack along seams and joints.
Avoid hanging heavy items directly on painted paneling without proper anchoring – the weight can pull at the paneling and damage both the structure and your paint job.
Create a maintenance schedule that includes gentle cleaning twice yearly and inspection for touch-up needs to keep your paneling looking freshly painted for years to come.
For rental properties with painted paneling, provide tenants with specific care instructions to prevent damage from inappropriate cleaning methods or wall-hanging techniques.
When done properly, painted paneling can become the most impressive feature in your home rather than an embarrassing dated eyesore.
The transformation is truly remarkable – visitors to my home never believe the bright, modern walls were once dark, dated wood paneling.
The key to success lies in not cutting corners on preparation, materials, or technique.
With these professional tips, your painted paneling project will deliver results that look like you hired a high-end contractor rather than doing it yourself.
Remember that patience through each step of the process pays dividends in the final appearance and longevity of your painted paneling.
Your home deserves this upgrade, and now you have the knowledge to make it happen like a true professional.


