That forgotten dresser in your garage or the $10 thrift store table you’ve been meaning to fix up?
They’re not just taking up space—they’re blank canvases waiting for your creative touch.
A little paint and some imagination can transform outdated furniture into custom showpieces that look high-end but cost next to nothing.
These game-changing furniture painting techniques will help you create one-of-a-kind pieces that perfectly match your style and space.
No professional skills required—just a willingness to get a little messy and have some fun.
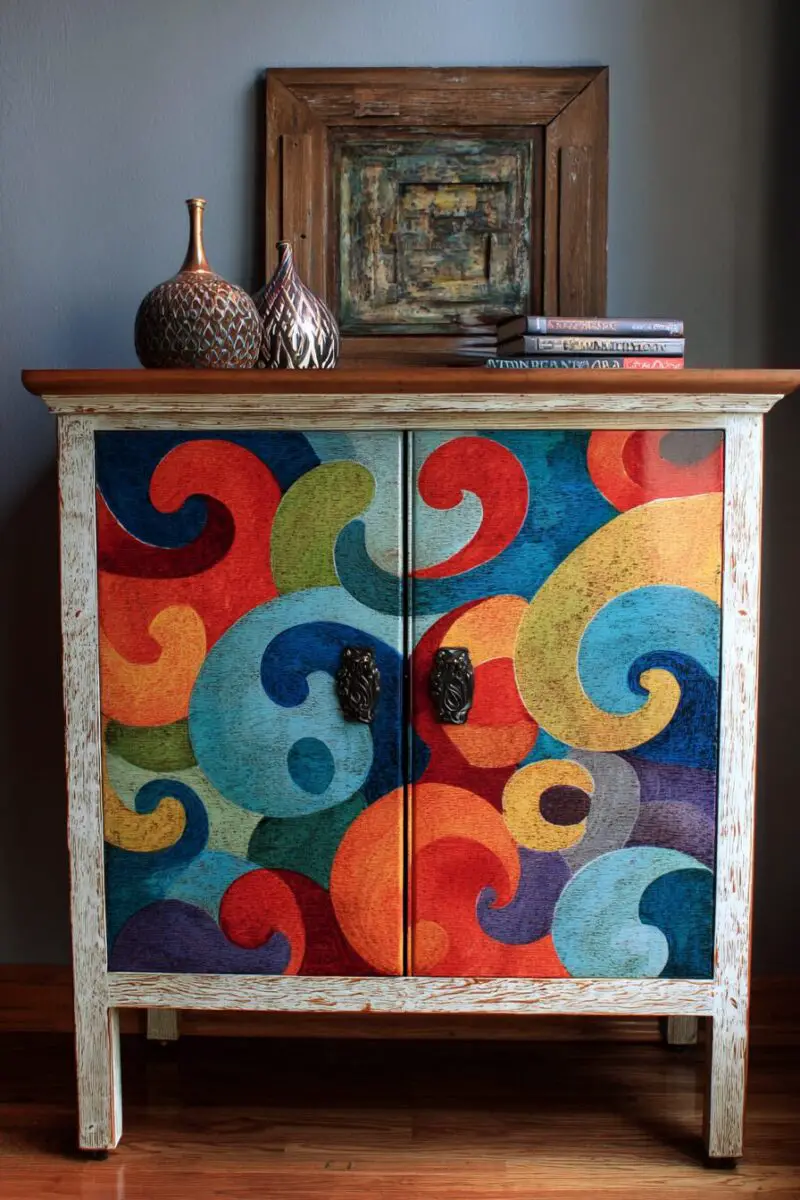
Color Block Drama: The Modern Statement Piece
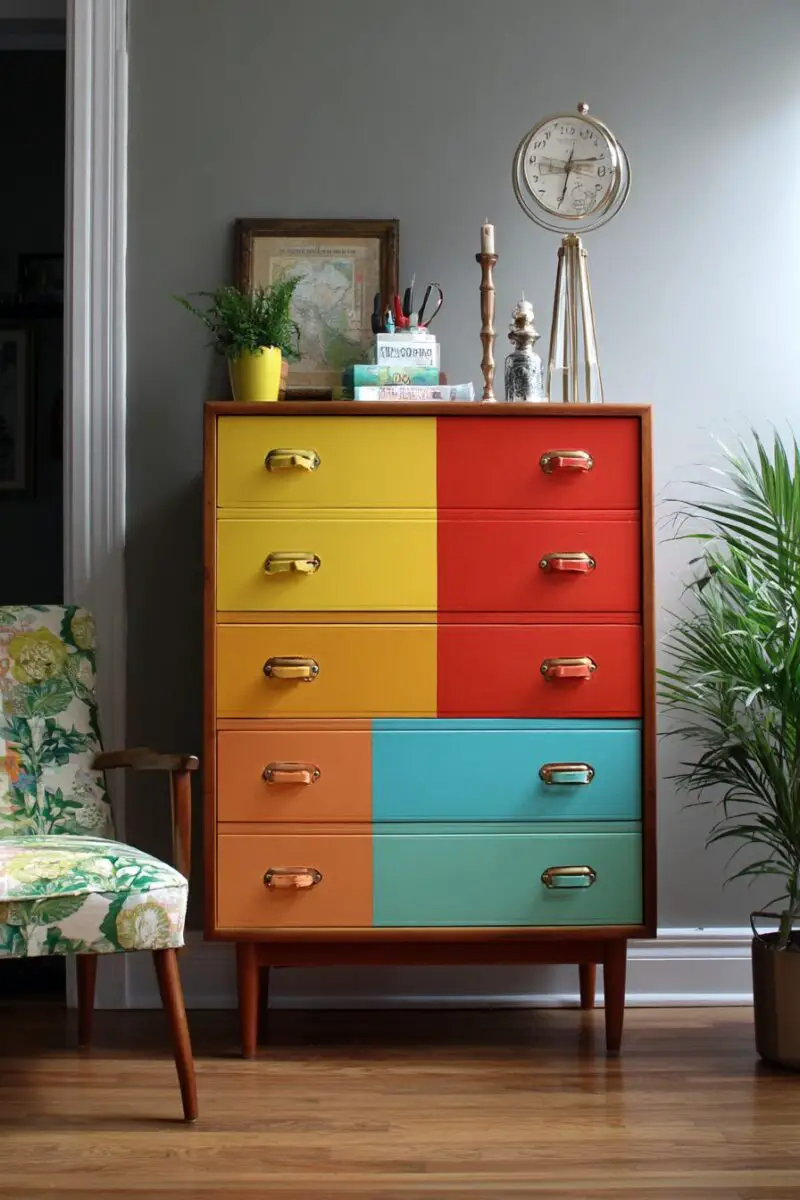
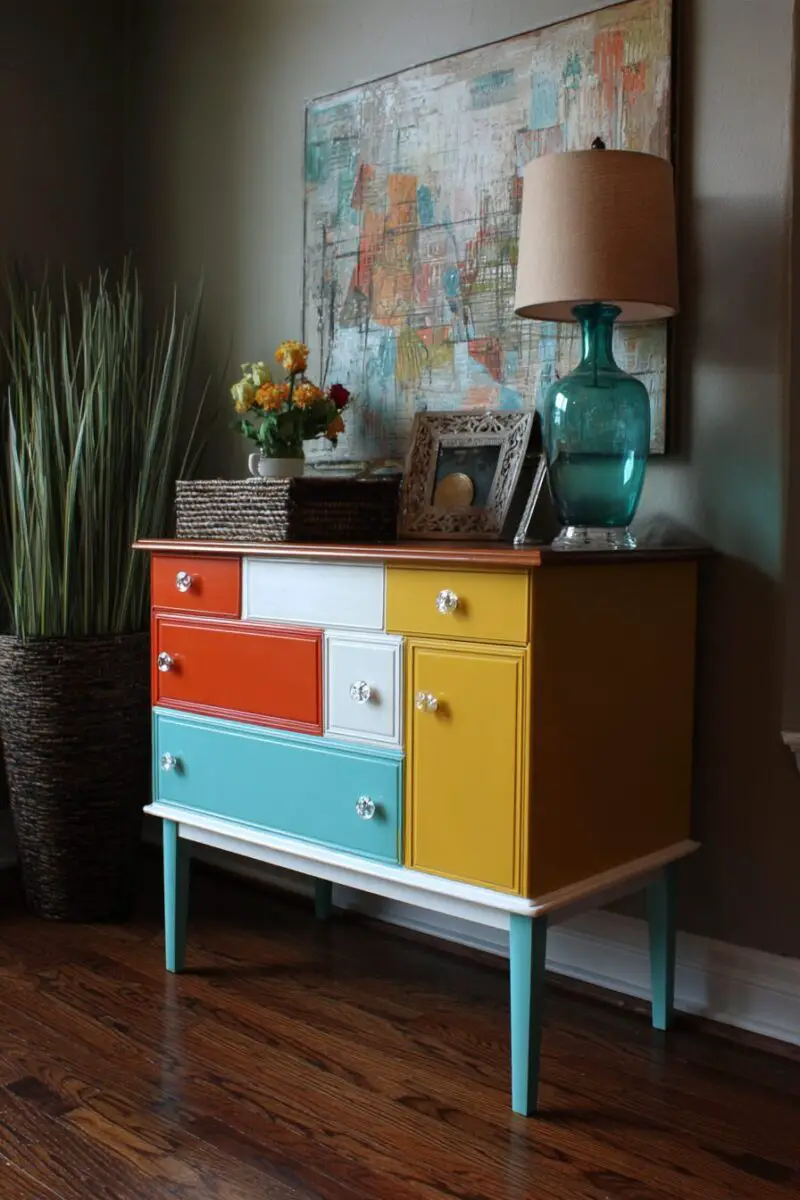
Nothing turns a forgotten piece of furniture into a conversation starter quite like bold color blocking.
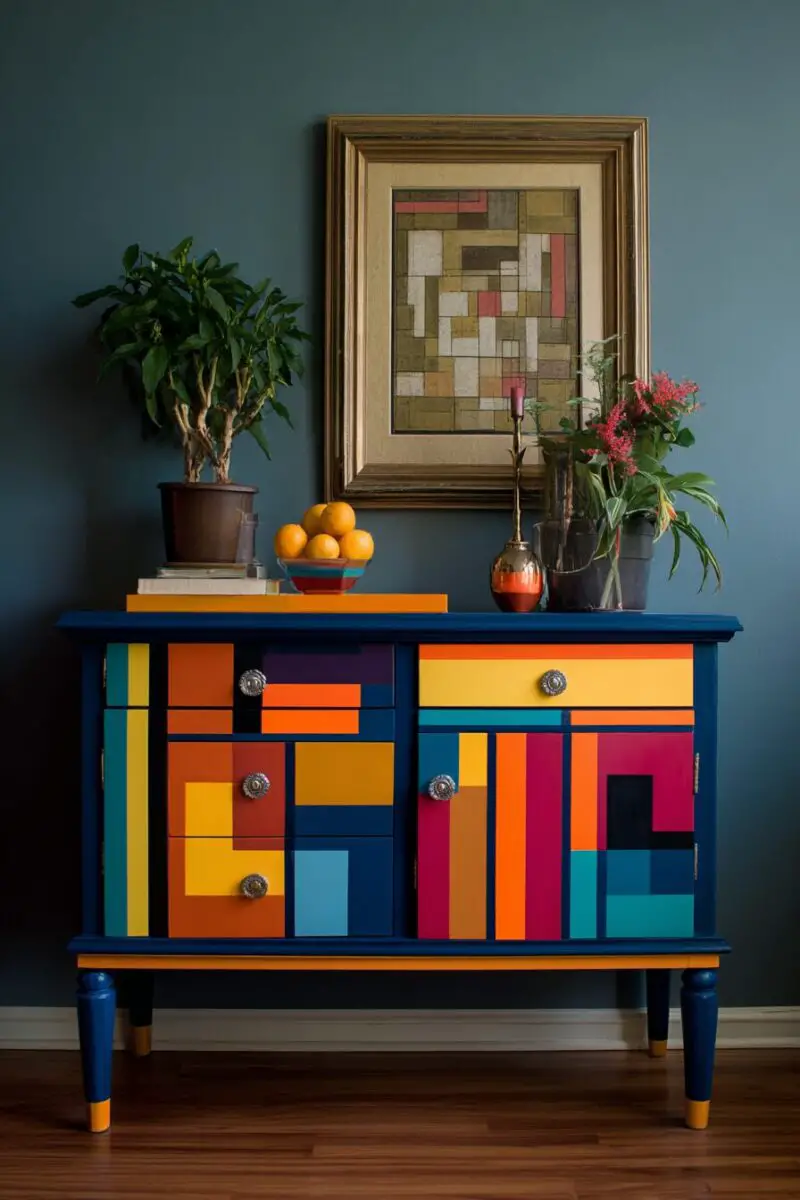
This technique lets you incorporate multiple colors in a geometric pattern that instantly modernizes even the most traditional furniture.
Start by selecting 2-3 complementary or contrasting colors that work with your existing decor – think navy blue paired with mustard yellow, or blush pink with deep emerald green.
Clean your furniture piece thoroughly and sand it down to create a smooth surface that will accept paint evenly.
Apply a quality primer and let it dry completely before moving on to the fun part.
Use painter’s tape to mark off your geometric sections – straight lines work wonderfully, but don’t be afraid to experiment with diagonals or even curved sections if you’re feeling adventurous.
Take your time with the taping to ensure clean, crisp lines that will make your finished piece look professional.
Paint each section with your chosen colors, applying 2-3 coats for maximum vibrancy and durability.
Carefully remove the tape while the paint is still slightly wet to prevent peeling and ensure the cleanest lines possible.
Once everything is dry, protect your masterpiece with a clear polyurethane or furniture wax to make it both beautiful and functional.
This technique works exceptionally well on square or rectangular pieces like dressers, nightstands, and bookshelves where the natural lines of the furniture can guide your color blocking design.
For extra impact, consider painting the inside of a bookshelf or cabinet in a contrasting color that provides a pop of surprise when doors are opened.
You can also experiment with metallic paints to add luxury touches – a gold geometric section can make even the most modest piece look high-end.
Color blocking isn’t just about bright, bold colors – even a monochromatic scheme using different shades of the same color family can create sophisticated, eye-catching results.
The beauty of this technique is its adaptability – it can be as subtle or as dramatic as you want, making it perfect for both design beginners and experienced DIYers looking for a weekend project.
When friends ask where you got your stunning new furniture, you’ll love seeing their surprised faces when you reveal it’s the same old piece they’ve seen before – just reimagined with some paint and creativity.
Ombré Effects: The Gradient Game-Changer
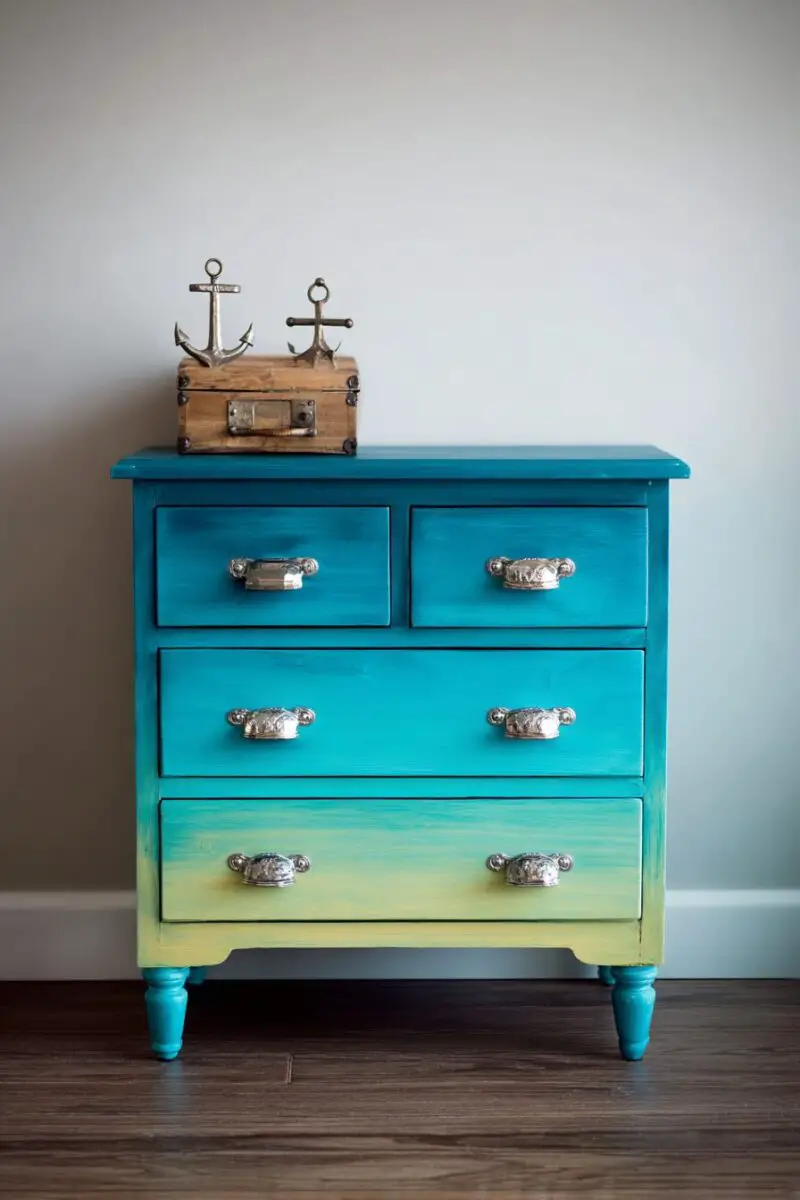
Ombré effects have dominated fashion and hair trends, but they make an equally stunning statement on furniture.
This gradual color transition technique creates depth and visual interest that plain painted pieces simply can’t match.
The key to a successful ombré furniture piece is choosing colors that flow naturally together – typically starting with a darker shade and gradually lightening to create a fading effect.
Begin by selecting your base color and then either buy or create 3-4 progressively lighter shades of the same hue.
Prep your furniture with a thorough cleaning and sanding, focusing particularly on creating a smooth, even surface that will showcase your gradient beautifully.
Apply a quality primer and let it dry completely before starting your ombré magic.
For vertical ombré effects on dressers or cabinets, start painting with your darkest shade at the bottom and work your way up, blending each new shade into the previous one while the paint is still wet.
For horizontal effects, like those on table tops or shelves, work from one side to the other, gradually incorporating more of your lighter shade as you move across the surface.
The secret to professional-looking ombré is the blending – use a slightly damp cloth or sponge to gently blur the lines between colors while the paint is still workable.
You can achieve different looks by adjusting how dramatically or subtly your colors shift – a dramatic change from navy to white creates a bold statement, while moving from deep sage to light sage offers a more subtle, sophisticated effect.
This technique works beautifully on curved or ornate pieces where the shifting light naturally enhances the gradient effect.
Seal your finished piece with clear polyurethane or furniture wax to protect your blended masterpiece from wear and tear.
The versatility of ombré makes it perfect for any room – from nurseries with pastel gradients to living rooms with rich, jewel-toned transitions.
What makes this technique truly special is that no two pieces ever turn out exactly the same, ensuring your furniture is truly one-of-a-kind.
Even furniture painting beginners can achieve impressive results with ombré – it’s actually quite forgiving since the blended nature of the technique disguises small mistakes or imperfections.
Design Your Dream Room in Minutes!
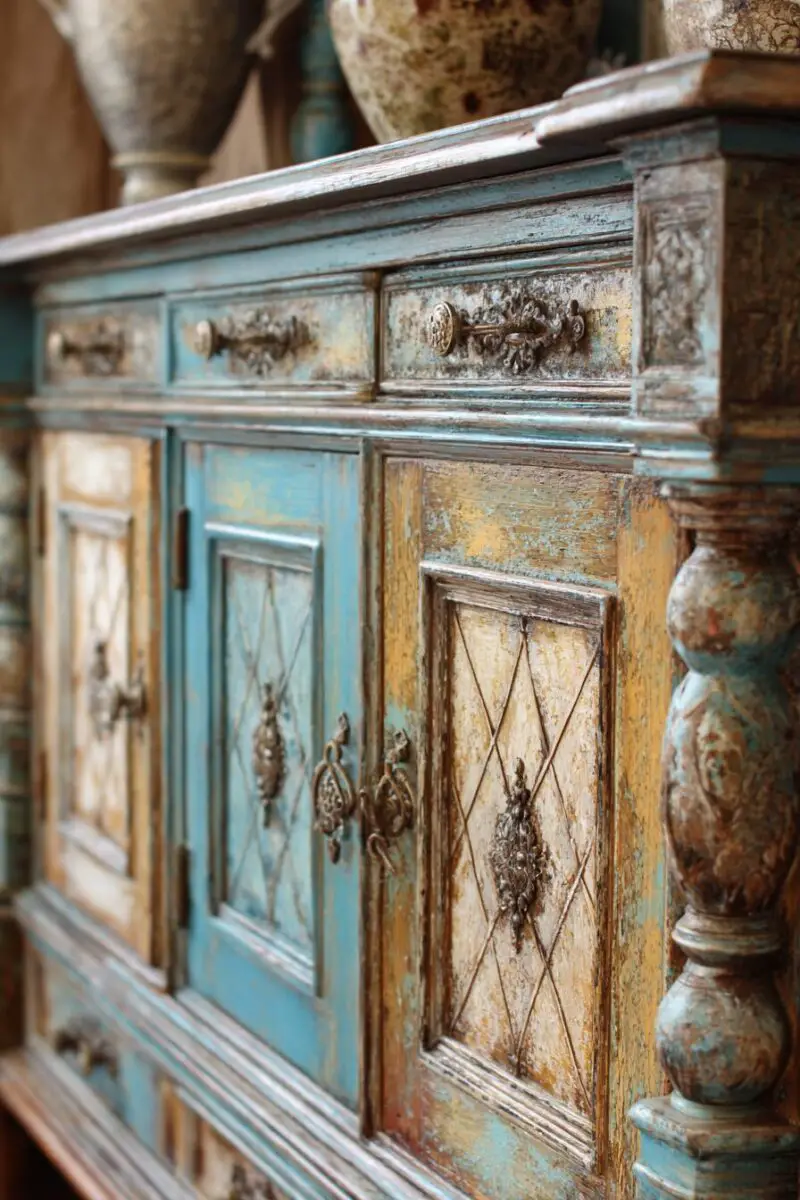
🏡 Start Creating FREE →Vintage Chalk Paint Distressing: The Timeless Transformation
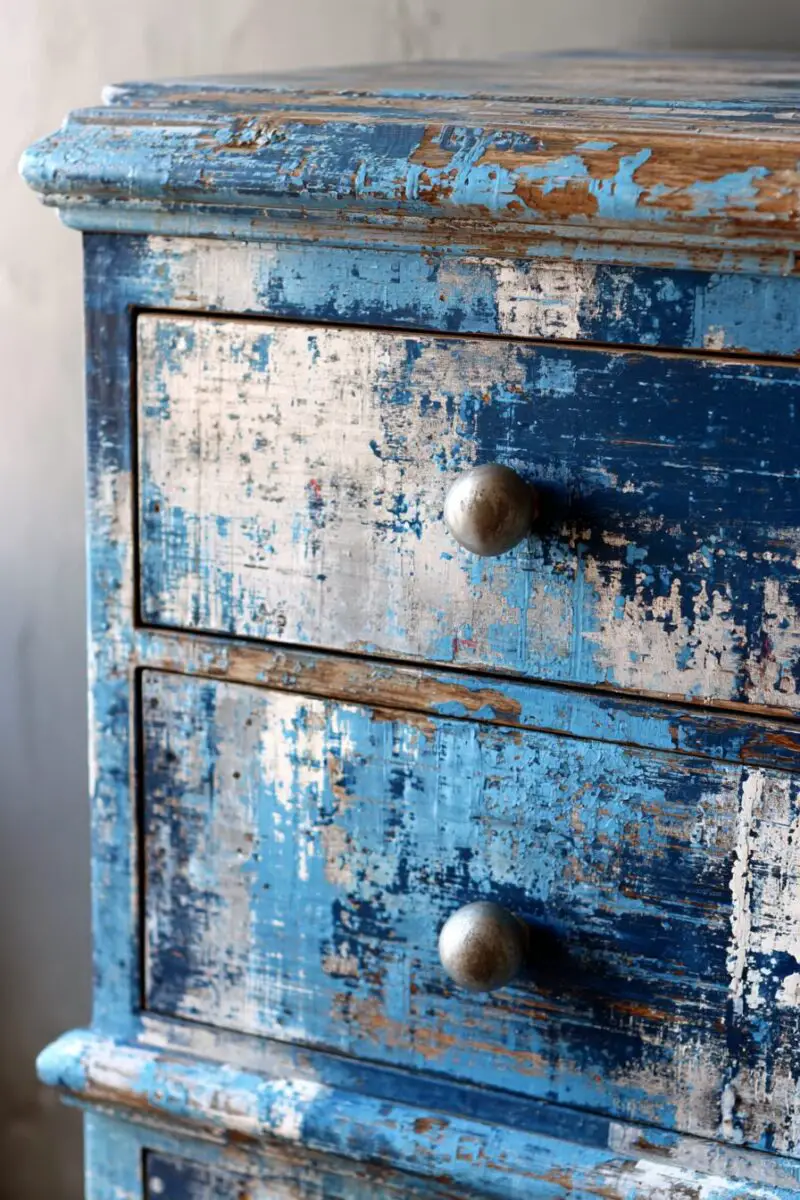
There’s something irresistibly charming about furniture that tells a story, and chalk paint distressing is the perfect technique to add character and history to even the newest pieces.
This approach creates that coveted farmhouse or French country look that makes furniture feel like a cherished family heirloom passed down through generations.
Chalk paint has become the go-to medium for this style because it adheres well to most surfaces with minimal prep work and creates the perfect matte finish for distressing.
Start by selecting a color that fits your desired aesthetic – soft whites, pale blues, sage greens, and muted grays are classic choices that work in nearly any space.
One of the biggest advantages of chalk paint is that you can often skip the heavy sanding and priming steps, though a light sanding helps with adhesion on particularly glossy surfaces.
Apply your chalk paint in two coats, allowing proper drying time between applications, and don’t worry about perfect coverage – slight variations add to the authentic vintage look.
Once your paint is completely dry, it’s time for the fun part – strategic distressing to mimic years of loving use and natural wear.
Focus your distressing on edges, corners, and areas that would naturally show wear over time – around handles, along drawer fronts, and on table edges.
Use medium-grit sandpaper for larger distressed areas and finer grit for more subtle effects, always sanding in the direction of the wood grain for the most natural appearance.
For an even more authentic aged look, apply a dark or antique wax over your distressed paint, working it into the grain and distressed areas where it will catch and create depth.
Wipe away excess wax with a clean cloth, leaving it primarily in the recessed areas and along edges for that time-worn patina that gives chalk-painted furniture its distinctive character.
Finish with a clear wax coat for protection, buffing to your desired sheen – typically chalk-painted pieces look best with a soft, subtle luster rather than a high shine.
This technique works wonders on ornate pieces with carved details, where the dark wax will accentuate the beautiful craftsmanship that might be lost with a solid paint job.
Mixing chalk paint colors can create unique, custom shades that make your piece truly one-of-a-kind – try adding a touch of gray to any color for an instantly aged, sophisticated look.
For a more colorful take on vintage style, consider using vibrant chalk paint colors like coral or turquoise, still distressed for character but with a modern twist that bridges traditional and contemporary aesthetics.
The beauty of this technique is its forgiving nature – mistakes simply add to the charm and character of your finished piece.
Two-Tone Cabinet Refinishing: The Kitchen and Bathroom Revitalizer
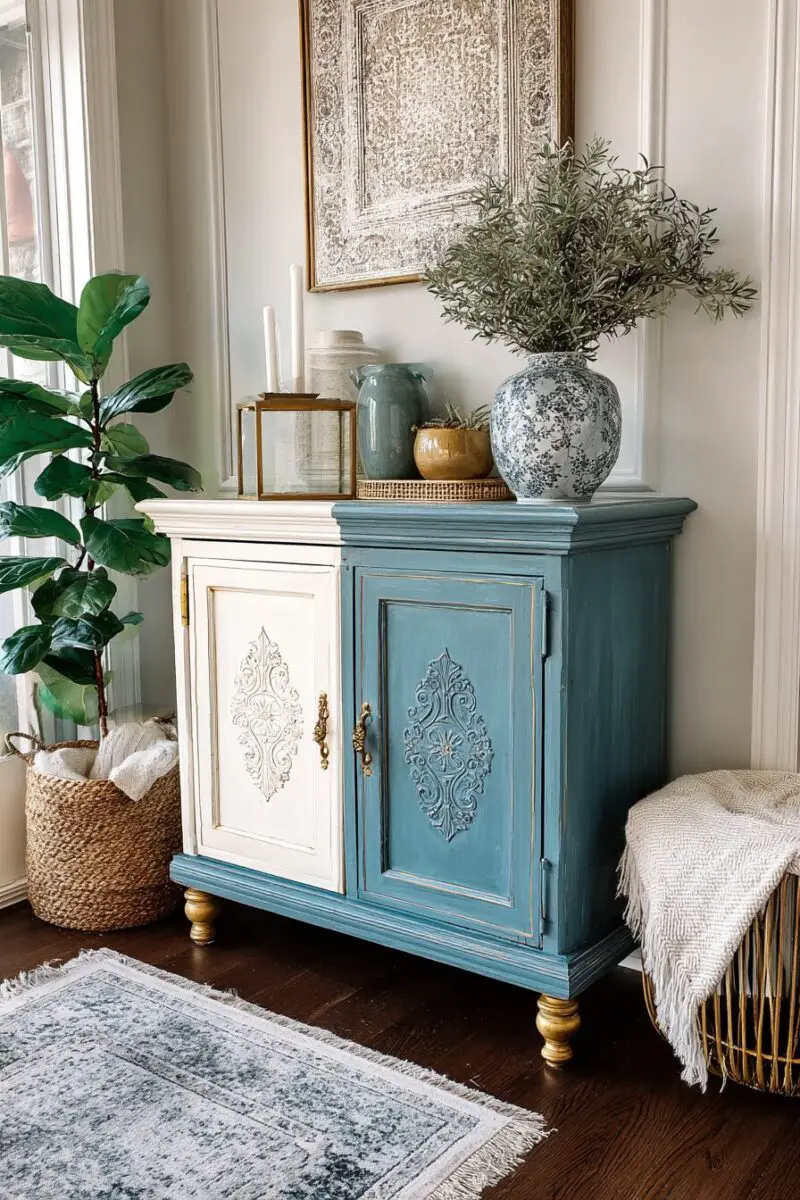
Kitchen and bathroom cabinets often represent the biggest painting opportunity in a home, and the two-tone approach is taking interior design by storm.
This technique uses contrasting colors to create visual interest and dimension, instantly updating tired cabinetry without the astronomical cost of replacement.
The classic approach involves darker lower cabinets grounded by a lighter shade on upper cabinets, creating a balanced, designer look that makes spaces feel larger and more modern.
Start by thoroughly cleaning all cabinet surfaces with a degreaser to remove cooking residue and bathroom moisture that can affect paint adhesion.
Remove all hardware and cabinet doors, labeling them carefully so you’ll know exactly where each piece belongs during reassembly.
Sand all surfaces lightly to create a tooth for the primer to grip, paying special attention to high-gloss finishes that resist new paint.
Apply a high-quality bonding primer specifically designed for cabinets and let it dry completely – this step is non-negotiable for kitchen and bathroom cabinets that will face heavy use.
Choose complementary colors that work with your countertops, backsplash, and flooring – navy blue lowers with cloud white uppers create a timeless look, while sage green and cream offer a softer approach.
Use a small foam roller for flat surfaces and a high-quality angled brush for insets and details to achieve the smoothest possible finish with minimal brush marks.
Apply at least two coats of a durable, semi-gloss or satin paint formulated for cabinets, allowing proper drying time between coats for the hardest possible finish.
Reinstall doors and drawers using new, updated hardware that complements your color choices – this small additional investment dramatically enhances the overall transformation.
For extra designer impact, consider extending your two-tone concept by painting a kitchen island or bathroom vanity in a third, bolder accent color that ties into other elements in the room.
The two-tone approach isn’t limited to just upper and lower cabinets – try painting cabinet frames one color and doors another for a more subtle variation on this trend.
This technique works particularly well in open concept spaces where the cabinetry becomes a major design element that needs to harmonize with adjacent living areas.
Be sure to seal kitchen and bathroom cabinet paint jobs with a clear, water-resistant polyurethane designed for high-moisture environments for maximum durability.
Stenciled Pattern Play: The Detail-Oriented Showstopper
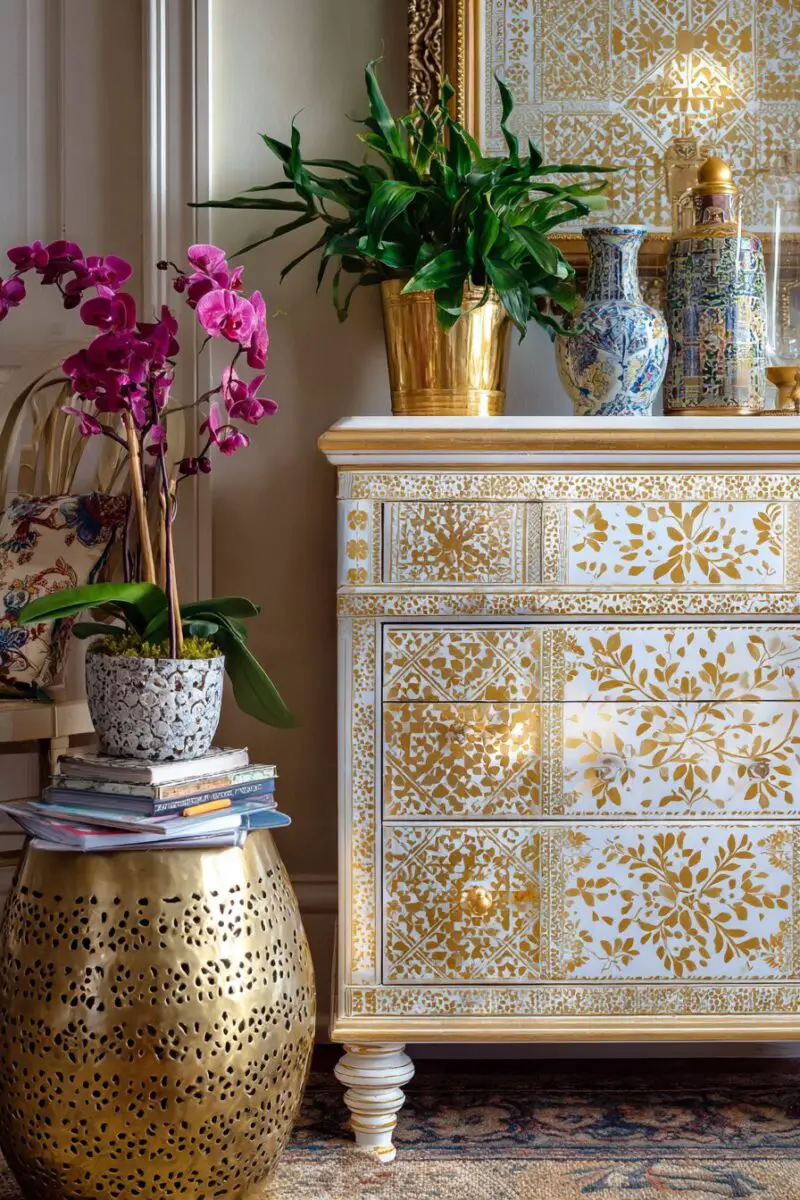
Stenciling transforms ordinary furniture into extraordinary statement pieces with patterns that catch the eye and showcase your creative flair.
This technique allows you to add intricate designs that would be impossible to paint freehand, giving furniture a custom, high-end appearance.
From Moroccan geometrics to delicate florals, the pattern you choose can completely change the vibe of your furniture and the room it occupies.
Start with a solid base coat in a color that complements your pattern – contrasting colors create bold statements, while tone-on-tone applications offer subtle sophistication.
Prep your furniture piece with cleaning, sanding, and priming to ensure a smooth canvas that will showcase your stenciled design clearly.
Secure your stencil firmly with painter’s tape or stencil adhesive spray to prevent bleeding under the edges during application.
Use a specialized stencil brush or small foam roller with very little paint – the key is to build up color gradually to avoid seepage under the stencil edges.
Apply paint using a dabbing motion rather than sweeping strokes, working from the outside edges of the stencil toward the center for the cleanest results.
For large furniture pieces like dressers or tabletops, work in sections, carefully aligning your stencil to ensure pattern continuity across the entire surface.
Metallic paints work beautifully for stenciling, adding a touch of luxury and catching the light to highlight your pattern work.
Allow each section to dry completely before moving your stencil to prevent smudging your freshly applied design.
For added dimension, consider layering different stencils or colors to create more complex, custom patterns that truly set your piece apart.
Stenciling works particularly well on flat surfaces, but don’t be afraid to experiment with curved or contoured pieces for unexpected pattern placement.
Seal your finished piece with several coats of clear polyurethane or furniture wax to protect your detailed pattern work from wear and tear.
This technique pairs beautifully with solid painted pieces in the same room, creating a coordinated look without overwhelming the space with too many patterns.
Textured Finish Techniques: The Tactile Experience

Beyond color, texture adds a whole new dimension to painted furniture that engages not just the eye but also the sense of touch.
Textured finishes can hide imperfections in older furniture while adding character and visual interest that flat paint simply cannot achieve.
From subtle linen effects to dramatic raised patterns, textured painting techniques offer endless possibilities for creative furniture transformation.
Start with a properly prepped piece – cleaned, sanded, and primed to ensure your textured finish adheres properly and lasts for years.
One of the simplest textured techniques involves mixing fine sand directly into your paint to create a subtle, uniform texture that adds depth and dimension.
For more dramatic effects, texture additives specifically designed for paint can create everything from fine stippling to heavy stucco-like finishes.
Experiment with different application tools – Spanish brushes, sea sponges, textured rollers, and even household items like plastic bags or combs can create unique patterns.
The dry brushing technique – using a nearly dry brush loaded with a contrasting color over a base coat – creates beautiful texture while highlighting the details and contours of ornate furniture.
Try the popular lime wash technique for a gorgeous aged effect that resembles weathered European plaster with subtle color variations and beautiful texture.
Raised stencil techniques using spackling compound or textured medium applied through a stencil before painting create dimensional patterns that literally stand out from the surface.
For a rustic, farmhouse look, try a simple dry brushing technique with two contrasting colors, allowing some of each to show through for depth and character.
Faux concrete finishes achieve the industrial chic look without the weight, using joint compound mixed with paint and applied with trowels for an urban, contemporary texture.
Create a leather-look finish by applying glaze over a base coat and manipulating it with plastic wrap pressed into the surface while still wet, then removed after it begins to set.
For the ultimate in luxury texture, try a velvet finish created with specialized paint and application techniques that leave furniture with a soft, touchable surface reminiscent of fine fabric.
Remember that heavily textured finishes work best on pieces that won’t need frequent cleaning or that won’t be touched constantly, making them ideal for accent pieces rather than daily-use items.
Always seal textured finishes with the appropriate protective coat – different textures require different sealers, from wax to polyurethane to specialized texture sealants.
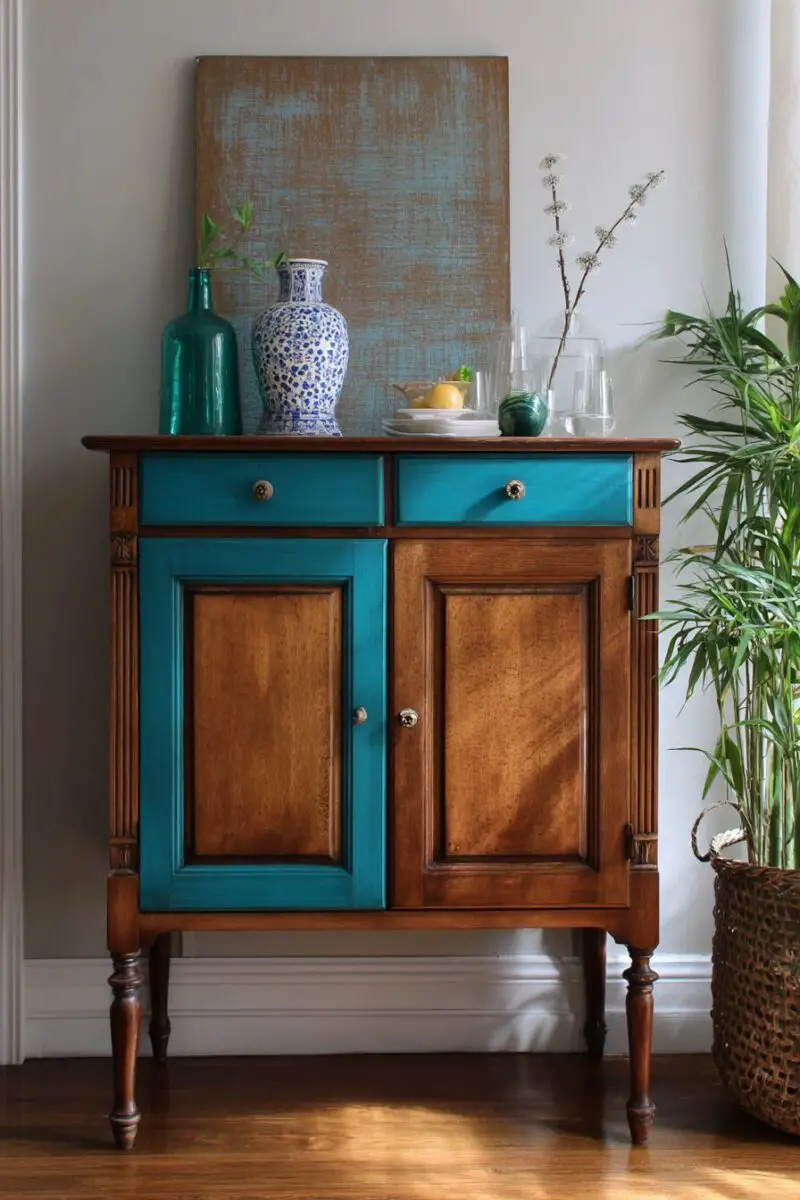
Painted Furniture with Wood Stain Combinations: The Best of Both Worlds
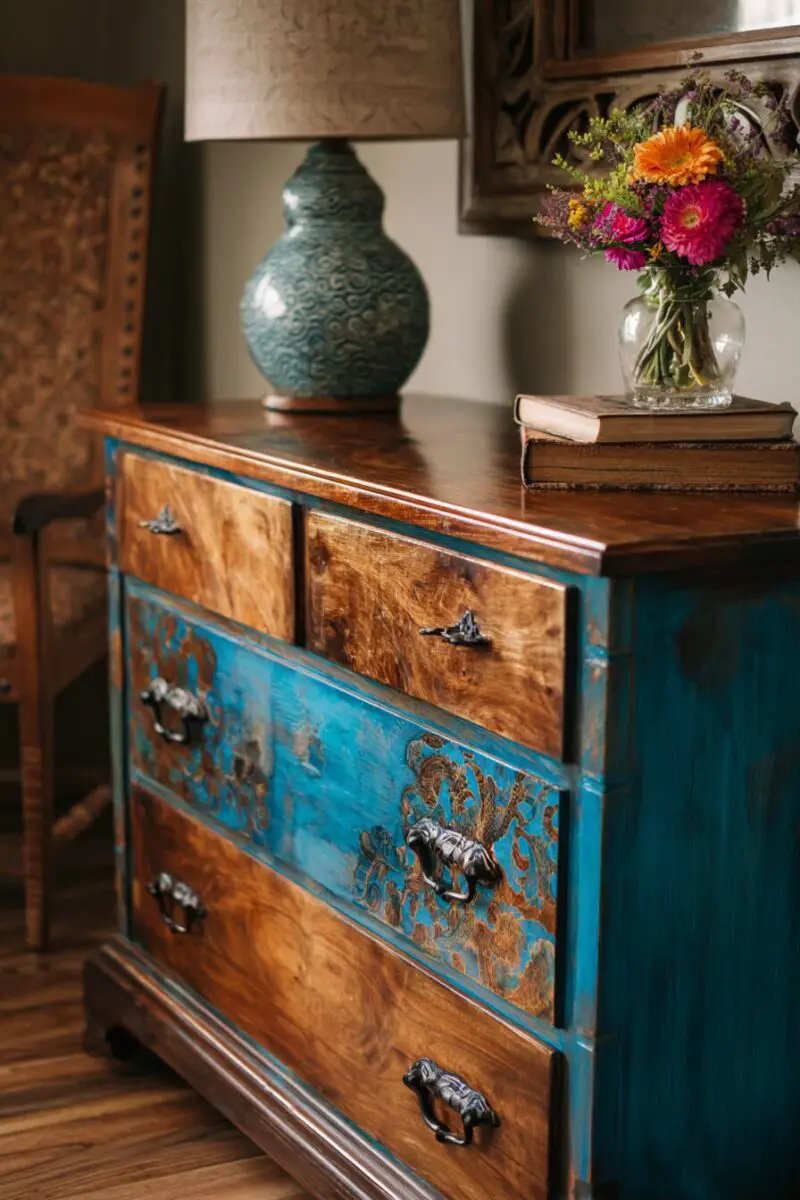
Combining paint with natural wood creates a harmonious balance that honors the beauty of wood grain while adding color and contemporary style.
This hybrid approach is perfect for those who appreciate wood’s natural beauty but still want to incorporate color into their furniture pieces.
The contrast between painted elements and rich wood tones creates sophisticated, designer-worthy furniture that appeals to nearly everyone’s aesthetic sensibilities.
Start by deciding which portions of your furniture will remain wood and which will be painted – drawers and frames, tops and bases, or insets and trim all offer natural division points.
Clean your entire piece thoroughly, then sand the sections that will remain wood down to bare timber, taking care to protect your soon-to-be-painted sections during this process.
Apply wood stain to the natural sections, choosing a tone that complements your planned paint color – rich walnut pairs beautifully with cream or white, while lighter oak works well with navy or forest green.
Once your stain has dried completely according to the manufacturer’s instructions, apply primer to the sections you’ll be painting, ensuring clean lines between painted and stained areas.
Choose paint colors that either contrast dramatically with your wood tone for a bold look or complement it subtly for a more cohesive, sophisticated approach.
Apply at least two coats of paint to your designated sections, allowing proper drying time between applications for the most durable finish.
For a cohesive look, consider how your hardware choices can bridge the painted and wood elements – antique brass often works beautifully with both painted and stained surfaces.
Seal both the painted and stained portions with appropriate finishes – polyurethane works well for both, though you may want different sheens for different sections.
This technique is particularly effective on pieces with beautiful wood tops but less attractive bases, allowing you to preserve the natural beauty where it matters most.
Mid-century modern pieces are perfect candidates for this treatment, as their clean lines and minimal designs provide natural division points for paint and stain.
The paint-and-wood combination works in virtually any design style from farmhouse to ultra-contemporary, making it one of the most versatile furniture makeover approaches.
This technique allows you to highlight architectural details by painting just the recessed panels of cabinet doors while leaving frames stained, or vice versa.
Painted Pattern Without Stencils: The Freehand Creative Expression
Freehand painted patterns unleash your inner artist and create truly unique furniture pieces that can’t be replicated or mass-produced.
Unlike stenciling, this approach embraces the beautiful imperfections and personal touch that come with hand-painted designs.
From bold geometric shapes to delicate botanical motifs, freehand painting allows unlimited creative expression tailored exactly to your space and style.
Begin with a solid base coat in a color that will complement your planned design – consider this your “canvas” for the artistic work to come.
For those nervous about freehand work, start by lightly sketching your design in pencil directly on the furniture piece, giving yourself a guide to follow with paint.
Choose appropriate brushes for your design – fine detail brushes for intricate work and wider flat brushes for bold strokes and larger elements.
Consider the scale of your pattern in relation to the size of your furniture piece – larger items can handle bigger, bolder patterns while smaller pieces benefit from more delicate designs.
For geometric patterns without stencils, use painter’s tape to block out shapes, creating clean lines that look professional even without artistic experience.
Experiment with different paint consistencies – slightly watered-down paint creates a watercolor effect perfect for subtle, artistic furniture that doesn’t overwhelm a space.
Don’t aim for machine-like perfection – the slight variations in hand-painted work are what give these pieces their charm and character.
Folk art patterns like rosemaling, hex signs, or simple florals are forgiving designs for beginners that still create impressive, heritage-inspired results.
For a modern approach, try color-blocked abstract designs with organic shapes and bold colors that make a contemporary statement.
Use painter’s tape to create crisp edges for your design areas, especially when working with furniture that has multiple planes or sections.
For those truly intimidated by freehand work, try the dot method – using the eraser end of a pencil dipped in paint to create perfect polka dots that anyone can master.
Build your confidence with simple patterns like stripes or chevrons before progressing to more complex designs – you’ll be surprised how quickly your skills improve.
Furniture Glazing Techniques: The Depth Creator
Glazing adds rich dimension and character to painted furniture that flat paint alone simply cannot achieve.
This technique involves applying a translucent colored glaze over a base coat, then manipulating it to create depth, age, and visual interest.
The magic of glazing lies in how it settles into crevices, highlights raised details, and creates subtle color variations that make furniture look expensive and carefully crafted.
Start with a fully painted and dried piece in a color that will complement your glaze – lighter base coats show glazing effects more dramatically than darker ones.
Mix your glaze according to the manufacturer’s instructions, or create your own by combining clear glazing medium with a small amount of paint in a contrasting color.
Traditional glazing colors include dark brown, black, or navy for an antique effect, but don’t be afraid to experiment with unexpected colors like forest green or deep burgundy.
Apply your glaze with a brush, working in small sections to ensure you can manipulate it before it begins to dry.
Use a variety of tools to create different effects – cheesecloth for a subtle, streaked look, crumpled paper bags for a mottled finish, or a dry brush for a striated appearance.
The key to successful glazing is removing most of what you apply – wipe away excess glaze with a clean cloth, leaving it primarily in recessed areas and along edges.
Work systematically across your furniture piece to ensure consistent coverage and effect, always blending the edges between sections for a seamless look.
For pieces with detailed carvings or ornate moldings, glazing is particularly effective at highlighting these architectural elements that might otherwise go unnoticed.
Consider using different glazing techniques on different parts of the same piece – heavier applications on decorative elements and lighter touches on flat surfaces.
Glazing can dramatically change the appearance of your base color – a white piece glazed with brown takes on a warm, antiqued ivory tone that looks naturally aged.
For modern pieces, try glazing with metallic colors like silver or copper for a contemporary twist on this traditional technique.
Practice your glazing technique on a sample board before applying it to your furniture to perfect your method and ensure you’ll be happy with the final result.
Unlike some painting techniques, glazing is forgiving and can be adjusted or even completely removed with a damp cloth if you work quickly before it sets.
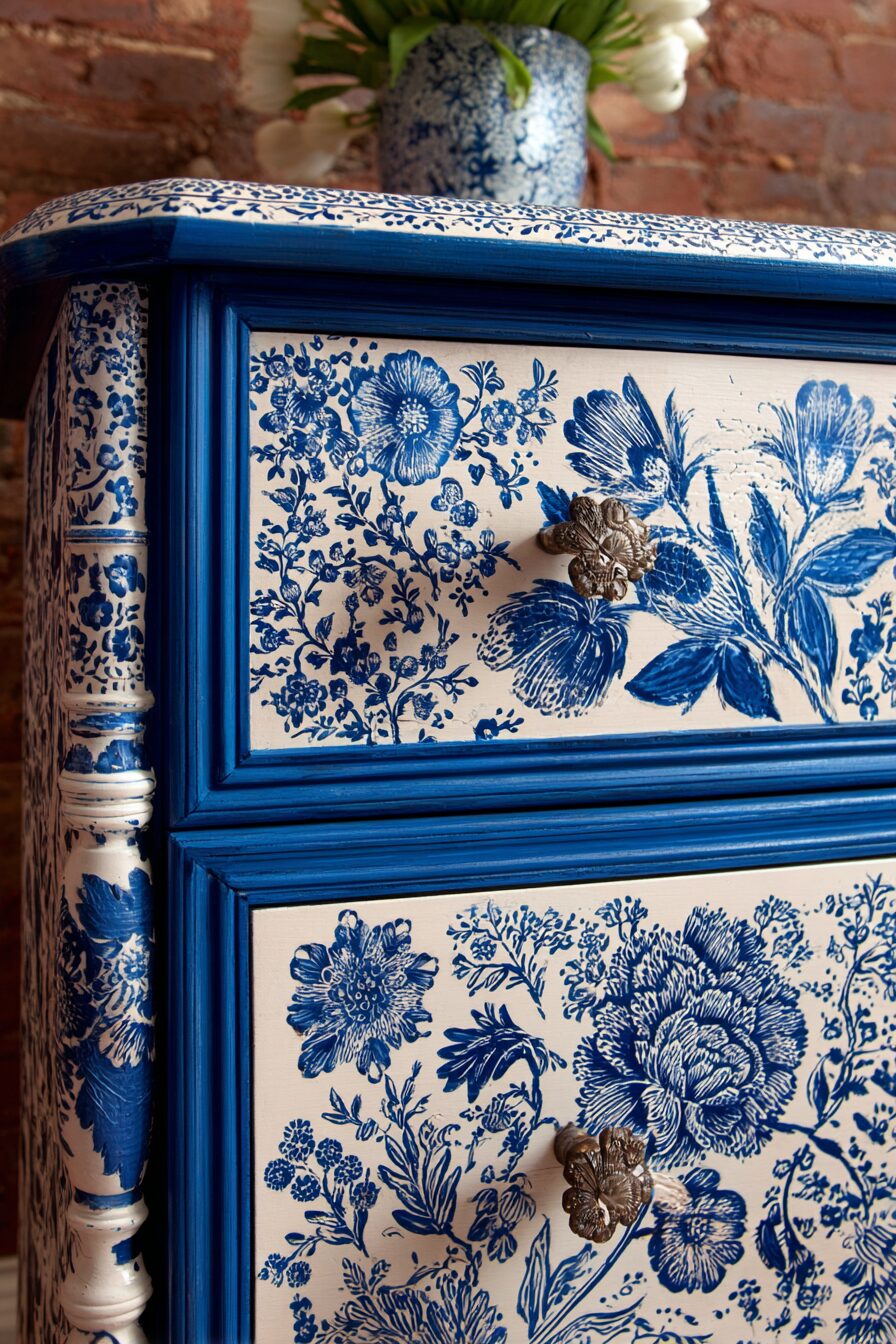
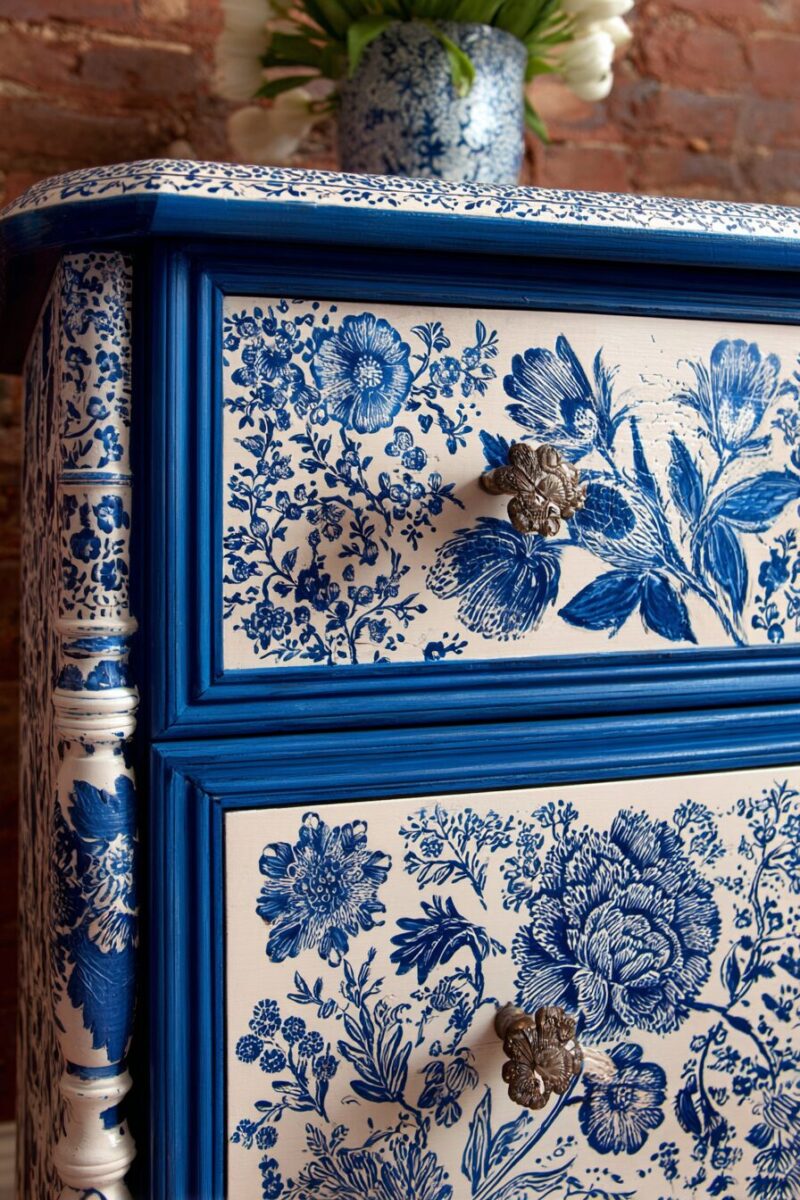
Furniture Transfer Magic: The Image Applier
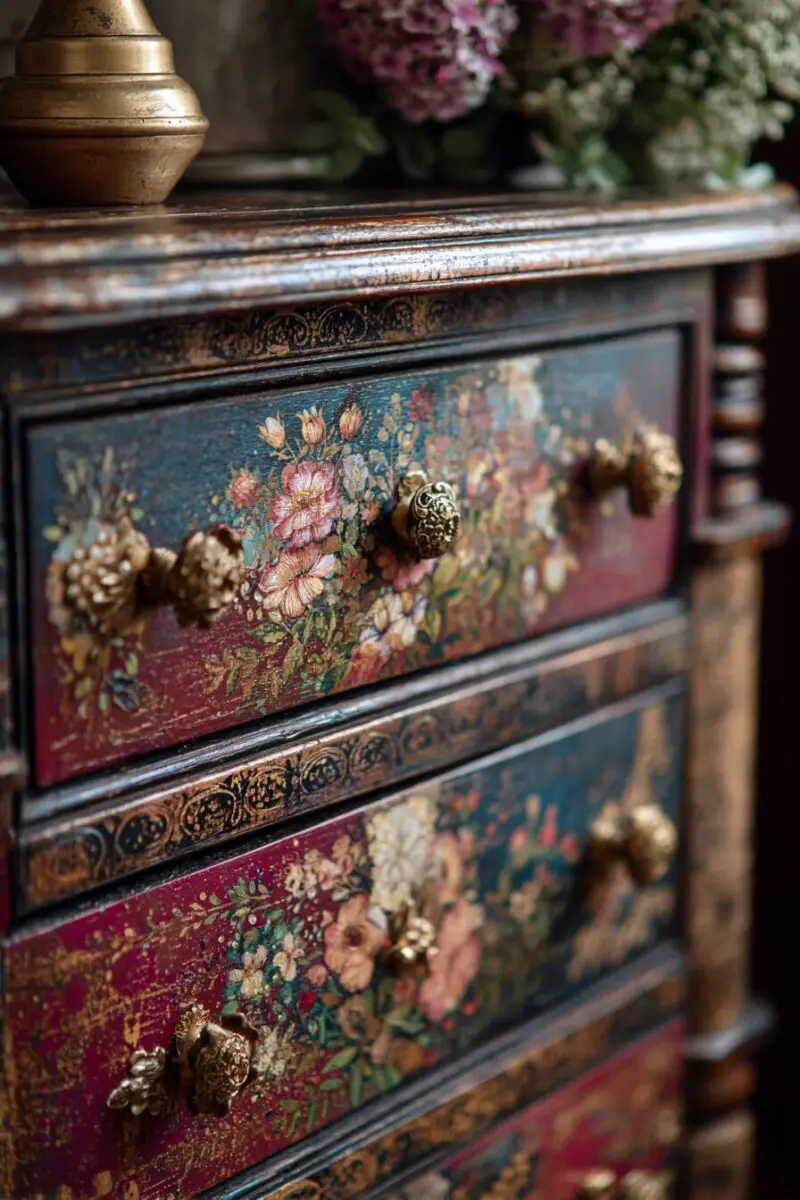
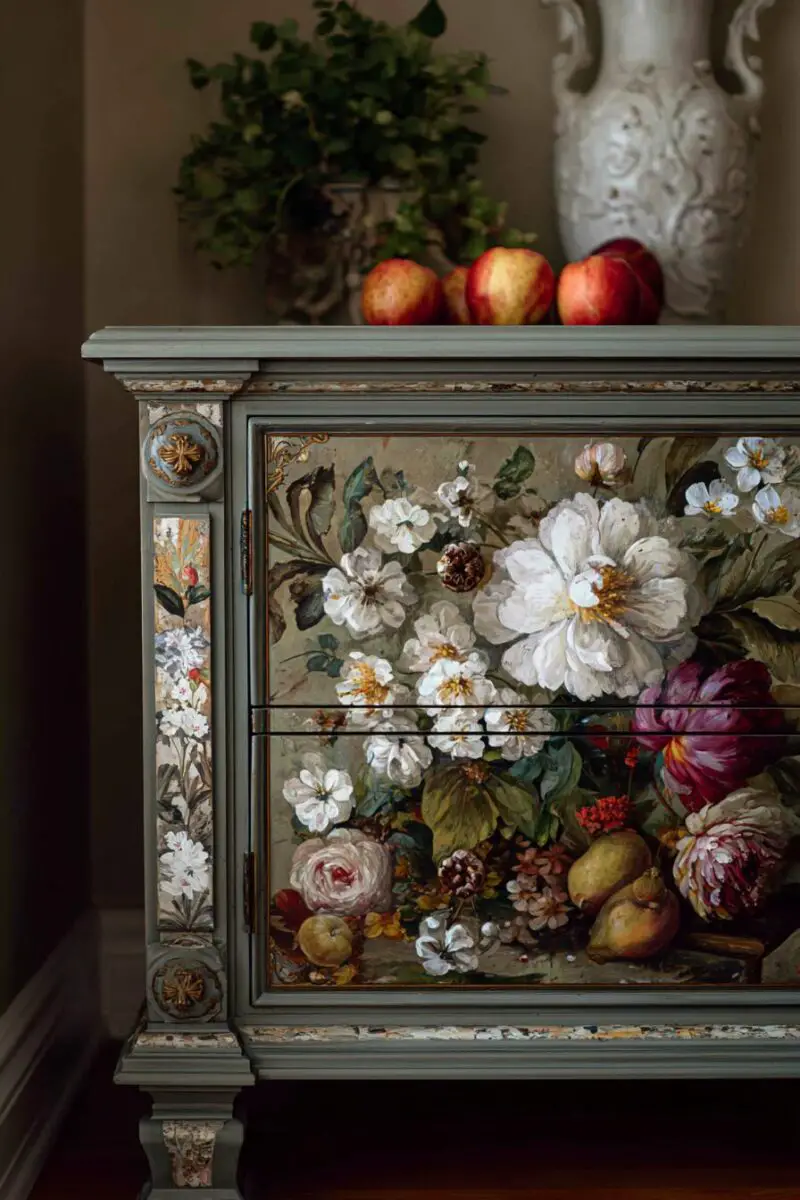
Furniture transfers have revolutionized the DIY furniture world, allowing anyone to apply intricate images, patterns, and text to furniture without artistic skills.
These pre-made designs come in endless varieties from vintage French advertisements to delicate botanical illustrations, allowing you to create professional-looking decorated furniture easily.
The best part about transfers is their fool-proof nature – they create consistent, detailed images that would take hours to paint by hand, even for skilled artists.
Start with a painted and fully dried furniture piece in a color that will complement your chosen transfer – neutral backgrounds like white, cream, or pale gray allow transfers to take center stage.
Carefully cut out your transfer design, leaving a small border around the image to make handling easier during application.
Position your transfer on your furniture piece, securing it temporarily with low-tack painter’s tape while you perfect the placement.
Once you’re satisfied with the positioning, follow the specific application instructions that came with your transfer – some require rubbing with a stick tool, others need water activation.
Work slowly and methodically, ensuring all parts of the transfer adhere properly to your painted surface without bubbles or wrinkles.
After application, gently rub over the entire transfer with a soft cloth to ensure complete adhesion and remove any air pockets that might cause lifting later.
Seal your transferred piece with clear polyurethane or furniture wax to protect the design and integrate it with the painted surface for a professional finish.
Transfers work particularly well on flat surfaces like drawer fronts, cabinet doors, or tabletops, but can also be applied to gently curved surfaces with patience.
For a subtle effect, choose transfers in a similar color to your base coat – white transfers on pale blue create a delicate, tone-on-tone appearance that’s sophisticated and understated.
Furniture transfers can be layered over textured or distressed paint finishes for even more dimension and character in your finished piece.
The range of available transfers is staggering – from French script and toile patterns to modern geometric designs and children’s themes for nursery furniture.
Many transfers are designed to look aged and imperfect, making them perfect for vintage-style or farmhouse furniture makeovers that embrace character and patina.
Transforming tired furniture with paint doesn’t just save money—it creates unique pieces that tell your story and reflect your personal style.
Whether you choose the bold drama of color blocking or the subtle sophistication of glazing, these techniques can turn forgotten furniture into the showstoppers of your home.
Remember, the most important tool in any furniture makeover isn’t the brush or the paint—it’s your willingness to see potential where others see trash.
Now grab that paintbrush and start creating furniture that’s uniquely yours!
