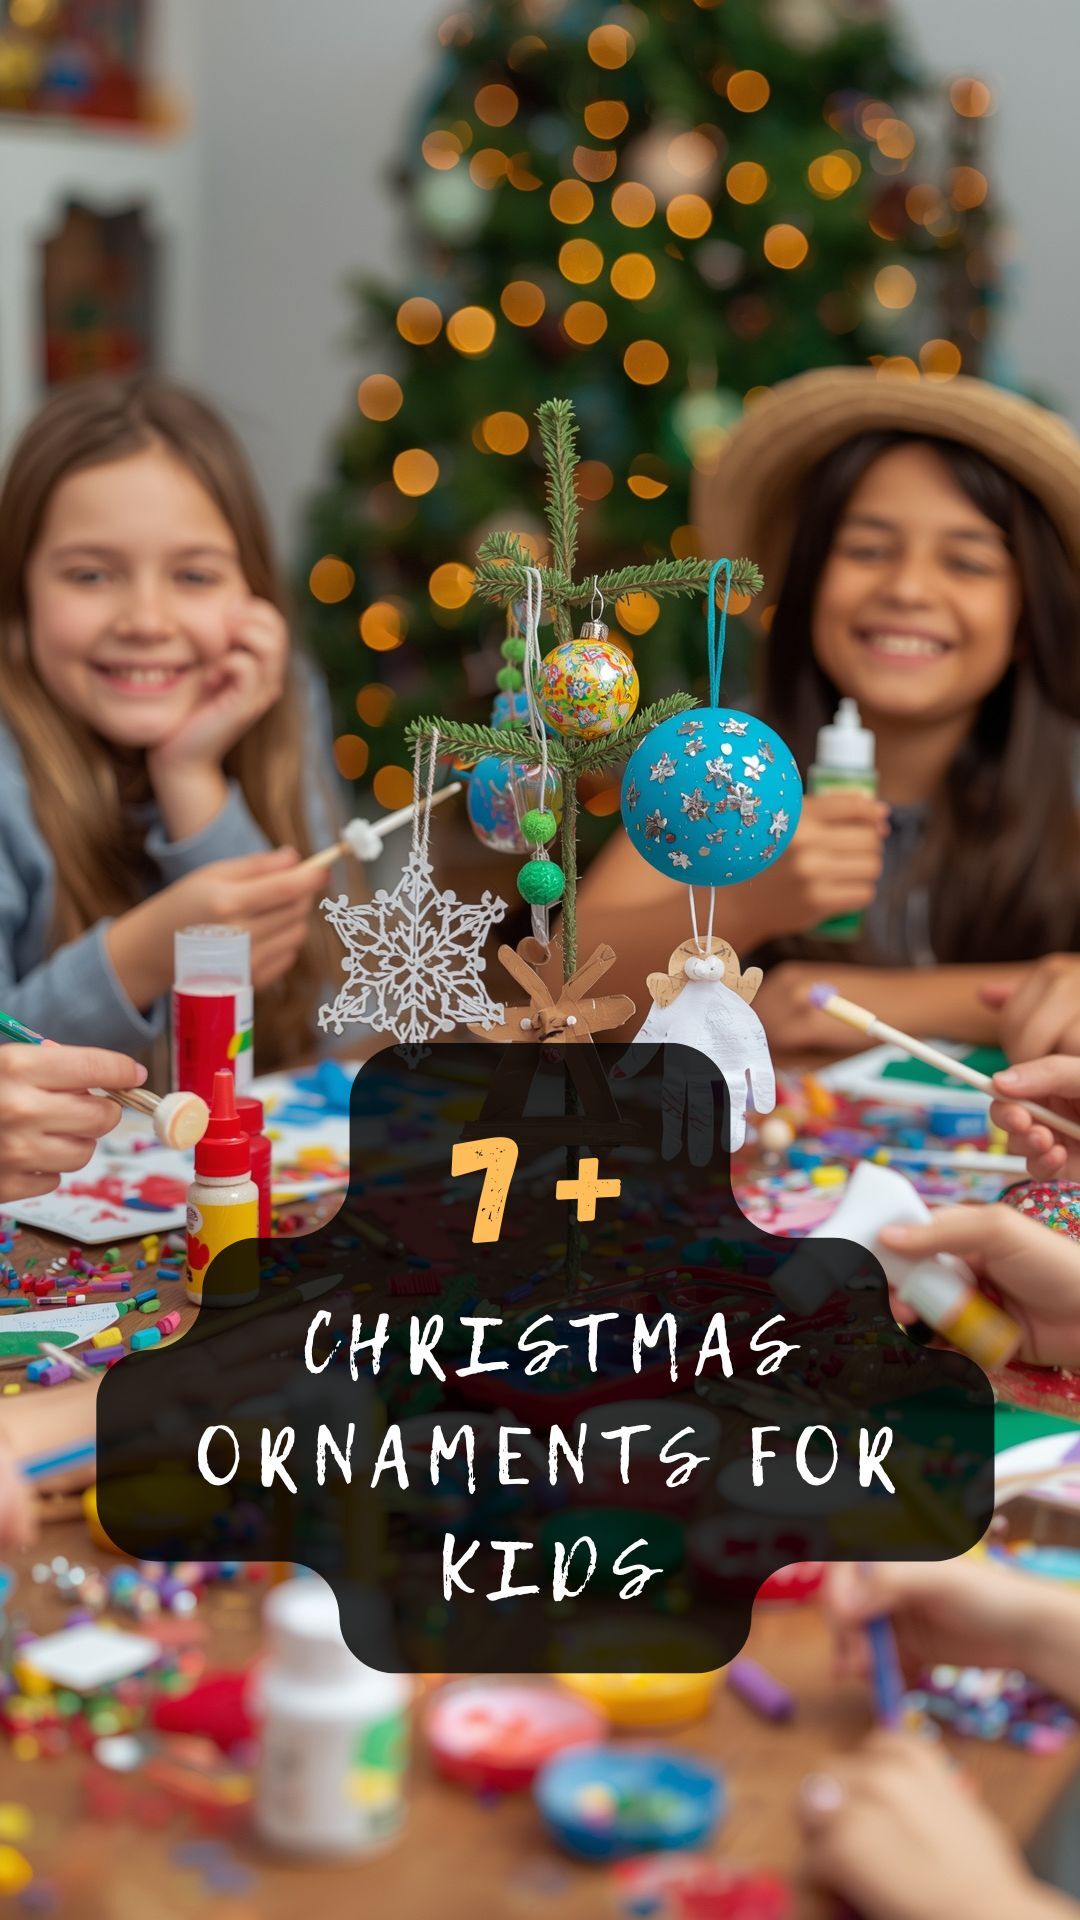
Every parent knows that store-bought ornaments are nice, but there’s something absolutely magical about hanging decorations that tiny hands created with love, glue, and probably a little bit of chaos.

Mason Jar Snow Globe Ornaments
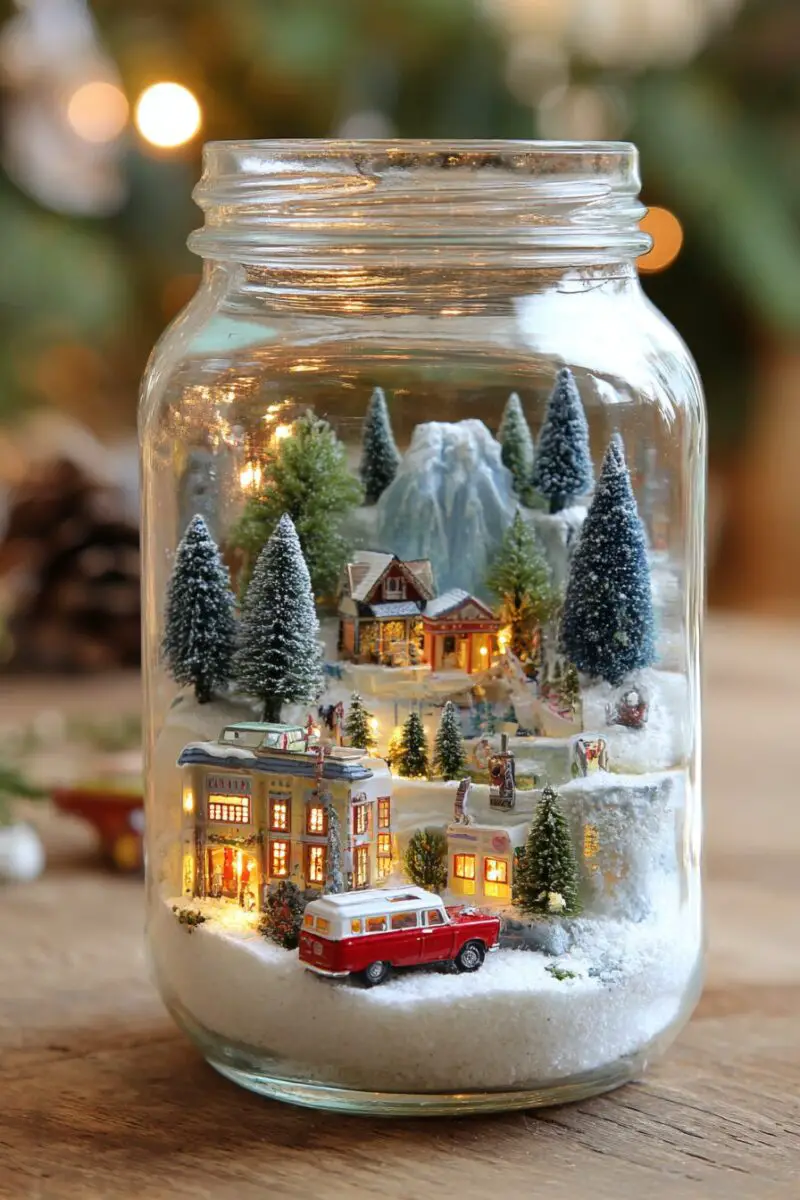

Transform ordinary mason jars into enchanting winter wonderlands that’ll make your kids feel like they’ve captured actual snowstorms in glass.
Start by gathering small mason jars, glycerin, distilled water, and waterproof figurines like tiny Christmas trees, snowmen, or reindeer.
Your kids will love choosing their favorite miniature characters to become the stars of their personal snow globes.
Hot glue the figurines to the inside of the jar lid, making sure they’re completely secure before moving to the next step.
Fill the jar almost to the top with distilled water, leaving just enough room for the glycerin that’ll make the “snow” fall slowly and beautifully.
Add a tablespoon of glycerin and a generous pinch of biodegradable glitter or artificial snow flakes.
Screw the lid on tightly and flip the jar over to test your magical creation.
Watch your children’s faces light up as they shake their homemade snow globes and see the glittery snow swirling around their chosen characters.
Thread a ribbon through the jar’s metal ring to create a hanging loop that’ll look perfect on your Christmas tree.
These ornaments double as fidget toys during the holiday season, giving restless little hands something mesmerizing to play with during family gatherings.
The best part about mason jar snow globes is that each child can create multiple versions with different themes, from winter animals to tiny Santa figures.
Your kids can even make them as gifts for grandparents, teachers, or friends, spreading homemade holiday cheer to everyone they love.
The clear glass allows the ornaments to catch and reflect Christmas tree lights beautifully, creating an extra magical glow in your holiday display.
Store these carefully after the holidays, and they’ll become treasured keepsakes that your family can enjoy year after year.
Popsicle Stick LED Christmas Trees


Create stunning miniature Christmas trees that actually light up, combining traditional crafting with modern LED technology that’ll blow your kids’ minds.
Gather green popsicle sticks, small battery-operated LED string lights, brown craft sticks, glue, and tiny star stickers or foam shapes.
Start by arranging seven green popsicle sticks in a Christmas tree formation, with one stick at the top, two in the second row, three in the third row, and one brown stick as the trunk.
Glue the sticks together at their connection points, creating a sturdy tree frame that can support the weight of the LED lights.
Once the glue dries completely, carefully weave the tiny LED lights through the popsicle stick framework, starting from the bottom and working your way up.
Your kids will be amazed as they watch their simple craft project transform into a glowing masterpiece with just the flip of a switch.
Secure the light string with small dots of clear glue, making sure the battery pack hangs nicely on the back where it won’t interfere with the ornament’s appearance.
Add a golden star to the top of the tree using foam shapes or metallic stickers that’ll catch the LED light and create a beautiful focal point.
Thread a ribbon or string through the top of the ornament to create a hanging loop that’s strong enough to support the weight of the lights and battery pack.
These LED trees look absolutely stunning on a Christmas tree, creating layers of light that make your entire holiday display more dynamic and interesting.
The battery-operated lights mean you don’t have to worry about electrical connections or safety hazards, making this project perfect for younger children to help with.
Your kids can experiment with different colored LED lights, creating rainbow trees, classic white light displays, or even alternating color patterns.
These ornaments work beautifully as nightlights in children’s bedrooms during the holiday season, providing a gentle, festive glow that helps little ones drift off to sleep.
Design Your Dream Room in Minutes!
🏡 Start Creating FREE →Paper Plate Reindeer Face Ornaments

Turn ordinary paper plates into adorable reindeer faces that’ll have your kids giggling while they craft and your guests smiling when they see the finished products.
Start with brown paper plates, or let your children paint white plates brown using washable tempera paint for an extra messy, fun experience.
Cut handprints from brown construction paper to create perfectly sized antlers that add a personal touch to each reindeer ornament.
Glue the handprint antlers to the back of the paper plate, positioning them so they peek out from behind the reindeer’s head at jaunty, playful angles.
Create reindeer eyes using large googly eyes, or cut circles from white paper and let your kids draw their own expressive eyes with markers or crayons.
A red pom-pom makes the perfect Rudolph nose, though your children might prefer pink, orange, or even rainbow-colored noses for their unique reindeer personalities.
Draw or glue on a smiling mouth using black markers or construction paper, encouraging your kids to give their reindeer different expressions and personalities.
Add festive accessories like tiny Santa hats, colorful scarves made from ribbon scraps, or even small jingle bells that’ll make music when the ornaments move.
Punch a hole at the top of the plate and thread through a loop of ribbon or yarn for hanging, making sure it’s centered so the reindeer hangs straight.
Your kids can create an entire reindeer family with different expressions, accessories, and personalities, turning ornament-making into storytelling time.
These lightweight ornaments are perfect for lower tree branches where heavier decorations might cause drooping or breakage.
The large surface area of paper plates gives children plenty of room to add creative details like rosy cheeks, freckles, or even reindeer clothing.
These ornaments photograph beautifully and make perfect keepsakes to document your children’s artistic development from year to year.
Salt Dough Fingerprint Ornaments

Create lasting memories with salt dough ornaments that preserve your children’s tiny fingerprints in beautiful, personalized decorations that’ll tug at your heartstrings for years to come.
Mix together two cups of flour, one cup of salt, and one cup of water to create a smooth, pliable dough that’s perfect for little hands to work with.
Knead the dough until it reaches a clay-like consistency that holds its shape but isn’t too stiff for children to press their fingers into.
Roll the dough into balls about the size of tennis balls, then flatten them into circles roughly half an inch thick.
Press your child’s finger firmly into the center of each circle, creating a clear, detailed fingerprint impression that’ll become the focal point of the ornament.
Use cookie cutters to shape the dough around the fingerprint into stars, hearts, Christmas trees, or traditional ornament shapes that complement your holiday theme.
Create a hanging hole using a drinking straw or pencil before the dough dries, making sure it’s large enough for ribbon but not so big that it weakens the ornament.
Allow the ornaments to air dry for 24 to 48 hours, or bake them in a 200-degree oven for two to three hours until they’re completely hardened.
Paint the dried ornaments with acrylic paints, letting your children choose their favorite colors while leaving the fingerprint area visible and special.
Add glitter, sequins, or small gems around the fingerprint to create a decorative border that makes the personal touch even more prominent.
Write your child’s name and the year on the back of each ornament using permanent markers or paint pens, creating dated keepsakes that’ll tell the story of their growth.
These ornaments become increasingly precious as your children grow older and their hands get bigger, serving as beautiful reminders of their younger selves.
Family members and friends treasure these personalized gifts because they represent something no store-bought ornament can replicate – the unique mark of a beloved child.
Felt Emoji Christmas Ball Ornaments

Bring modern digital culture to your traditional Christmas tree with emoji-inspired ornaments that’ll have your tech-savvy kids excited about old-school crafting.
Start with plain foam or plastic Christmas ball ornaments in bright colors like yellow, red, green, or blue that’ll serve as the perfect backdrop for emoji faces.
Cut small pieces of colored felt to create emoji expressions, from the classic smiley face to the heart-eyes emoji that’s every kid’s favorite.
Use fabric glue or a glue gun (with adult supervision) to attach felt pieces, creating iconic emoji expressions that your children recognize from their favorite apps and games.
Create the laughing-crying emoji using yellow balls with black felt teardrops and curved smile pieces that capture that perfectly expressive digital emotion.
The heart-eyes emoji works beautifully with red felt hearts cut into perfect little shapes and positioned exactly where the eyes should go.
Make angry emojis using red ornaments with black felt eyebrows angled downward and frowning mouths that look delightfully grumpy hanging on your tree.
Your kids can create the sunglasses emoji using black felt cut into cool shades shapes, instantly making your Christmas tree look hip and modern.
Add texture with different felt techniques like layering colors, creating gradient effects, or using patterned felt pieces for extra visual interest.
These ornaments spark conversations with guests who’ll be amused and impressed by the creative blend of traditional Christmas decorating with contemporary digital culture.
Your children can make emoji ornaments representing their current favorite expressions, creating a time capsule of their digital generation’s communication style.
The soft felt texture contrasts beautifully with the smooth ornament surface, creating tactile interest that invites touching and examining up close.
These ornaments photograph incredibly well for social media posts, letting your family share their creative holiday spirit with friends and extended family online.
Kids love explaining their emoji choices to grandparents and other relatives, bridging generational gaps through shared laughter and creativity.
Toilet Paper Roll Angel Ornaments


Transform everyday toilet paper rolls into heavenly angel ornaments that prove the most beautiful decorations can come from the most unexpected materials.
Gather toilet paper rolls, white paint or construction paper, cotton balls, gold or silver pipe cleaners, and small wooden beads for angel heads.
Paint the toilet paper rolls white or wrap them in white construction paper, creating clean, angelic bases that’ll look ethereal hanging on your Christmas tree.
Cut slits about two inches deep on opposite sides of one end of the roll, creating tabs that’ll become the angel’s flowing robes when bent outward.
Bend these tabs outward and downward to create the illusion of a flowing dress or robe that gives the angel movement and grace.
Glue a wooden bead to the top of the roll for the angel’s head, letting your children draw sweet faces with fine-tip markers or leave them minimalist and serene.
Stretch cotton balls and glue them around the angel’s head to create fluffy, cloud-like hair that looks divinely soft and realistic.
Twist gold or silver pipe cleaners into wing shapes, making them proportional to the angel’s body and bending them into graceful curves that suggest flight.
Attach the wings to the back of the angel using strong craft glue, positioning them so they extend beautifully beyond the sides of the body.
Create tiny halos by twisting small pieces of gold pipe cleaner into circles and attaching them above the angel’s head at slight angles for authentic celestial appearance.
Your kids can personalize their angels with different hair colors using various shades of cotton balls or even yarn for more elaborate hairstyles.
Add glitter to the wings and robes for extra sparkle that catches Christmas tree lights and creates magical reflections throughout your holiday display.
These angels look particularly beautiful when grouped together at different heights on the tree, creating a heavenly choir effect that brings spiritual meaning to your decorations.
The cylindrical shape makes them perfect for hiding small LED tea lights inside, creating glowing angel ornaments that illuminate from within.
Button Snowflake Ornaments


Create intricate, sparkling snowflakes using colorful buttons and wire that’ll add handmade elegance to your Christmas tree while teaching your kids about symmetry and patterns.
Collect buttons in various sizes, colors, and styles – the more variety you have, the more unique and interesting each snowflake will become.
Use thin craft wire or pipe cleaners as the base structure, cutting six equal pieces to create the classic six-pointed snowflake foundation that mimics real snow crystals.
Twist the wire pieces together at their centers, creating a star shape with six evenly spaced arms radiating outward like natural snowflakes.
Thread buttons onto each wire arm, alternating sizes, colors, and styles to create patterns that are both random and intentionally beautiful.
Your kids will develop their fine motor skills as they thread buttons onto wire, learning to manipulate small objects while creating something gorgeous.
Secure each button in place with small twists of wire, ensuring they won’t slide around but can still move slightly for dynamic visual interest.
Create variation by making some arms longer than others, or by clustering multiple small buttons together on single arms for texture and depth.
Add small jingle bells between buttons for ornaments that create gentle music when they move with air currents or tree vibrations.
Finish each arm with a particularly special button – perhaps a vintage piece, an unusually shaped button, or one with special meaning to your family.
Twist a small loop at the end of one arm to create a hanging point, or attach a ribbon loop for easier tree hanging and better ornament positioning.
The combination of different button materials creates interesting visual textures, from shiny plastic to elegant mother-of-pearl to rustic wood buttons.
These snowflakes look stunning when backlit by Christmas tree lights, with the various button surfaces reflecting and refracting light in beautiful, complex patterns.
Your children can sort through button collections, learning about colors, sizes, and patterns while developing their aesthetic sense and creative decision-making skills.
Photo Transfer Wood Slice Ornaments

Create rustic, personalized ornaments that showcase your favorite family memories on natural wood slices, blending modern photo technology with traditional woodland Christmas aesthetics.
Purchase pre-cut wood slices from craft stores, or cut your own from fallen branches if you want a more authentic, hands-on experience with your children.
Sand the wood slices smooth to create perfect surfaces for photo transfers, letting your kids help with fine-grit sandpaper for a satisfying tactile experience.
Choose your favorite family photos from the past year – vacation pictures, silly faces, holiday moments, or candid shots that capture your family’s personality perfectly.
Print photos on special transfer paper designed for wood surfaces, following package directions carefully to ensure clear, lasting image quality.
Apply the photo transfers to the wood slices using the heat transfer method, which your children can help with under careful adult supervision.
The combination of natural wood grain with modern family photos creates a beautiful contrast between organic textures and precious memories.
Seal the transferred photos with clear acrylic sealer to protect them from moisture and handling, ensuring these ornaments will last for many holiday seasons.
Drill small holes near the top edge of each wood slice and thread them with natural twine, jute, or ribbon that complements the rustic aesthetic.
Your kids can help choose which photos become ornaments, creating discussions about favorite family memories and special moments from the past year.
Add hand-painted borders around the photos using acrylic paints, letting your children contribute their artistic touches to these personalized keepsakes.
Create themed sets using photos from specific events like summer vacations, birthday parties, or family gatherings, organizing your ornaments by memory categories.
These ornaments make incredibly meaningful gifts for grandparents, godparents, and other special family members who treasure photos of your children’s growth and family adventures.
The natural wood backing means these ornaments complement both rustic and modern Christmas decorating styles, fitting seamlessly into any holiday aesthetic.
Yarn-Wrapped Twig Star Ornaments


Gather natural materials to create stunning rustic star ornaments that bring outdoor beauty inside while teaching your children about nature and resourcefulness.
Collect five straight twigs of similar length during family nature walks, making this project an adventure that starts long before the actual crafting begins.
Break or cut the twigs to approximately the same length, around four to six inches each, creating uniform pieces that’ll form balanced, symmetrical stars.
Arrange the twigs in a star pattern by overlapping their ends, creating the classic five-pointed shape that’s instantly recognizable and pleasing to the eye.
Use small pieces of thin wire or strong thread to secure the twig intersections, wrapping tightly to ensure the star structure stays firmly connected during handling.
Choose colorful yarn in holiday colors like red, green, gold, or silver, or let your children pick their favorite colors for truly personalized ornaments.
Start wrapping yarn at one star point, securing the end with a small knot, then methodically wrapping around and between the twigs to create interesting geometric patterns.
Your kids will love watching the plain brown twigs transform into colorful, textured art pieces as they wrap yarn in different directions and densities.
Encourage creative wrapping patterns – some sections can be wrapped tightly for solid color blocks, while others can be wrapped loosely for more open, airy effects.
Leave some areas of the natural twig exposed to maintain the rustic, organic feel that makes these ornaments so charming and unique.
Create hanging loops by leaving extra yarn at the finishing point and tying it into a sturdy loop that’ll support the ornament’s weight on tree branches.
These ornaments look particularly beautiful when made in sets with coordinating color schemes, creating cohesive groupings that enhance your overall tree design.
The natural materials mean these ornaments can be composted at the end of their useful life, making them an environmentally friendly choice for eco-conscious families.
Your children learn about natural textures, colors, and patterns while developing the patience and focus required for repetitive wrapping motions.
Cookie Cutter Clay Ornaments

Create professional-looking clay ornaments using simple cookie cutters and air-dry clay that hardens without firing, making this project accessible for any family without special equipment.
Purchase white or natural air-dry clay from craft stores, choosing brands that dry hard and smooth for ornaments that’ll last through many holiday seasons.
Roll the clay into sheets about quarter-inch thick using a rolling pin, creating surfaces that are substantial enough to hold their shape but thin enough to dry evenly.
Press cookie cutters firmly into the clay, using Christmas shapes like stars, trees, angels, candy canes, or any shapes that spark your children’s excitement.
Remove excess clay carefully, saving scraps for re-rolling and creating additional ornaments, teaching your kids about minimizing waste and maximizing materials.
Use drinking straws or pencils to create hanging holes before the clay dries, positioning them carefully to ensure balanced hanging when the ornaments are completed.
Allow ornaments to air dry according to package directions, usually 24 to 48 hours, teaching your children patience as they watch their creations slowly harden.
Paint the dried ornaments with acrylic paints, letting your kids choose color combinations that reflect their personalities and artistic preferences.
Add details with fine brushes, markers, or paint pens, creating intricate designs that showcase your children’s growing artistic abilities and attention to detail.
Apply glitter while paint is still wet for sparkly accents that catch Christmas tree lights beautifully, or add sequins and small gems for extra glamour.
Create matching sets by using the same cookie cutter multiple times but decorating each ornament differently, showing how one shape can become many unique pieces.
These ornaments can be personalized with names, dates, or special messages painted on the back, creating keepsakes that commemorate specific holidays and family moments.
The clay surface accepts many different decorating materials, from paint to markers to stamps, giving your children multiple ways to express their creativity on single projects.
Your kids can make themed collections using related cookie cutter shapes, creating ornament stories or groupings that work together visually on your Christmas tree.
