
Mud kitchens have become the ultimate outdoor play solution for kids who love to get their hands dirty while developing crucial sensory and imaginative skills.
These magical outdoor spaces combine natural elements with creative play, encouraging hours of screen-free entertainment.
Here are my top extraordinary mud kitchen ideas that will have your little ones begging to go outside:
✨Click to Get My 101 FREE Designer Room Ideas
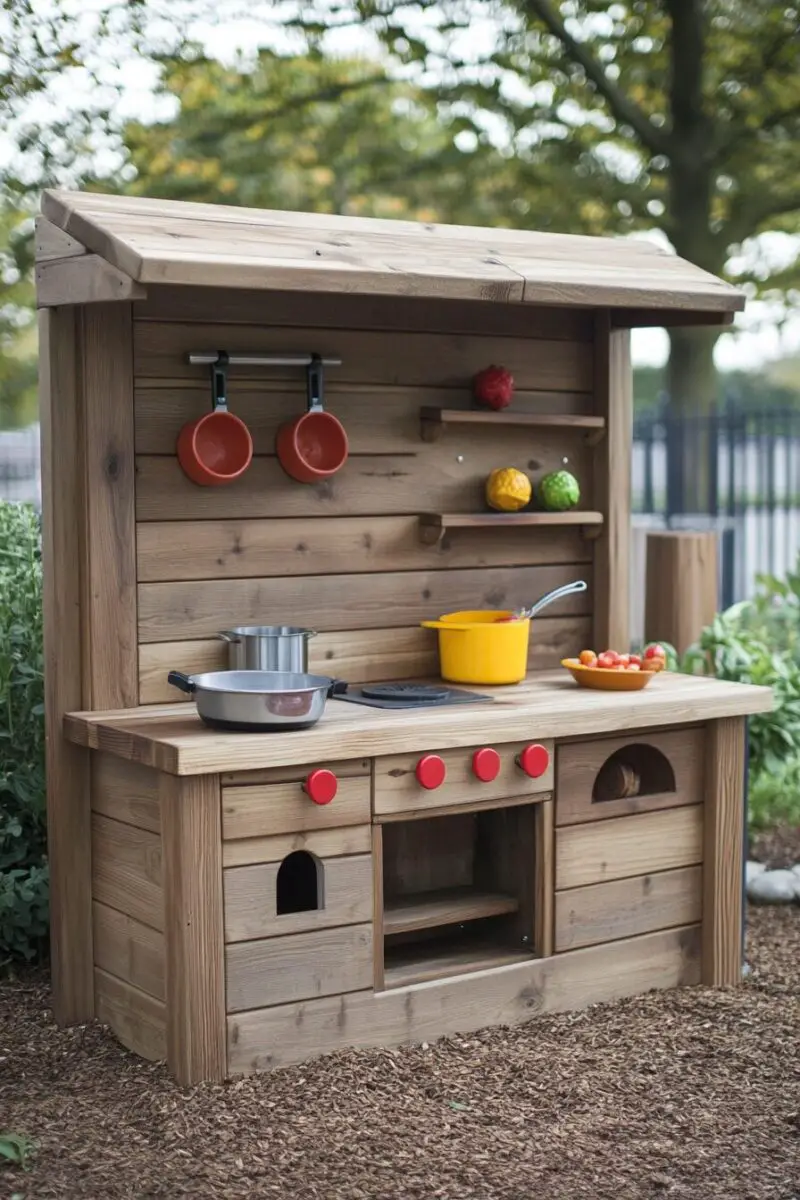
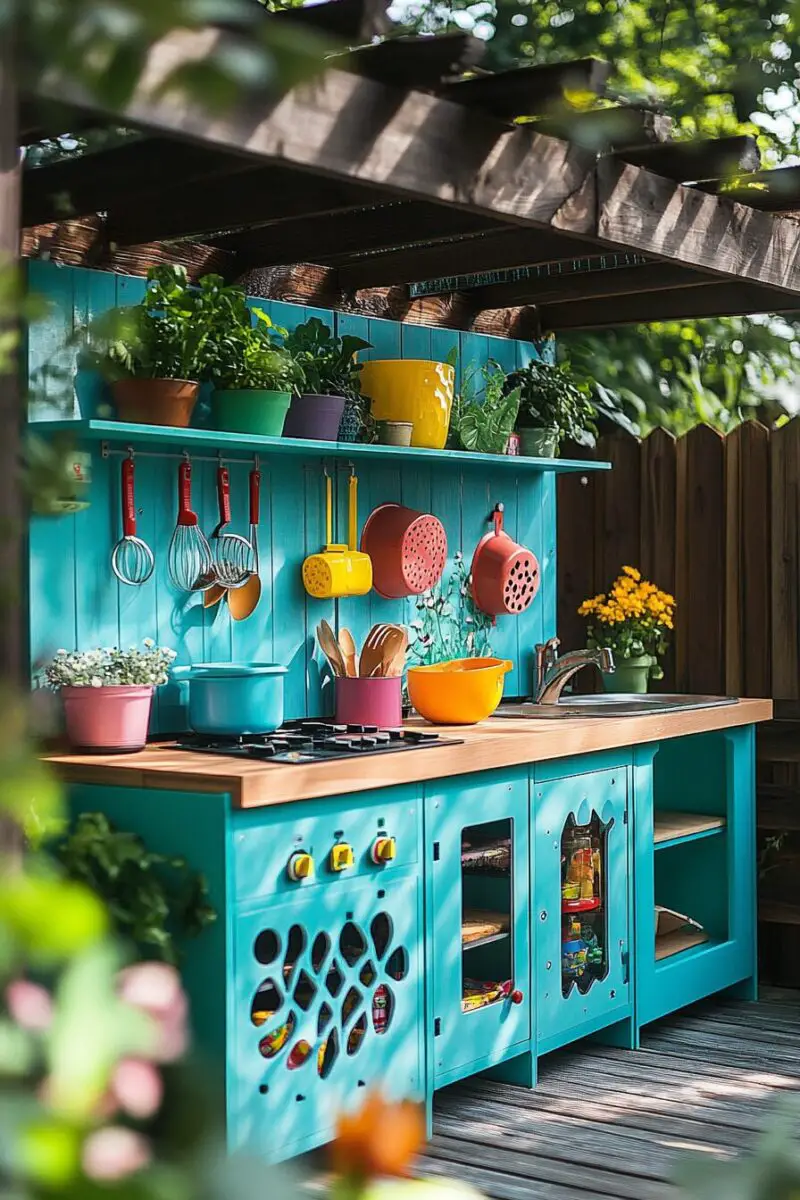
Rustic Pallet Paradise Mud Kitchen
Pallets aren’t just for shipping anymore – they’re the perfect foundation for a stunning mud kitchen that looks straight out of a countryside dream.
Start by selecting 2-3 sturdy wooden pallets that haven’t been treated with harmful chemicals.
Sand down any rough edges to prevent splinters, creating a safe play environment for curious little hands.
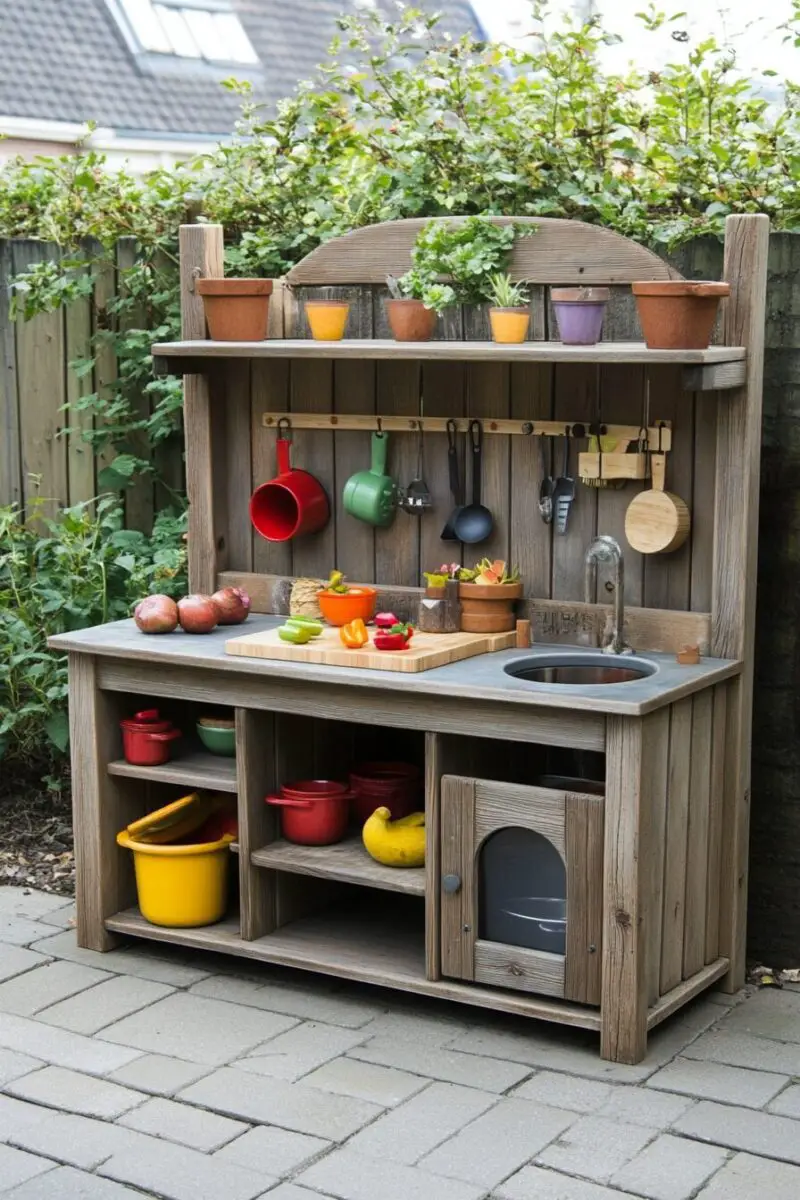
The beauty of pallet construction lies in its built-in shelving – those slats become perfect spots for storing mud pies and nature collections.
Add a simple countertop made from weather-treated plywood, ensuring it’s sealed properly to withstand constant water and mud exposure.
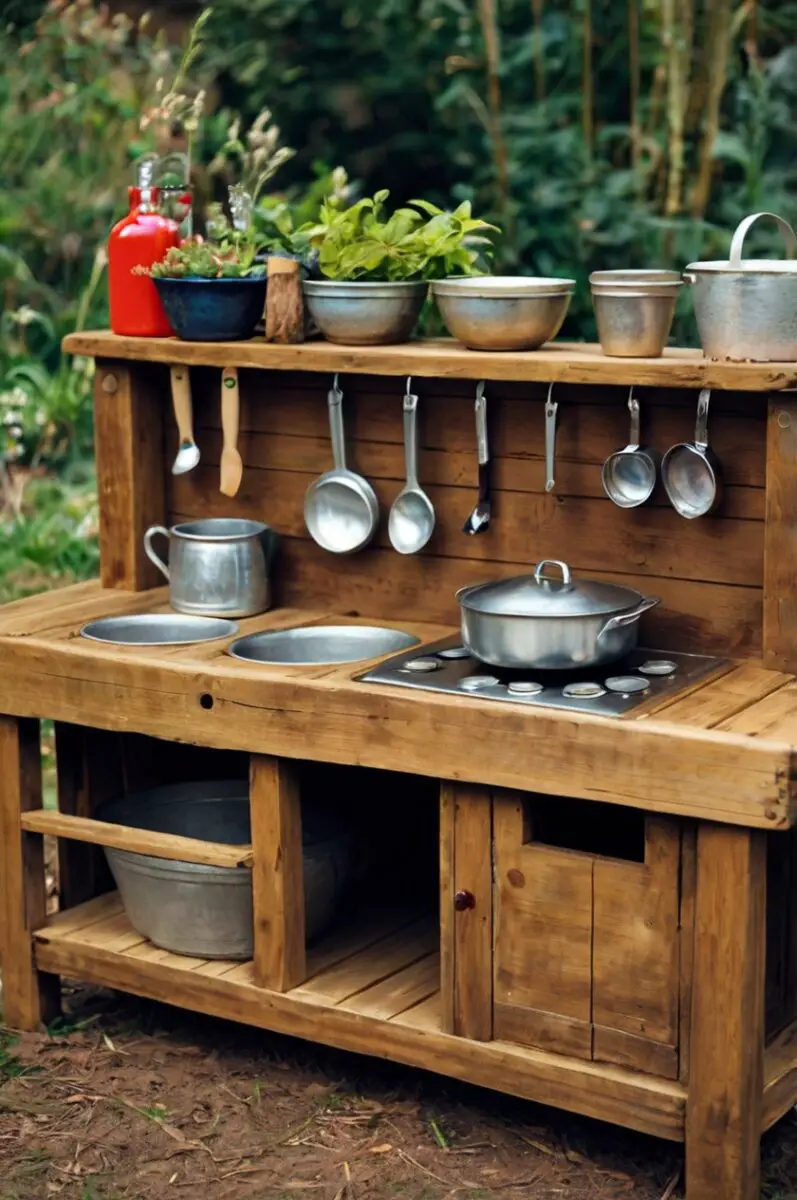
Incorporate salvaged items like old metal bowls, colanders, and kitchen utensils to create an authentic cooking experience.
Take this kitchen to the next level by attaching an old faucet connected to a rainwater barrel, providing a renewable water source for mud-making adventures.
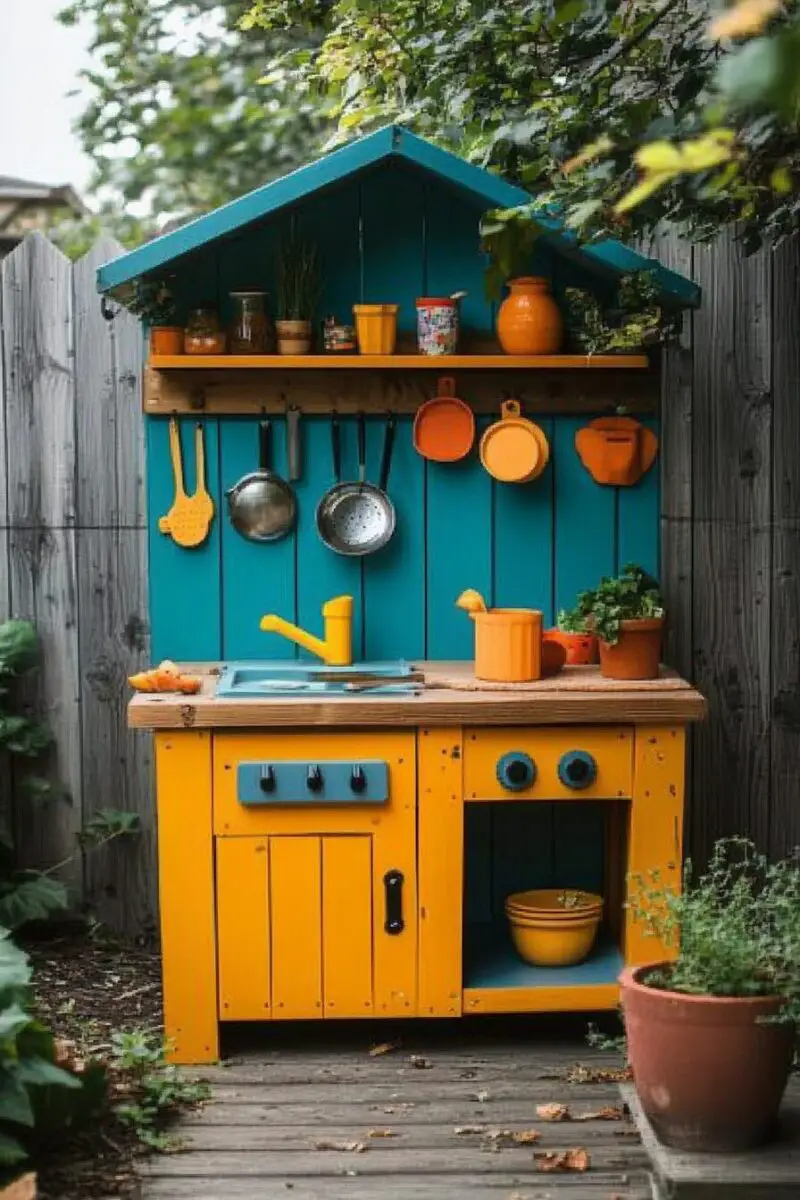
Paint the kitchen in weatherproof, child-safe colors that complement your outdoor space – earthy tones blend beautifully with natural surroundings.
Include a small container garden with kid-friendly herbs like mint, lemon balm, and marigolds that can become “ingredients” in imaginative recipes.
Install small hooks for hanging kitchen tools, teaching organizational skills while keeping the play area tidy.
Add a simple awning made from waterproof fabric to extend playtime even during light rain or intense sunshine.
This budget-friendly creation costs under $50 if you source most materials secondhand, proving that extraordinary play doesn’t require extraordinary spending.
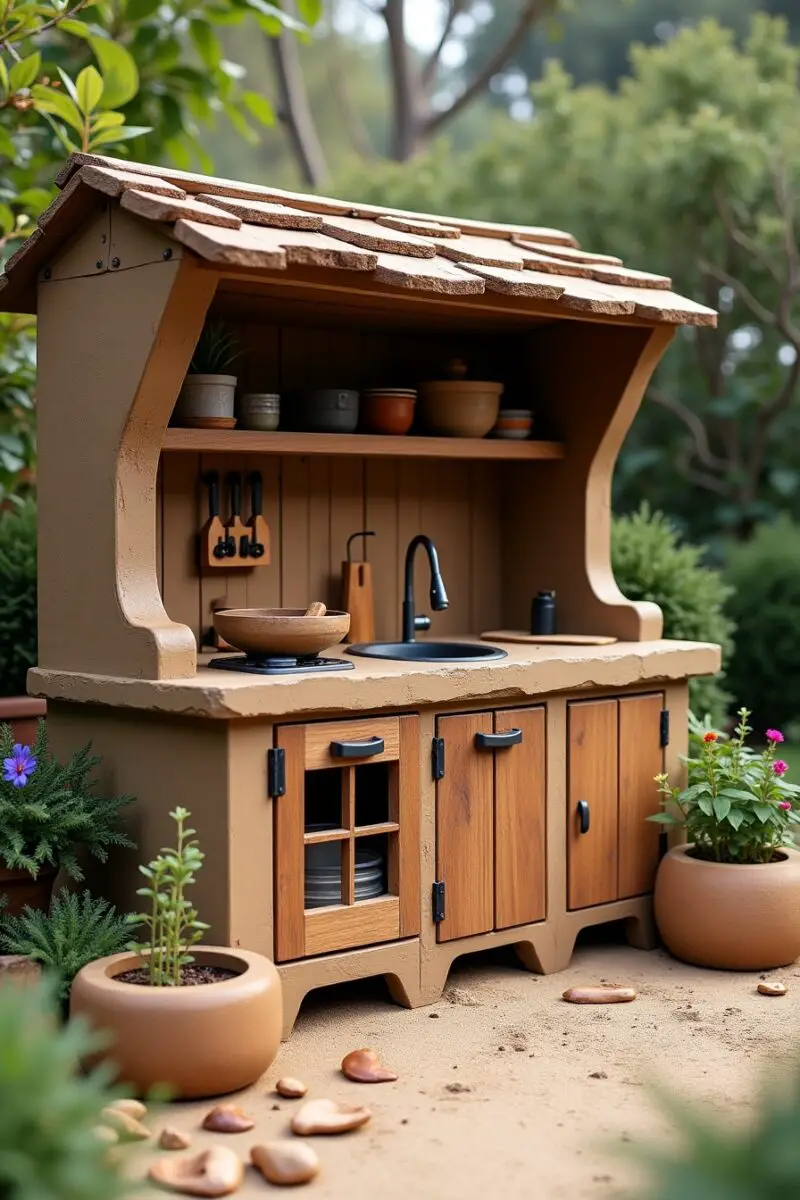
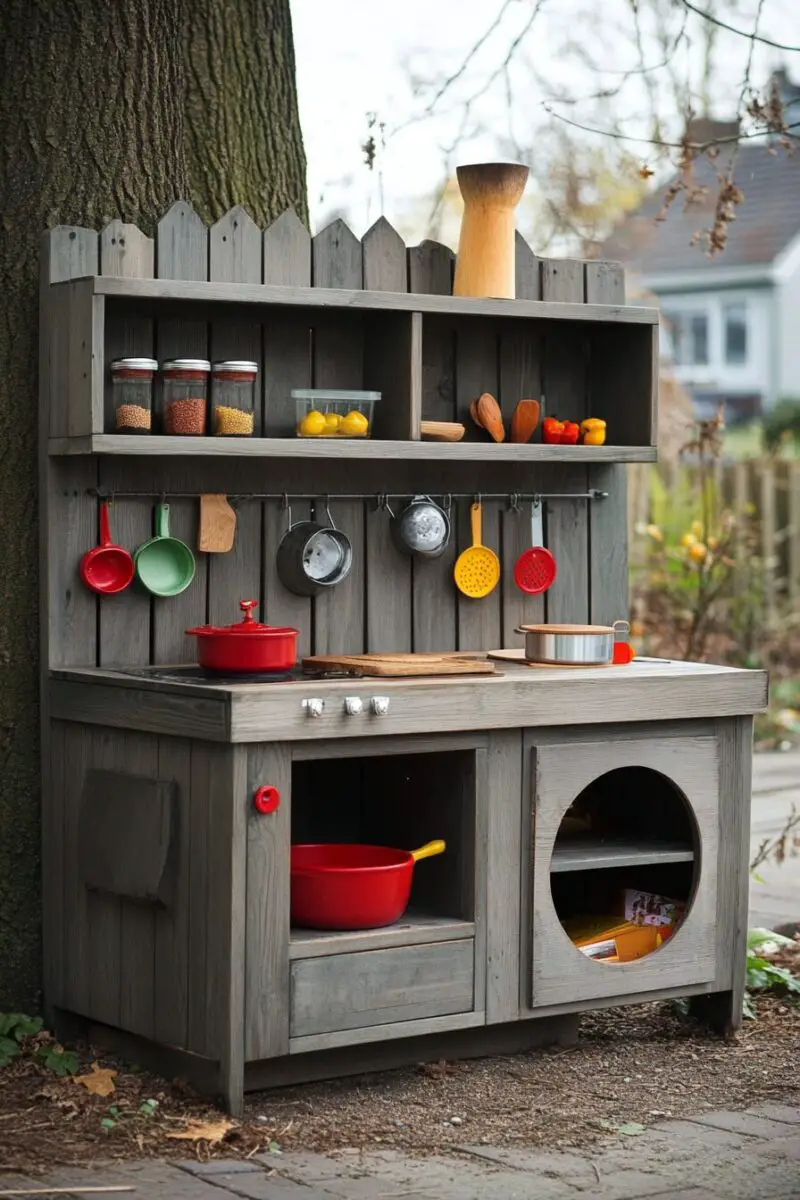
Treasure Transformed Mud Kitchen
Nothing creates magical outdoor play quite like repurposing a vintage piece of furniture into a muddy masterpiece.
Begin your hunt at thrift stores, garage sales, or Facebook Marketplace for old nightstands, dressers, or console tables with good bones but past their prime.
Look specifically for pieces with drawers – these become perfect storage for natural treasures like pinecones, interesting rocks, and other outdoor collectibles.
Strip away any existing finish using child-safe paint remover, then sand thoroughly to create a blank canvas for your creative vision.
Apply several coats of exterior-grade polyurethane to ensure your piece withstands years of enthusiastic mud mixing and weather exposure.
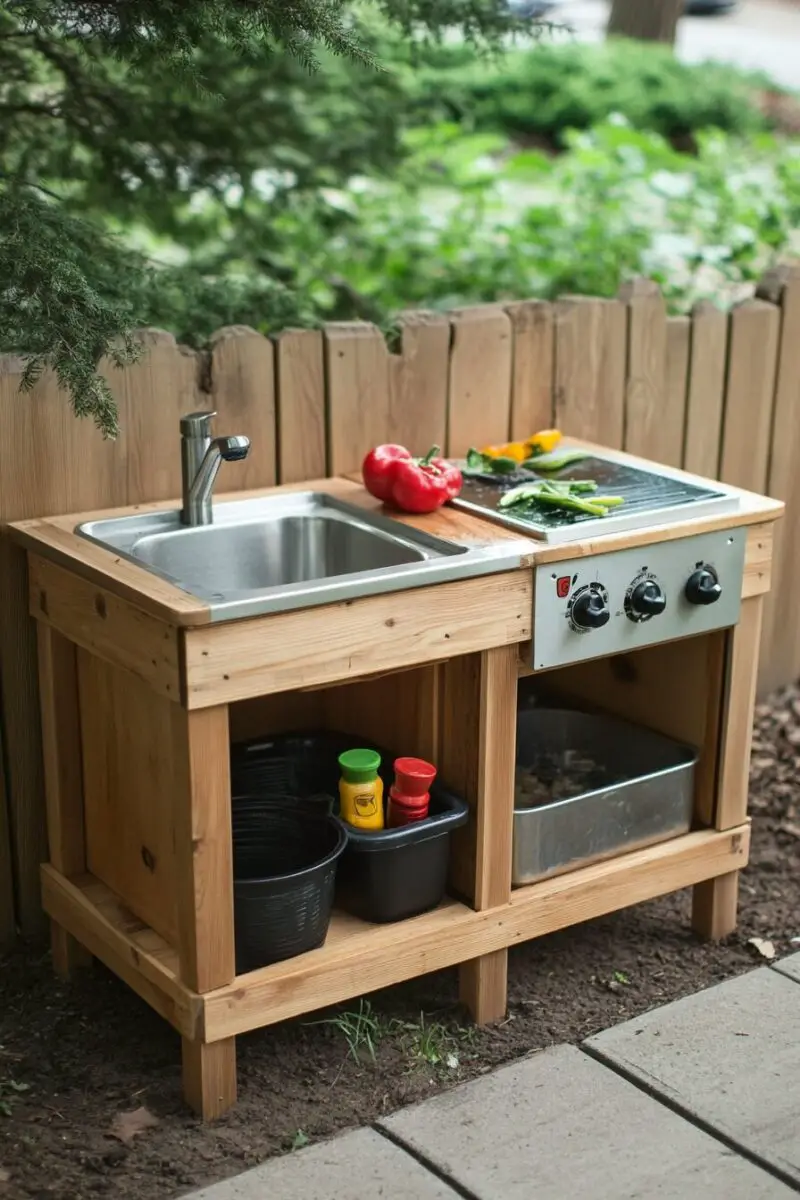
Install an old kitchen sink into the top surface – stainless steel options work wonderfully and can often be found for free from kitchen renovation projects.
Replace traditional drawer pulls with colorful silicone or wooden knobs that are easier for small hands to grasp.
Add whimsical details like vintage cooking timers, old-fashioned measuring spoons, or antique kitchen scales to enhance the playful aesthetic.
Create a backsplash using weather-resistant decorative tiles, adding visual interest while providing a practical splash guard.
Install a small shelf above the play area where you can place seasonal items like flowers in spring, pumpkins in fall, or pinecones in winter.
Incorporate special touches like a wind chime made from old kitchen utensils, adding sensory sound elements to the play experience.
This mud kitchen style brings character and history to outdoor play, teaching children about upcycling while providing a truly one-of-a-kind play space.
Mobile Mud Magic on Wheels
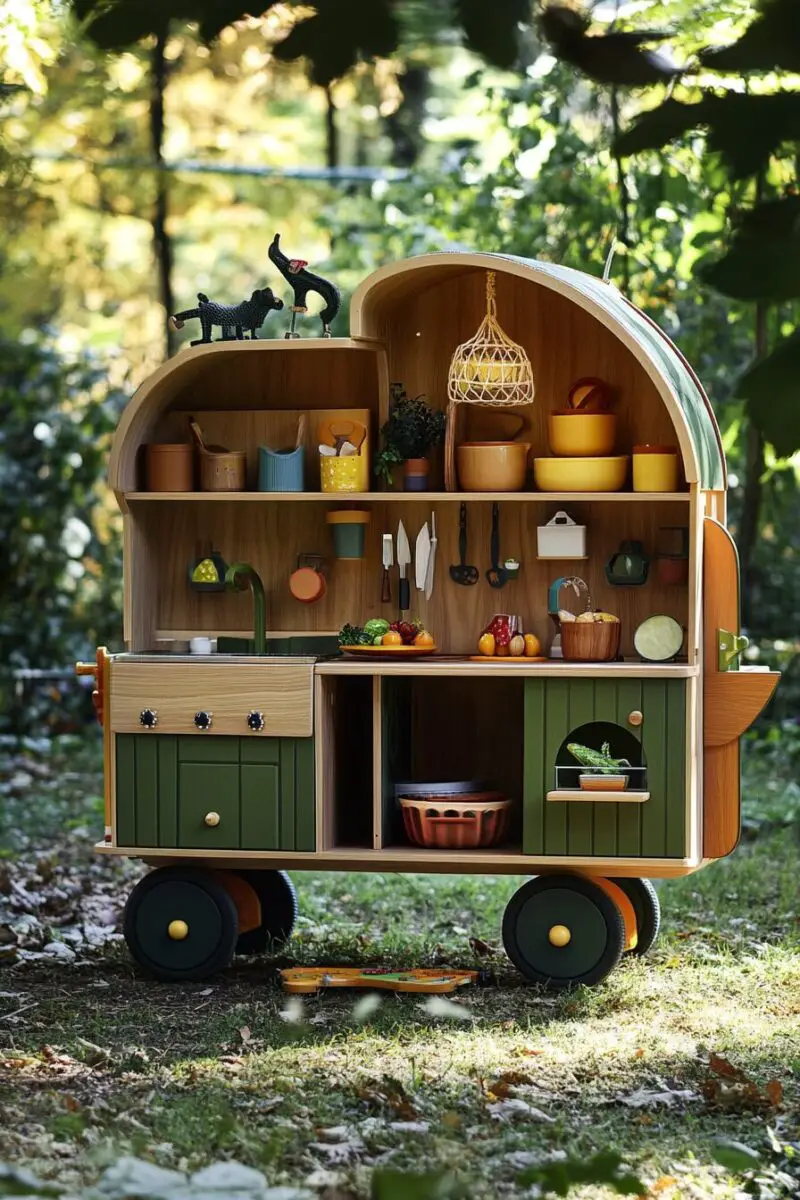
Flexibility meets functionality with a rolling mud kitchen that can follow the shade, avoid rainy patches, or be stored away when not in use.
Start with a sturdy utility cart or rolling kitchen island as your base – look for options with at least two shelves and strong, lockable wheels.
Ensure the wheel locks function properly to prevent unwanted movement during enthusiastic play sessions.
Reinforce the top surface with water-resistant material like marine-grade plywood, creating a durable workspace for mud masterpieces.
Mount a simple splash guard using PVC board along the back edge to contain mess while adding structural stability.
Install a removable plastic basin that serves as your sink – the removable aspect makes cleanup significantly easier after play.
Create dedicated spots for essential mud kitchen tools by adding pegboard to one side of your cart, perfect for hanging utensils.
Customize with fold-down side tables that provide extra workspace but can collapse when it’s time to move or store the kitchen.
Incorporate covered storage bins on the lower shelves to keep play materials dry and organized between adventures.
Add rope handles to both ends, making it easy to pull the kitchen to different yard locations depending on weather or play preferences.
Label different sections using weather-resistant tags to encourage organizational skills and create a more authentic kitchen experience.
Add specialized features like a dedicated “spice rack” filled with small containers of different colored sand, dried flowers, and interesting seeds.
This mobile mud kitchen solution is perfect for smaller yards or families who need flexible outdoor play options that can adapt to changing needs.
Nature’s Kitchen with Water Feature
Elevate sensory play by creating a mud kitchen that incorporates a recirculating water feature, bringing the magical elements of water and earth together.
Begin with a sturdy base structure, ideally raised to a comfortable height for children to stand and play without hunching.
Install a small, solar-powered pump system connecting to a shallow basin, creating a sustainable water source that doesn’t require electrical connections.
Position the pump so water gently cascades from one level to a lower catch basin, providing the soothing sound of flowing water while enabling water play.
Incorporate natural elements like smooth river rocks, creating textured pathways for water to trickle through before reaching the main mud area.
Add a simple hand pump mechanism (similar to old-fashioned water pumps) that children can operate themselves, building fine motor skills.
Create a series of bamboo channels or gutters that can be rearranged, teaching basic engineering concepts through water flow experiments.
Include a rain gauge and weather recording station alongside your kitchen, connecting outdoor play with science and observation skills.
Build in several distinct areas – one for water collection, one for mud mixing, and one for “cooking” and presenting final creations.
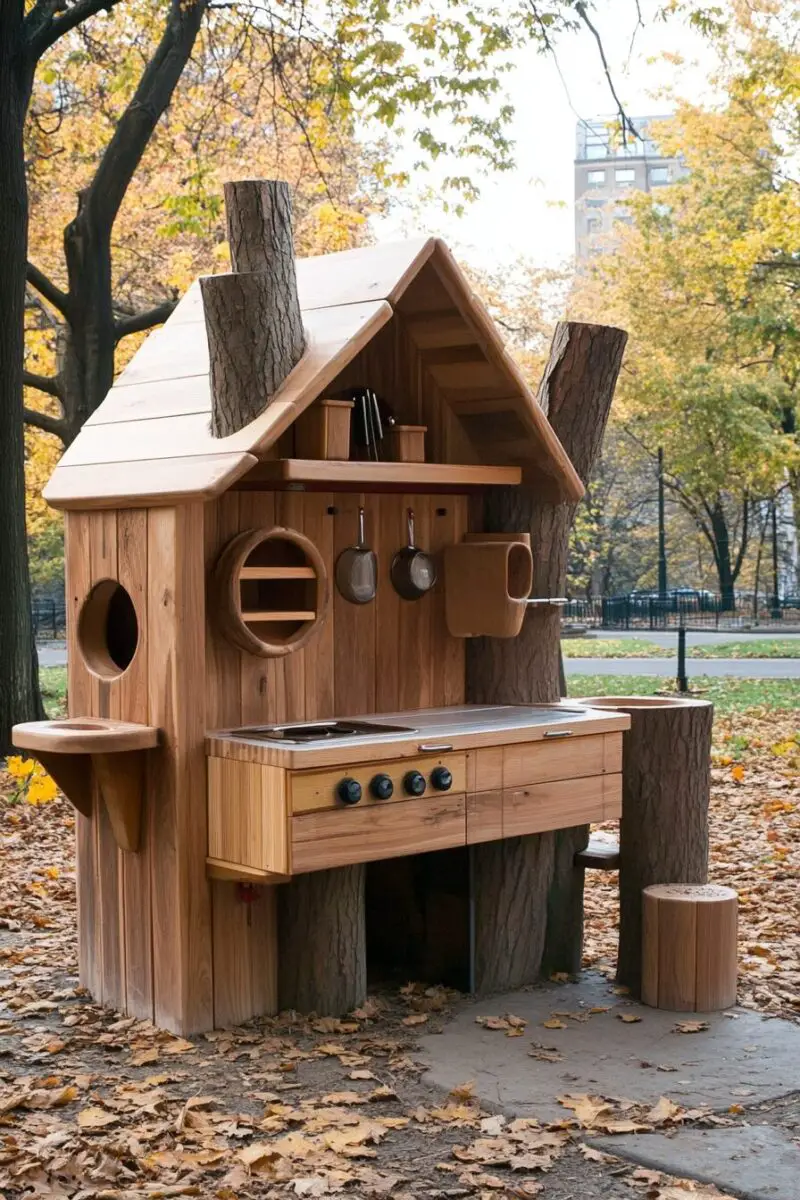
Source natural wood rounds of varying heights to create an organic seating area nearby, perfect for mud tea parties or outdoor gatherings.
Use hollowed logs as natural containers for storing larger utensils or as planters for kitchen-adjacent sensory plants.
Install a simple pulley system with buckets for lifting water or mud mixtures between different levels, introducing simple machine concepts through play.
This water-integrated mud kitchen creates a mini ecosystem where children can observe the relationship between water and earth while engaging in rich sensory play.
✨Click to Get My 101 FREE Designer Room Ideas
Textural Wonderland Mud Kitchen
Sensory development reaches new heights with a mud kitchen specifically designed to incorporate multiple textures and tactile experiences.
Begin with a traditional wooden mud kitchen structure, but the magic lies in the intentional inclusion of materials that feel different to exploring fingers.
Incorporate sections of artificial turf as “place mats” where finished mud creations can rest, providing an interesting textural contrast to the smooth counter.
Install different work surfaces – perhaps smooth tile in one section, natural wood in another, and a small slate or chalkboard area in a third.
Create a unique backsplash using materials like cork, smooth stones, rough bark pieces, and sections of bubble wrap secured under clear marine varnish.
Add a “discovery wall” with securely attached items of varying textures – pieces of carpet, sandpaper, smooth shells, fluffy fabric, and bumpy seed pods.
Include containers filled with different sensory materials – fine sand, larger pebbles, dried beans, and water beads that can be incorporated into play.
Attach different types of brushes – from soft paintbrushes to stiff scrubbing brushes – encouraging exploration of how each interacts with mud and water.
Create imprint stations using textured rolling pins, shaped molds, and stamps that can press patterns into mud creations.
Install a vertical xylophone made from different materials – metal pipes, wooden blocks, and plastic tubes – adding musical texture to the sensory experience.
Incorporate scented elements like lavender plants, lemon balm, and mint in small pots around the kitchen, adding olfactory dimensions to sensory play.
Include containers with materials of varying weights – lightweight feathers, medium-weight pinecones, and heavier rocks – for comparison and exploration.
Provide tools with different handle textures – some wrapped in smooth silicone, others in rough twine, and some in soft fabric – developing tactile discrimination.
This textural wonderland kitchen supports sensory processing development while creating an endlessly fascinating play environment that evolves with each visit.
Four-Season Mud Kitchen Wonderland
Weather shouldn’t limit outdoor play – create a mud kitchen specifically designed to transition seamlessly between seasons, offering year-round adventures.
Start with a sturdy, weather-resistant base structure positioned in a location that receives shade in summer but sun in cooler months.
Install a retractable awning or pergola overhead that can be adjusted seasonally – open for winter sun but covered for summer shade or rain protection.
Create a special winter mud section with a small fire pit nearby (always with adult supervision) where snow can be melted for winter mud making.
Include seasonal storage boxes – one for spring flower petals and sprouting seeds, summer water toys, fall leaves and pine cones, and winter snow tools.
Design your water system with freeze-proof considerations, including easy drainage for winter and removable parts that can be stored during extreme cold.
Add seasonal decoration hooks where themed elements can be displayed – flower garlands in spring, water misters in summer, leaf collections in fall, and icicle catchers in winter.
Include a weather station with thermometer, rain gauge, and wind sock to track seasonal changes and discuss how they affect mud consistency.
Create a seasonal ingredient chart showing what natural materials are available during different times of year for mud kitchen creations.
Install solar-powered fairy lights around the structure, providing gentle illumination during early winter evenings when daylight is shorter.
Incorporate a small greenhouse section where children can grow simple herbs and edible flowers for their mud kitchen, observing seasonal growing patterns.
Design a “seasonal suggestion” board with different play ideas appropriate for each time of year, from mud popsicles in summer to snow cakes in winter.
Add a dedicated nature journal station where seasonal observations can be recorded through drawing or writing, connecting outdoor play with documentation skills.
This four-season kitchen transforms outdoor play from a fair-weather activity to a year-round adventure that connects children deeply with natural cycles.
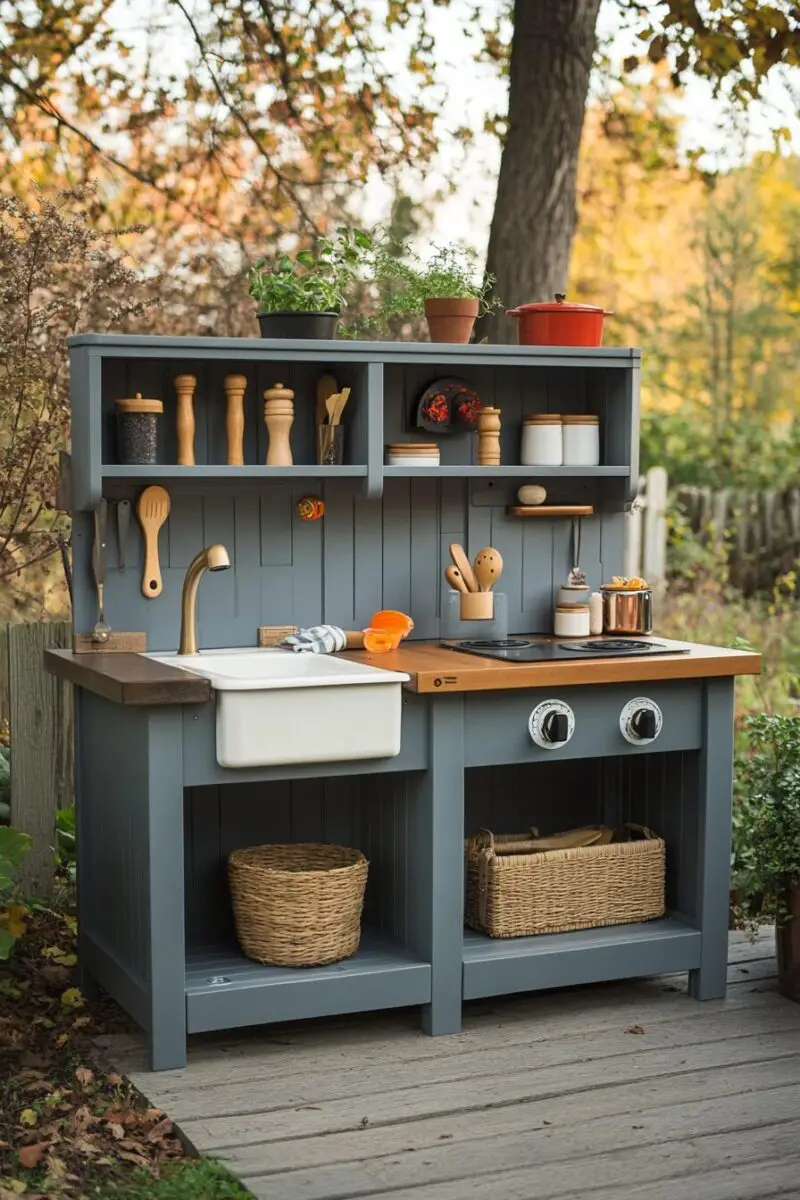
Multi-Generation Mud Kitchen Adventure
Create an inclusive outdoor space with varying heights and accessibility features that invites everyone from toddlers to grandparents to enjoy the sensory pleasures of mud play.
Begin with a thoughtfully designed structure featuring three distinct height levels – toddler height (18 inches), standard child height (24 inches), and standing adult height (36 inches).
Ensure each level has its own work surface, sink area, and accessible storage appropriate for different ages and abilities.
Include a comfortable seating area with weather-resistant cushions where adults or those needing rest can sit while remaining engaged in the play.
Create wide, stable pathways to and around the kitchen using compacted crushed stone or wood chips that accommodate wheelchairs or unsteady walkers.
Install raised garden beds adjacent to the kitchen where family members of all ages can grow edible flowers, herbs, and sensory plants for kitchen use.
Add a simple hand-washing station with steps for little ones and height-appropriate access for taller family members, promoting inclusive cleanup.
Include clear, picture-based signage throughout the kitchen, making instructions accessible to pre-readers and those with different communication needs.
Provide tools of varying sizes and with different grip options – from chunky, easy-grip utensils for small hands to ergonomic tools for those with limited dexterity.
Create a “recipe book” with simple visual instructions showing different sensory activities appropriate for various developmental stages.
Install a small, covered reading nook adjacent to the play area where family members can take breaks while still being part of the experience.
Include a community chalkboard where family members of all ages can share ideas, draw pictures, or leave messages for each other between play sessions.
Design storage solutions that organize materials by developmental appropriateness, clearly marking which items are suitable for different ages and abilities.
This thoughtfully inclusive mud kitchen creates precious cross-generational experiences, allowing family members of all ages to connect through sensory play and shared outdoor adventures.
Weekend Warrior Simple Mud Kitchen
Transform a single afternoon of work into months of outdoor play with this straightforward mud kitchen design requiring minimal tools and materials.
Begin with a basic wooden crate or sturdy plastic storage tub turned on its side as your kitchen base – no complex construction required.
Secure the crate or tub to the ground using garden stakes or by placing heavy rocks inside the bottom to prevent tipping during enthusiastic play.
Add a simple work surface by placing a weather-resistant cutting board or piece of pressure-treated wood across the top of your overturned container.
Create instant storage by placing small plastic buckets or recycled food containers inside the crate, perfect for organizing mud kitchen tools and treasures.
Enhance the play space by surrounding it with large rocks or logs that serve as both seating and additional surfaces for mud creations.
Gather kitchen tools from your donation pile – old measuring cups, wooden spoons, metal colanders, and plastic containers all make perfect mud kitchen equipment without requiring any purchases.
Add a simple water source using a plastic drink dispenser with spigot placed on a stack of bricks, allowing gravity to create running water for mixing mud.
Create a “sink” by simply burying the rim of a large plastic basin in the ground next to your kitchen structure, making it easy to remove for emptying and cleaning.
Establish a dedicated mud-making station by designating a small patch of earth nearby where the ground can be regularly turned and watered for optimal mud consistency.
Enhance the sensory experience by placing small containers of natural materials around the kitchen – pinecones, interesting stones, fallen leaves, and flower petals become gourmet ingredients.
Define the kitchen space by marking its boundaries with a simple border of stones, sticks, or even a length of garden hose laid in a circle.
Personalize this simple space by having your child make and decorate a kitchen sign using a piece of scrap wood and weather-resistant paint or markers.
Create a hanging tool storage system using an old towel rack or sturdy branch suspended between two trees or garden stakes, adding S-hooks for hanging utensils.
Add a cleanup station by repurposing a plastic laundry detergent container with spigot as a handwashing station, filling it with water and placing it on a stump or rocks.
This weekend warrior mud kitchen demonstrates that exceptional play spaces don’t require complicated construction or expensive materials – simply gathering and thoughtfully arranging everyday objects creates a magical outdoor experience that rivals elaborate designs.
✨Click to Get My 101 FREE Designer Room Ideas
No-Build Portable Mud Kitchen Adventure
Create an instant mud kitchen that requires zero construction skills and can be set up or packed away in minutes, perfect for rental properties, small spaces, or kitchens that travel.
Start with a folding table as your base – a camping table, plastic folding table, or even a card table provides an instant work surface at the perfect height for little chefs.
Add stability by placing the table on level ground and weighing down the legs with rocks if it’s a particularly windy day.
Create your sink by simply placing a large plastic washing-up basin or dish tub on one side of the table surface – no cutting or installation required.
Establish instant organization by using a shower caddy or plastic tray with compartments to hold and separate utensils and natural materials.
Add vertical storage using a folding clothes-drying rack positioned behind your table, with S-hooks for hanging tools and utensils where little hands can reach them.
Create water access by filling a clean watering can or plastic pitcher that children can pour themselves when they need to add moisture to their mud recipes.
Collect kitchen tools from your existing kitchen – that mismatched measuring cup, the potato masher no one uses, or the colander with the broken handle all find new purpose in mud play.
Define your kitchen’s boundaries using a large outdoor blanket or tarp placed beneath the table, clearly marking the play zone while containing some of the mess.
Add seating with folding camp chairs, garden stools, or simply large upturned buckets positioned around your table for comfortable mud cuisine creation.
Enhance the sensory experience by bringing out ice cube trays, muffin tins, and silicone baking molds that can be washed and returned to indoor use after play.
Add a cleanup solution by bringing out a spray bottle filled with water and a small hand towel for quick hand washing, or position your kitchen near an outdoor water source.
Incorporate a tool-drying rack by simply laying a dish-drying rack on one corner of your table, providing a designated spot for wet utensils between uses.
Take this kitchen concept anywhere by packing all components in a large plastic storage tub that fits in your car trunk, making it possible to create mud kitchen adventures at parks, beaches, or family gatherings.
Upcycled Eco-Hero Mud Kitchen
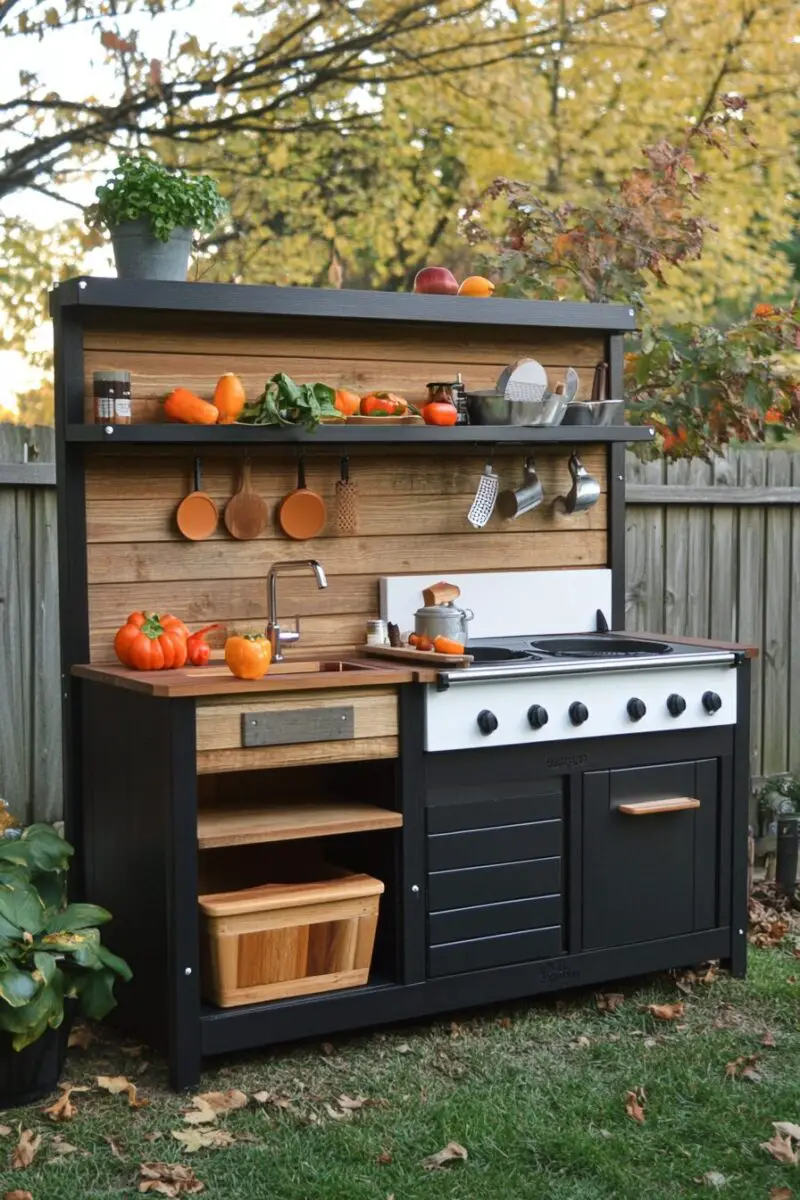
Transform discarded materials into an environmental teaching tool with this sustainable mud kitchen made entirely from rescued and repurposed items.
Begin by sourcing materials destined for landfill – old furniture, discarded kitchen cabinets, unused plant pots, and salvaged building materials.
Turn an abandoned dresser into the main structure, removing drawers to create open shelving but keeping one functional drawer for tool storage.
Repurpose an old sink from a kitchen renovation, connecting it to a simple gravity-fed water system using rescued rain barrels.
Create work surfaces from reclaimed wood, old cutting boards, or salvaged countertop pieces, sanding and sealing them for safe outdoor use.
Incorporate broken tiles into a beautiful mosaic backsplash, teaching children about transforming waste into art through creative reuse.
Add a collection system for sorting natural materials – perhaps old mason jars, tin cans decorated with waterproof paint, or sectioned garden trays.
Include an educational display identifying all the repurposed materials, explaining what they were originally and how they’ve been transformed.
Create mud kitchen tools from objects that would otherwise be discarded – old spoons with bent handles, measuring cups with missing numbers, or colanders with broken handles.
Install a mini-compost system nearby where organic mud kitchen materials can decompose, completing the cycle of sustainable play.
Add a “creation station” where children can build their own mud kitchen tools from clean discarded materials, fostering engineering skills and environmental consciousness.
Include a rainwater diversion system made from old gutters, teaching water conservation principles through hands-on interaction.
Create signage from reclaimed wood scraps, painting environmental messages and mud kitchen instructions with natural or low-VOC paints.
This eco-hero kitchen transforms environmental education from abstract concept to tangible experience, empowering children to see creative potential in materials others might discard.
Mud kitchens offer an unparalleled opportunity to combine sensory play, imaginative thinking, and outdoor exploration in one magnificent space.
The most important ingredient isn’t fancy materials or perfect construction – it’s your willingness to embrace the mess, celebrate creativity, and join in the muddy magic alongside your child.
