
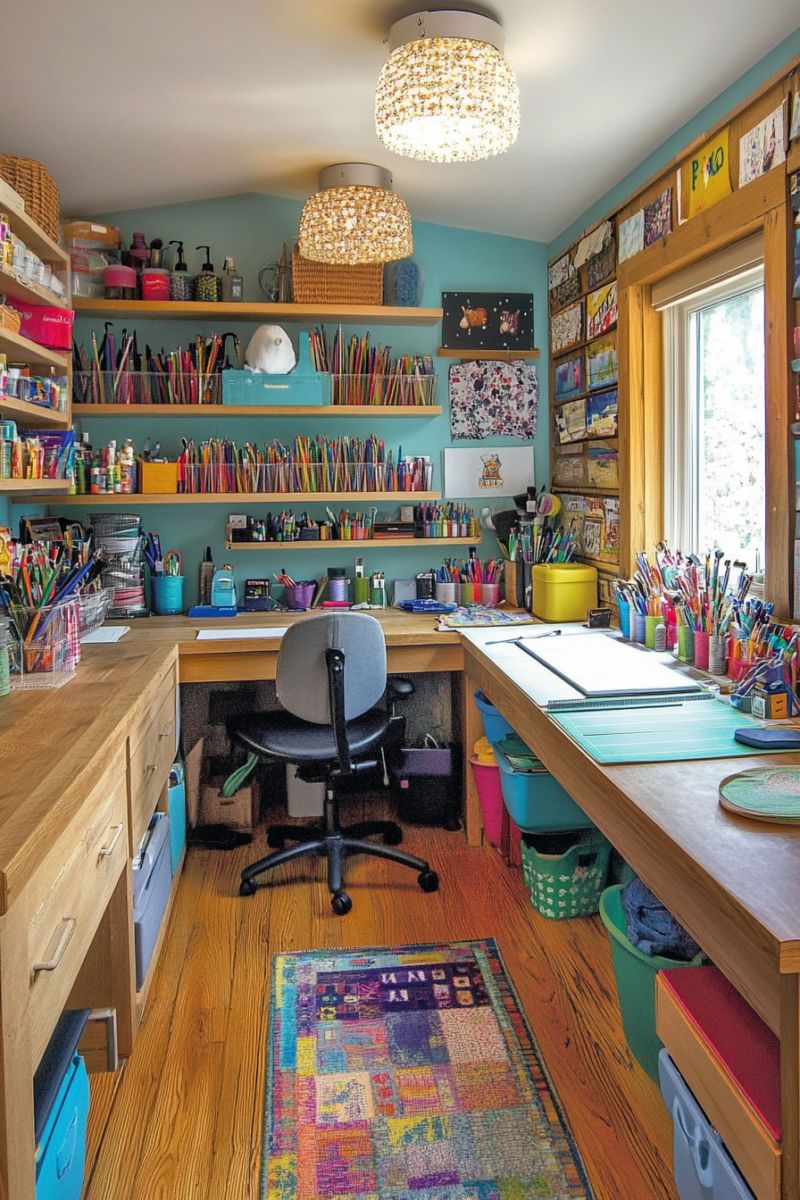

I ruined a perfectly good cutting mat because I had nowhere to put it except the floor, where Biscuit promptly sat on it.
That was the moment I finally admitted my “craft corner” wasn’t working.
Not even a little.
So I spent the better part of a year obsessing over craft room layouts — testing a few, wishing I’d tested others, and pinning approximately four thousand ideas I’ll never fully execute.
What I found is that the layout matters way more than the supplies.
A bad setup makes you dread sitting down.
A good one makes you stay for three hours when you planned to stay for twenty minutes.

Below I’m sharing 15 actual layouts worth considering — from a full zoned studio down to a cart on wheels.
Further down I’ll show you the attic setup that blew my mind, the basement den trick that fixes the worst part about crafting underground, and the one layout I genuinely think is underrated for small apartments.
Scroll past the first few and it gets really good.

The Zoned Craft Studio — Separate Stations for Cutting, Sewing, Painting, and Storage


This is the layout I’d build if I ever had a full dedicated room — and honestly, it’s the one I’m slowwwly working toward in my spare bedroom.
The whole idea is simple: different crafts get different zones, so nothing bleeds into anything else.
No thread tangled in your cutting mat.
No paint-crusted scissors near the good fabric.
Each station has its own purpose and its own supplies.

Here’s how a real zoned studio breaks down:
Cutting Station
This is your biggest open surface.
Ideally a 36-inch-high table (standing height — your back will thank you) with at least 4 feet of clear length.
Mine is a basic IKEA countertop screwed to wall brackets, total cost around $85.
You want a self-healing cutting mat, rotary cutter, quilting rulers, and a small container right there for scissors and seam rippers.
Nothing else.
Clutter on a cutting surface is how you slice through something you weren’t supposed to.
Sewing Station

The sewing table should be a dedicated surface — not a shared one.
Your machine needs to be at a height where your elbows rest comfortably at roughly 90 degrees while seated.
A lot of people get this wrong and end up with neck tension after an hour.
Pull-out drawers nearby for thread (sorted by color if you can manage it), notions, and zippers.
Task lighting directly above is non-negotiable.
I use a clip-on daylight bulb lamp, around $22, and it changed everything about nighttime sewing.
Painting and Messy Crafts Station

Keep this zone near a window or a vent.
Seriously — ventilation matters more than people think, especially with mod podge, spray adhesives, or oil-based anything.
A vinyl tablecloth over a cheap folding table works great here.
The table can wipe clean, and when a project goes sideways (and it will), you haven’t destroyed anything permanent.
Store paints, brushes, and adhesives on a nearby rolling cart so they don’t migrate to your clean zones.

Finish and Assembly Station
This is basically a wide, clean surface for putting things together — attaching hardware to a wreath, assembling a card set, doing final stitching.
It doesn’t need to be fancy.
A folding table with good overhead light works.
The important thing is keeping it clear of the other stations so you’re not assembling next to wet paint or a pile of cut fabric.
Drying and Long-Term Storage Station

Walls and a small rack system handle this.
I use a $30 over-door rack for drying painted pieces, and a section of pegboard above it for seasonal stuff I don’t need constantly.
The key is that items drying here don’t block your workflow in other zones — keep it tucked to a corner or a back wall.
Zone boundaries don’t have to be expensive to be effective.
A different colored rug under each station, a low bookcase between two areas, or even just consistent bin colors per zone will train your brain to switch modes without even thinking about it.

The reason this layout works for multi-crafter households is that two people can be working simultaneously — one sewing, one painting — without getting in each other’s way.
When all your stations are running at once, you barely notice it because everything is contained.
Mini Craft Studio — A Lofted Workspace and Wall-to-Wall Storage for Small Spaces

This one’s for the apartment crafters.
The ones with, like, one room and a dream.
I’ve been there — my first apartment had a craft “area” that was essentially one shelf and a tv tray.
It didn’t work.
The mini craft studio gets clever by going vertical.
The signature feature is a lofted workspace — a platform structure suspended or built up near the ceiling that serves as the main crafting surface.
What this does is free up every square foot of floor space underneath for storage, seating, or movement.
Think of it like a loft bed, but for making stuff instead of sleeping.
Walls get completely covered.
And I mean completely — from about 6 inches off the floor all the way up to the ceiling if you can reach it.
Open shelves for things you use daily.
Closed cabinets for things that look messy (I’m talking about you, rubber stamp collection).
A few modular pegboard sections can hold tools like scissors, tape dispensers, and rulers so they’re visible but not taking up surface space.
Furniture does double duty here.
An ottoman with a removable lid?
That’s your yarn storage and your footrest.
A flip-top table mounted to the wall folds flat when not in use and gives you an extra 24 inches of surface when it’s down.
Tiered rolling carts — the kind that run about $35 at Target — roll under the loft when not in use and come out when you’re actively working.
The thing that surprises people about the mini studio is how much you can store when you stop thinking horizontally.
Floor space is not your friend in a small room.
Ceiling space is.
Sectional Craft Nook — Modular Furniture That Reconfigures Around You
A U-shaped sectional with storage ottomans serves multiple crafters.

This layout is my pick for households where more than one person crafts, or where you swap between very different types of projects regularly.
The whole point is that nothing is locked in place.
You’re building around a modular sectional or customized furniture system — think right-angle chaises, ottomans, and corner units that click together but also work independently.
The most useful versions have storage built into every single piece: lidded ottomans with about a cubic foot of interior storage each, coffee tables with pull-out drawers underneath, corner units with hidden cubbies.
When my friend Carla set her nook up this way, she used three different ottomans as her main storage — one for yarn, one for paper crafts, one for her kids’ supplies.
Everything had a home that was also a seat.
That’s efficient.
The removable coffee table is underrated here.
You use it when you need a flat surface for assembling or laying things out, then roll it away entirely when you need floor space for a big project or when another person wants to join and you need to reconfigure the seating.
Section walls (the back panels of the sectional pieces) become display surfaces.
Pin up fabric swatches, reference photos, or inspiration images right there at eye level while you’re working.
It’s one of those small things that sounds trivial but actually keeps you from losing track of what you’re making.
The flexibility is the whole appeal.
Two people can be spread out in their own corners of the U, or you can push everything together for a shared project.
It takes about ten minutes to fully reconfigure and no tools to do it.
Sewing Studio Layout — A Dedicated Setup Built Around Your Machine

If sewing is your main thing, trying to work it into a general craft space is always a compromise.
The sewing studio layout says no to compromises.
Everything centers on the sewing table — and I mean that literally.
It goes in the middle of the room if space allows, or at least positioned so you can approach it from at least two sides.
Waist height is the standard recommendation, roughly 28 to 30 inches for most people, but if you’re on the taller side you may want to go up to 32.
Getting this wrong is how you end up with upper back tension after an hour-long session.
(I learned this the uncomfortable way on a table that was three inches too low.)
Your machine sits permanently on this surface — not stored, not moved.
A machine that has to be set up and put away every time is a machine that gets used less.
Swivel seating with armrests makes a real difference for extended sessions.
A good used office chair works fine here; I grabbed mine for $15 at a church sale and it’s lasted three years.
Storage lines the perimeter: pull-out drawers for thread (one drawer, sorted by color), wall cabinets for patterns and fabrics, open shelving for notions jars.
Label everything.
Seriously — labeled storage in a sewing room saves you from digging through four bins to find your seam ripper when you’re mid-project and already frustrated.
The design wall is worth building if you have one full wall to commit.
It’s usually just a big piece of batting or flannel mounted flat — fabric pieces stick to it without pins so you can arrange and step back to evaluate.
Mine is about 4 feet by 5 feet and I use it more than I expected to.
Natural light on the left side (if you’re right-handed) is the old seamstress rule, and it genuinely helps.
If that’s not possible, a good daylight-balanced task lamp directly above the needle area makes up for it.
Customizable Wall System — Your Entire Wall Becomes a Reconfigurable Storage Grid

This is the layout feature I wish I’d installed in year one instead of year three.
The whole premise: instead of permanent shelves that lock you into one configuration, you put up a wall system of hooks, rods, and rails, then hang baskets, bins, and shelves from them in whatever arrangement makes sense right now.
The best-known version of this is the IKEA SKÅDIS pegboard system (around $15-$30 per panel depending on size), but there are heavier-duty options like the Wall Control metal pegboard (around $60-$80 per panel) that hold more weight and feel sturdier for tools.
Either way, the accessories — small bins, hooks, shelves, magnetic strips — are designed to click or hang directly onto the panel so nothing requires drilling new holes every time you rearrange.
What makes this different from regular pegboard is that the entire wall becomes three-dimensional.
You’re not just hanging things flat — you’re building outward from the wall in layers, stacking bins, adding shelves at different depths, creating a storage system that literally changes shape as your projects change.
Practically speaking: group by project type, not by supply type.
So instead of “all scissors in one spot,” your embroidery scissors live on the embroidery section of the wall, right next to your hoops and floss.
That way everything you need for a specific type of project is in one zone, grabbable without hunting.
Add-ons like under-shelf baskets, small drawer units, and wall pouches for flat items (pattern pieces, stencils) make the system expand without buying a whole new piece of furniture.
This is genuinely one of the most cost-effective storage approaches for a craft room, because you buy as you need instead of committing to a full cabinet system upfront.
The Craft Lounge — Cozy, Comfortable, and Built for Long Creative Sessions

I’ll be honest: the craft lounge is the layout that most closely matches how I actually want to craft.
Not in a sterile studio with everything labeled and perfect.
In a really comfortable chair, with good light, where I can spread out on the floor when I need to and put my feet up when I don’t.
The anchor piece is a large, genuinely comfortable chair — not a desk chair, not a folding chair.
A real tufted armchair or a chaise-style loveseat that you’d be happy sitting in for two hours.
This matters more than it sounds.
If you’re uncomfortable, you stop crafting.
Simple as that.
Next to it goes a generous side table on wheels — something like a butcher block cart or even a repurposed kitchen island if you have the space.
The wheels matter because you’ll want to reposition it constantly depending on what you’re making.
A table that rolls is infinitely more useful than one that’s bolted down.
The open floor space is what gives this layout its personality.
Quilts, large embroidery hoops, flat paper art, rug hooking projects — anything that benefits from spreading out low gets plenty of room here.
Perimeter storage (wall cabinets, a tall bookcase or two) keeps supplies out of the floor area without boxing you in.
Plants, a reading lamp, maybe a small area rug underfoot — these aren’t frivolous additions.
They’re what make the room feel like somewhere you want to be rather than somewhere you feel obligated to go.
Craft rooms that feel warm get used more.
That’s just reality.
Attic Craft Room — Pull-Down Storage and Strategic Lighting for Sloped Ceilings

Attic craft rooms are one of my favorite layouts to look at because they solve a problem that most people treat as a dealbreaker — the weird angles and sloped ceilings — by treating it as a feature instead.
The sloped ceiling is actually perfect for built-in storage, because you can use the lower portions (where you can’t stand anyway) for cabinets and cubbies, and the higher center section as the active workspace.
All those awkward triangular areas that you’d otherwise ignore?
That’s prime storage real estate.
Pull-down storage is the game-changer here.
Options include:
- Pull-down cabinet units that mount flat against the ceiling and glide down on integrated rails — similar to pull-down kitchen shelf inserts, but scaled up.
These run roughly $80-$200 depending on size.
- Retractable storage walls where a whole section of sloped ceiling folds open to reveal an enclosed nook — more of a custom build, but incredibly functional for storing seasonal supplies or large flat items like foam boards and poster prints.
- Simple ceiling hooks and baskets that swivel out of the way — the cheapest option, good for lightweight items like yarn, ribbon, or dried botanicals.
Work tables and storage trunks in an attic should have adjustable legs.
Sloped floors are common and a wobbly work table is miserable.
Lighting here is crucial — natural light from attic windows helps, but you’ll want adjustable task lighting on independent tracks or hanging pendants you can reposition as needed.
LED shop lights on a cable system run about $30-$50 each and work great for this.
Ventilation is the one thing people forget until it’s too late.
Attics get hot.
Fast.
Make sure there’s a ceiling fan, a window that opens, or an added vent before you spend a summer up there.
Cottage Craft Garage — Rustic Charm and Serious Wall Storage

Converting a garage into a craft studio is one of the best moves if you have the option, because you get things that interior rooms rarely offer: high ceilings, a big open footprint, and often a concrete floor that doesn’t care about paint spills or glue drips.
The cottage approach takes that utilitarian shell and softens it with things like reclaimed wood shelving, arched or framed garage doors left in place as a visual element, and paint colors that feel organic — robin’s egg blue, warm sage green, soft daffodil yellow.
Edison bulb string lights go a long way toward making a garage feel like a studio rather than a storage unit.
The high walls are the real asset.
Sturdy open shelves mounted from floor to near-ceiling hold everything from ceramics to bolts of fabric to art supply bins, arranged so the things you use most sit at eye level.
Double-deep box shelves along the very top hold off-season or bulk storage — the stuff you need twice a year, not twice a week.
Hook rails below the shelving keep works in progress hanging to dry, hold garden tools if there’s overlap, and display things you want to look at while you’re working.
I love this detail specifically because it keeps newly painted pieces out of your workspace without requiring a separate drying station.
Freestanding rolling carts and worktables mean you can reconfigure the floor plan completely without any tools.
A seating area near the garage doors — a couple of stools, an inspiration board, a small plant corner — makes the space feel inhabited rather than just functional.
If your garage has outdoor access to a garden, lean into it.
A grow table just outside the window, some outdoor sculptures or a small fountain nearby — those things feed creativity in a way that’s hard to quantify but very easy to feel.
Kids’ Craft Suite — An Enclosed Zone That Contains the Chaos (Mostly)

If you share your craft space with kids, you already know the problem: their supplies end up in your supplies, their projects end up on your work surface, and somehow there is always glitter somewhere it should not be.
The kids’ craft suite solves this with a defined, enclosed area within the larger studio.
Not a full separate room — just a clearly bounded zone.
A freestanding playpen structure, a partial wall, a low bookcase used as a divider, or an L-shaped lounge built into a corner all work.
The goal is a psychological and physical boundary that kids recognize as their space.
Inside the zone: child-height tables with washable laminate tops (IKEA FLISAT is about $60 and perfect for this), stools sized for actual small humans, open shelves with labeled bins at kid-reachable height so they can be independent.
Non-toxic paints, blunt scissors, magnetic drawing boards, and basic craft kits stored right there at their level.
A small chalkboard or whiteboard wall panel inside the zone costs almost nothing and gets used constantly.
Toddler-proof floor cushions invite them to work low when they want to.
A movable easel (about $25-$40) lets you change up the activity without adding new furniture.
Keep electrical outlets inside this zone positioned high, outside their reach — or cover them.
String lights add a warm, fun ambiance that kids genuinely love and that makes the space feel special to them, not just convenient for you.
The thing I’d add that the original layouts often skip: an easy-clean floor covering.
A vinyl mat under the kids’ zone means you’re not scrubbing paint off your hardwood or your good area rug after every session.
A 4×6 clear vinyl floor protector runs about $30 and is completely worth it.
Basement Craft Den — Making the Most of Low Ceilings and Zero Natural Light

Basements are a weird gift for crafters.
Tons of square footage, usually quiet, totally separate from the rest of the house — but also dim, sometimes damp, and easy to turn into a depressing underground storage pile if you’re not intentional about it.
The fix starts with light.
Not just overhead fixtures — multiple layers of it.
Recessed ceiling lights for general brightness, adjustable task lamps at your work surfaces, and if you can swing it, daylight-balanced LED panels (around $40-$60 each) mounted under the low ceiling sections.
The goal is to eliminate the flat, shadowless quality that makes basements feel like basements.
Light sources at different heights and angles make a room feel alive.
Storage under the eaves (the sloped sections where the ceiling meets the floor around the perimeter in some basements) is prime real estate.
Built-in cubbies or deep shelves here hold bulky seasonal supplies — holiday fabric, large foam blocks, that bolt of upholstery fabric you bought two years ago and haven’t touched yet.
Pegboards mounted to the triangular walls under sloped sections hold tools on hooks and make good use of otherwise dead space.
A large central worktable anchors the room — non-permanent, so you can shift it when you need to.
Epoxy-painted concrete floors are absolutely worth the one-weekend investment (a kit runs about $80-$100 and covers roughly 250 square feet).
They’re durable, wipeable, and look a thousand times better than bare gray concrete.
Moisture control is not optional.
A dehumidifier in the basement craft den protects your paper supplies, fabrics, and adhesives from going bad.
A good mid-size dehumidifier runs about $150-$180 and is one of the better investments you’ll make if you’re serious about using the space year-round.
Plants, an area rug or two, and some wall art warm the space visually.
Furniture arranged to define sub-zones — a small seating corner here, the main worktable there — gives the basement layout and intention.
It stops feeling like a basement and starts feeling like a room.
Mudroom Craft Nook — Creativity at the Front Door
This one’s a little unconventional and I kind of love it for that reason.
The mudroom is where everyone passes through multiple times a day — it catches kids coming in from school, partners dropping bags before dinner, neighbors stopping in for five minutes.
It’s already a high-traffic, high-energy spot.
Why not make it creative?
A small built-in shelf or compact table tucked into an unused mudroom corner becomes an ongoing project station.
The key is that something is always in progress there — a community collage, a seasonal wreath, a paint-by-number that anyone can add to.
Supplies within reach: colored pencils, glue sticks, scrap paper, a few basic stamps.
Not a full toolkit, just enough to spark something.
A mini chalkboard on the wall for doodles, notes, or inspiration quotes keeps the space feeling active even when nobody’s actively crafting.
Rotating displays — framed artwork that changes seasonally, a small shelf of in-progress projects — make the mudroom feel curated and alive in a way that most mudrooms never achieve.
Natural light from a high window is ideal here since you don’t want the nook to eat into traffic space.
Keep the footprint small: one shelf, one small vertical cabinet, maybe a small stool that tucks under.
The charm of this layout is that it’s ambient creativity rather than a dedicated studio session — it’s the difference between a craft room you have to go to and craft that’s just part of moving through your home.
DIY Craft Cart — The Whole Studio on Wheels
For anyone without a dedicated room (hi, me for the first four years of this house), the craft cart is the layout.
Not a layout in the traditional sense — more like a portable studio you wheel to wherever you happen to be working.
The goal is to get everything you need for your main type of crafting onto one rolling unit.
Common configurations that actually work:
- Three-tier rolling cart (the Alex IKEA cart at around $120, or the RASKOG for $40 if you need lighter duty): top tier for active supplies, middle tier for in-progress projects, bottom tier for tools and extras.
- Kitchen island on wheels (around $100-$200 at places like Wayfair): butcher block top doubles as a cutting surface, cabinets and drawers below for organized storage, and it rolls to any room in the house.
- A converted bar cart: oddly perfect for craft supplies.
Wider shelves, sturdy frame, wheels that roll smoothly on most flooring.
The practical details matter: locking casters so the cart doesn’t drift while you’re cutting, dividers inside drawers for small items (Amazon sells drawer organizer sets for $8-$15), and a small mounted hook rail on the side for scissors, rulers, and tape dispensers you grab constantly.
A pull-out shelf that extends from the main surface gives you extra working area when you’re set up, then slides back in when you’re moving.
Optional add-on: a battery-powered LED light strip mounted under a shelf for task lighting when you’re in a dark corner of the living room at 10pm.
(No judgment.
I’ve been there.)
The honest tradeoff with the cart is that you’re limited in scale — you can’t spread out a big quilt or a 4-foot painting project.
But for small to medium crafts, paper crafts, jewelry making, card making, embroidery — it’s genuinely excellent.
And it rolls into a closet when company comes over, which is a feature I have used more times than I can count.
Craft Trailer Layout — The Portable Studio for Outdoor Creatives
Okay, this one is aspirational for most of us, but it’s too good not to include.
The craft trailer is for the person who wants a studio they can take camping, to a craft fair, to a friend’s property, or just to the backyard on a nice afternoon.
The design priorities are identical to any small-space layout — multipurpose furniture, smart vertical storage, non-tip everything for when it’s in motion — but scaled to a trailer footprint, usually somewhere between 12 and 20 feet long.
A fold-down dining table with an extension leaf doubles as the main work surface and seats.
Bench seats along the walls convert to additional work surfaces or sleeping spots.
Wall cabinets built into the sidewalls go floor to nearly the roofline — spring-loaded door latches keep everything from flying open when you hit a bumpy road.
Solar panels on the roof run small devices: a Cricut, a lamp, a phone charger.
Backup batteries add a buffer for overcast days.
Large windows on both sides make the interior feel bigger and give you natural light for color-accurate work.
Blackout shades pull down when you need to darken the space.
Padded stools at the right height keep your back happy even in close quarters.
Adjustable clip-on lamps add flexibility for evening sessions.
And outdoor space right outside the trailer door expands your effective footprint for bigger projects or for working with natural materials.
Not cheap to build.
Not practical for most people’s daily crafting.
But as a concept — a self-contained, fully stocked studio that goes wherever you go — it’s genuinely inspiring even if you never build one.
Nautical Craft Cabin — Coastal Details That Actually Make You Want to Sit Down and Make Something
Theme rooms get a bad rap sometimes, and honestly, most of the time it’s deserved.
But the nautical craft cabin works when it’s done with restraint — actual structural nods to the aesthetic rather than slapping anchor decals on everything and calling it a day.
Walls in soft, watery tones: robin’s egg, light turquoise, faded navy.
These colors are calming without being cold, which matters in a room you’re spending hours in.
Sea glass art or texture panels add depth without clutter.
The built-in storage gets the theme treatment: porthole-style inserts on cabinet doors (you can buy these as hardware for about $15-$30 each), rope drawer pulls, captain’s wheel knob hardware.
These are small details but they make the storage feel intentional instead of generic.
A large central sewing or work table with nautical leg details.
A button bin that’s basically a small wooden chest.
Rope baskets for yarn or fabric scraps.
Netting draped loosely in a corner for holding lightweight items like rolled paper or dried botanicals.
String lights overhead that actually do look like fishing nets when done right — the warm Edison bulb type, not the icy white ones.
A window nook with a cushioned seat is the dream piece of this layout — somewhere to sit with a hand project, look outside, and feel like you’re somewhere good.
Task lighting in compass or lantern-style fixtures reads as practical and decorative at the same time.
The nautical cabin is one of those spaces that has a mood.
Not everyone wants that in a craft room, and that’s completely fair.
But if the coast calms you down and sparks ideas, building that feeling into your studio is a genuinely smart design move.
Garden Shed Craft Studio — The Backyard Escape That’s Entirely Yours
Converting an existing shed into a craft studio is one of the most satisfying projects in this whole list, because you end up with something that feels completely separate from the house — a dedicated creative space that’s just yours, with a door you can close.
Structural basics first.
New cedar siding or wall panels if the existing ones are rough.
A standing seam metal roof if you’re replacing it — more durable and handles rain beautifully.
Insulated walls for year-round comfort; without insulation, the shed bakes in summer and freezes in winter and you won’t use it half the year.
Skylights are worth the investment here (around $150-$300 per unit installed) because they flood the space with overhead natural light without eating wall space.
Large side windows bring in more.
Solar panels on the roof handle your basic electrical needs — a lamp, a Cricut, a small fan, a phone charger.
Heavy-duty perimeter shelving, floor to ceiling on at least two walls, handles your bulk storage.
Deep shelves for big items, wall cabinets up high for valuables or sharp tools.
A wide center worktable with a butcher block top (durable, beautiful, ages well) and storage drawers built underneath.
Caster-mounted shelving carts add flexible secondary surfaces that tuck away when not needed.
A small sitting area near the window — a plush-backed stool or a small loveseat — gives you somewhere to think and sketch before you start making.
String lights strung along the ceiling ridge create warm evening atmosphere when the natural light fades.
A mini fridge for drinks and a small kettle for coffee (obviously) make the space livable for long sessions.
And the garden just outside the windows?
That’s the whole point.
Inspiration right there, growing and changing with the seasons, visible while you’re working.
The garden shed studio is about proximity to the outdoors and total separation from the indoors.
For a lot of crafters, that’s exactly the combination that makes the work feel possible.
Related read: Things I Wish I Knew Before I Decorated My First Home — Instant PDF + Kindle download. Secure checkout by Stripe

