Ready to turn your home into a Pinterest-worthy paradise without breaking the bank?
Upcycling furniture isn’t just about saving money—it’s about creating one-of-a-kind pieces that tell your story and showcase your creativity.
If you’re a DIY newbie or a seasoned crafter, these top furniture makeover ideas will inspire you to see potential in the most unexpected places.
Transform That Forgotten Dresser Into a Kitchen Island That’ll Blow Your Mind

Your old bedroom dresser is about to become the star of your kitchen, and everyone’s going to wonder where you got such an expensive-looking island.
Start by removing all the drawers and hardware, then sand down the entire surface to create a smooth base for your transformation.
Paint the body in a bold navy or classic white, depending on your kitchen’s color scheme, and don’t forget to use furniture paint that can handle kitchen humidity and daily use.
Replace the top with a gorgeous butcher block or marble slab that you can find at most home improvement stores for a fraction of what custom islands cost.
Add heavy-duty casters to the bottom so you can roll your new island wherever you need extra prep space or storage.
Install open shelving where some of the drawers used to be, perfect for displaying your prettiest dishes or storing frequently used appliances.
Keep a couple of drawers for utensils and kitchen linens, but make sure to add dividers to keep everything organized and easily accessible.
The best part about this makeover is that you can customize every detail to match your existing décor, from the paint color to the hardware style.
Your friends will be asking for your designer’s contact information, and you’ll get to smile knowing you created this masterpiece yourself for less than $200.
Turn a Vintage Ladder Into a Rustic Bookshelf That Screams Character

That old wooden ladder collecting dust in your garage is about to become the most talked-about feature in your living room.
Clean off all the dirt and grime first, then decide whether you want to keep the weathered look or sand it down for a cleaner finish.
If you love the rustic vibe, just seal the wood with a clear protective coating to prevent any further deterioration while maintaining that authentic aged appearance.
Cut wooden planks to fit between each rung, creating shelves that are perfectly sized for books, plants, or decorative objects that reflect your personality.
Secure these shelves with small L-brackets underneath for extra stability, especially if you plan to load them up with heavy hardcover books.
The uneven spacing between ladder rungs creates visual interest that you simply can’t get from store-bought furniture, making each shelf a unique display opportunity.
Style the bottom shelves with larger items like coffee table books or storage baskets, then use the higher shelves for lighter decorative pieces.
Lean your new bookshelf against the wall at a slight angle for that casual, lived-in look that interior designers charge thousands to achieve.
You can even create a matching set by using different sized ladders throughout your home, turning this into your signature design element that guests will remember forever.
Design Your Dream Room in Minutes!
🏡 Start Creating FREE →Create a Luxurious Pet Bed From a Vintage Suitcase That’ll Spoil Your Furry Friend
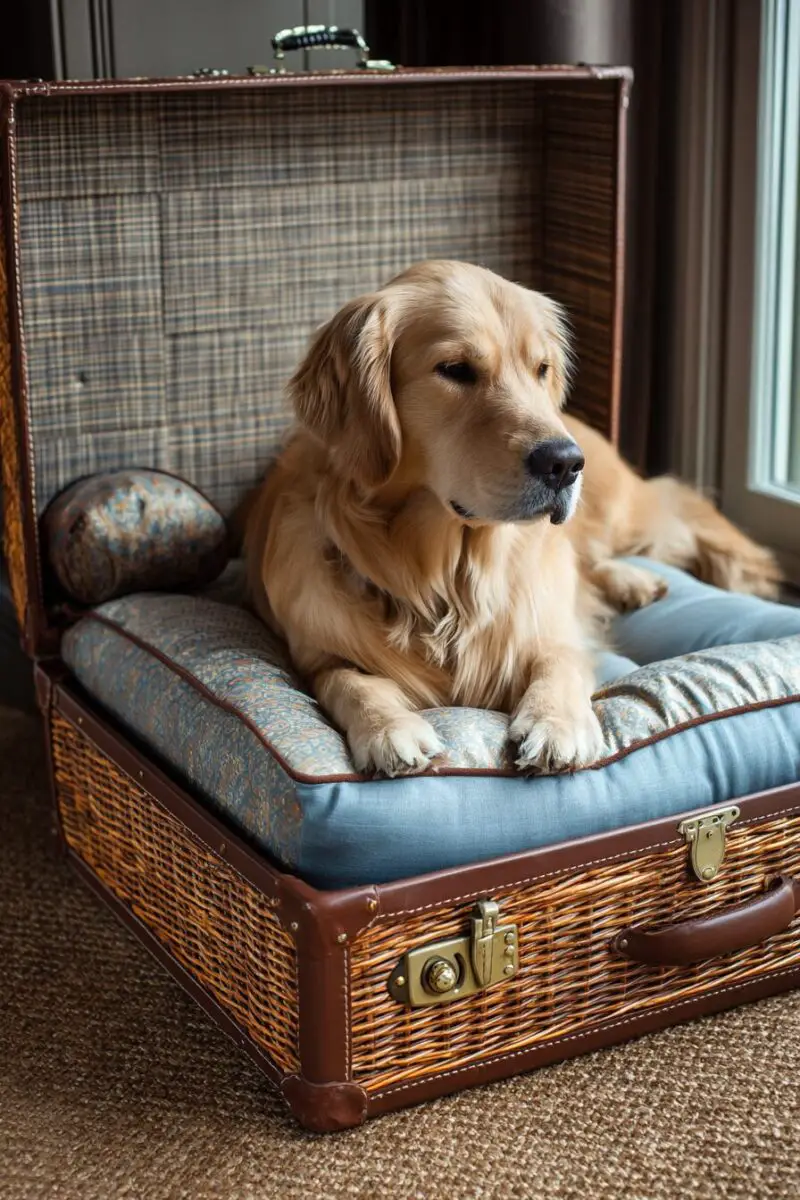
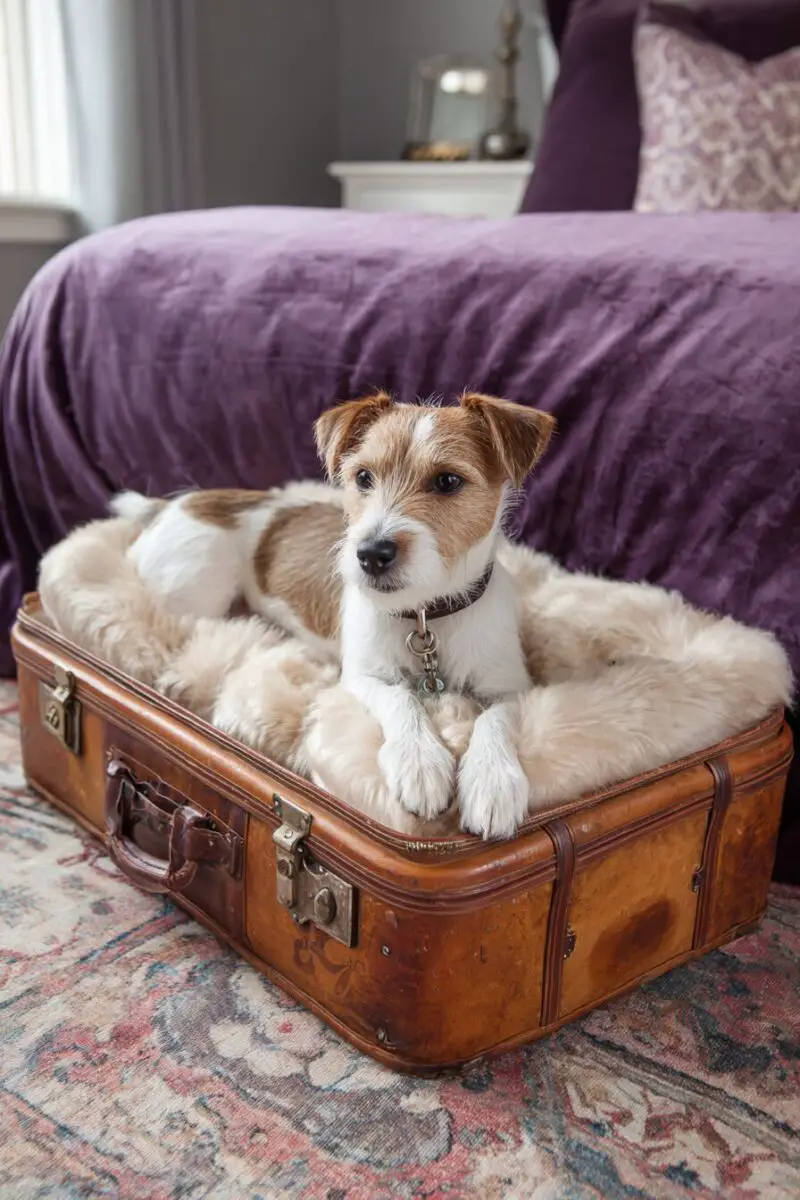
Your pet deserves furniture as stylish as yours, and that vintage suitcase you found at the thrift store is about to become their new favorite spot.
Remove any old fabric lining and give the inside a thorough cleaning with gentle soap and water, making sure to let it dry completely before moving forward.
Sand down any rough edges or rusty spots, then apply a pet-safe sealant to protect both the suitcase and your furry friend from any potential hazards.
Add short furniture legs to the bottom of the suitcase so it sits elevated off the floor, giving it a more furniture-like appearance and better airflow.
Cut a piece of memory foam to fit snugly inside the suitcase, creating a comfortable sleeping surface that your pet will absolutely love.
Cover the foam with removable, washable fabric in a pattern that complements your home’s décor, because pet furniture should be beautiful too.
Install small hinges and a soft-close mechanism if the suitcase didn’t come with them, so the lid can serve as a canopy for extra coziness.
Add a small nameplate or decorative element to the outside that matches your pet’s personality, making this bed truly one-of-a-kind.
The portability of this design means you can move your pet’s bed from room to room, or even take it along when you travel to pet-friendly destinations.
Your guests will be amazed by this creative solution, and your pet will thank you for providing them with the most stylish sleeping spot in the neighborhood.
Convert Window Shutters Into a Room Divider That Adds Instant Elegance
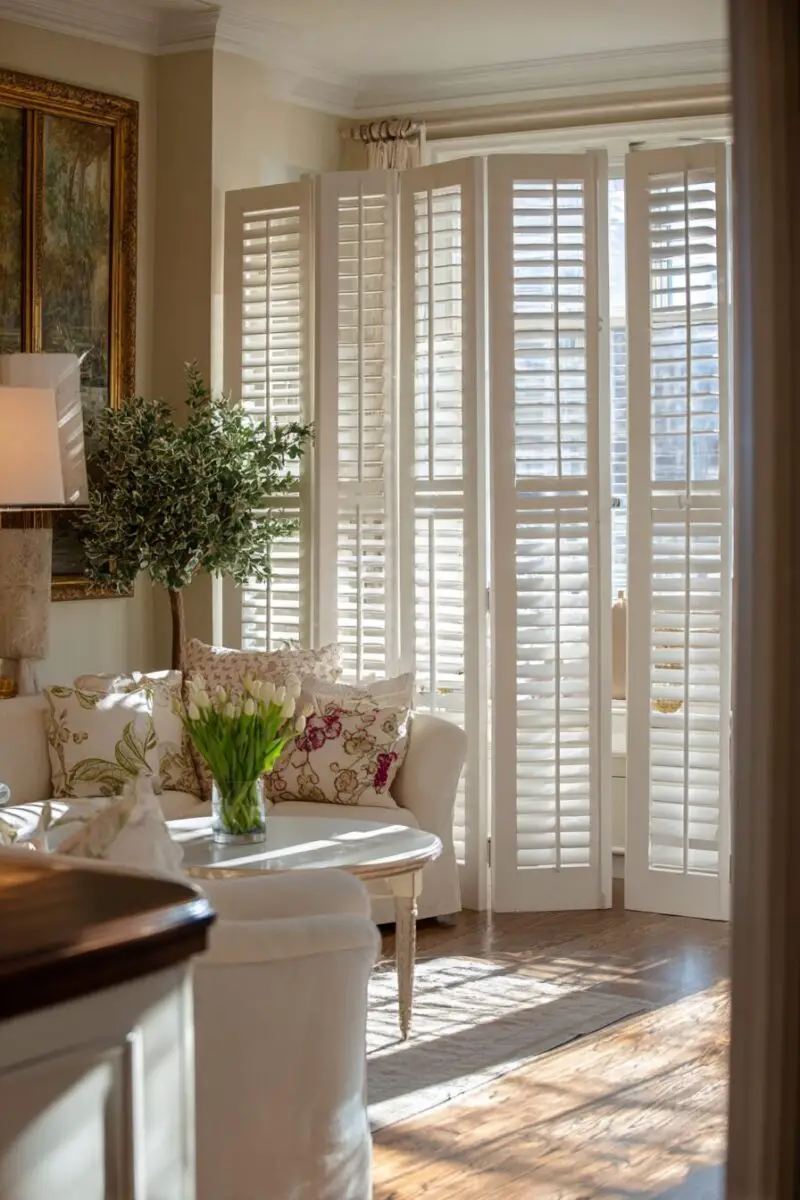
Old window shutters are about to solve your open-concept space problems while adding architectural interest that looks like it cost a fortune.
Start by collecting three or four matching shutters from architectural salvage yards, flea markets, or online marketplaces where they’re surprisingly affordable.
Clean them thoroughly and decide whether you want to maintain their original paint for that authentic vintage look or refresh them with a new color.
If repainting, choose colors that complement your existing palette—soft whites and grays work beautifully, but don’t be afraid to go bold with navy or forest green.
Connect the shutters using heavy-duty hinges that allow them to fold accordion-style, making your room divider both functional and space-efficient.
Add adjustable feet to the bottom of each panel so your divider stands stable on any floor surface, even if it’s not perfectly level.
The beauty of shutter room dividers lies in their ability to provide privacy while still allowing light and air to flow through the space naturally.
Position your new divider to separate your home office from your living area, or create a cozy reading nook in a large bedroom.
This sophisticated solution will have everyone asking where you found such a unique piece, and you’ll love how it transforms your space both functionally and visually.
Build a Statement Headboard From an Antique Door That Tells a Story

That weathered old door is about to become the focal point of your bedroom, bringing history and character that new furniture simply can’t match.
Hunt for doors with interesting details like panels, glass inserts, or unique hardware at salvage yards where each piece comes with its own mysterious backstory.
Measure your bed carefully before purchasing to ensure the door width works proportionally—you want it to extend slightly beyond your mattress on both sides.
Strip off any old paint if you prefer a natural wood finish, or embrace the layered paint look that shows decades of loving use and family memories.
Sand any rough spots smooth, paying special attention to areas where you might accidentally brush against the headboard during sleep.
Mount the door securely to the wall using heavy-duty brackets, making sure it’s level and positioned at the right height for comfortable reading in bed.
If your door has glass panels, consider backlighting them with LED strips for a dramatic evening effect that creates beautiful ambiance.
Add hooks or small shelves to the door for bedside essentials like reading glasses, books, or your phone charger, maximizing both style and function.
The patina and wear marks on antique doors tell stories of families who came before, adding soul to your bedroom that mass-produced furniture lacks.
Your bedroom will instantly feel more collected and intentional, like a space that evolved over time rather than being decorated all at once.
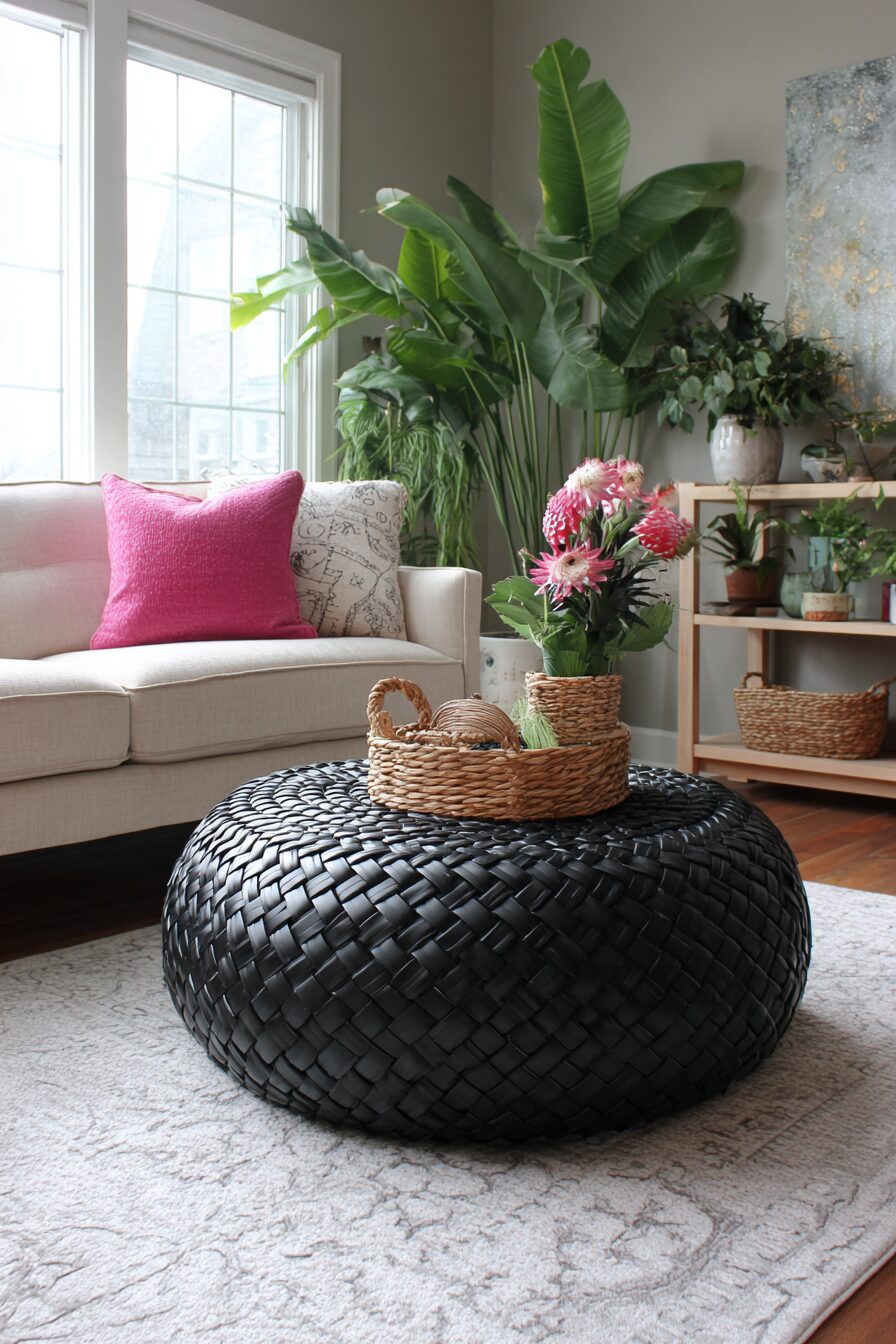
Transform a Tire Into a Chic Ottoman That Nobody Will Believe Started as Car Parts
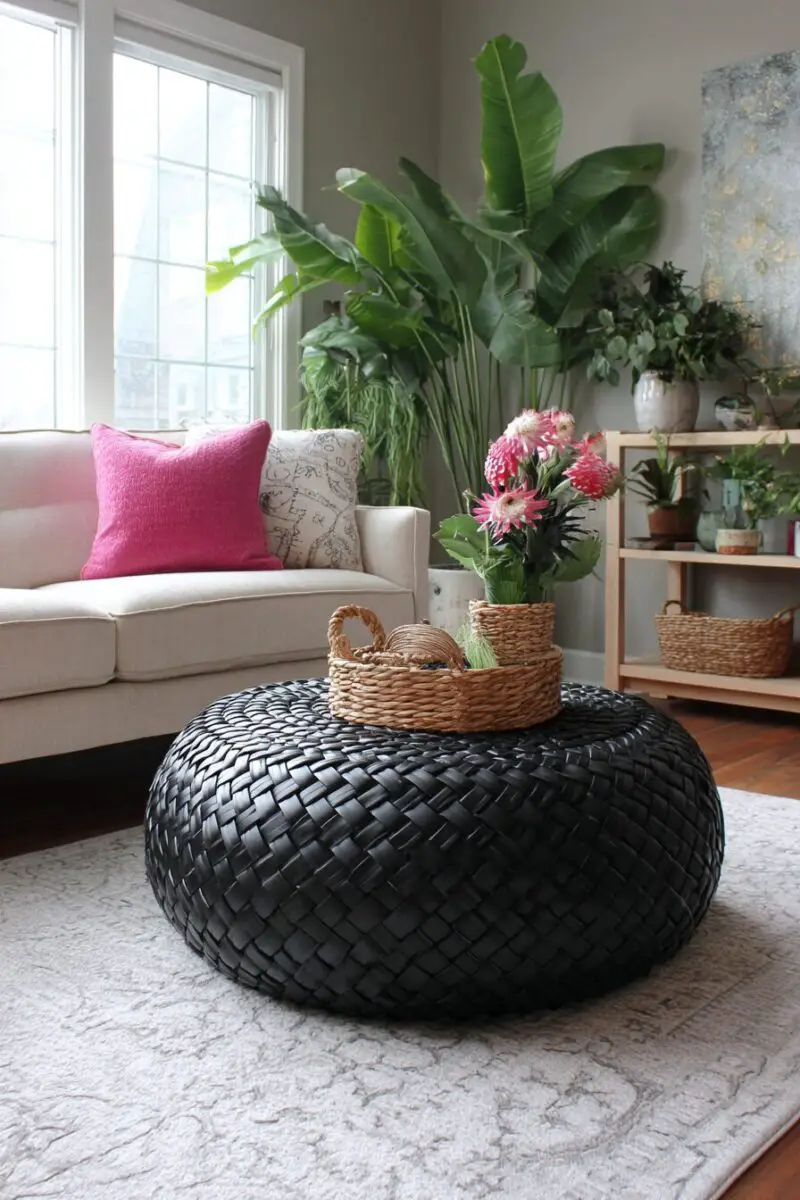
Before you dismiss this idea, prepare to be amazed by how sophisticated a tire can look with the right makeover approach and styling choices.
Choose a tire in good condition from a tire shop—they often have used tires that are perfect for crafting and will usually give them away.
Clean the tire thoroughly with degreasing soap to remove any road grime, oil residue, or rubber particles that could transfer to your home.
Wrap the entire tire tightly with thick rope, starting from the bottom and working your way up, using a hot glue gun to secure each layer.
This rope wrapping not only looks beautiful but also provides a comfortable surface that won’t leave black marks on your floors or clothing.
Create a cushioned top by cutting a circle of plywood to fit the tire opening, then adding a layer of batting and fabric for comfort.
Choose upholstery fabric that matches your décor style—linen for a casual look, velvet for luxury, or outdoor fabric for durability and easy cleaning.
Secure the fabric-covered cushion to the tire base using heavy-duty adhesive or screws, ensuring it won’t shift during use.
Add decorative furniture glides to the bottom to protect your floors and make the ottoman easy to move around for flexible seating options.
The result is a surprisingly elegant piece that provides extra seating, footrest functionality, and hidden storage space that guests will never guess came from an auto shop.
Build a Coffee Table From Wooden Pallets That Brings Industrial Chic Home
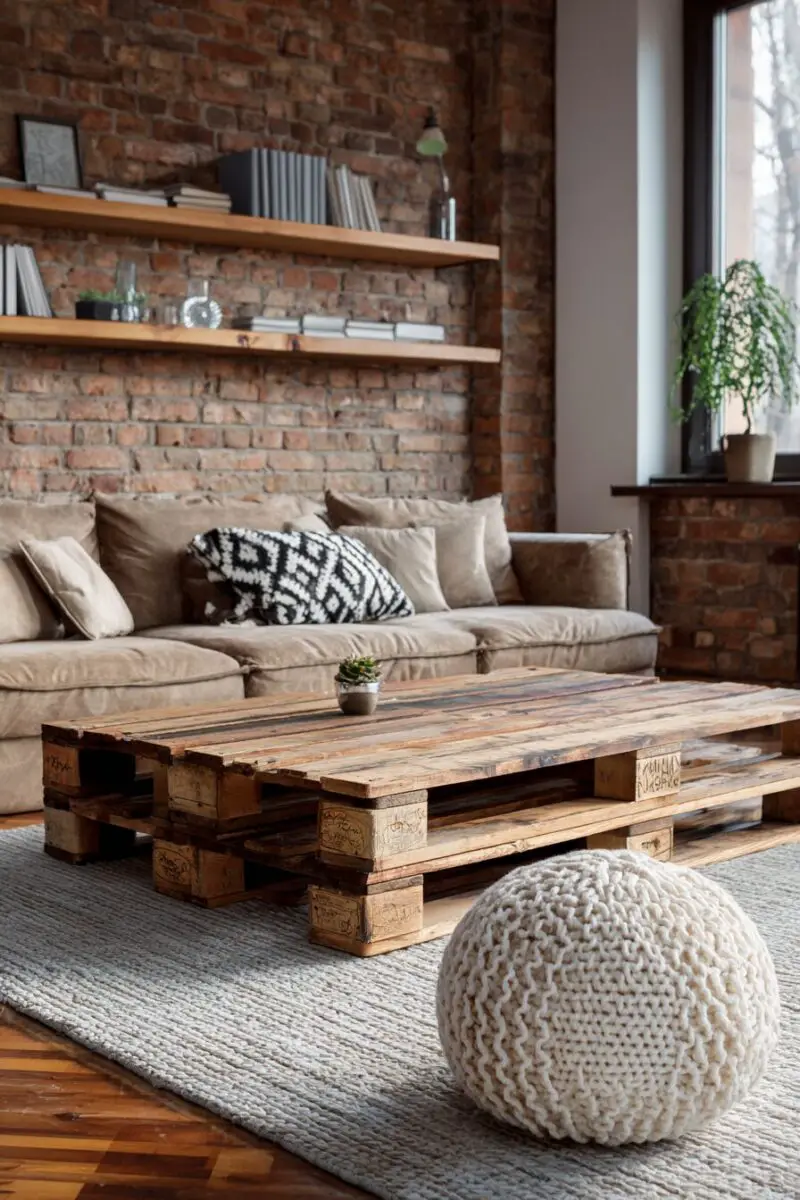
Wooden shipping pallets are everywhere, often free for the taking, and they’re about to become your living room’s most conversation-starting centerpiece.
Source clean pallets from businesses that receive regular shipments—avoid any marked with chemicals or showing signs of damage or pest infestation.
Sand every surface thoroughly to remove splinters and rough spots, paying special attention to areas where people will rest their feet or place drinks.
Decide whether you want a rustic finish that celebrates the pallet’s working history or a more refined look with paint or stain.
Stack two pallets on top of each other for the perfect coffee table height, securing them with long screws that go through both layers.
Add industrial-style casters to the bottom pallet so your table can roll easily for cleaning or rearranging your furniture layout.
Install a glass top cut to size by a local glass shop for a smooth surface that protects the wood while showcasing its character.
The gaps between pallet slats create natural storage compartments perfect for books, magazines, or decorative baskets that keep clutter organized.
This project costs almost nothing but delivers the high-end industrial look that furniture stores charge hundreds of dollars to achieve.
Convert an Old TV Stand Into a Rolling Bar Cart That’s Ready to Party
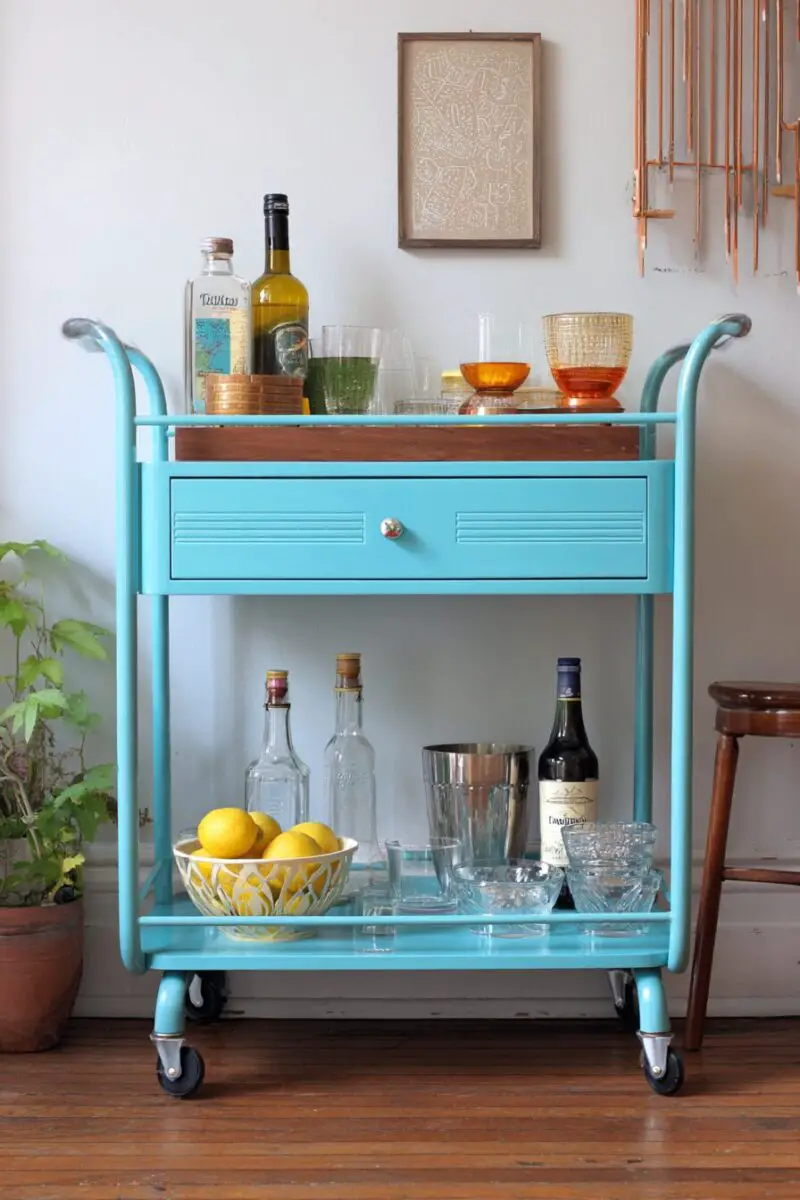
That bulky entertainment center gathering dust since you mounted your flat screen is about to become your home’s most sophisticated entertaining piece.
Remove all the old electronics components and give the cabinet a thorough cleaning, paying attention to any sticky residue from cable management.
Sand the surfaces smooth and apply a fresh coat of paint in a color that matches your entertaining style—classic black for elegance or bright teal for fun.
Replace any missing or damaged hardware with stylish new pulls that elevate the piece from functional storage to furniture art.
Add a mirror or metallic contact paper to the back panel for that upscale bar cart reflection effect that makes bottles and glassware sparkle.
Install wine glass holders underneath one of the shelves, creating dedicated storage that keeps your stemware safe and easily accessible.
Add a small wine fridge or ice bucket to one of the compartments, turning your cart into a fully functional beverage station.
Include heavy-duty casters so your bar cart can roll from kitchen to patio to living room, bringing the party wherever your guests gather.
Stock it with your favorite spirits, cocktail tools, and beautiful glassware that makes every drink feel like a special occasion.
The transformation from outdated electronics storage to sophisticated bar cart will impress guests and make you feel like a professional entertainer.
Create Wall Storage From Wooden Crates That Maximizes Every Square Inch
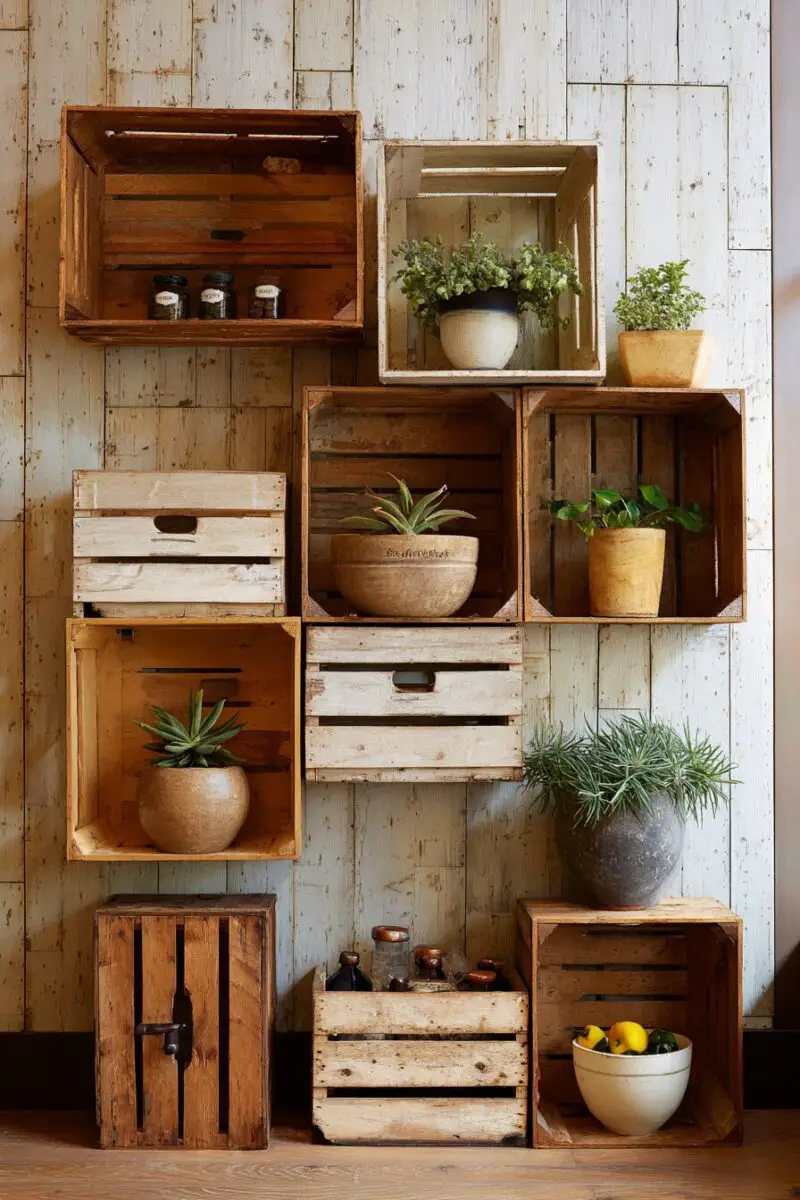
Wooden crates from craft stores or farmers markets are about to solve all your storage problems while adding rustic charm that feels authentically collected.
Start by sanding each crate smooth to prevent snags on clothing or skin, then decide whether you want to keep the natural wood or add color.
If painting, choose colors that work with your room’s palette—white for a clean look, or various shades of the same color for visual interest.
Plan your wall arrangement on the floor first, playing with different configurations until you find a layout that’s both functional and visually pleasing.
Mount the crates securely to wall studs using heavy-duty brackets, ensuring they can hold the weight of books, plants, or other stored items.
Mix horizontal and vertical orientations for dynamic visual appeal that draws the eye up and makes your room feel larger and more interesting.
Add fabric backing to some crates for a pop of pattern, or install small battery-operated lights for dramatic nighttime illumination.
Use different sized crates to create varying storage compartments perfect for everything from books to plants to decorative objects.
The modular nature of this system means you can easily reconfigure or add more crates as your storage needs change over time.
This solution works equally well in bedrooms, living rooms, or offices, providing personalized storage that reflects your style and organizational needs.
Transform a Piano Bench Into Entryway Storage That Greets Guests in Style
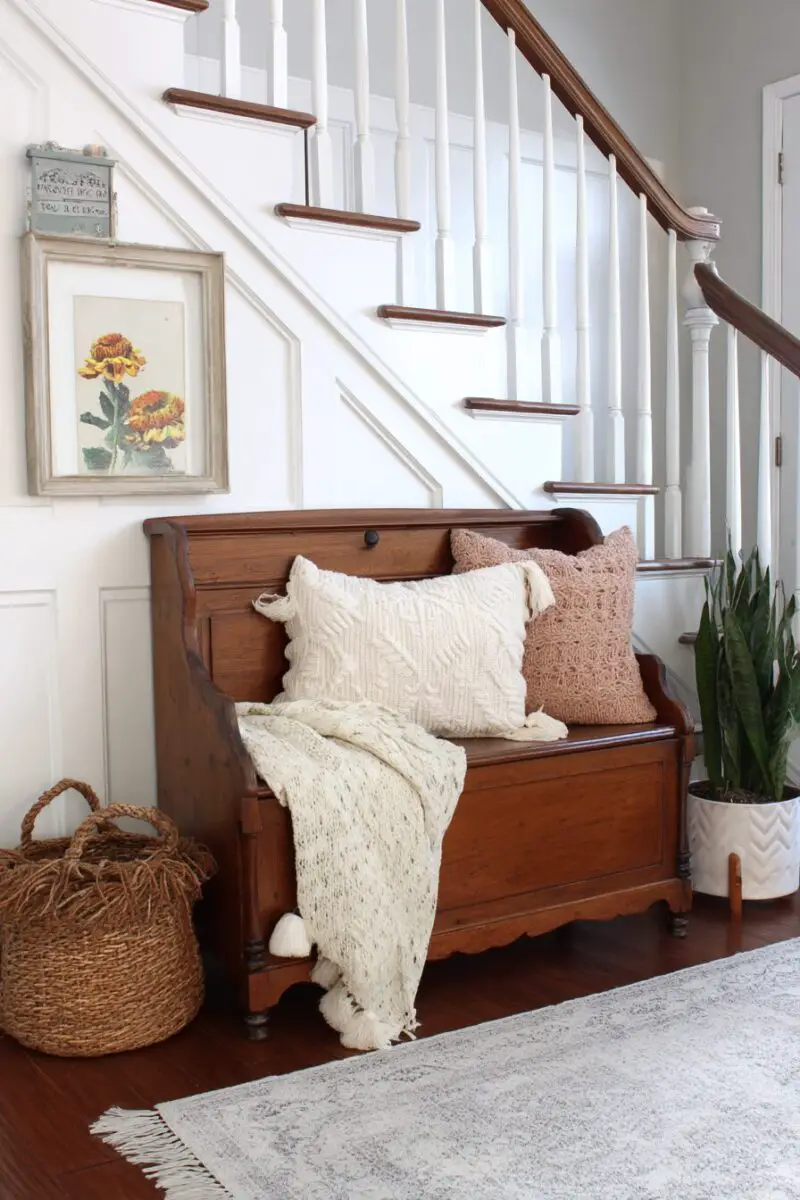
An old piano bench holds incredible potential for becoming your entryway’s most functional and beautiful piece of furniture.
Look for sturdy benches at estate sales, thrift stores, or online marketplaces where they’re often undervalued and reasonably priced.
The lift-top design provides perfect hidden storage for shoes, gloves, scarves, or any other items you want to grab quickly when heading out.
Sand the entire bench to remove any scratches or wear marks, creating a smooth surface that’s ready for your chosen finish.
Apply wood stain to enhance the natural grain, or paint it in a bold color that makes a statement as soon as guests walk through your door.
Add a comfortable cushion to the top using foam padding and fabric that coordinates with your entryway’s color scheme and style.
Install coat hooks on the wall above the bench, creating a complete entryway station that handles all your coming-and-going needs.
The bench provides seating for putting on shoes while the storage compartment keeps everyday essentials organized and out of sight.
This transformation turns a forgotten musical accessory into an essential piece of furniture that combines form, function, and style in perfect harmony.
With a little creativity, some basic tools, and the willingness to see potential where others see junk, you can create a home that’s uniquely yours without spending a fortune.
Start with one project that excites you most, and watch how transforming forgotten pieces into treasured furniture becomes an addictive and rewarding hobby that friends and family will admire for years to come.
