Music is a huge part of many people’s lives.
Being able to play, record, and produce music at home is a dream for a lot of music lovers and musicians.
However, dedicating space in your home for a music studio can be challenging, especially if you have limited square footage.
But with some creativity and planning, you can carve out a functional, inspiring music workspace even in a small home.
As we go through each idea, I’ll provide plenty of tips and insights so you can determine what might work best in your home.
✨Click to Get My 101 FREE Designer Room Ideas
Repurpose a Walk-In Closet or Small Bedroom

One of the most common spaces used for a home music studio is a walk-in closet or small bedroom.
These contained rooms offer a sense of separation from the rest of the house, allowing you to focus on your music without distractions.
If using a closet, remove the hanging rods and shelves to open up the floor space.
For a bedroom, remove any unnecessary furniture.
For both spaces, consider installing wall panels or acoustic foam to improve sound isolation and absorption.
Sound dampening curtains over the door can also help prevent sound from disturbing housemates.
When designing the layout, place any equipment like keyboards, speakers, or audio interfaces along the walls to leave floor space open.
Have your computer desk face the wall to avoid visual distractions.
Folding chairs take up little room when not in use.
For storage, wall-mounted shelves and slide-out drawer units maximize vertical room.
Plastic stackable storage bins are great for corralling cables, mics, and other accessories.
Having proper lighting is also key.
LED ceiling fixtures provide full light for detail work while dimmable bulbs allow adjusting the mood.
If the room lacks natural light, hanging a full spectrum daylight bulb can help energize you during long sessions.
To allow a multi-purpose space, hang acoustic panels on one wall while leaving others open for decor.
A small corner accent rug warms up the vibe and absorbs sound.
Finally, plants breathe life into the space while also naturally absorbing echoes.
With some creativity, even an unused closet can become a fully functioning micro-music studio.
The containment shields the rest of the home from your jam sessions while also providing that inspiring creative sanctuary vibe.
Soundproof a Basement Corner
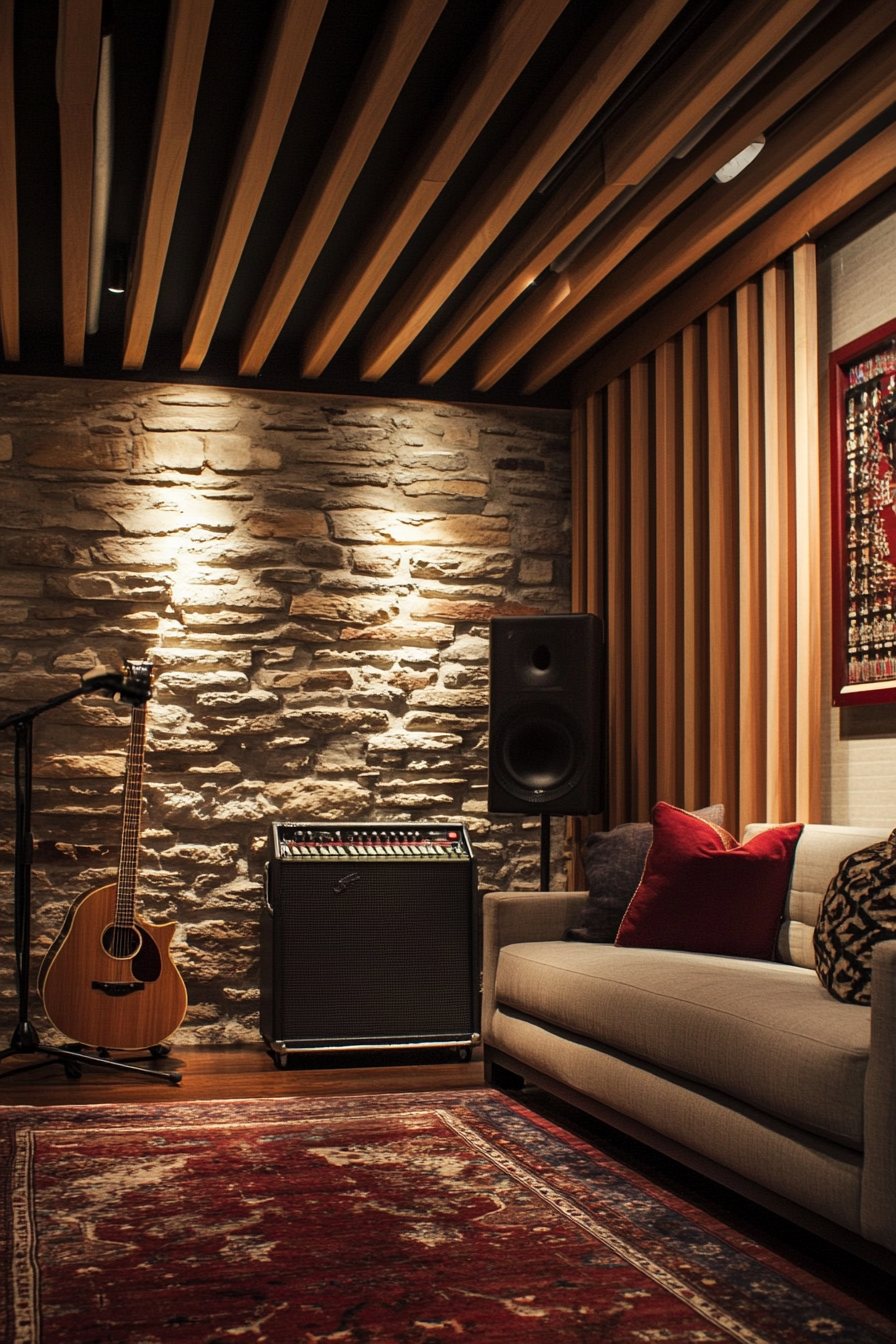

Basements are already secluded spaces perfect for a music setup.
Choosing a back corner and building out some soundproofing structures will let you make as much noise as you want without shaking the whole house.
Use room dividers or even ceiling-height bookshelves to fence in your studio corner.
Cover walls with acoustic foam panels and fill gaps with insulation for maximum sound absorption.
Building a simple vocal booth is also great for containing vocals or loud amps; use PVC pipes and acoustic blankets for an affordable DIY booth.
Install industrial carpeting on the floor and ceiling to further dampen sound.
Hang a thick soundproof curtain in the doorway of your corner to contain sounds when recording or belting out vocals.
Lighting is especially important in dark basements.
Hang adjustable studio lighting on the ceiling to illuminate your gear and sheets of music.
Strip LED lights around the booth or corner perimeter provide a cool ambiance.
While basement studios can feel cold, you can add warmth with area rugs, throw pillows, and inspiring art on the soundproofed walls.
Space heaters and a dehumidifier provide physical comfort during long sessions.
With the right soundproofing solutions, a basement studio lets you rock out to your heart’s content without annoying housemates above.
Just be sure to accessorize the space for comfort and inspiration.
Build a Backyard Studio Shed
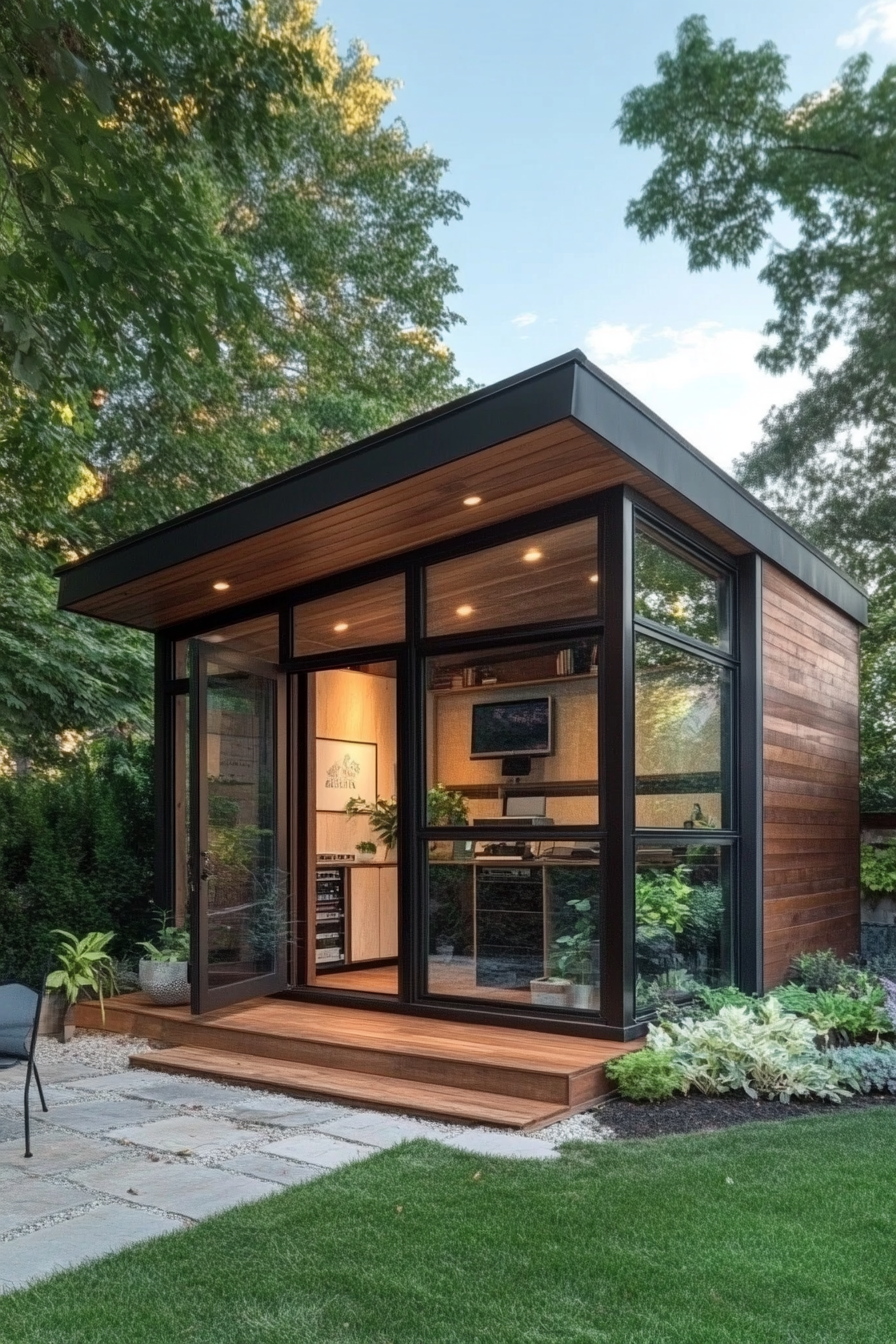
For the ultimate secluded recording experience, build a backyard studio shed from the ground up.
While requiring more investment, a detached studio removes all possibility of noise disturbances.
Converting a ready-made garden shed is the most affordable route.
Choose an insulated model and replace one wall with acoustic blankets for a DIY vocal booth.
Some sheds even have electricity installed – if not, hire an electrician to wire it up safely.
For a more professional studio, build a custom shed using proper soundproofing techniques, like double-wall framing with offset studs and Green Glue noiseproofing sealant between layers.
Install bass traps in corners to absorb low frequencies.
If planning on loud recording sessions, also consider pouring a concrete floating slab floor for isolation.
Make sure to weatherproof your shed studio with exterior treatments, insulation, and climate control.
An AC unit keeps summer sessions comfortable while a space heater extends the season into winter.
Sound lock the entry door with seals and sweeps and use thick curtains over windows.
The detached environment means you can decorate and equip your backyard studio like a professional workspace.
Experiment with colorful acoustic wall paneling and energy-boosting lighting.
Outfit the space with pro gear like external preamps, monitor speakers, and a large-format mixing console that may be unwieldy in the house.
Building a studio from scratch is a major endeavor but pays off with your own private creative space.
Escape to your backyard music sanctum anytime creativity strikes.
Designate Space in an Open Floor Plan
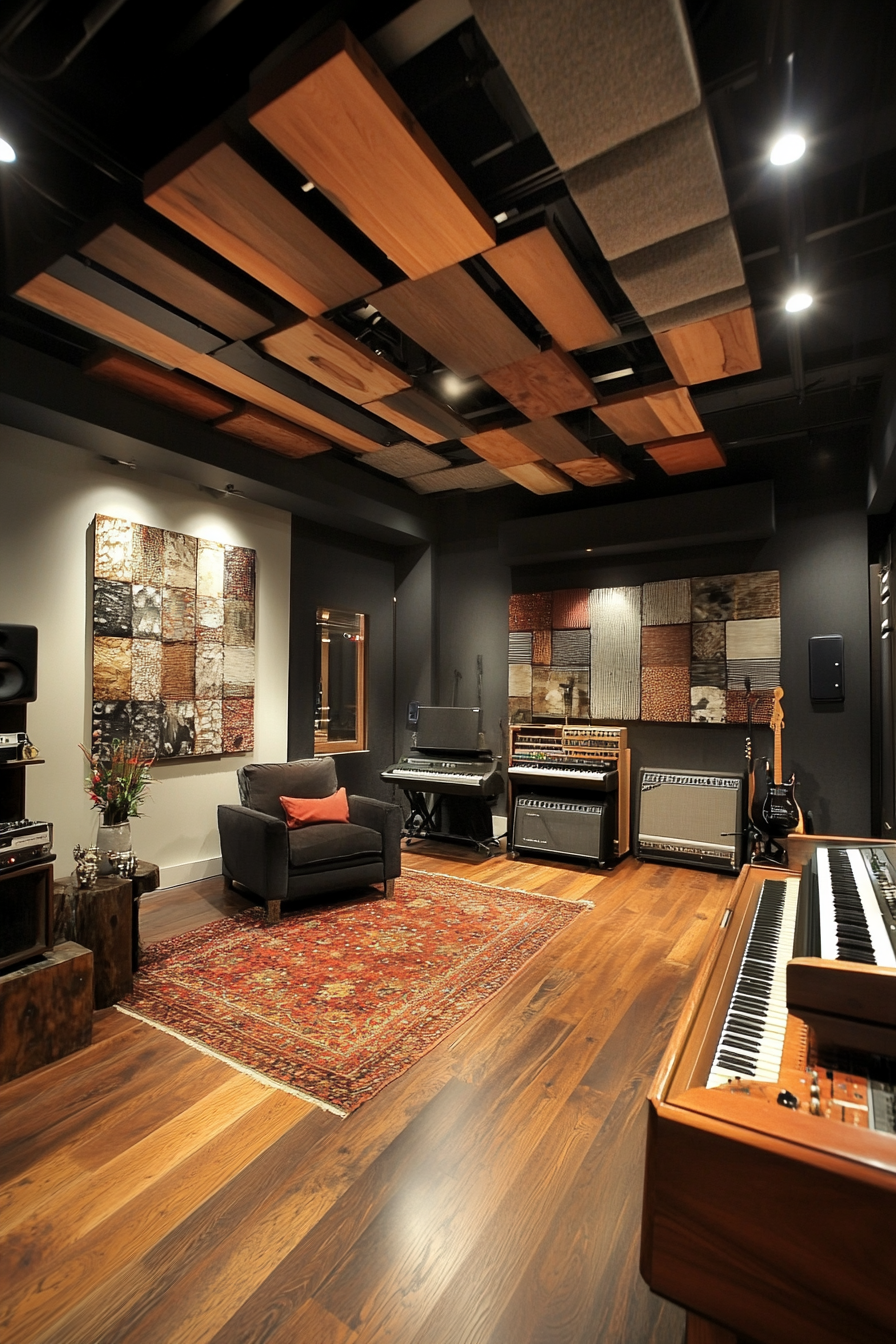
For those without rooms to dedicate, you can carve out a mini music corner even in an open floor plan home.
Use an area rug to define the space and absorption panels on stands to buffer sound.
Face the corner to avoid distracting sight lines.
Look for a section that’s out of high-traffic zones.
Near a wall outlet is ideal for equipment positioning.
You can also install floor-to-ceiling room dividers for more separation from living areas.
Strategically place storage like shelves and cabinets to block sound transmission further.
When recording, use a freestanding portable vocal booth to contain sound leakage.
Move any noisy gear like amps or monitor speakers into the booth as well.
Close doors to nearby rooms to further distance your session.
Make sure to maximize acoustic treatment all around your workspace.
Foam panels above the desk, diffusers on stands behind you, and bass traps in corners all help shape a clean sound.
Rugs under gear help decouple vibrations.
During non-recording time, have a way to conceal the studio corner for a cleaner look.
A large cabinet on casters lets you hide the computer desk and screens.
Acoustic panels can be covered with artwork or decorative fabric.
With smart acoustic tweaks and visual concealment options, you can create a mini recording station even in a wide open family room or dining space.
Just be mindful of volume levels and schedule intense tracking sessions during quiet house times.
✨Click to Get My 101 FREE Designer Room Ideas
Build a Custom Closet Studio
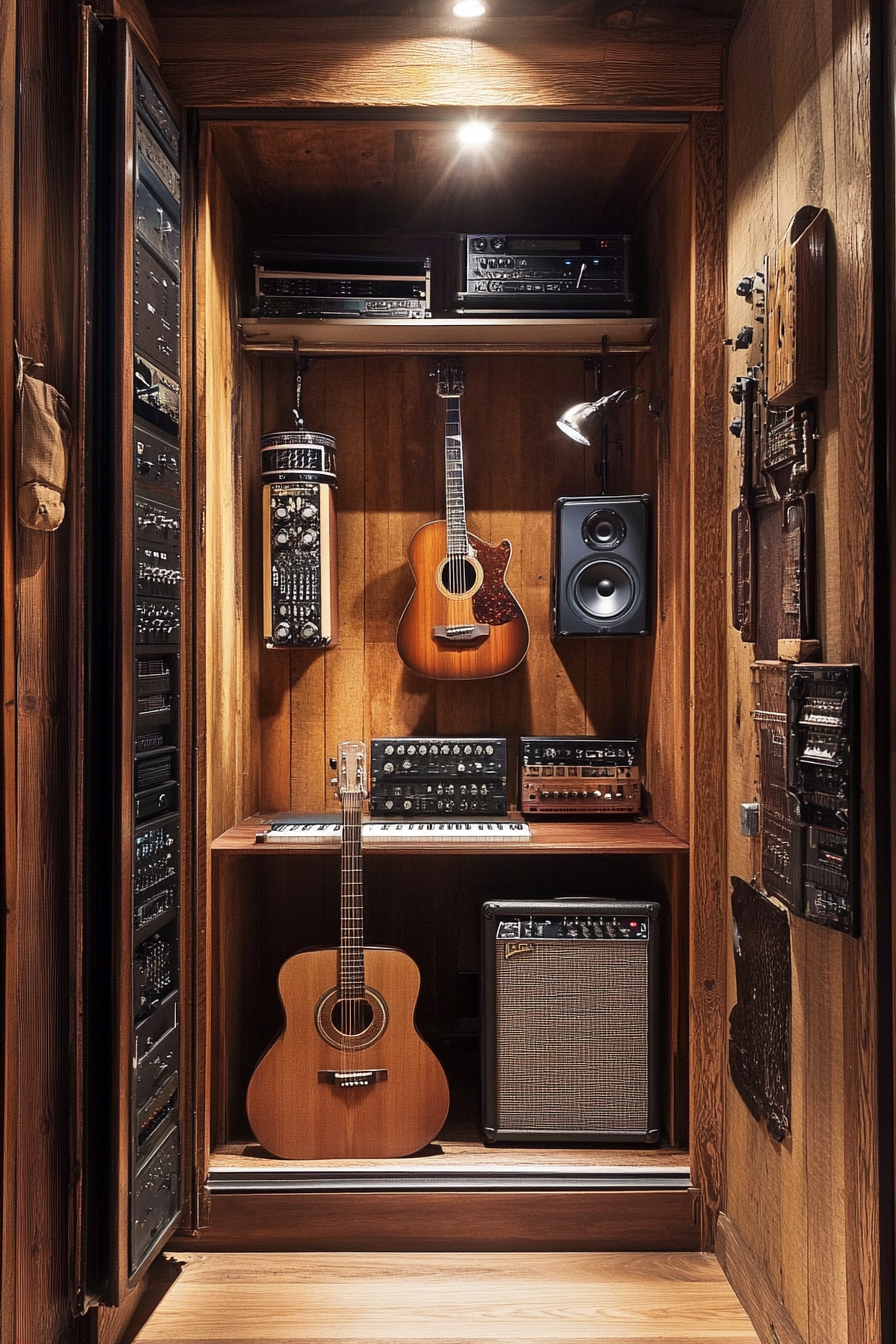
For a more permanent open floor plan music nook, build a customized closet studio.
Convert an underutilized coat closet or build a music cubby into existing living room bookshelves and cabinets.
This hides away your gear when not in use while embedding you in the action of the home.
Line the interior with acoustic foam panels using adhesive or hook-and-loop fasteners.
Install corner bass traps for low-end control.
Seal the entry with weather stripping around the edges and hang an acoustic curtain across the doorway.
maximize your square footage by going vertical.
Use tall narrow shelving units and mount the computer monitor, speakers, and interfaces on arms to conserve desk space.
A mounted flat screen on the wall doubles as a monitor when editing.
Proper studio lighting keeps the windowless closet space energizing.
Opt for lighting designed specifically for audio-visual tasks like desktop luminaires on articulating arms.
Include a mix of white and chromatic hues for balancing focus and creativity.
A custom closet build allows you to perfectly organize your gear for maximum efficiency while also designing an aesthetic that inspires.
Keep decor minimalist and orderly so the compact space doesn’t feel cluttered.
When it’s time to record, simply slide the curtains closed for an isolated tracking booth.
The rest of the time your studio gear remains discretely concealed but readily accessible.
Design a Multi-Use Guest Room
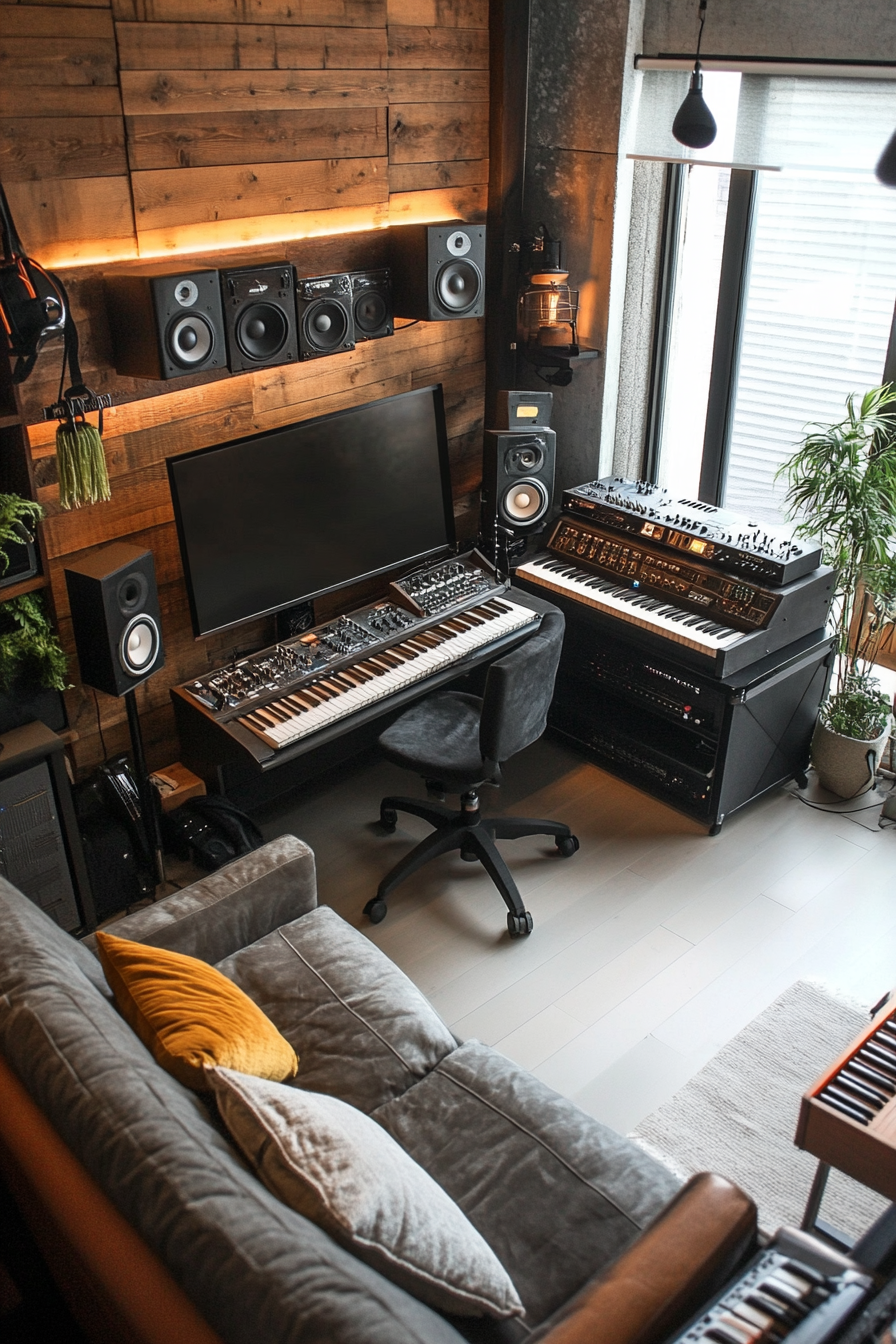
For households with space, converting a guest room into a music studio allows designing a luxurious creative environment while still supporting overnight visitors.
Built-in acoustic treatment preserves sound isolation while keeping decor flexible.
Start by consulting an acoustician on optimal soundproofing for the existing structure.
They may recommend upgrades like double drywall, Green Glue application, offset studs, and sealed electrical outlets.
For a clean look, build absorption panels, bass traps, and diffusers right into custom cabinetry and wall units.
Conceal isolating curtains inside a decorative pelmet over the window designed to match the room.
When guests aren’t visiting, the room transforms into the ultimate lounge studio.
Use high-end monitor speakers, state-of-the-art software instruments, and any speaker-based equipment you don’t want occupying public living zones.
Place accent furniture like a leather sofa and area rug to enhance the vibe.
During visits, fold up the keyboard stand, swing the monitors out of the way, and stow recording gear in closets and cabinets designed for integrated storage.
Your guests will appreciate the calm, welcoming environment.
With built-in soundproofing and integrated storage, you can shape shift a room between a luxury lounge studio and practical guest quarters as needed.
Careful acoustic planning prevents noise leakage so you can fully crank monitors when jamming.
Construct a Backyard Shed Office/Studio
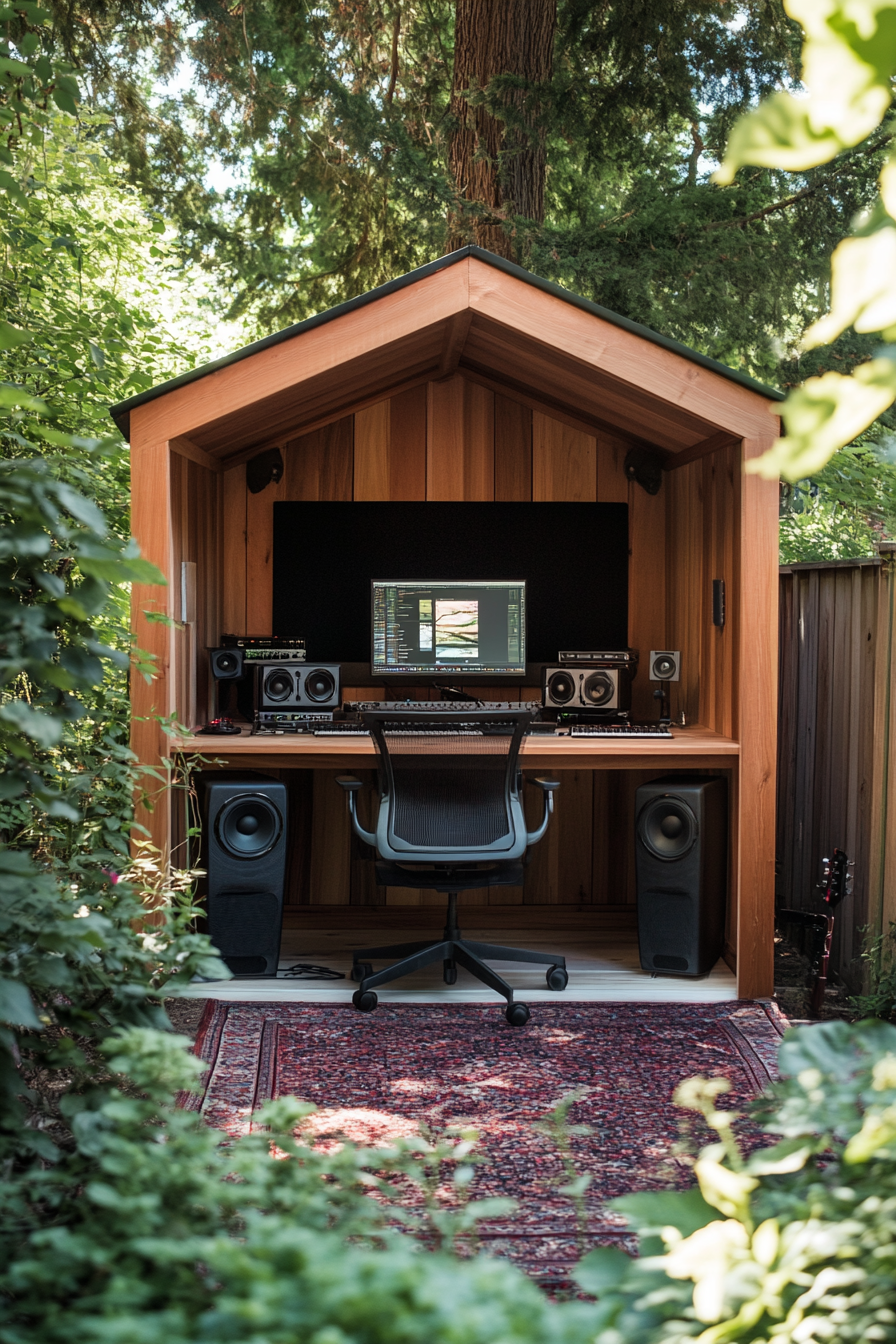
If you regularly work from home, combining your office and studio into a backyard shed provides the ultimate isolated work environment.
Custom build the shed with top-notch soundproofing so you can switch from work to music seamlessly.
Make sure to wire the shed for both computer and audio equipment.
Include plenty of power outlets and Ethernet/WiFi connectivity for professional live streaming and uploading.
Insulate thoroughly and include an AC/heat source to keep you comfortable year-round.
Build in extensive acoustic treatment like bass traps, absorbers, and diffusers to make the most of the detached structure.
Floating floor and ceiling systems decouple surfaces further.
Construct a vocal isolation booth in one corner.
On your office days, face the booth area to avoid visual distractions.
Hang acoustic art over soundproofing panels when video conferencing to liven up your background.
When your workday wraps up, simply swivel around to access your musical equipment and computer audio workstation.
Close the booth curtains and crank the monitors as you mix, record, and jam for hours without disturbing anyone.
Combining both passions in your own backyard oasis provides the perfect balance.
Get privacy for heads-down work focus, then relax by making music surrounded by nature.
With the right noise isolation, you can transition seamlessly.
Designate a Corner of the Garage

Like basements, garages provide built-in seclusion that allows cranking up the volume.
Choose a back corner, build some acoustic partitioning, and soundproof to create your own jam space.
Start by framing ceiling-height walls around your studio corner.
Ensure a tight air seal and fill with Roxul insulation for absorption.
Next, address the garage door, which is notoriously leaky.
Seal gaps with weatherstripping and cover with mass loaded vinyl, securing edges with spray adhesive.
The concrete garage floor amplifies vibration, so lay down thick carpet or a floating room-within-a-room floor.
Treat the corner walls and ceiling with acoustic foam to absorb reflections.
Use a clamp light with an LED bulb so you can adjust positioning as needed.
While garages tend to be chilly, space heaters can quickly warm your studio corner.
Place instruments cases on their sides to form sound-buffering barriers.
An enclosed backline soundproofing shield behind amps also helps project sound forward.
Treat the harsh space like an industrial loft, leaning into the gritty vibe.
Fill empty wall space with inspiring graffiti murals or album cover art.
The garage studio gives you raw authenticity and ample volume levels to fully rock out.
✨Click to Get My 101 FREE Designer Room Ideas
Maximize a Large Walk-in Closet
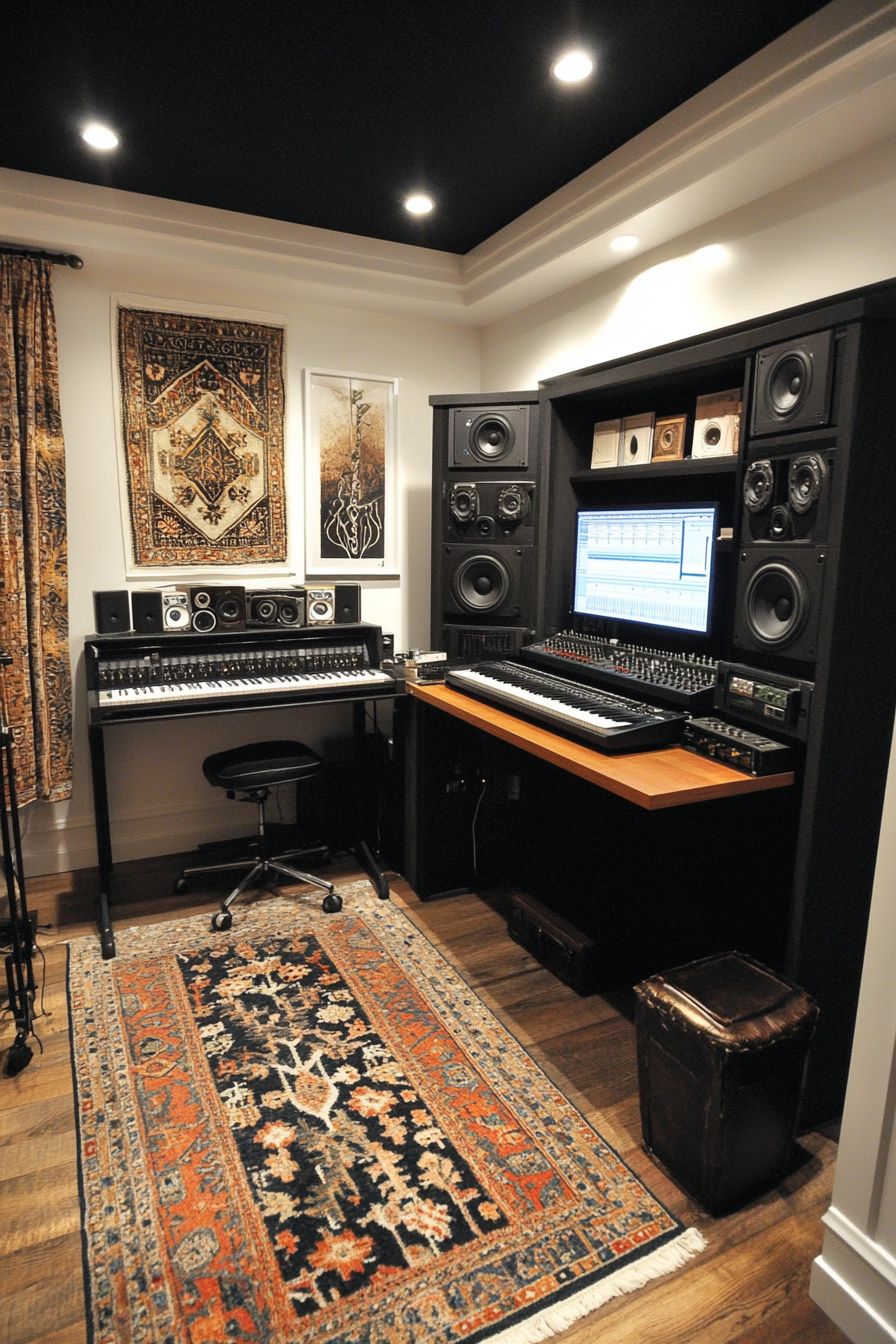
For those blessed with spacious closets, this ample square footage allows creating a tricked out studio sanctuary.
Outfit the space like a pro mixing suite but on a compact scale.
Cover walls with varied acoustic treatment like absorbers, diffusers, and bass traps.
Install hanging brackets or shelves to get equipment, screens, and speakers up off the floor.
Use an articulating wall mount for the studio monitor so you can angle toward your mix position.
Incorporate a retractable desk that folds back into the wall when not in use.
Under-desk mounted rack gear keeps everything compact while remaining accessible.
Conceal cables inside the walls or under baseboard covers.
Lighting is key for detailed audio work.
Add adjustable task lighting above the desk plus accent lighting around the perimeter.
Sconces flanking the mixing/computer area illuminate your work surface.
Filling empty floor space with a rug provides additional comfort while absorbing sound.
Add personalized touches like vintage concert posters and your instrument collection to inspire creativity.
A patterned curtain over the entry adds visual interest.
A large closet provides a blank canvas for building your dream studio sanctuary without compromises.
Take advantage of the abundant space to include high-end equipment and pro acoustic treatment that makes mixing and recording a joy.
Optimize Storage with a Mixing Cart

In tight spaces, getting creative with mobile and compact equipment can help maximize functionality.
A mixing cart or console moves all your recording gear into one portable unit.
These carts feature slide-out shelves and trays to hold interfaces, microphones, headphones, and mic stands.
Enclosed backing isolates and contains noisy computer fans and drives.
Mount monitor speakers on articulating arms so they can be positioned properly for the room.
When ready to record, simply roll your mixing console wherever you have some open space, like the corner of the bedroom or living area.
It keeps your entire studio tidy and self-contained.
Close by doors and windows and set up a portable vocal booth to optimize isolation further.
During non-recording times, the cart condenses down, allowing you to tuck it away out of sight.
Some even include locking wheels and dust covers for secure, protected storage.
For small or shared spaces, a mixing console provides flexibility.
Get pro studio quality mixes from any room without permanent installation.
The ability to quickly stow everything out of sight keeps your living space tidy.
Soundproof Under the Stairs

For quirky enclosed spaces, converting the area under a staircase can provide surprising usable square footage for a mini studio, especially if properly soundproofed.
Line the walls and underside of the stairs with thick sound absorption panels.
Seal gaps along edges with acoustic caulk.
Cover the floor above with mass loaded vinyl to contain footfall noise.
Hang an acoustic curtain across the entrance for further isolation.
Make the most of the angular space with customized shelving and cabinetry.
Use angled racks to hold gear and musical instruments.
Install corner bass traps and diffusers where walls meet.
Pro lighting is critical in darker under-stair spaces.
Use track lighting around the perimeter to illuminate gear and lighting.
Swivel desk lamps allow directing task light where needed.
Embrace the unusual architecture by adding creative touches like vintage wallpaper or colorful patterned carpet.
Keep decor fun and whimsical to inspire creativity within the cocoon-like confines.
While challenging, an under-stair studio provides hidden space that won’t occupy more useful square footage.
Just be sure to overcompensate on soundproofing and lighting to make the cramped quarters fully functional.
Fashion a “Studio Shed” Attachment

If converting an entire shed or building a backyard structure is over budget, create a budget studio shed attachment designed specifically for music.
Even a lean-to shed addition spanning just 6 x 8 feet can house a surprising amount of gear.
Follow standard shed soundproofing techniques like offset studs, double drywall, and Green Glue application.
Outfit the interior with broadband acoustic absorption using rigid fiberglass panels.
Include a corner vocal booth for isolation during tracking.
Add power along with any required HVAC and insulation to keep conditions comfortable year-round.
Include a window and fill with natural light during sessions.
Use blackout curtains when recording vocals and instruments.
Maximize every inch inside with wall-mounted fold-out workstations, overhead storage racks, and slide-out drawers.
Hang acoustic treatment panels on hinges to access storage behind
A fold-down mixing desk maximizes space when not recording.
Even a modest attached shed can become the perfect secluded studio sanctuary.
Built properly, these intimate spaces contain endless possibilities for customization on a budget.
Creating a home music studio in limited square footage may seem difficult, but hopefully the ideas presented give you inspiration for maximizing any available nook or unused space.
With resourceful acoustic treatment, compact equipment, and clever room adaption, you can design a studio tailored to your needs.
The most important considerations are sound isolation from the rest of the home and absorption within your space for accurate monitoring.
But don’t forget ergonomic design, lighting for detailed work, storage solutions, and personal touches to keep you motivated.
Pursuing your musical passion doesn’t have to be limited by house size.
Get creative with these micro music studio concepts and soon you’ll have the perfect soundproofed space to record, mix, compose, or just jam out.
Most importantly, make sure your studio sanctuary resonates with your personal style so you love spending time there perfecting your craft.
