our RV doesn’t have to feel cramped or outdated just because it’s compact.
With the right design choices and creative thinking, you can transform your mobile home into a stylish, functional space that rivals any traditional house.
These remodel ideas will help you maximize every square inch while creating an atmosphere that truly feels like home on the road.

Maximize Every Inch with Multi-Functional Furniture


Your RV’s limited square footage demands furniture that works overtime, and multi-functional pieces are absolute game-changers for small space living.
Start by replacing your traditional dining table with a drop-leaf design that folds against the wall when not in use, instantly freeing up precious floor space for daily activities.
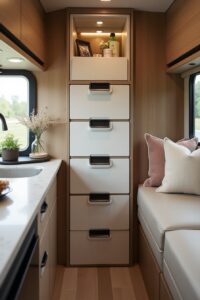
Ottoman storage cubes serve triple duty as seating, footrests, and hidden storage for blankets, games, or seasonal clothing that would otherwise clutter your cabinets.
Built-in bench seating around your dining area creates a cozy breakfast nook while hiding storage compartments underneath for kitchen supplies, linens, or outdoor gear.
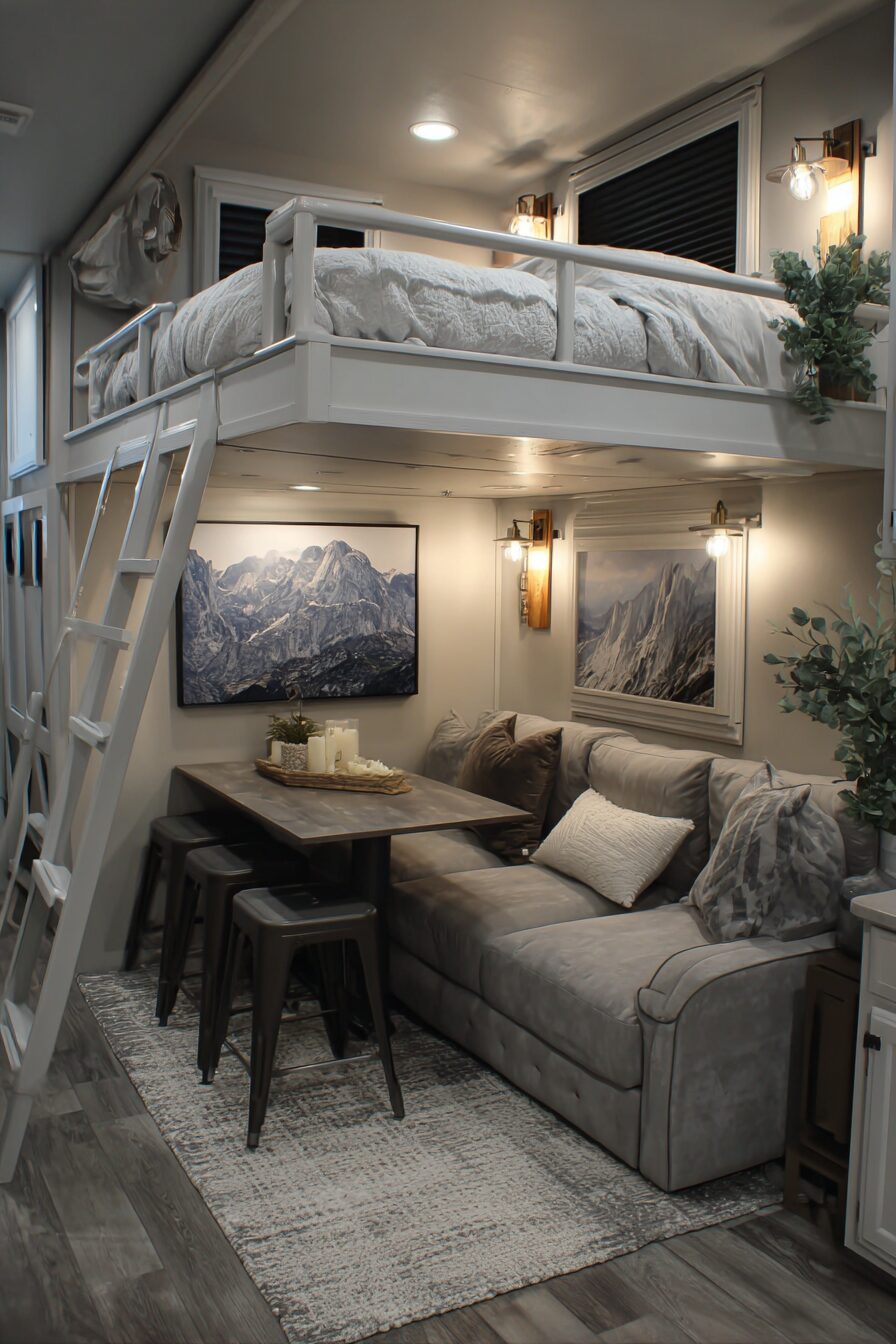
Murphy beds or convertible sofas transform your living room into a guest bedroom within seconds, perfect for when friends or family visit your campsite.
Nesting tables slide under each other when not needed but pull out to provide extra surface space for meals, games, or laptop work.
Wall-mounted desks fold down from the wall to create an instant workspace that disappears completely when you’re done, leaving your living area open and uncluttered.
Modular shelving systems adapt to your changing storage needs and can be reconfigured as you acquire new gear or change your travel lifestyle.
Magnetic strips on walls hold knives, spice jars, or small tools without taking up valuable drawer space, while magnetic hooks support lightweight items like keys or kitchen utensils.
Under-bed storage boxes on wheels make accessing seasonal gear effortless, and they slide completely out of sight when you want to maintain clean lines in your bedroom.
Ceiling-mounted nets hold lightweight bulky items like pillows or sleeping bags, utilizing overhead space that typically goes unused in most RV layouts.
Tap to Explore These Beauties
See my ideas in action 👇 Tap any image to explore full details.
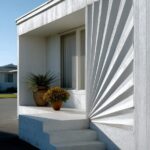
Create Drama with Bold Accent Walls

A single accent wall can completely transform your RV’s personality from bland to breathtaking, making your compact space feel intentional and designed rather than generic.
Peel-and-stick wallpaper offers endless pattern possibilities without the commitment or mess of traditional wallpaper, and it removes cleanly when you’re ready for a change.
Geometric patterns add modern sophistication and can make your walls appear taller or wider depending on the design direction you choose.
Wood paneling creates warmth and texture that makes your RV feel like a cozy cabin, especially when you choose reclaimed or weathered finishes that add character.
Stone or brick-look panels bring natural elements indoors and create fascinating focal points that draw the eye and make spaces feel larger than they actually are.
Painted accent walls in deep, rich colors like navy blue or forest green create intimate, cocoon-like feelings that make your RV feel like a luxury retreat.
Removable wall decals let you experiment with bold graphics or inspirational quotes that reflect your travel personality and create conversation starters with fellow campers.
Shiplap or beadboard adds farmhouse charm and vertical lines that make low ceilings appear higher while creating interesting shadow play throughout the day.
Fabric panels stretched over frames create soft, textile interest and can incorporate colors or patterns that tie together your entire decorating scheme.
Metallic finishes like copper or gold leaf add glamour and reflect light to brighten dark corners while creating unexpected luxury in your mobile home.
Gallery walls featuring your travel photography turn your adventures into art and personalize your space with meaningful memories from the road.
Illuminate Your Space with Strategic Lighting Upgrades

Proper lighting transforms your RV from a dim, cave-like space into a bright, welcoming home that feels spacious and comfortable at any time of day.
LED strip lights under cabinets eliminate shadows in work areas while providing energy-efficient task lighting that won’t drain your battery during boondocking adventures.
Pendant lights over your dining area create intimate ambiance for meals while freeing up table space that traditional lamps would occupy.
Battery-operated sconces provide reading light beside your bed without requiring electrical work, and they add elegant architectural details to plain walls.
String lights draped along the ceiling create magical, café-style atmosphere that makes your RV feel festive and cozy during evening relaxation time.
Dimmable fixtures let you adjust lighting intensity throughout the day, from bright task lighting for cooking to soft ambient lighting for romantic dinners.
Solar-powered lanterns charge during the day and provide portable lighting that you can move wherever needed, both inside your RV and at your outdoor campsite.
Motion-sensor lights in cabinets and closets automatically illuminate storage areas when you open doors, making it easy to find items without fumbling in the dark.
Skylights or additional windows flood your space with natural light during the day, making your interior feel more connected to the outdoors and less claustrophobic.
Color-changing LED bulbs let you adjust the mood from energizing daylight to relaxing warm tones, helping regulate your circadian rhythms while traveling across time zones.
Task lighting in your kitchen workspace prevents accidents while cooking and makes food preparation more enjoyable and efficient.
Mirror placement opposite windows reflects natural light deeper into your RV, effectively doubling the brightness without using additional electricity.
Find Your Room’s Color Palette
Tap a vibe — get a curated 5-color palette with hex codes you can copy ✨
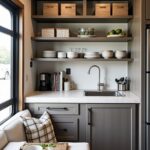
Transform Your Kitchen into a Gourmet Galley

Your RV kitchen can rival any home kitchen with smart upgrades that maximize functionality while maintaining the compact footprint essential for mobile living.
Induction cooktops provide precise temperature control and faster cooking times while generating less heat than traditional gas burners, keeping your interior more comfortable during summer travels.
Convection microwave ovens combine multiple cooking methods in one compact appliance, allowing you to bake, roast, and reheat without dedicating space to separate appliances.
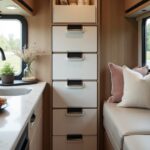
Pull-out pantry drawers make accessing stored food effortless and prevent items from getting lost in deep cabinets where they’re easily forgotten.
Magnetic knife strips and spice racks utilize vertical wall space while keeping essential cooking tools within easy reach of your prep area.
Under-cabinet cutting boards slide out when needed and store flat against the cabinet bottom, providing extra workspace without permanent counter clutter.
Deep-drawer dishwashers fit more dishes than traditional models while using less water, perfect for conserving resources during extended boondocking periods.
Farmhouse sinks with cutting board accessories create additional prep space right over your sink, maximizing your limited counter area for food preparation.
Open shelving displays attractive dishes and glassware while making everything easily accessible, and it creates an airy feeling that closed cabinets can’t match.
Wine storage racks keep bottles secure during travel while adding sophisticated touches that make your galley feel more like a real kitchen.
Backsplash tiles in subway or mosaic patterns protect walls from cooking splashes while adding personality and visual interest to your cooking area.
Compact appliance garages hide small appliances when not in use, maintaining clean counter lines while keeping your coffee maker, blender, or food processor easily accessible.

💭 I Wrote a Book About My Biggest Decorating Mistakes!
When I decorated my first home, I thought I knew what I was doing. Spoiler: I didn’t. 😅
💸 I bought a sofa way too big for my living room. Paint colors that looked amazing in the store but terrible on my walls.
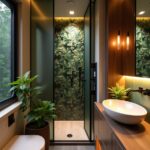
Design a Spa-Like Bathroom Retreat


Your RV bathroom can become a luxurious retreat that rivals hotel bathrooms with thoughtful upgrades that make the most of limited square footage.
Rainfall showerheads create a spa-like experience that makes your daily routine feel indulgent rather than rushed, transforming your small shower into a personal oasis.
Floating vanities make your bathroom appear larger by exposing more floor space while providing storage for toiletries and bathroom essentials underneath.
Large mirrors with integrated lighting eliminate shadows during grooming routines while reflecting light to make your bathroom feel more spacious and brighter.
Heated floors provide luxury comfort during cold morning routines and help prevent condensation problems that plague many RV bathrooms.
Vessel sinks add elegant style while taking up less counter space than traditional undermount sinks, leaving more room for your personal care items.
Natural stone or wood accents bring spa-like serenity to your bathroom while adding textural interest that makes the space feel more expensive and intentional.
Pocket doors save space compared to traditional swing doors while providing complete privacy, and they slide smoothly without interfering with your bathroom layout.
Ventilation fans with humidity sensors automatically remove moisture to prevent mold and mildew problems that can plague small, enclosed bathroom spaces.
Built-in storage niches in shower walls hold shampoo and soap without cluttering your shower floor or taking up valuable shelf space.
Towel warmers provide hotel-like luxury while helping towels dry quickly in humid bathroom environments, preventing musty odors during extended travels.
Waterproof luxury vinyl plank flooring looks like hardwood but stands up to bathroom moisture while being comfortable underfoot and easy to clean.
What’s Your Decor Personality?
5 questions · 30 seconds · Instant style match 🏡
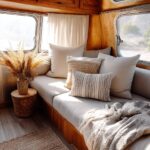
Create a Cozy Sleeping Sanctuary

Your RV bedroom should be a peaceful retreat that promotes restful sleep and provides a comfortable escape from the day’s adventures.
Memory foam mattresses conform to your body for better sleep quality while often being lighter than traditional spring mattresses, important for weight distribution in your RV.
Built-in reading lights with adjustable arms provide perfect bedside illumination without taking up nightstand space, and they fold away completely when not needed.
Blackout curtains or cellular shades block outside light for better sleep while providing insulation against temperature extremes that can affect your comfort.
Under-bed storage drawers keep your bedroom clutter-free while providing easy access to clothing, linens, or personal items without disrupting your sleeping area.
Ceiling fans improve air circulation for better sleep comfort while reducing your dependence on air conditioning, helping conserve energy during boondocking adventures.
Textile layers including throw pillows and soft blankets add comfort and style while allowing you to adjust your bedding for different seasons and climates.
Wall-mounted TVs save precious floor space while providing entertainment options for relaxing evenings or rainy days spent inside your RV.
Sound dampening materials reduce road noise and outside disturbances for better sleep quality, especially important when camping in busy campgrounds or near highways.
Temperature control options like mattress cooling pads or heated blankets help you maintain comfortable sleeping temperatures regardless of outside conditions.
Personal storage cubbies for each person’s belongings prevent bedroom clutter while ensuring everyone has dedicated space for their personal items and nighttime essentials.
Privacy dividers or curtains create separate sleeping areas if your RV layout includes multiple beds or sleeping spaces for different family members.
Build the Perfect Mobile Office Space


Remote work and digital nomad lifestyles require dedicated workspace that functions efficiently while fitting seamlessly into your RV’s living area.
Ergonomic desk chairs that fold or nest under your workspace prevent back strain during long work sessions while storing compactly when you’re not working.
Multiple monitor setups increase productivity for computer-intensive work, and slim monitors take up less space while providing the screen real estate you need.
Cable management systems keep your workspace organized and prevent tangled cords that can make your work area look messy and unprofessional during video calls.
Adequate electrical outlets and USB charging stations power all your devices without extension cords creating trip hazards or cluttering your workspace.
High-speed internet boosters and external antennas ensure reliable connectivity for video conferences and file uploads regardless of your campground’s signal strength.
Sound dampening materials or white noise machines help you concentrate during calls while preventing outside campground noise from disrupting your work concentration.
Adjustable lighting prevents eye strain during long computer sessions while providing adequate illumination for paperwork or video calls throughout the day.
File storage solutions keep important documents organized and easily accessible while protecting them from moisture and temperature fluctuations during travel.
Backup power solutions like portable batteries or generators ensure you can work even when campground electrical service is unreliable or unavailable.
Privacy screens or curtains create professional backgrounds for video calls while separating your work area from your living space psychologically.
Printer storage and paper supply organization maintain your ability to handle physical documents while keeping office supplies contained and easily accessible.
This or That?
Pick your fave — see what other readers chose! 👀
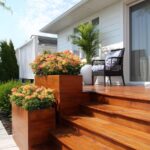
Blend Indoor and Outdoor Living Seamlessly

Extending your living space outdoors creates the feeling of a much larger home while taking advantage of the natural beauty that draws you to RV travel.
Retractable awnings provide instant outdoor rooms that offer shade and weather protection while extending your usable living space beyond your RV’s interior walls.
Outdoor kitchens with portable grills and prep stations let you cook outside during nice weather, keeping heat and cooking odors out of your RV interior.
Weather-resistant furniture that folds or stacks efficiently travels well while providing comfortable seating for outdoor relaxation and entertainment.
Outdoor lighting strings or solar lanterns create magical evening ambiance while extending your outdoor living hours well past sunset for maximum enjoyment.
Portable fire pits or fire tables provide warmth and gathering spots for socializing while creating cozy focal points for your outdoor living area.
Outdoor storage solutions keep camping gear, sports equipment, and outdoor furniture organized while protecting them from weather when you’re traveling.
Privacy screens or portable fencing create intimate outdoor spaces even in crowded campgrounds while reducing wind and providing visual barriers.
Outdoor rugs define your living space while providing comfortable surfaces for bare feet and helping prevent dirt from being tracked into your RV.
Shade structures like pop-up canopies or umbrellas create comfortable outdoor areas even during hot, sunny days when your awning doesn’t provide adequate coverage.
Water features like portable fountains add soothing sounds while creating peaceful outdoor environments that help you relax and unwind after driving days.
Plant containers with easy-care plants bring natural beauty to your campsite while providing fresh herbs or flowers that enhance your outdoor living experience.
Integrate Smart Home Technology

Modern technology can make your RV more efficient, secure, and comfortable while providing conveniences that rival or exceed traditional home amenities.
Smart thermostats learn your temperature preferences and automatically adjust heating and cooling for optimal comfort while conserving energy during battery operation.
Voice-controlled assistants manage lighting, music, and information requests hands-free while helping you multitask during cooking or relaxation time.
Smart security systems with cameras and motion sensors protect your RV when you’re away exploring while sending alerts to your phone about any security concerns.
Automated leveling systems make setup easier and faster while ensuring your RV is properly positioned for optimal appliance operation and comfort.
Smart lighting systems adjust automatically based on time of day while allowing you to control all lights from your smartphone or voice commands.
Tank monitoring systems track fresh water, gray water, and black water levels remotely while sending alerts before tanks need attention.
Smart locks provide keyless entry while allowing you to grant access to friends or service providers without being physically present at your RV.
Climate monitoring systems track temperature and humidity levels while automatically adjusting ventilation to prevent condensation problems and maintain optimal indoor air quality.
Entertainment systems with streaming capabilities provide endless viewing options while working efficiently with limited internet bandwidth available at many campgrounds.
Energy management systems monitor battery levels and power consumption while optimizing solar charging and generator usage for maximum efficiency.
Smartphone apps control multiple RV systems from one interface while providing remote monitoring capabilities when you’re away from your RV exploring.
Quick Design Dilemma
Cast your vote — see what other readers think! 🤔
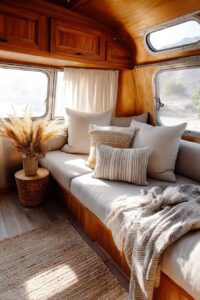
Embrace Bohemian or Rustic Styling Themes

Cohesive design themes transform generic RV interiors into personalized spaces that reflect your personality and create the atmosphere you want for your travels.
Bohemian styling incorporates rich colors, layered textiles, and eclectic accessories that create warm, inviting spaces full of personality and global influences.
Rustic themes use natural materials like reclaimed wood and stone textures that bring outdoor elements inside while creating cozy, cabin-like atmospheres.
Vintage accessories and repurposed items add character and storytelling elements while often costing less than new furnishings and providing unique conversation pieces.
Macramé wall hangings and woven textiles add textural interest while softening hard RV surfaces and creating more comfortable, home-like environments.
Natural fiber rugs in jute or sisal patterns ground your living spaces while adding warmth and comfort underfoot without overwhelming small spaces.
Earthy color palettes using terracotta, sage green, and warm browns create calming environments that connect your interior space with natural outdoor surroundings.
Hanging plants in woven baskets bring life and fresh air to your interior while adding natural beauty that changes and grows throughout your travels.
Vintage lighting fixtures like lanterns or Edison bulb pendants add authentic character while providing the warm, ambient lighting that makes spaces feel cozy.
Handcrafted accessories from local artisans encountered during your travels personalize your space while creating meaningful connections to places you’ve visited.
Natural wood furniture pieces add warmth and authenticity while often being more durable than manufactured alternatives for long-term RV living.
Layered window treatments using curtains and blinds provide privacy and light control while adding softness and color that make your RV feel more home-like.
Your RV remodel doesn’t have to break the bank or require professional contractors to achieve stunning results.
With creativity, planning, and these ten ideas as your starting point, you can transform your mobile home into a space that truly reflects your style and enhances every adventure.
Remember that the best RV is one that feels like home, no matter where the road takes you.
💭 I Wrote a Book About My Biggest Decorating Mistakes!
When I decorated my first home, I thought I knew what I was doing. Spoiler: I didn’t. 😅
💸 I bought a sofa way too big for my living room. Paint colors that looked amazing in the store but terrible on my walls.