never thought I’d become one of those people obsessed with IKEA hacks, but here we are.
It all started when I moved into my first apartment after college.
I was on a tight budget and needed storage that wouldn’t break the bank.
Enter the IKEA Kallax—a simple, affordable shelving unit that seemed to fit all my needs.
But as functional as it was, it kind of looked… basic.
I wanted my space to feel stylish, like something out of a home decor magazine, but the Kallax wasn’t exactly screaming “elevated design.”
So, I started researching ways to upgrade it, and before I knew it, I was deep into the world of IKEA makeovers.
Fast forward a few years, and I’ve tried just about every trick in the book to make the Kallax look like a high-end piece of furniture.
From adding hardware to swapping out the shelves, I’ve transformed it into something that feels much more custom and chic.
If you’re staring at your Kallax right now and feeling like it could use a glow-up, check my ideas out:
Use It as a Room Divider

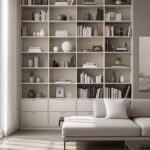
If you’ve got an open-concept layout or need to separate spaces in a studio apartment, the Kallax can double as a stylish room divider.
To make it look more upscale, focus on styling each cube with intention and balance.
Fill some sections with decorative items like books, vases, and candles, while leaving others open to create visual interest.
Adding baskets or storage bins to a few of the cubes can help hide less attractive items like cables or miscellaneous clutter.
To take it a step further, consider painting the Kallax or adding contact paper, as mentioned earlier, to make it blend seamlessly with your decor.
Another way to elevate the look is by incorporating plants—try trailing vines like pothos or ivy to add a lush, organic feel.
For a more dramatic effect, you can even hang lightweight curtains or fabric panels from the top of the Kallax to create a semi-private partition.
This approach not only makes the Kallax look high-end but also adds functionality by dividing your space in a way that feels intentional and stylish.
Click for more room divider Ideas.
Tap to Explore These Beauties
See my ideas in action 👇 Tap any image to explore full details.
Add Chic Hardware

One of the simplest ways to elevate your Kallax is by adding decorative hardware.
You’d be surprised by how much personality a set of stylish knobs or handles can bring to something as plain as a shelving unit.
Start by picking out hardware that matches your design aesthetic.
If you’re going for a modern look, try sleek brass or matte black options.
For something a little more vintage, look for glass or ceramic knobs with intricate details.

You can find affordable options online or even at thrift stores if you’re up for a little treasure hunting.
To install the hardware, you’ll need a drill, a screwdriver, and some patience.
Measure out the placement of each knob carefully before drilling to ensure everything is aligned.
Once you’ve attached the knobs or handles, step back and admire how much more custom your Kallax looks.
The hardware instantly adds a sense of sophistication and makes the unit feel less “off-the-shelf.”
This upgrade works especially well if you’ve added doors or drawers to your Kallax.
It gives those sections a polished, finished look that screams high-end design.
💭 Ever wondered what your room would actually look like rearranged?
I built a free tool that lets you drag furniture around a 2D floor plan. No signup, no catch.
See the Room Planner →Add Cane Webbing Panels


Cane webbing is having a major moment in home decor right now, and incorporating it into your Kallax can make a huge difference.
The texture of cane webbing adds warmth and a touch of boho elegance that looks anything but cheap.
To pull this off, you’ll need some sheets of cane webbing, a staple gun, and a pair of scissors or a utility knife.
If your Kallax has doors, remove them and cut the cane webbing to fit the size of each door panel.
Staple the webbing to the inner edges of the door frame for a clean, professional look.
Don’t have doors on your Kallax?
No problem.
Ready to Master the Kallax?
Transform your IKEA cube storage into custom furniture. Get my complete guide with 100+ projects, material lists, and pro tips.
“The IKEA Kallax Bible: 100+ Ways to Transform Cube Storage”
You can use cane webbing to create custom inserts for the cube openings.
Cut the webbing slightly larger than the opening and secure it with small nails or adhesive strips.
This trick instantly adds texture and depth to your shelving unit.
Pair it with natural wood tones or earthy decor pieces for a cohesive vibe.
Cane webbing is also great because it’s lightweight and easy to work with, making it a perfect DIY material even for beginners.
Paint It a Bold Color


Nothing transforms furniture quite like a fresh coat of paint.
If your Kallax is still rocking that basic white or black-brown finish, consider giving it a bold new look.
Choose a color that complements your space and makes a statement.
Rich jewel tones like emerald green or navy blue can make the Kallax look super luxe, while soft pastels like blush pink or sage green add a touch of elegance.
Prep is key for this project, so don’t skip sanding and priming your Kallax before painting.
This ensures the paint adheres properly and creates a smooth, even finish.

Use a high-quality paintbrush or roller for the larger surfaces and a smaller brush for tight corners.
Two coats of paint should do the trick, but make sure to let each coat dry completely before applying the next.
To take it up a notch, consider adding a glossy topcoat for a lacquered look or a matte finish for a modern vibe.
Painting your Kallax is an easy way to customize it and make it feel like a one-of-a-kind piece.
Plus, it’s a fun weekend project that doesn’t require a ton of skill or tools.
Find Your Room’s Color Palette
Tap a vibe — get a curated 5-color palette with hex codes you can copy ✨
Add Legs for Height


Adding legs to your Kallax is a game-changer.
Not only does it elevate the look (literally), but it also gives the unit a custom, furniture-like feel.
You can find affordable furniture legs online or at your local hardware store.
Wooden legs with a tapered mid-century design are super trendy right now, but there are also metal options if you’re going for a more industrial look.
To attach the legs, you’ll need mounting plates and a drill.
Flip your Kallax upside down, mark where you want the legs to go, and secure the mounting plates to the bottom of the unit.
Then, screw in the legs and flip the Kallax back over.
The added height not only makes the unit look more expensive but also creates the illusion of more space in your room.
This trick is especially useful in small apartments where every inch counts.
With the legs in place, your Kallax will look less like a budget bookshelf and more like a custom piece from a high-end furniture store.
Wrap It in Contact Paper or Vinyl


If you want to completely transform the look of your Kallax without committing to paint, contact paper or adhesive vinyl is your new best friend.
This is the perfect solution for renters or anyone who likes to switch up their decor frequently.
There are so many patterns and textures to choose from, including marble, wood grain, concrete, or even metallic finishes.
For a luxurious look, go for a faux marble pattern to mimic high-end stone, or a rich wood grain to give your Kallax a warm, natural vibe.
Start by cleaning the surface of your Kallax thoroughly to ensure the adhesive sticks properly.
Measure each section you want to cover and cut the contact paper to size.
Peel back a small portion of the backing to align it, then slowly smooth it onto the surface as you remove the rest of the backing.
Use a credit card or a squeegee to press out any air bubbles for a seamless finish.
You can cover the entire unit or just highlight certain sections, like the top and sides, for a two-tone effect.
Contact paper is budget-friendly, easy to apply, and just as easy to remove when you’re ready for a change.
Plus, it instantly gives your Kallax a bespoke, high-end look without breaking the bank.
Ready to Master the Kallax?
Transform your IKEA cube storage into custom furniture. Get my complete guide with 100+ projects, material lists, and pro tips.
“The IKEA Kallax Bible: 100+ Ways to Transform Cube Storage”
What’s Your Decor Personality?
5 questions · 30 seconds · Instant style match 🏡
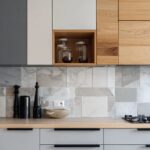
Add a Custom Wood Top


A custom wood top is one of the most effective ways to make your Kallax look like a piece of designer furniture.
The contrast between the IKEA frame and a rich, solid wood top adds a touch of sophistication that no one will believe came from a budget shelving unit.
To pull this off, you’ll need a wooden board that’s slightly larger than the top of your Kallax.
You can choose from a variety of wood types depending on the look you’re going for—oak and walnut are great for a classic vibe, while pine or birch work well for a lighter, Scandinavian aesthetic.
Sand the board to smooth out any rough edges and apply a stain or finish to enhance the natural grain of the wood.
For a more polished look, you can apply a polyurethane coat to make it glossy and durable.
Once your top is ready, secure it to the Kallax using adhesive strips, brackets, or even just resting it in place if you want it to be non-permanent.
The wood top makes the Kallax feel like a custom-built piece and adds warmth and character to your room.
It’s a great way to upgrade the unit while also making it more functional as a console table, TV stand, or even a kitchen island.
Install Sliding Doors


Adding sliding doors to your Kallax is a clever way to hide clutter and give it a sleek, modern look.
This upgrade works especially well if you’re using the Kallax in a living room or an area where you want it to double as decor.
You can purchase ready-made sliding door kits designed specifically for the Kallax, or you can DIY your own doors for a more budget-friendly option.
For a DIY approach, you’ll need a pair of thin panels cut to fit the openings of your Kallax and some sliding door hardware, like a rail and rollers.
Attach the rail to the top of the Kallax and secure the rollers to the panels so they can glide smoothly back and forth.
You can paint or stain the panels to match your decor or add texture with fabric, cane webbing, or even rattan for a trendy, boho look.
Sliding doors not only make your Kallax look more expensive but also add functionality by providing concealed storage.
This is a great option for anyone looking to create a clean, minimalist vibe in their space.
Create a Built-In Look
If you have the space and want to go all out, turn your Kallax into a faux built-in unit.
This project requires a bit more effort, but the results are totally worth it.
Start by stacking multiple Kallax units together to create a larger shelving system.
Secure them to the wall using brackets for safety.
Once everything is in place, use trim molding to fill in the gaps between the units and the wall, creating the illusion of a built-in structure.
Ready to Master the Kallax?
Transform your IKEA cube storage into custom furniture. Get my complete guide with 100+ projects, material lists, and pro tips.
“The IKEA Kallax Bible: 100+ Ways to Transform Cube Storage”
You can paint the molding and the Kallax the same color as your walls for a seamless, cohesive look.
To make it even more custom, add crown molding to the top of the unit for a polished, architectural finish.
A built-in Kallax instantly elevates your space and makes it look like you spent a fortune on custom cabinetry.
This is a great option for living rooms, home offices, or even walk-in closets where you want both storage and style.
This or That?
Pick your fave — see what other readers chose! 👀
Add Glass Doors
Glass doors are another chic option for upgrading your Kallax, especially if you want to display your items while keeping dust at bay.
You can find glass door inserts designed specifically for the Kallax, or you can DIY your own set if you’re feeling crafty.
For a high-end look, opt for frosted or textured glass instead of plain clear panels.
This adds an element of privacy while still letting light filter through.
Pair the glass doors with decorative hardware, like brass or chrome handles, to complete the look.
For an extra touch of luxury, consider installing LED strip lights inside the cubes to illuminate your items.
The combination of glass doors and lighting transforms the Kallax into a display cabinet that looks like it came straight out of a designer showroom.
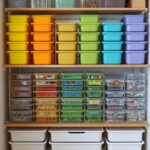
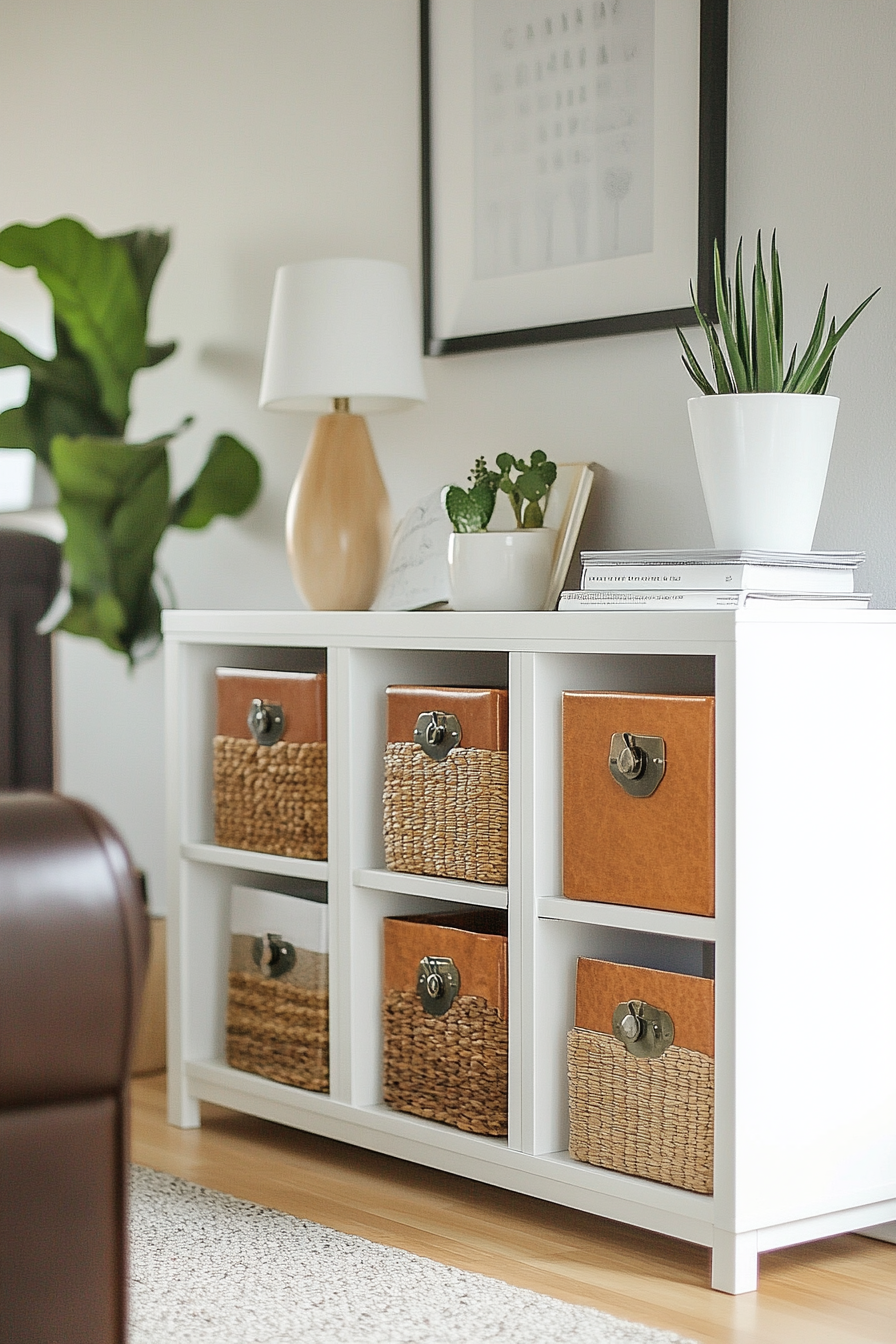
Style It With Decorative Storage Bins
Sometimes, the easiest way to elevate your Kallax is to swap out the standard storage bins for something more unique and high-end.
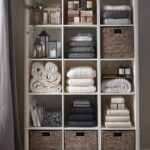
Instead of the plain fabric boxes that IKEA sells, invest in decorative storage bins made from materials like woven rattan, seagrass, or leather.
These materials add texture and warmth to the unit, giving it a more sophisticated look.
For a modern vibe, you can opt for bins with clean lines in neutral tones like black, white, or gray.
If you prefer something boho or coastal, natural textures like wicker or jute are perfect.
You could even mix and match different bins for a more eclectic look, as long as they share a cohesive color palette.
Decorative bins are not just pretty—they’re also functional.
Use them to hide unsightly items like cables, kids’ toys, or office supplies while keeping everything organized.
For an added personal touch, consider labeling the bins with small, stylish tags or decals.
This makes the unit feel intentional and curated, like a designer piece.
With the right storage bins, your Kallax will go from looking like a basic organizer to a stylish statement piece that complements your decor.
Quick Design Dilemma
Cast your vote — see what other readers think! 🤔
Frame It With Trim
If you want your Kallax to look like a custom piece of furniture, framing it with trim is a game-changer.
This trick gives the unit a built-in, polished appearance that feels high-end and professional.
Start by measuring the edges of your Kallax and purchasing trim or molding pieces that suit your design style.
You can go for something simple and sleek, or choose more ornate molding for a traditional or vintage look.
Cut the trim pieces to size using a saw or ask your local hardware store to do it for you.
Once you have the pieces ready, attach them to the edges of your Kallax with wood glue or small finishing nails.
Ready to Master the Kallax?
Transform your IKEA cube storage into custom furniture. Get my complete guide with 100+ projects, material lists, and pro tips.
“The IKEA Kallax Bible: 100+ Ways to Transform Cube Storage”
Be sure to fill any gaps or seams with wood filler for a seamless finish.
After the trim is attached, paint everything the same color to create a cohesive look.
This works especially well if you’ve already painted your Kallax a bold or custom color.
Framing the Kallax with trim gives it a level of detail and sophistication that makes it feel like a designer piece, rather than an affordable shelving unit.
Add Wallpaper or Decorative Back Panels
If you want to make your Kallax a true focal point, consider adding wallpaper or decorative panels to the back of each cube.
This is a simple yet impactful way to add personality and depth to the unit.
Start by selecting a wallpaper pattern that complements your space.
You can go bold with something colorful and graphic, or stick to subtle textures like faux linen or grasscloth for a more understated look.
If wallpaper isn’t your thing, you can use decorative panels made from wood, cork, or even fabric for a unique touch.
Cut the wallpaper or panels to fit the back of each cube, and attach them using double-sided tape or adhesive spray.
This makes it easy to remove or switch out the design later if you want a change.
The decorative back panels create a custom, layered effect that draws the eye and makes the Kallax look more expensive.
Pair this upgrade with carefully styled decor items in each cube to complete the look.
Think: a mix of books, vases, small sculptures, and plants to create a balanced, curated display.