Finding enough counter and storage space in your home kitchen can be a constant struggle.
No matter how big or small your kitchen is, there never seems to be enough room to prep meals, store appliances, or organize all your ingredients and cookware.
These ideas range from simple DIY projects and organizational hacks to full remodels and high-tech solutions.
I’ll go in-depth on each one, explaining the pros and cons, costs, and steps for making them happen.
Some require just a little elbow grease, while others may need professional help.
With a bit of creativity and strategic planning, you can take your cluttered counters and transform them into an efficiency dream!
✨Click to Get My 101 FREE Designer Room Ideas
Add an Island or Cart

One of the easiest ways to expand your counter space is by bringing in a freestanding island or car
Islands can often double your spread by adding square footage in the middle of the kitchen.
Carts take up less space but still give you extra surface area for food prep and storage.
Islands are great for dividing a long galley kitchen or opening up the flow of an L-shaped space.
Look for islands with lower or open shelving to maximize leg room.
Built-in electrical outlets are also handy for plugging in appliances.
Islands on locking wheels provide flexibility to move them out of the way when not in use.
Carts come in a range of sizes, some with extra storage drawers and racks.
Even a small 2-tier cart can hold appliances and baking sheets that would otherwise clutter your counters.
Carts with fold-down sides or a butcher block top allow for temporary expandable space.
Just roll them out when you need more room!
The main downsides are the cost and footprint of an island, and finding a permanent home for a cart.
But in terms of versatility and added space, islands and carts can be game changers for small to medium kitchens.
Budget at least $250 for a quality cart and $1000+ for a kitchen island.
Build a Counter Overhang


Short on floor space but have extra wall space?
Consider building a counter overhang along one wall.
This creates added space by extending your counter depth.
It basically gives you a half-island attached to the wall.
For a simple DIY overhang, attach a board, or mount a narrow table top or thick shelf securely on brackets.
Make sure it is properly supported and can hold weight without sagging.
Stone, butcher block, or stainless steel make durable overhang materials.
Use decorative brackets for exposed overhangs, or L-brackets for a subtle look.
Get creative with the space underneath too – try open shelving, vertical storage for baking sheets, a spice rack, or an under-mount microwave.
Just be sure to keep the overhang height comfortable, around 36-42 inches.
Also check that appliances can slide under and you have safe access to electrical outlets.
Overhangs are great for fitting in extra work area without changing your whole kitchen layout.
The cost is minimal if you have basic DIY skills.
Just be careful not to make the overhang too deep or it will be awkward to work at.
Keep it under 18 inches for the most usable space.
Optimize Cabinets with Organizers


The insides of your cabinets offer prime real estate for freeing up counter clutter!
Take full advantage of this hidden space with smart organizers and storage solutions.
For starters, contain spices, oils, and condiments in tiered racks that slide neatly onto shelves.
Install vertical dividers for cookie sheets, cutting boards, and baking pans – no more messy piles.
Use hanging racks on the inside of cabinet doors to stash utensils and pot lids at your fingertips.
Get deep drawers to make room for bulky kitchen tools and Tupperware that overwhelm your drawers.
Consider pull-out cabinets for food processors and mixers to conveniently store them off the counter.
Clearing food boxes and small appliances off your countertops prevents them from monopolizing precious surface area.
Just be sure to measure your cabinet dimensions first and opt for organizers that maximize vertical storage.
With a little sorting and strategizing, those jumbled cabinets can hold way more than you think!
Better cabinet storage comes down to spending a couple hundred dollars, at most, on smart inserts and dividers.
Get your cabinets working overtime as hidden counter space with these savvy upgrades.
Remove Upper Cabinets


For a radical change that opens up your whole kitchen, take down those upper cabinets!
Eliminating upper cabinets instantly gives you more counter space below and a lighter, airier look.
Start by clearing out the uppers and donating or selling anything you don’t use regularly.
Patch and repaint the wall once they’re gone.
Then spread out and enjoy your newfound countertop territory.
Depending on your storage needs, you may want to replace some of the lost cabinet space with open shelving.
Floating shelves are great for displaying pretty dishware in place of boring cabinet fronts.
For a barely-there look, glass shelves make a minimal statement.
Removing upper cabinets also highlights the architecture, whether it’s exposed brick, beams, or windows.
Without bulky cabinets interrupting sightlines, the eye can flow smoothly around the whole kitchen.
Just be ready to find new homes for all those exiled small appliances and dishes.
You may need to get creative with under-counter and freestanding storage solutions.
But gaining a spacious, airy aesthetic may be worth the work of reorganizing.
✨Click to Get My 101 FREE Designer Room Ideas
Install Shelves Above Cabinets

If removing your uppers altogether sounds too extreme, here’s a middle ground option.
Install extra shelves or cabinets above your existing wall cabinets to double the storage space.
Take this idea as high as your ceiling allows.
Even 12-24 inches of additional space above can eliminate a ton of everyday kitchen clutter.
Just make sure any cabinets or heavy shelves are securely attached to studs.
Floating glass or acrylic shelves create lightweight breathability.
For enclosed storage, mini wall cabinets come in sleek designs.
Opt for cabinets with retractable doors that lift up and slide in so they don’t bang into wall decor or light fixtures.
Another option is open metal utility racks for stashing large platters and bulky cookware.
Or get creative – weave baskets, mount magnetic strips for knives, or display pretty ceramics.
Adding vertical layers of storage gets a ton of stuff off your counters, freeing them up for actual food prep and cooking.
And the high-low look of stacked cabinets has a modern, almost industrial chic vibe.
Just be careful not to overwhelm a small kitchen or make upper reaches too difficult.
Add Pull-Out Boards Behind Cabinets
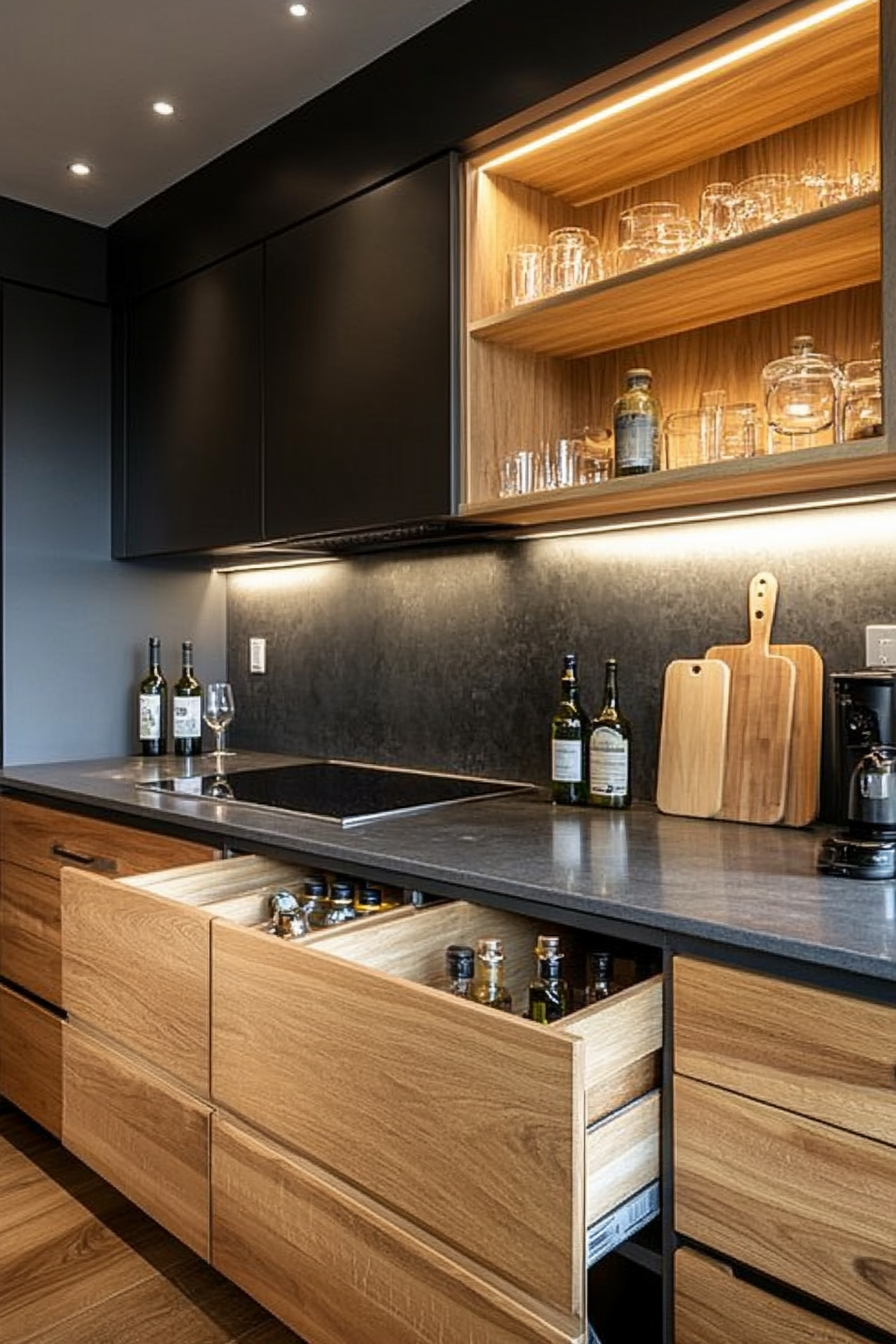
Here’s a sneaky storage hack to create hidden countertop space.
Install pull-out cutting boards and shelving behind your base cabinets and walls.
When closed, these custom pull-outs are completely concealed and out of the way.
But slide them out when you need extra surface area for chopping, food prep, or serving.
Think of them as secret counters ready at your command.
Try placing slim pull-out boards between your cabinets and walls.
Or install wider shelving above base cabinets or the stove.
For a cutting surface, bamboo, wood, or acrylic boards are durable options.
Add side rails to pull-outs to hold small appliances that can just live there.
Floating shelves that slide out from the wall work too.
Hide them behind framed art, mirrors or a chalkboard for camouflaged coolness.
Just be sure all hardware and brackets are strong enough to hold weight without sagging.
With custom cabinetry, the possibilities are endless for functional pop-out space.
These hidden helpers keep your counters clear until it’s time to pull them out and expand your workspace.
Extend Counters to the Ceiling

For built-in vertical storage that doubles counter space, make your cabinets go sky-high.
Floor to ceiling cabinets give you way more room for organization.
With custom cabinetry or DIY skills, remove your existing wall cabinets and extend cabinet fronts all the way up.
For a budget option, build open shelving from the counter to the ceiling.
Then maximize the space with:
– Adjustable shelves and hidden compartments
– Narrow pull-out pantry cabinets
– Corner lazy susans
– Spice organizers
– Appliance garages to corral small appliances and free the counters
– Dedicated areas to store everything from plastic containers to party platters.
Going to the ceiling takes some work but totally transforms wasted “dead space” into functional storage.
The towering cabinets also give your kitchen a sleek, modern look.
Keep it from feeling too imposing by choosing lighter cabinet colors, glass doors, or open shelving near the top.
Convert Dead Space Behind Doors

Swing open your kitchen cabinets – see any wasted space you can put to better use?
Those lifeless voids behind cabinet doors are prime real estate for pull-out storage hacks.
Spin unused space into usable space with upgrades like:
– Pantry pull-outs for canned goods and dry ingredients
– Tiered pull-out baskets for harder-to-reach cabinets
– Swing-out racks to corral cookie sheets and bulky pans
– Spice organizers and vertical racks mounted on the door backside
– Cutting board and tray storage in shallow trays
Look for skinny vertical spaces between shelves that can hold custom racks.
Use self-adhesive wire accessories to hang utensils, towels, and measuring cups.
It takes some measuring and planning to outfit your unique cabinet voids.
But the organizational payoff is well worth it.
You get hidden storage that keeps counters free for actual cooking.
✨Click to Get My 101 FREE Designer Room Ideas
Convert Wasted Space Under Sinks

Don’t ignore the dark abyss under your kitchen sink – this out-of-sight space could be putting shelving and storage to work.
Make the most of the indoor “crawl space” with options like:
– Tiered pull-out cabinets beneath the sink to neatly organize cleaners, sponges, scrub brushes, and gloves.
– Rolling corner lazy susans for hard-to-reach corners.
– Slide-out trays and tip-out hampers to corral trash and recycling.
– Vertical racks and hanging bars for stashing awkward bottles and spray cleaners.
Consider open wire shelving if plumbing allows, to keep the space bright and airy.
For a custom look, integrate pull-outs and racks right into surrounding cabinetry.
You can also move bulky trash cans and recycling bins to pull-out cabinetry beside or beneath the sink.
This gets them off your counters while still keeping them accessible.
Add a Hutch for Vertical Storage

Hutches or cabs are basically extra upper cabinets on stilts.
They provide acidic vertical storage without taking up your valuable counter surface area.
Standard hutches sit on the counter and have an open or glass-front cabinet on top.
You can store bulky or ugly items you don’t mind displaying, like crockpots and mixing bowls.
Or use the hutch top creatively for pretty china, cookbooks, or barware displays.
Freestanding cabs have a counter surface base so they don’t eat up existing counter space.
The storage cabinet sits on top of the base, almost hovering above your counter.
These are great for cramming small appliances and gadgets into the upper section, while keeping countertops clear.
Hutches and cabs neatly corral awkward kitchen gear like large mixers, serving platters, and electric grills.
They add structured vertical storage without permanent installation.
Place one at the end of a counter run for an organized bookend.
Get Creative with Vertical Clearance

Kitchens often have random nooks, gaps, and dead space above the counters.
Look at the vertical clearance around windows, near ceiling slopes, and between cabinets for storage opportunities.
Fill annoying sloped ceilings with narrow shelving fitted to the angle.
Build open shelves between windows.
Mount utility racks or shelving above awkward gaps between wall cabinets.
Put tall pantries and cabinetry on unused sections of wall.
Install floating shelves for coffee makers and microwave ovens to clear the counters.
Use racks or wall cabinets near cooktops to stow cooking utensils up and out of the way.
Basically, look for any wasted vertical real estate you can transform into storage.
You can buy custom organizers or get crafty with DIY shelving and brackets suited to your unique space.
The goal is to lure bulky items off your counters and stow them overhead within arm’s reach.
Install an Auto-Lift Mixer Shelf


If towering cabinets or hutches won’t work, here’s a high-tech way to clear counter clutter: concealed automated storage!
Auto-lift cabinetry uses push-to-open mechanisms and electric lifts to make storage disappear at the touch of a button.
Kitchen items descend into the cabinet or rise up through the counter when needed.
For instance, you can install a section of counter that will lift up an entire standing mixer on command.
Push a button and the mixer rises up through a hidden compartment, ready for you to use.
Then lower it back down and reclaim the counter space with no trace.
Auto-lift cabinets take storage off the counter but keep items easily accessible.
It’s like having a elevator for your appliances!
However, this luxury feature requires serious custom cabinetry skills and an electrical contractor to wire the lifts.
The splurge can run $1000-$2000 but may be worth it for a dream kitchen.
✨Click to Get My 101 FREE Designer Room Ideas
Add a Wall-Mounted Drop-Down Table

This space-saving hack adds a drop-down prep surface right where you need it – without taking up permanent floor space.
Mount a narrow table or wide shelf on sturdy brackets or chains so it folds down against the wall when not in use.
Make sure it’s installed securely into studs.
Add side rails so items don’t slide off the angled surface.
When you need extra chopping, serving, or cooking space, simply lower the built-in table.
It creates a handy temporary work area, then folds flush against the wall and out of the way.
Try mounting your drop-down workspace near cooktops for extra space to stage ingredients and plated meals.
For prep space, install it near counters or islands.
Look for sturdy folding tables at thrift stores or build your own simple platform.
This flexibility lets you adapt counter space on demand.
Use it for food prep, potlucks, holiday meals, or kids’ craft projects.
Crank up the productivity by doubling your usable counter area in an instant!
The key is creatively using vertical storage, portable carts, under-cabinet space, and multifunctional surfaces.
Identify wasted voids and fill them with shelving, racks, pull-outs and fold-downs tailored to your needs.
It takes some measuring and planning, but the massive increase in usable space is so worth it.
With any of these space-saving techniques, you can take back your counters from clutter and congestion.
I hope these ideas get your wheels turning on how to unlock your kitchen’s full organizational potential.
Now get out your measuring tape, fire up those DIY muscles, and start doubling your counter space!
