
What if you could create something so personal and thoughtful that your loved ones will treasure it forever?
My modern DIY Christmas gifts will have everyone asking where you bought them, and you’ll get to smile knowing you made them with your own two hands.
Glowing LED Name Signs That Light Up Their World


Your gift recipient’s name will literally shine bright when you create a custom LED name sign that transforms any room into a personalized sanctuary.
This modern twist on traditional signage combines sleek acrylic letters with battery-powered LED strip lights to create an Instagram-worthy piece of art.
Start by purchasing clear acrylic letters from your local craft store or ordering them online – you can find letters in various fonts and sizes to match any personality.
The magic happens when you carefully attach thin LED strip lights to the back of each letter using strong double-sided tape.
Choose warm white LEDs for a cozy vibe, or go bold with color-changing strips that can cycle through the entire rainbow.
Mount the letters on a piece of reclaimed wood, painted canvas, or even a sleek black acrylic backing for that high-end boutique look.
The battery pack can be hidden behind the mounting surface, and many LED strips come with remote controls for easy operation.
Your recipient will love being able to dim the lights or change colors to match their mood or room decor.
This gift works perfectly for teenagers who want to personalize their bedrooms, college students in dorms, or adults who appreciate modern home decor.
The best part is that you can customize everything – from the font style to the backing material to the LED color options.
Total cost runs between $15-30 depending on the size and materials you choose, but the impact is priceless.
The project takes about 2-3 hours from start to finish, making it perfect for a weekend afternoon crafting session.
You can even create themed versions like “COFFEE” for the kitchen or “DREAM” for the bedroom.
TRENDING NOW
Luxury Christmas Decor Ideas To Make Your Home ShineResin Art Phone Cases That Turn Everyday Tech into Masterpieces

Transform a boring phone case into a stunning piece of wearable art using epoxy resin and alcohol inks that create mesmerizing marble effects.
This trendy gift combines function with beauty, giving your loved one a one-of-a-kind accessory they’ll use every single day.
Start with a clear silicone phone case that fits their specific phone model – these provide the perfect canvas for your resin artwork.
Epoxy resin might sound intimidating, but it’s actually quite forgiving and creates professional-looking results even for beginners.
Mix your resin according to package directions in a well-ventilated area, then add a few drops of alcohol ink in complementary colors.
The alcohol inks will create organic, flowing patterns that look like expensive marble or abstract art.
You can manipulate the design using a toothpick or heat gun to create swirls, cells, and other interesting effects.
Add metallic leaf flakes, dried flowers, or holographic glitter for extra dimension and sparkle.
The key is working quickly since resin has a limited working time before it starts to cure.
Pour the mixture into the phone case, making sure to cover all areas evenly without overfilling.
Use a small torch or heat gun to pop any air bubbles that rise to the surface.
Let the piece cure for 24-48 hours in a dust-free environment before handling.
The finished result looks like something from a high-end boutique, with depth and dimension that photographs beautifully.
You can create matching sets for families or make each one completely unique.
Design Your Dream Room in Minutes!
🏡 Start Creating FREE →Living Terrarium Ecosystems in Vintage Mason Jars


Create a miniature world that brings nature indoors with these self-sustaining terrarium gardens that require minimal maintenance but maximum wow factor.
Mason jar terrariums have exploded in popularity because they combine the satisfaction of gardening with the convenience of low-maintenance houseplants.
Start with large mason jars – quart-sized or bigger work best to give your plants room to grow and create visual impact.
Layer the bottom with small pebbles or aquarium gravel for drainage, followed by activated charcoal to keep the ecosystem fresh.
Add a thin layer of sphagnum moss to separate your soil from the drainage layer, then fill with potting soil designed for succulents or tropical plants.
Choose plants based on whether you want an open or closed terrarium – succulents and air plants thrive in open systems, while ferns and moss love closed, humid environments.
Arrange your plants with the tallest in back and shortest in front, creating depth and visual interest.
Add decorative elements like small figurines, colored sand, or interesting rocks to create a themed landscape.
Closed terrariums create their own water cycle, with condensation forming on the glass walls and “raining” back down on the plants.
Open terrariums need occasional misting but are less prone to mold and easier to maintain.
Include care instructions written on decorative paper tied with twine around the jar’s rim.
The recipient gets a living piece of art that evolves over time, with plants growing and changing throughout the seasons.
These work perfectly for people who love plants but travel frequently or forget to water regularly.
You can theme them for different interests – beach scenes with air plants and sand, woodland scenes with moss and tiny mushrooms, or desert landscapes with colorful succulents.
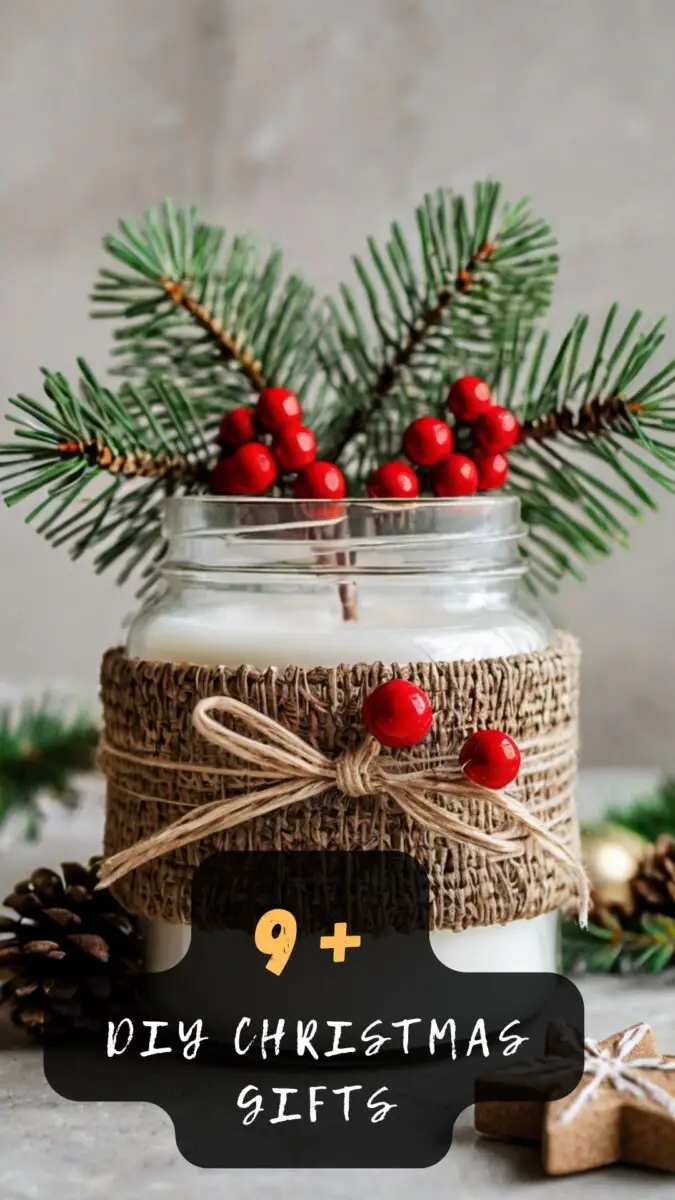
Hand-Poured Soy Candles with Signature Scent Blends


Craft luxury candles with custom fragrance combinations that smell better than anything from expensive boutique stores and burn cleaner too.
Soy wax creates a longer, cleaner burn than traditional paraffin while holding fragrance beautifully and producing minimal soot.
Start by melting soy wax flakes in a double boiler or dedicated wax melting pot – you’ll need about 8 ounces of wax for a standard mason jar candle.
While the wax melts, prepare your containers by centering pre-tabbed wicks and securing them with a small dot of hot glue.
The magic happens when you create custom scent blends using high-quality fragrance oils designed specifically for candle making.
Mix complementary scents like vanilla and sandalwood, or go bold with unexpected combinations like coffee and orange.
Start with small amounts – fragrance oils are potent, and you can always add more but can’t take it out once it’s mixed.
Add your fragrance blend when the wax reaches about 185°F, stirring gently to distribute evenly without creating bubbles.
Pour slowly into your prepared containers, leaving about half an inch of space at the top for safety.
Let the candles cool completely before trimming wicks to quarter-inch length – this ensures clean burning.
Create custom labels with the scent name and burning instructions using kraft paper and calligraphy pens for that artisanal look.
Package them in gift boxes with tissue paper, or group several small candles together in a decorative basket.
The recipient gets hours of ambiance and relaxation, plus the satisfaction of knowing their candle was made specifically for them.
Macrame Plant Hangers with Handpicked Succulents

Bring the boho-chic trend home with handwoven plant hangers that showcase beautiful succulents while adding texture and greenery to any space.
Macrame has made a huge comeback, and plant hangers are the perfect beginner project that looks far more complicated than it actually is.
Start with natural cotton cord in 3mm or 4mm thickness – this creates clean lines while being forgiving for beginners to work with.
Cut eight pieces of cord, each about 3 feet long, then fold them in half and secure the loop to a dowel or hook for easy working.
Learn just a few basic knots – the lark’s head knot for starting, square knots for the body, and gathering knots for shaping.
Create a cradle section about 6 inches from the bottom by tying knots that form a basket shape to hold your plant pot.
The rhythm of knotting becomes meditative, and you’ll find yourself getting into a flow as the pattern emerges.
Choose pots that are 4-6 inches in diameter to fit comfortably in your finished hanger without overwhelming the design.
Succulents work perfectly because they’re nearly impossible to kill and come in amazing varieties of colors, shapes, and textures.
Visit your local nursery and handpick unique varieties like echeveria, jade plants, or string of pearls for visual interest.
The combination of natural fibers and living plants creates an organic, calming presence in any room.
Hang your finished piece at varying heights to create visual layers, or make several for a stunning plant wall display.
Include care instructions for the specific succulent you’ve chosen, plus tips for adjusting the plant’s position for optimal light.
This gift works beautifully for apartment dwellers who want greenery but lack floor space, or anyone who appreciates handmade craftsmanship.
Luxurious Bath Bomb Sets with Essential Oil Blends


Create spa-worthy bath bombs that fizz with luxury and fill bathrooms with therapeutic aromas while moisturizing skin naturally.
Store-bought bath bombs often contain harsh chemicals and artificial fragrances, but your homemade versions use only skin-loving ingredients.
Start with the basic dry ingredients – baking soda provides the fizz, citric acid creates the reaction, and cornstarch softens the water.
Add Epsom salts for muscle relaxation and witch hazel as a natural binding agent that holds everything together.
The key to perfect bath bombs is getting the moisture content just right – too dry and they won’t hold together, too wet and they fizz prematurely.
Mix your dry ingredients thoroughly, then slowly add witch hazel one spray at a time while mixing constantly.
Create custom essential oil blends that serve different purposes – lavender and chamomile for relaxation, eucalyptus and peppermint for energy, or sweet orange and vanilla for mood boosting.
Add natural coloring using mica powder or food coloring, creating beautiful marbled effects or solid colors.
Press the mixture firmly into silicone molds or ice cube trays, packing it tight to ensure they hold their shape.
Let them dry for 24-48 hours before carefully removing from molds – they should feel firm and hold together when handled.
Package individual bath bombs in clear cellophane wrap tied with ribbon, or create gift sets in decorative boxes.
Include a card describing the essential oil blend and its intended benefits – this adds a professional spa touch.
The recipient gets multiple luxurious baths that rival expensive spa treatments, with the added satisfaction of knowing they’re using natural ingredients.
You can create seasonal blends or tailor the scents to match someone’s personality or needs.
Personalized Wood-Burned Cutting Boards with Custom Designs

Transform plain wooden cutting boards into personalized kitchen art that combines function with sentimental value through the ancient art of pyrography.
Wood burning, or pyrography, creates permanent designs that won’t fade, peel, or wash away like painted or stenciled decorations.
Start with high-quality hardwood cutting boards – maple, cherry, or walnut work beautifully and provide smooth surfaces for burning.
A basic wood burning pen costs around $20 and comes with various tip attachments for different line weights and textures.
Practice your design on scrap wood first – wood burning is permanent, so you want to perfect your technique before working on the final piece.
Transfer your design using carbon paper or create templates with stencils for consistent lettering and shapes.
Popular designs include family names with established dates, favorite recipes written in elegant script, or decorative borders with meaningful quotes.
Work slowly and steadily, allowing the heated tip to burn through the wood surface at an even pace.
Different wood types burn at different rates, so take time to understand how your specific board responds to heat.
Create depth and dimension by varying the pressure and speed of your burning pen for lighter and darker lines.
Season the finished board with food-safe mineral oil to enhance the wood grain and protect the burned design.
The contrast between the natural wood and dark burned lines creates striking visual appeal that photographs beautifully.
These boards become family heirlooms that get better with age, developing character through years of use.
Include care instructions about oiling and proper cleaning to ensure the board lasts for generations.
Recipients love having a functional piece of art that reflects their family identity while serving practical kitchen needs.
Custom Tote Bags with Original Fabric Paint Designs


Design one-of-a-kind tote bags using fabric paints and stencils that create professional-looking results while expressing personal style and environmental consciousness.
Canvas tote bags provide the perfect blank canvas for creative expression while replacing disposable shopping bags with reusable, stylish alternatives.
Start with high-quality canvas totes in natural colors – cream, light gray, or white provide excellent bases for colorful designs.
Fabric paints have improved dramatically in recent years, offering vibrant colors that stay flexible and won’t crack or peel after washing.
Create custom stencils using card stock or purchase pre-made designs that match your recipient’s interests or personality.
Position stencils carefully and secure with painter’s tape to prevent paint bleeding under edges.
Apply paint with foam brushes or sponges using gentle dabbing motions rather than brushing strokes for even coverage.
Build up colors gradually with multiple light coats rather than trying to achieve full opacity in one application.
Remove stencils while paint is still slightly wet to prevent peeling, then allow designs to dry completely.
Heat-set the paint according to manufacturer instructions – usually this involves ironing the design or putting it in a hot dryer.
Add personal touches like hand-lettered quotes, names, or dates using fine-tip fabric paint pens.
Create themed designs for different purposes – grocery shopping totes with vegetable motifs, book bags with literary quotes, or beach bags with ocean themes.
The finished bags combine practicality with personal expression, encouraging recipients to reduce plastic bag usage while carrying something uniquely theirs.
Custom Embroidered Denim Jackets with Personal Artwork

Transform vintage denim jackets into wearable art pieces featuring hand-embroidered designs that reflect your recipient’s personality, interests, or meaningful memories.
Embroidered denim has exploded across social media platforms, with celebrities and influencers showcasing personalized jackets that cost hundreds of dollars in boutiques.
Start by finding the perfect vintage denim jacket at thrift stores, consignment shops, or online marketplaces – look for classic cuts in good structural condition.
Lighter wash denim provides better contrast for colorful threads, while darker denim creates dramatic backgrounds for metallic or bright embroidery floss.
Plan your design based on the recipient’s style – botanical flowers for nature lovers, constellation patterns for astronomy enthusiasts, or abstract geometric shapes for modernists.
Transfer your design onto the denim using water-soluble fabric markers or chalk that will disappear after the first wash.
Invest in quality embroidery floss in multiple colors – DMC brand offers hundreds of shades and maintains consistent color quality across different dye lots.
Start with basic stitches like backstitch for outlines, satin stitch for filled areas, and French knots for texture and dimension.
Work in good lighting and take breaks to prevent eye strain – embroidery is meditative but requires focus and precision.
Layer different thread weights and textures to create visual interest – combine matte cotton floss with metallic threads or silk for varied finishes.
Add unexpected elements like small beads, sequins, or patches to enhance your embroidered design and create mixed-media artwork.
The back panel provides the largest canvas for dramatic designs, while smaller motifs work beautifully on pockets, sleeves, or lapels.
Document your progress with photos – recipients love seeing the transformation from plain jacket to personalized masterpiece.
This gift combines fashion with art, creating a unique piece they’ll treasure and wear with pride for years to come.
Include care instructions for washing and storing embroidered garments to preserve your handiwork and maintain the jacket’s longevity.
Aromatic Coffee Body Scrub Jars with Custom Labels


Blend coffee grounds with natural ingredients to create invigorating body scrubs that exfoliate, moisturize, and energize skin while reducing waste from used coffee grounds.
Coffee grounds are rich in antioxidants and caffeine, which can help improve circulation and temporarily tighten skin while providing gentle exfoliation.
Start with freshly used coffee grounds – save them from your morning brew or ask local coffee shops for their used grounds.
Let the grounds dry completely to prevent mold growth, spreading them on baking sheets and letting them air dry for 24 hours.
Combine the dried coffee grounds with coconut oil, which melts on contact with warm skin and provides deep moisturization.
Add brown sugar for additional exfoliation and sweet vanilla extract for a delicious scent that complements the coffee aroma.
Mix ingredients in ratios that create a slightly wet consistency that holds together but isn’t overly oily.
A pinch of sea salt enhances the exfoliating properties while essential oils like peppermint or orange add energizing aromatherapy benefits.
Package the scrub in mason jars with tight-fitting lids to preserve freshness and prevent oil separation.
Create custom labels using kraft paper and calligraphy pens, including the ingredients list and usage instructions.
Add decorative touches like twine around the jar rim, wooden spoons for application, or small cards explaining the benefits of coffee-based skincare.
The recipient gets multiple uses from each jar, with the scrub providing an spa-like experience that awakens the senses and leaves skin soft and smooth.
This gift appeals to coffee lovers, skincare enthusiasts, and anyone who appreciates eco-friendly beauty products that repurpose waste materials.
