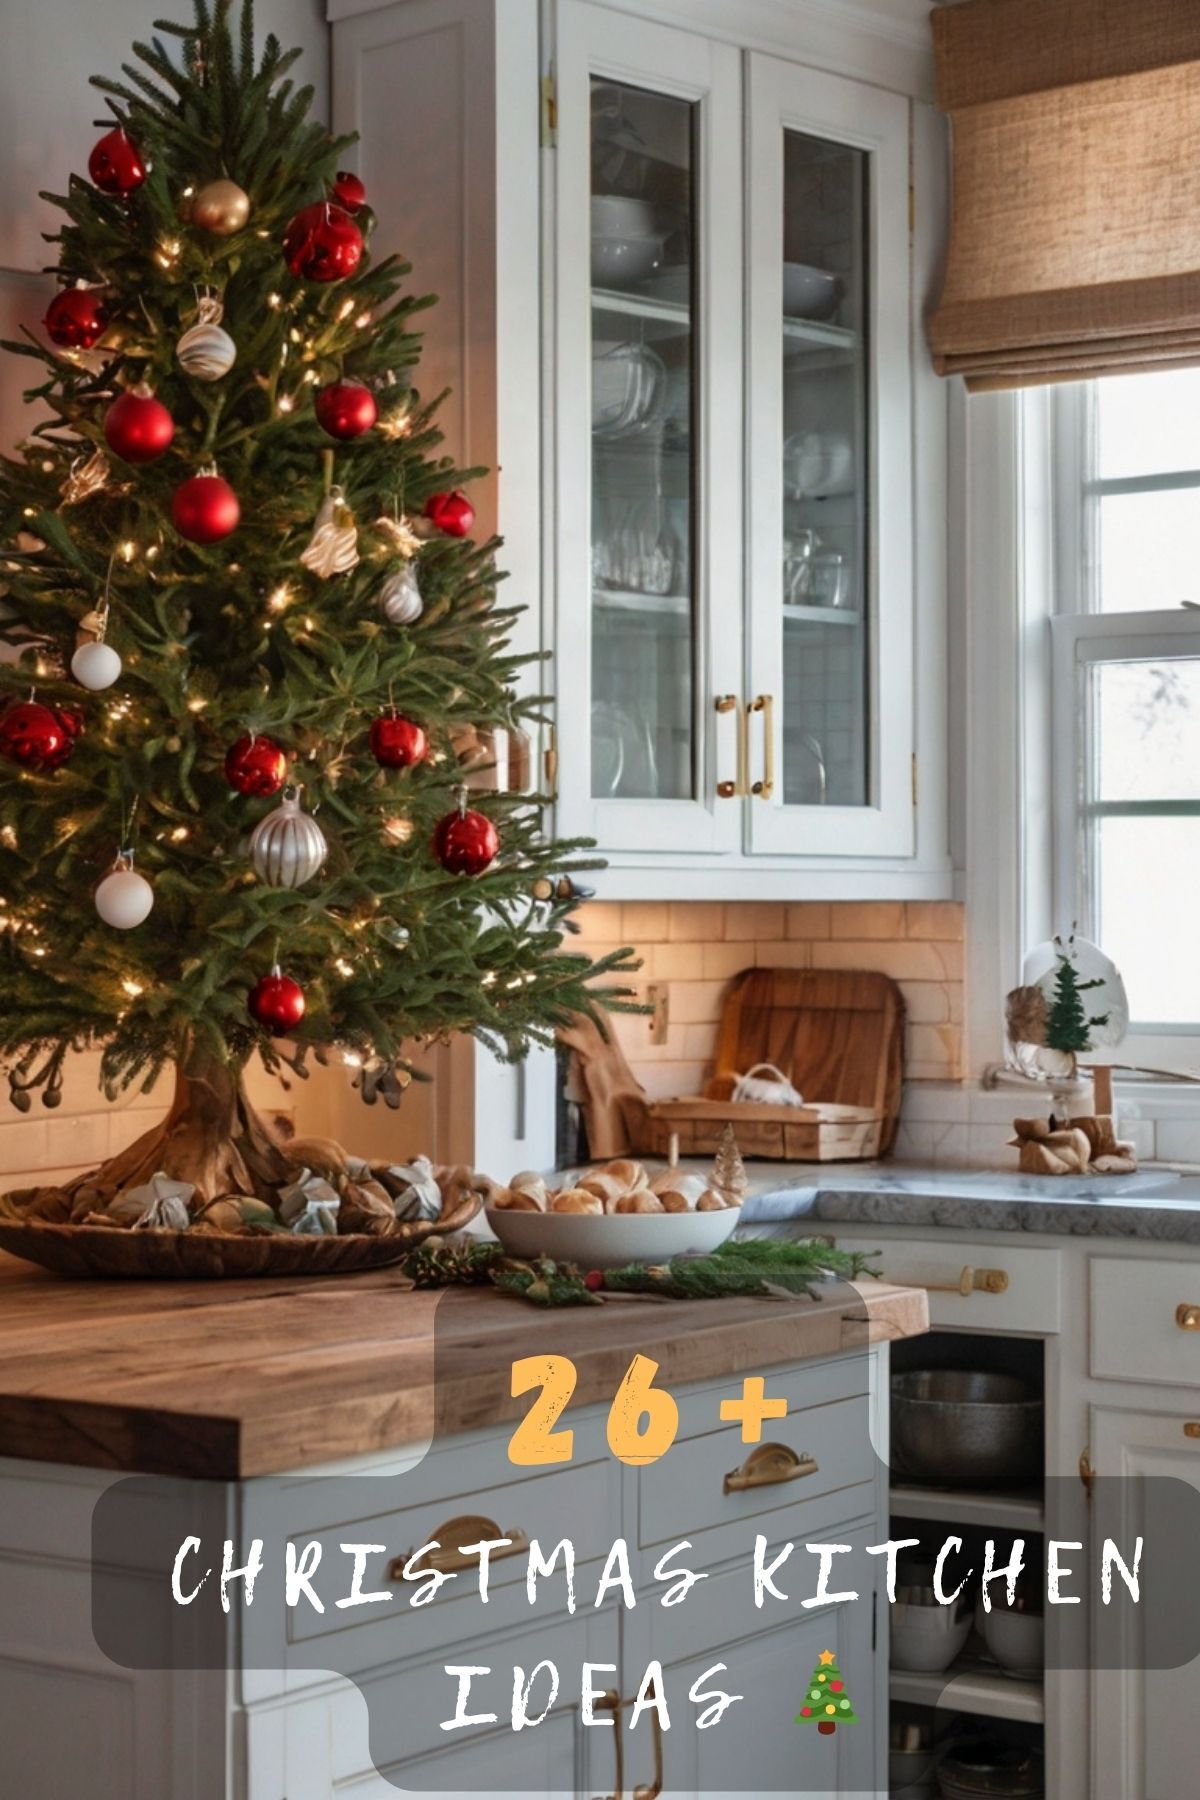
Your kitchen doesn’t have to miss out on the Christmas magic just because it’s a workspace.
With the right touches, you can turn your cooking space into a festive hub that brings joy to every meal preparation and gathering this holiday season.

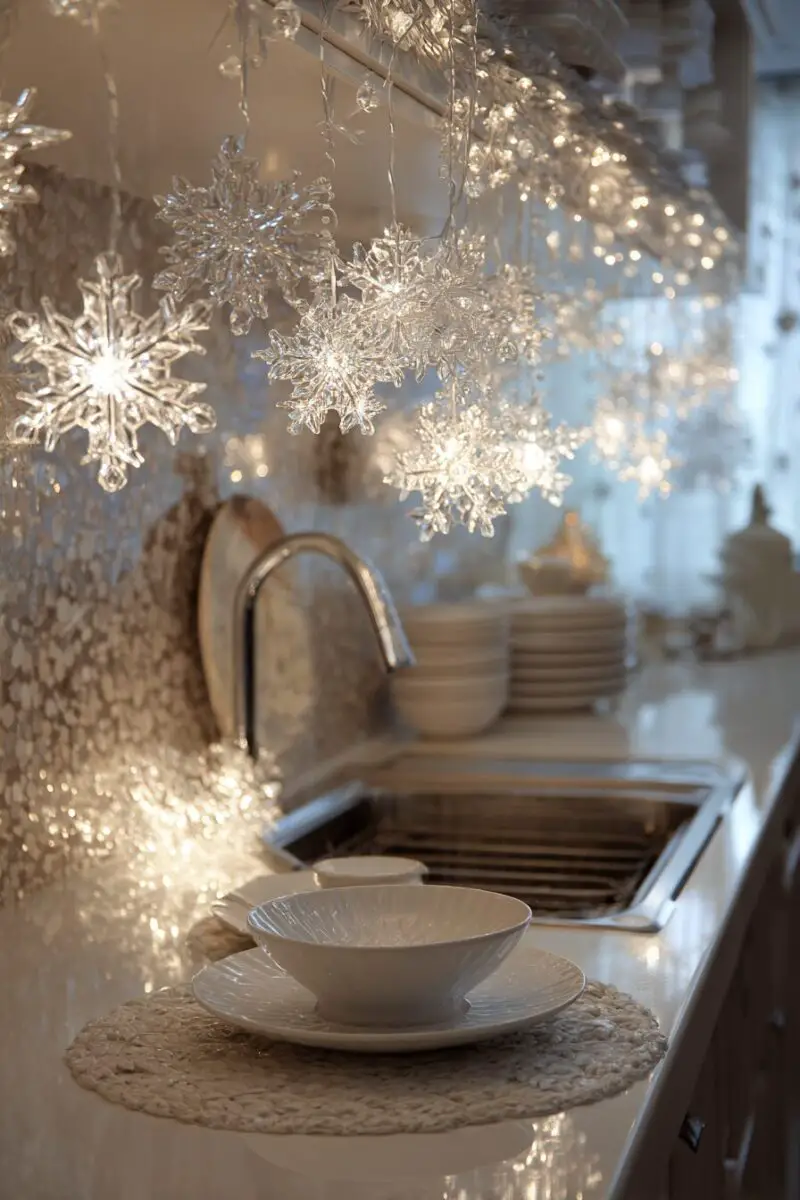
Create a Festive Backsplash Display That Stops Guests in Their Tracks
Picture walking into a kitchen where twinkling lights dance behind glass shelves, creating an enchanting backdrop that makes even washing dishes feel magical.
Your backsplash offers the perfect canvas for temporary Christmas decorations that won’t damage your beautiful tile or stone work.
Start by attaching removable adhesive hooks along the top edge of your backsplash area, spacing them about 12 inches apart for optimal light distribution.
String battery-operated LED lights in warm white or soft gold tones across these hooks, creating gentle swags that catch the eye without overwhelming the space.
Layer in some artificial greenery by tucking small sprigs of pine or holly behind the light strings, securing them with tiny clips that blend into the foliage.
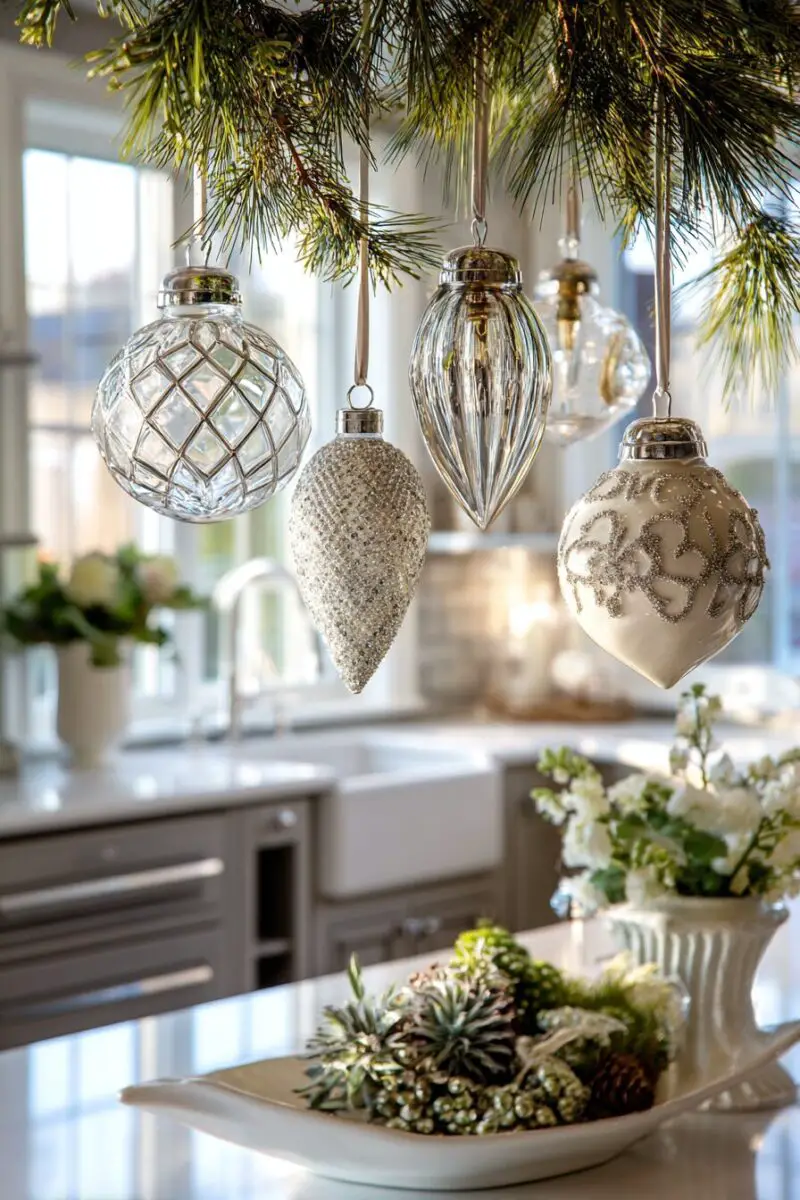
Add depth and visual interest by hanging lightweight ornaments at varying heights from fishing line attached to the same hooks.
Choose ornaments in colors that complement your existing kitchen palette – if you have a neutral kitchen, go for classic red and gold, or if your space features bold colors, opt for silver and white for elegant contrast.
Transform Your Kitchen Island Into a Show-Stopping Christmas Centerpiece

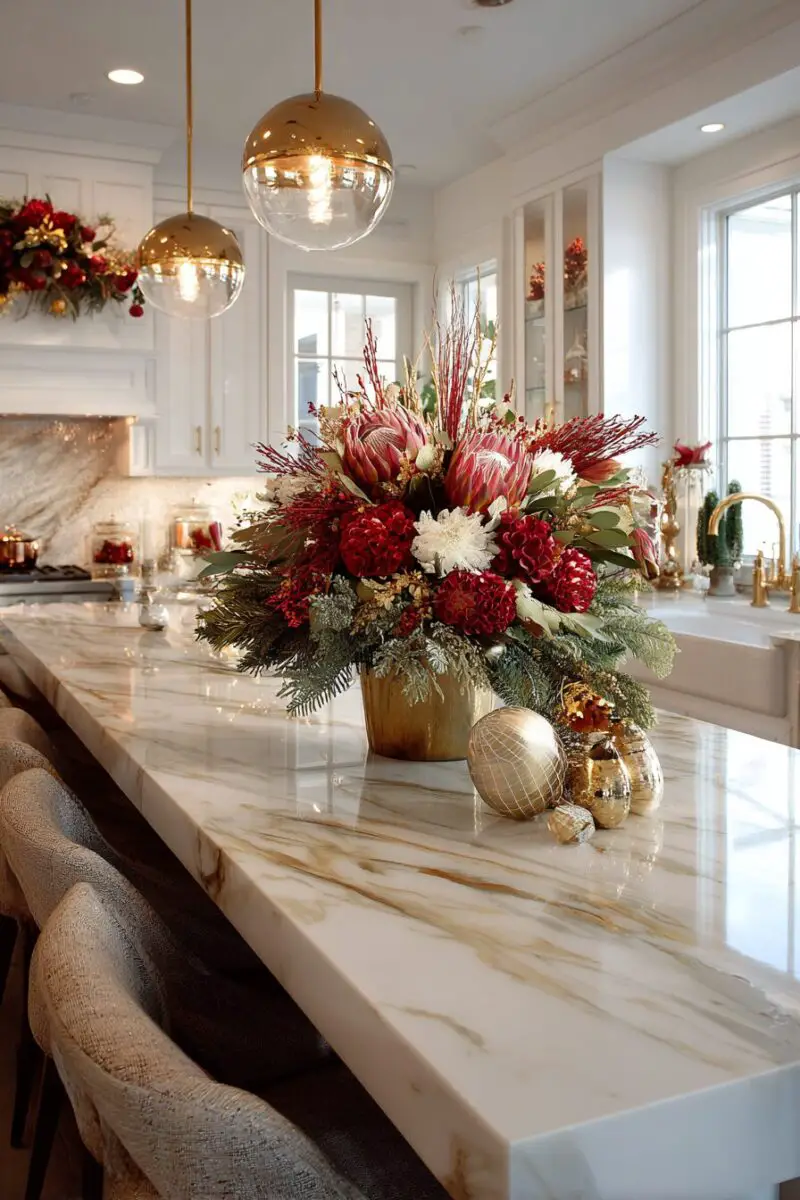
Your kitchen island serves as the natural gathering spot during holiday parties, so why not make it the most beautiful focal point in your entire home?
Start by clearing everything off your island surface and giving it a thorough cleaning to create your blank canvas.
Lay down a festive table runner that extends about 12 inches over each end of the island – choose something in rich velvet, classic plaid, or elegant metallic fabric that coordinates with your overall Christmas color scheme.
Create height variation by placing different sized pedestals or cake stands along the runner, alternating between tall, medium, and short pieces to establish visual rhythm.
On these elevated surfaces, arrange a collection of Christmas elements that tell a cohesive story.
Place a large glass bowl filled with ornament balls on the tallest pedestal, mixing different textures like matte, shiny, and glittered finishes in your chosen color palette.
Use medium-height stands for smaller arrangements like pinecones spray-painted in metallic tones, small potted evergreen plants, or clusters of pillar candles in hurricane glasses.
The shortest platforms work perfectly for scattered elements like cinnamon sticks tied with ribbon, small wrapped gift boxes, or miniature Christmas trees.
Weave battery-operated string lights throughout the entire display, tucking them behind and around your decorative elements to create that magical glow.
Add fresh greenery by draping garland around the base of your pedestals and along the edges of your island, securing it with removable adhesive clips underneath the countertop edge where they won’t be visible.
Include some practical elements that maintain the island’s functionality – a beautiful wooden cutting board decorated with a small wreath can stay out for quick food prep, and a decorative bowl can hold seasonal fruits like oranges studded with cloves or red apples.
The secret to making this work is ensuring you still have at least 2 feet of clear workspace on one end of the island for actual food preparation.
Design Your Dream Room in Minutes!
🏡 Start Creating FREE →Drape Your Cabinets and Shelving in Gorgeous Garland Magic


Nothing says “Christmas kitchen” quite like lush garland gracefully draped across your cabinetry, creating a cohesive look that ties your entire space together.
Start with your upper cabinets, where garland can have the most visual impact without interfering with your daily cooking routine.
Choose high-quality artificial garland that looks realistic – you want something full and dense with varied needle lengths and perhaps some built-in pinecones or berries for added texture.
Measure the fronts of your upper cabinets to determine how much garland you’ll need, adding extra length for the graceful swags between cabinet sections.
Attach small adhesive hooks to the top corners of each cabinet door, positioning them where they’ll be hidden by the garland once it’s in place.
Create elegant swags by allowing the garland to drape naturally between each hook, with the lowest point of each swag hanging about 4-6 inches below the cabinet bottom.
This creates a beautiful scalloped effect that adds movement and softness to the hard lines of your cabinetry.
For open shelving units, wind garland around the shelf supports and along the front edges of shelves, securing it with small clips or twist ties hidden behind decorative elements.
Layer in some sparkle by weaving battery-operated LED lights throughout the garland, spacing them evenly to avoid dark spots or overly bright areas.
The warm glow against the green foliage creates an inviting atmosphere that makes your kitchen feel like a cozy Christmas retreat.
Add personality by tucking in some small ornaments along the garland’s length – choose lightweight options that won’t weigh down the greenery or create safety hazards if they fall.
Ribbon bows in coordinating colors can be attached at the hook points to hide the hardware while adding extra festive flair.
For a more natural look, incorporate real elements like small pinecones, cinnamon sticks, or dried orange slices wired directly into the artificial garland.
TRENDING NOW
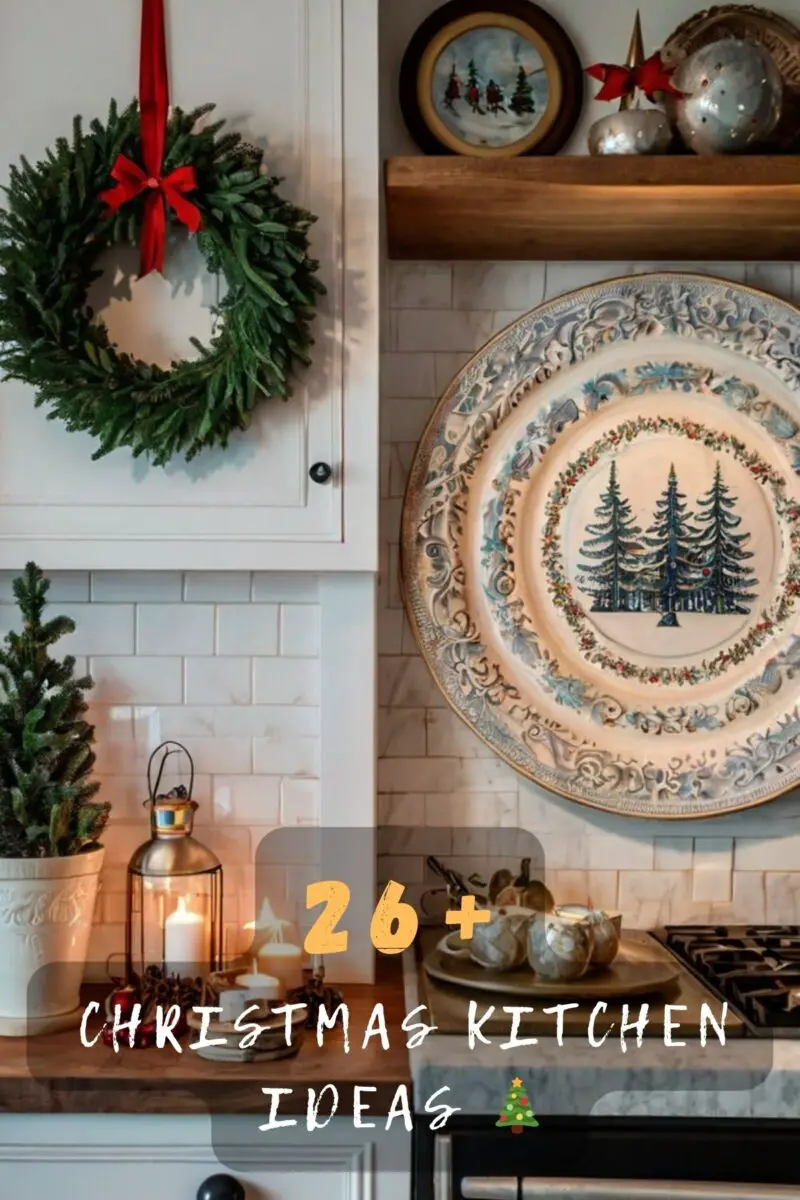
13 Chic Color Schemes To Transform Your KitchenDisplay Your Most Beautiful Christmas Dishware Like Holiday Art
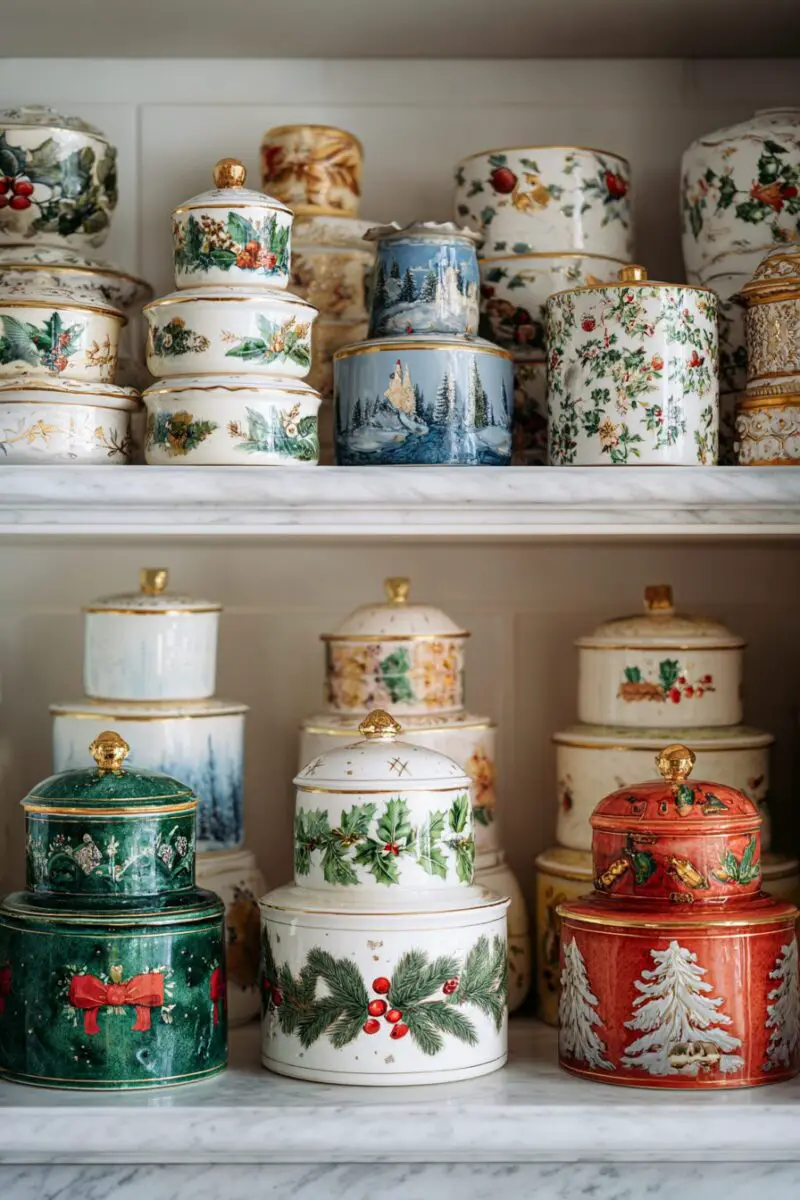
Your Christmas dishes deserve to be showcased as more than just functional items – they can become stunning decorative elements that bring holiday cheer to your everyday kitchen experience.
Start by clearing out some prime real estate in your glass-front cabinets or open shelving areas to create dedicated display zones for your festive dishware.
Arrange your Christmas plates by size, with larger dinner plates standing vertically against the back wall of the shelf, medium-sized salad plates in front of them, and smaller dessert plates creating the front layer.
This layered approach creates depth and allows you to see the beautiful patterns on each piece while maximizing your display space.
Intersperse coordinating mugs, cups, and serving pieces throughout the arrangement, turning handles outward to show off their design details.
Use small plate stands or easels to prop up particularly beautiful pieces at eye level, treating them like pieces of art rather than just functional dishes.
Fill in gaps with complementary items like Christmas-themed salt and pepper shakers, small bowls filled with colorful ornament balls, or vintage-style Christmas cookie jars.
Create visual cohesion by grouping items with similar colors or patterns together, even if they’re from different sets – mixing patterns can actually create more visual interest than perfectly matched sets.
Add some height variation by placing small risers or overturned bowls behind your front-row items to elevate pieces in the back.
For closed cabinets, install battery-operated puck lights inside to illuminate your display and make it visible even when the cabinet doors are closed.
The soft glow filtering through glass cabinet doors creates a beautiful ambient lighting effect in your kitchen.
Don’t forget about your everyday open counter space – a beautiful Christmas serving tray can stay out all season, topped with a few special mugs ready for hot cocoa or coffee.
Rotate different pieces throughout the season to keep the display fresh and give all your Christmas dishware a chance to shine.
This approach transforms necessary storage into decorative display, making your kitchen feel more festive while keeping your special dishes easily accessible for holiday entertaining and everyday use during the Christmas season.
Illuminate Your Space with Enchanting Christmas Lighting
Strategic lighting can completely transform your kitchen’s atmosphere, turning it from a simple workspace into a warm, inviting Christmas haven that beckons family and friends to gather.
Begin by assessing your existing lighting and identifying opportunities to layer in festive illumination without overwhelming the space or interfering with task lighting needs.
Battery-operated LED string lights offer the most versatility and safety for kitchen applications – choose warm white bulbs for a cozy, traditional feel, or go with multicolored lights if your kitchen has a more playful, family-friendly vibe.
Outline your kitchen windows with lights, securing them with removable adhesive clips that won’t damage your window frames or trim.
The lights will create a beautiful glow visible from both inside and outside your home, making your kitchen windows look like warm, welcoming beacons.
Drape lights along the top edges of your cabinets, where they’ll cast a soft upward glow toward the ceiling and create ambient lighting that supplements your overhead fixtures.
Use small clips designed for holiday lights to secure the cord every 12-18 inches, ensuring the lights stay in place but can be easily removed after the holidays.
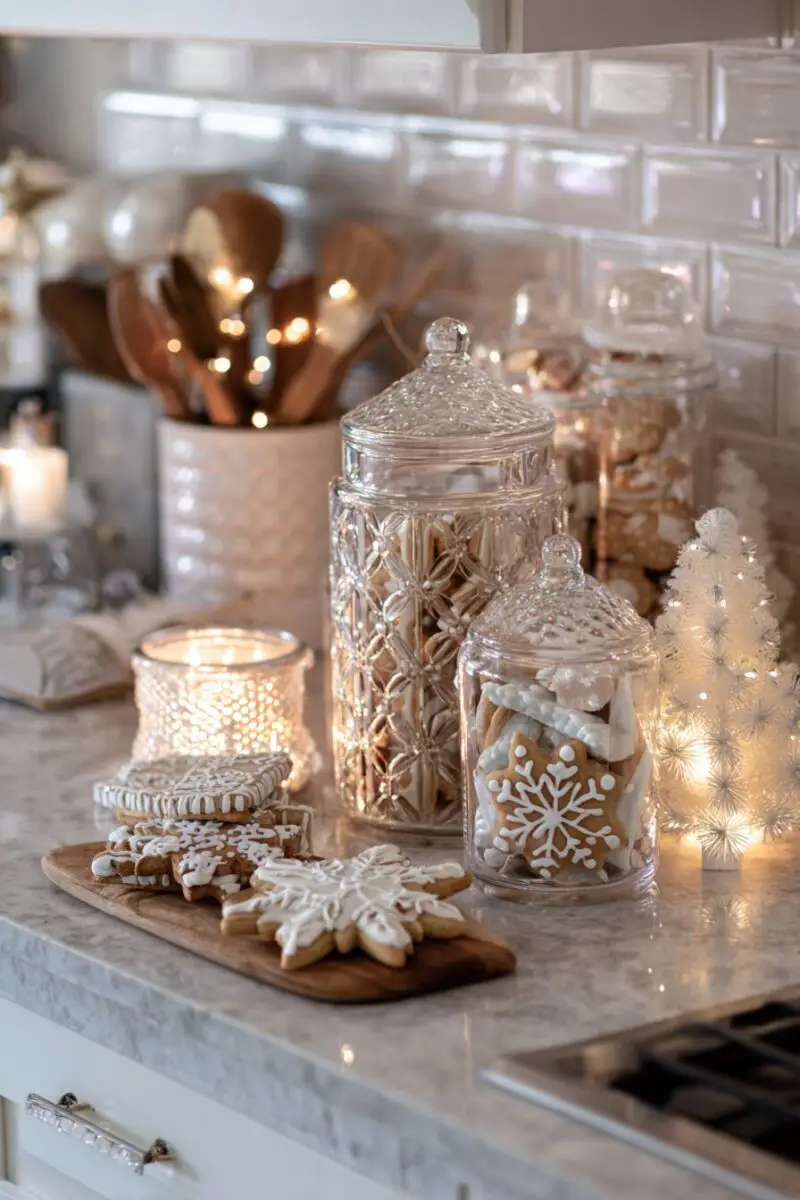
Create stunning focal points by filling large glass containers like apothecary jars, hurricane lanterns, or even clean mason jars with coiled string lights.
These illuminated containers can sit on countertops, islands, or shelves, providing pools of warm light that add magic to any surface.
For a more elegant approach, invest in flameless pillar candles that flicker like real flames but offer complete safety near food preparation areas.
Group these in varying heights on decorative trays or directly on countertops, creating intimate lighting zones that encourage conversation and relaxation.
Under-cabinet lighting gets a festive twist when you add color-changing LED strips that can shift from everyday white light to warm Christmas colors with the touch of a button.
Install dimmer switches for your existing fixtures so you can lower the main lighting and let your Christmas lights take center stage during evening gatherings.
Set Up an Irresistible Hot Cocoa Station That Brings Joy to Winter Mornings
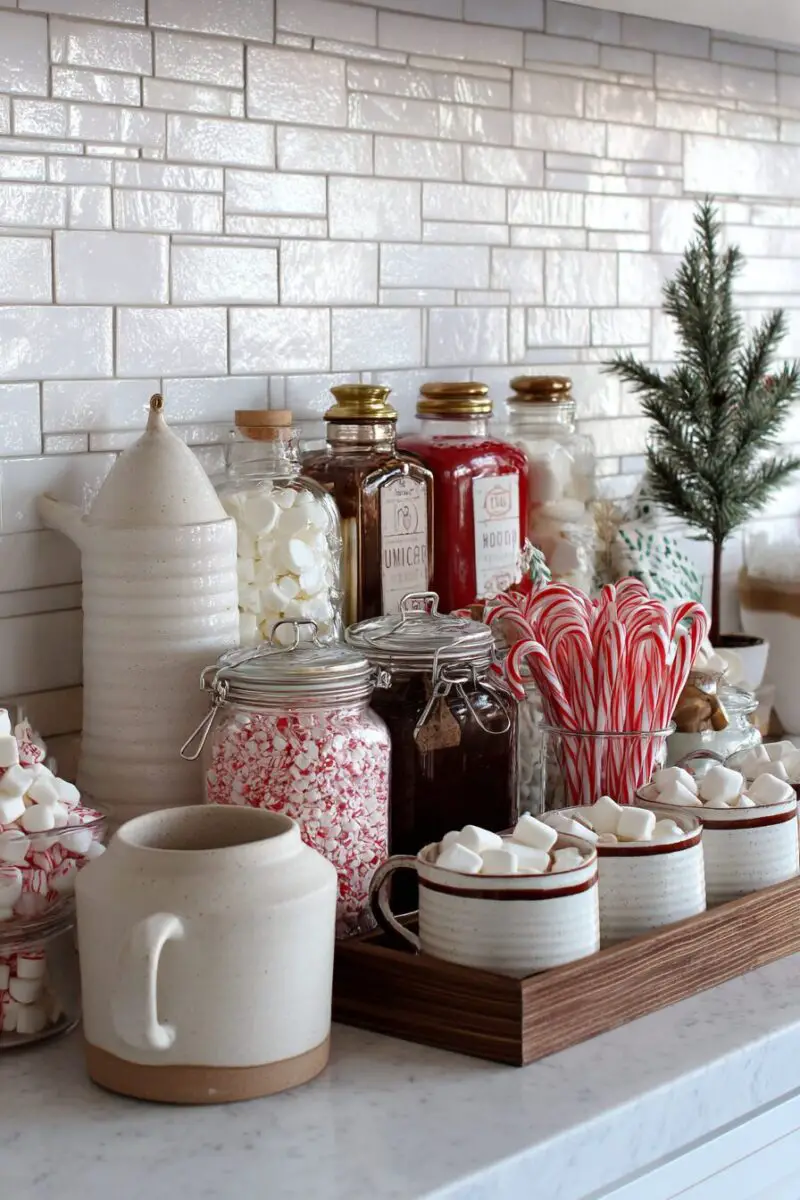
Creating a dedicated hot cocoa station transforms a simple corner of your kitchen into a delightful destination that encourages family bonding and adds sweetness to cold winter days.
Choose a spot that’s easily accessible but won’t interfere with your main cooking workflow – a section of countertop near your coffee maker, a kitchen cart, or even a cleared area of your island works perfectly.
Start with a beautiful tray or decorative board as your foundation, something large enough to hold all your supplies while defining the space and making everything easily portable if needed.
Position a slow cooker or thermal carafe as your cocoa vessel, keeping the hot chocolate warm and ready throughout the day without constant reheating.
If you’re using a slow cooker, choose one with a “warm” setting and line it with a festive dish towel or decorative cloth to hide the utilitarian appearance.
Arrange an assortment of mugs in Christmas patterns, colors that coordinate with your kitchen, or charming mismatched vintage pieces that add personality and whimsy to the station.
Create a toppings bar that rivals any coffee shop by filling small bowls or jars with marshmallows, whipped cream, cinnamon sticks, peppermint sticks, crushed candy canes, chocolate shavings, and caramel sauce.
Label each topping with small chalkboard signs or pretty gift tags to add a professional touch and help family members and guests identify options.
Include some special additions like flavored syrups (vanilla, hazelnut, or peppermint), different types of chocolate (dark, milk, or white chocolate chips for melting in), and even some adult additions like Bailey’s or rum for evening treats.
Position a small basket nearby with festive napkins, spoons for stirring, and perhaps some homemade cookies or store-bought treats that pair perfectly with hot chocolate.
Add some decorative elements that don’t interfere with functionality – a small Christmas tree, some battery-operated string lights coiled in a jar, or a few ornaments scattered around the base of your setup.
Keep everything stocked and ready by checking supplies daily and refreshing the hot chocolate as needed.
This station becomes a natural gathering point where family members can customize their drinks, chat about their day, and create those spontaneous moments of connection that make the holiday season so special.
The beauty lies in its simplicity – it’s an invitation to slow down and savor both the drink and the company.
TRENDING NOW
13 Moody Kitchen Designs to Transform Your SpaceCreate a Charming Christmas Cookbook and Recipe Display
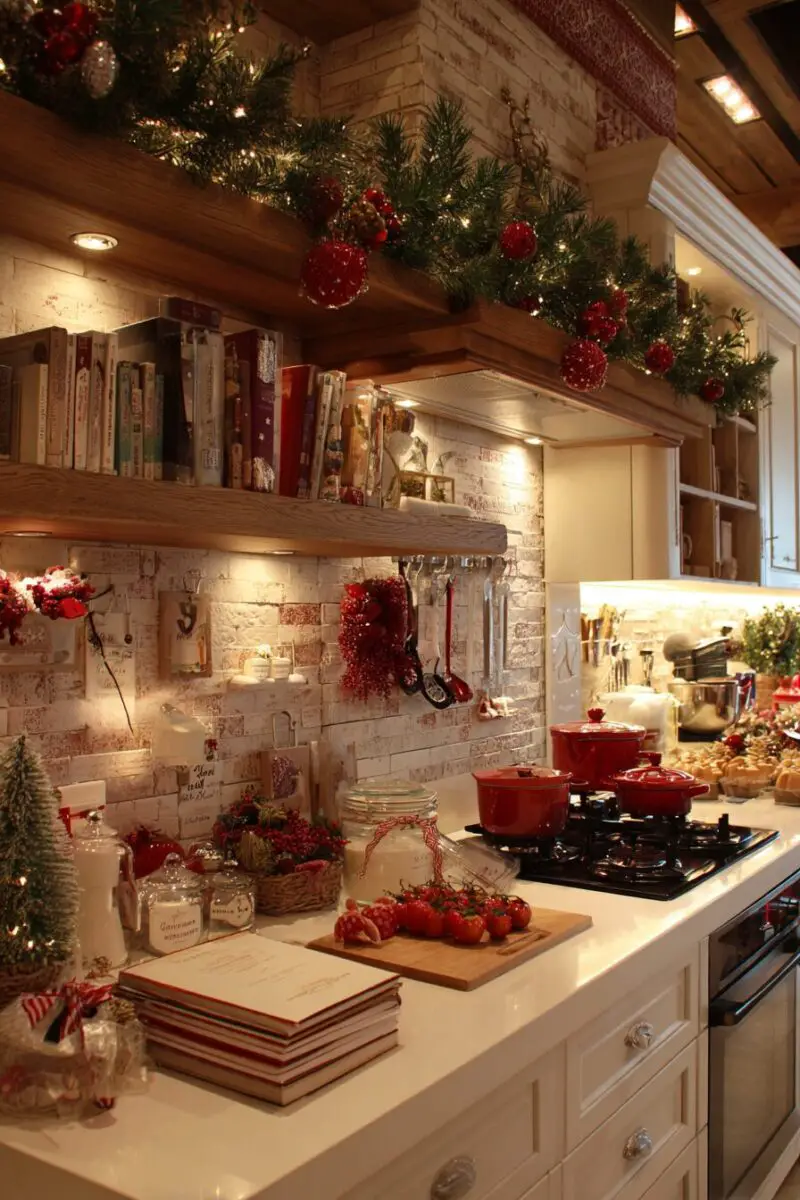
Your collection of holiday recipes and Christmas cookbooks can become both functional reference material and beautiful seasonal decoration when displayed thoughtfully throughout your kitchen space.
Start by gathering all your Christmas-related cookbooks, family recipe cards, handwritten notes from grandmothers, and printed recipes you’ve collected over the years.
Choose the most visually appealing cookbooks – those with beautiful covers, vintage charm, or sentimental value – to serve as the foundation of your display.
A small easel placed on your countertop or island can showcase one opened cookbook, displaying a beautiful photograph or illustration while keeping your current recipe easily visible during cooking.
Rotate different books throughout the season, featuring different types of recipes as you move from cookie baking to holiday dinner preparation to New Year’s treats.
Create a dedicated recipe station by clearing a small section of countertop or a kitchen cart where you can spread out ingredients and refer to instructions without shuffling papers around your main workspace.
Use a decorative cutting board or tray as a base for holding your current recipe, keeping it elevated and protected from spills while maintaining easy readability.
Install a small bulletin board or magnetic board on a wall or the side of your refrigerator where you can display family recipe cards, creating a rotating gallery of cherished holiday traditions.
Frame some of your most treasured handwritten recipes from family members – these become meaningful kitchen art that celebrates your heritage while inspiring your holiday cooking.
Add some festive touches by tying ribbons around stacks of cookbooks, tucking small sprigs of artificial greenery between pages, or placing battery-operated fairy lights around your display area.
Create recipe card holders using small picture frames or clipboard-style holders that can stand on their own, making it easy to reference multiple recipes while cooking large holiday meals.
Organize recipes by category using decorative dividers or small baskets labeled “Cookies,” “Main Dishes,” “Sides,” and “Desserts” to make finding specific recipes quick and easy during busy cooking sessions.
This approach transforms your recipe collection from hidden kitchen clutter into a celebration of family traditions and culinary creativity that enhances both the functionality and beauty of your holiday kitchen.
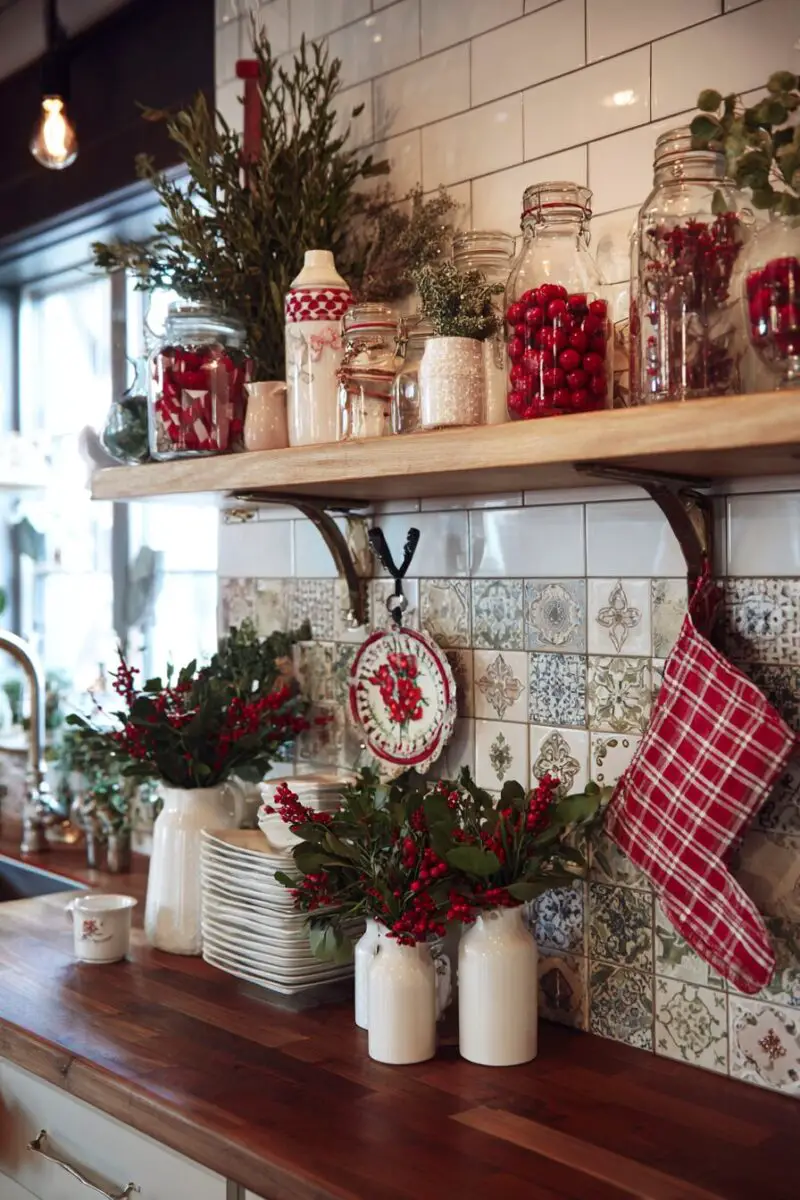
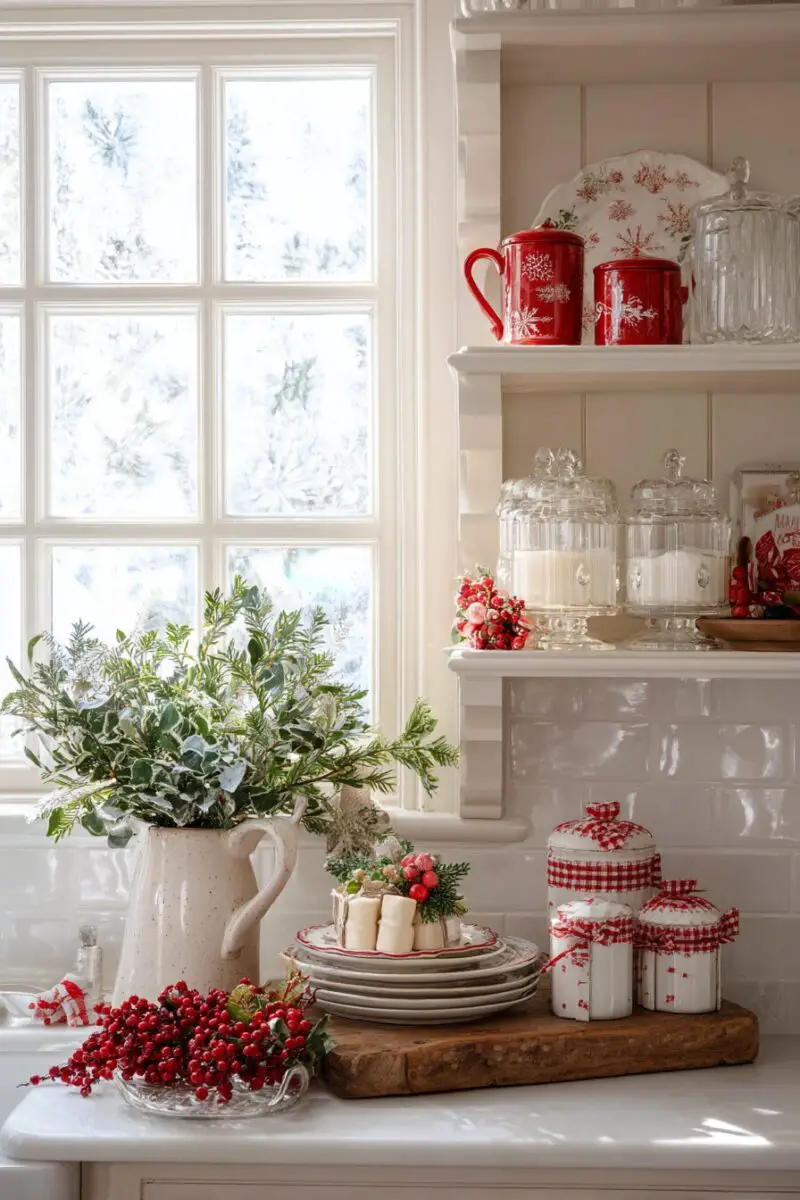
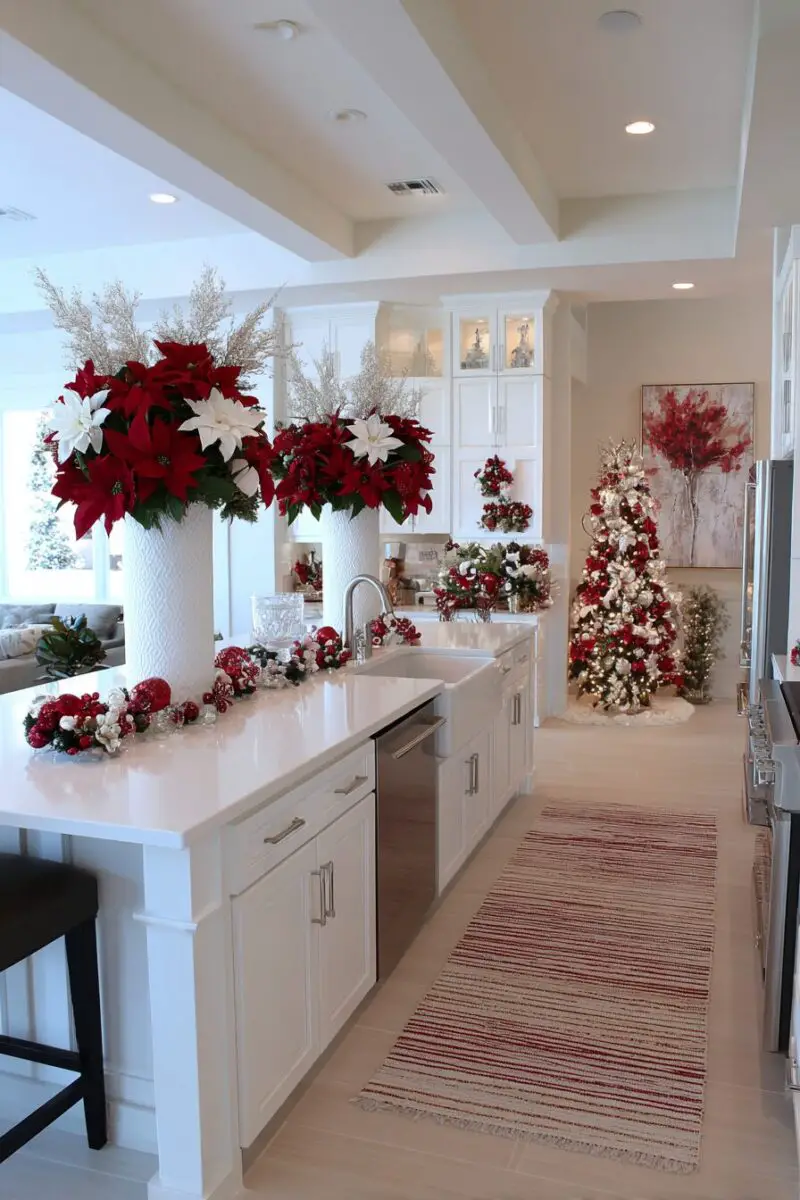
Bring Nature Indoors with Stunning Natural Christmas Elements
Natural elements add authentic beauty and wonderful seasonal scents to your kitchen while creating connections to the outdoors during the winter months when fresh greenery is especially precious.
Start by incorporating fresh evergreen branches from pine, fir, or cedar trees, which you can often purchase inexpensively from Christmas tree lots or even gather from your own yard if you have evergreen trees.
Arrange these branches in tall vases or mason jars filled with water, creating instant natural bouquets that will stay fresh for weeks while filling your kitchen with that distinctive Christmas tree fragrance.
Place these arrangements on your island, countertops, or kitchen table where they won’t interfere with cooking but will provide maximum visual and aromatic impact.
Gather pinecones from your yard or purchase them from craft stores, then transform them into stunning decorative elements by leaving some natural and spray-painting others in metallic gold, silver, or copper tones.
Fill decorative bowls with these treated pinecones, mixing sizes and finishes to create textural interest that works with any kitchen color scheme.
Create aromatic bundles by tying cinnamon sticks together with raffia or ribbon, then placing these bundles around your kitchen where they’ll release their spicy scent and add rustic charm.
Incorporate fresh citrus fruits like oranges, lemons, and limes by arranging them in wooden bowls or wicker baskets – they add beautiful color, provide fresh scents, and remain functional for cooking needs.
Create pomanders by studding oranges with whole cloves, following traditional patterns or creating your own designs, then displaying these fragrant decorations on windowsills or open shelves.
Add dried elements like eucalyptus branches, wheat stalks, or preserved baby’s breath for texture variation and neutral colors that complement your fresh greenery.
Create natural garland by stringing cranberries, popcorn, or dried orange slices, then draping this edible decoration along open shelving or around doorways.
Incorporate small branches of holly, winterberry, or other plants with colorful berries to add pops of red or orange that complement the predominantly green natural palette.
Transform Your Range Hood Into a Stunning Christmas Focal Point
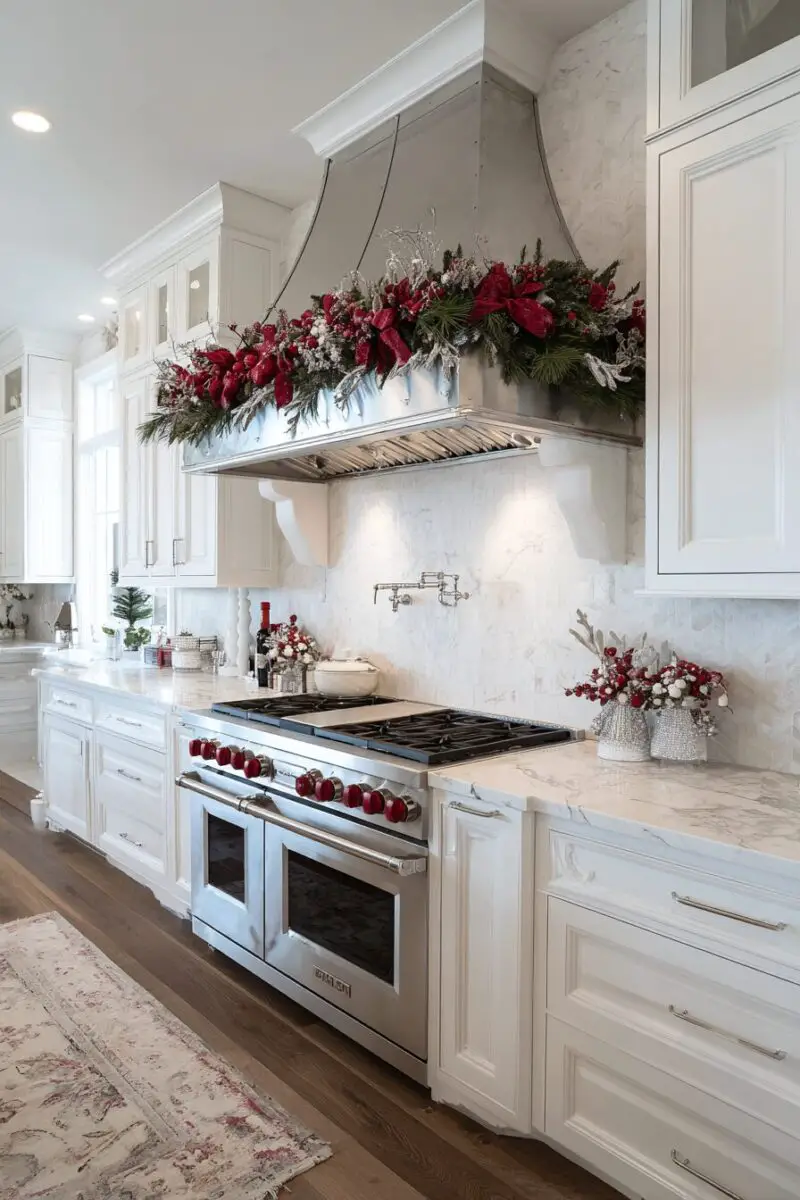
Your range hood offers an often-overlooked opportunity to create a dramatic Christmas display that becomes the centerpiece of your entire kitchen design.
This prominent feature sits at eye level and naturally draws attention, making it the perfect location for a show-stopping holiday arrangement that guests will notice immediately upon entering your kitchen.
Start by ensuring your range hood is thoroughly cleaned and that any decorations you add won’t interfere with its ventilation function or create fire hazards near your cooking surface.
Drape high-quality garland across the top edge of your hood, securing it with removable adhesive hooks placed at the corners and middle points for even distribution.
Allow the garland to create natural swags that soften the hard lines of your appliance while maintaining clearance from your cooktop below.
Layer in battery-operated string lights throughout the garland, choosing warm white LEDs that will create a beautiful glow without generating heat that could damage your range hood’s finish.
Add substantial decorative elements like large ribbon bows at each corner of the hood, choosing colors that complement your kitchen’s existing palette and the other Christmas decorations throughout the space.
Incorporate oversized ornaments hung at varying lengths from fishing line attached to small hooks along the hood’s edge, creating movement and visual interest without blocking sight lines or interfering with cooking activities.
For hoods with decorative brackets or architectural details, weave smaller garland pieces around these features to highlight the hood’s design while adding festive touches.
Create depth by layering different textures – combine traditional green garland with metallic ribbon, natural pinecones, and perhaps some artificial snow or frosted elements for a winter wonderland effect.
Add height variation by incorporating tall, battery-operated candles in hurricane glasses placed on the countertop directly below the hood, creating a cohesive vertical display that draws the eye upward.
For stainless steel hoods, choose decorations with warm tones like gold, copper, or deep red to provide beautiful contrast against the cool metal surface.
If your hood is painted or has a decorative finish, select ornament colors that either complement or provide striking contrast to make the display pop against its background.
Remember to maintain at least 24 inches of clearance between any decorations and your cooking surface to ensure safety while creating your stunning focal point display.
TRENDING NOW
Stunning Kitchen Counter Decor Ideas To InspireDesign a Magical Christmas Cookie Decorating Station
A dedicated cookie decorating station transforms baking from a messy chore into a delightful family activity that creates both beautiful treats and cherished holiday memories.
Choose a location that offers plenty of workspace – your kitchen island, a large section of countertop, or even your dining table if it’s adjacent to your kitchen and easily accessible for cleanup.
Start by covering your work surface with a festive tablecloth or disposable plastic covering that can handle spills and splatters while adding to the holiday atmosphere.
Set up individual work stations by providing each decorator with their own plate, set of decorating tools, and designated space that prevents crowding and allows for creativity.
Create an organized supplies station using a lazy Susan or tiered serving tray to hold all your decorating materials in one easily accessible and rotatable display.
Fill small bowls with different colored sprinkles, nonpareils, sugar pearls, mini chocolate chips, and any other decorative elements you’ve chosen for your cookie decorating session.
Prepare multiple colors of royal icing in squeeze bottles or piping bags, making sure to have basic colors like red, green, white, and perhaps gold or silver for classic Christmas designs.
Include food coloring gels and small spoons so decorators can mix custom colors and adjust consistency as needed during their creative process.
Provide an assortment of decorating tools including offset spatulas, small spoons, toothpicks for detail work, and various sizes of round piping tips for different line weights and effects.
Set up a drying station using cooling racks covered with parchment paper where completed cookies can rest without smudging while decorators work on additional pieces.
Create inspiration by displaying photos of decorated cookies, providing simple design templates, or having a few pre-decorated examples to spark creativity without limiting individual expression.
Keep cleanup supplies readily available with damp paper towels, napkins, and perhaps small bowls of water for cleaning tools between colors.
Add festive touches to the station itself with battery-operated string lights around the perimeter, a small Christmas tree or holiday centerpiece that doesn’t interfere with workspace, and holiday music playing softly in the background.
