I killed my lawn on purpose.
Ripped it out, hauled in a ton of river rock (literally, a ton — I have the receipt), and built a dry creek bed where the soggy patch used to be.
My neighbors thought I’d lost it.
Now they ask me who did the work.
I did.
With a shovel and a bad back and a lot of YouTube.
Rock landscaping is one of those things that looks expensive and complicated but is honestly way more DIY-able than people think.
Further down I’ll show you how to build a dry creek bed that actually solves drainage problems, how to place a single boulder so it looks intentional instead of abandoned, and how to install gravel paths that don’t turn into a weedy mess by August.
Plus a few things I wish someone had told me before I started.
My Dry Creek Bed: The Project That Started Everything

The corner of my backyard turned into a small lake every time it rained.
I’d tried French drains, extra soil, all of it.
Finally I just committed to the creek bed and it genuinely changed everything about that side of the yard.
The concept is simple: you’re mimicking the path a seasonal stream would naturally carve, using rocks instead of water to fill it.
It looks beautiful when it’s dry and it actually works when it rains.
Here’s how I did mine, step by step:
- Walk your yard during a heavy rain first.
I know, it’s miserable.
But you need to see where water actually wants to go.
Follow that path, don’t fight it.
- Dig a meandering channel — mine is about 18 inches wide at the narrowest and opens up to nearly three feet in a couple of “pooling” spots.
The curves matter.
Straight ditches look like ditches.
- Lay landscape fabric along the bottom and up the sides before you put a single rock in.
Skipping this step is how you end up with a weedy gravel pit.
(I learned this the expensive way on a different project.)
- Start with your largest rocks along the outer banks to define the edges.
Then fill the center channel with smooth river rock in the 2-4 inch range.
Finish with smaller pebbles and a little fine gravel in the gaps.
- Use darker stones in the deeper sections and lighter ones toward the edges.
It genuinely creates an illusion of depth and moving water, which sounds like design-speak but it actually works.
I planted ornamental grasses and a few hostas along the banks.
The grasses move in the wind and make the whole thing feel alive.
Biscuit thinks it’s a snack bar.
He’s wrong, but I appreciate his enthusiasm.
One honest caveat: if you have serious drainage issues that involve water coming toward your foundation, please get a professional assessment before you DIY this.
A creek bed handles surface runoff beautifully, but it’s not a substitute for proper grading near your house.
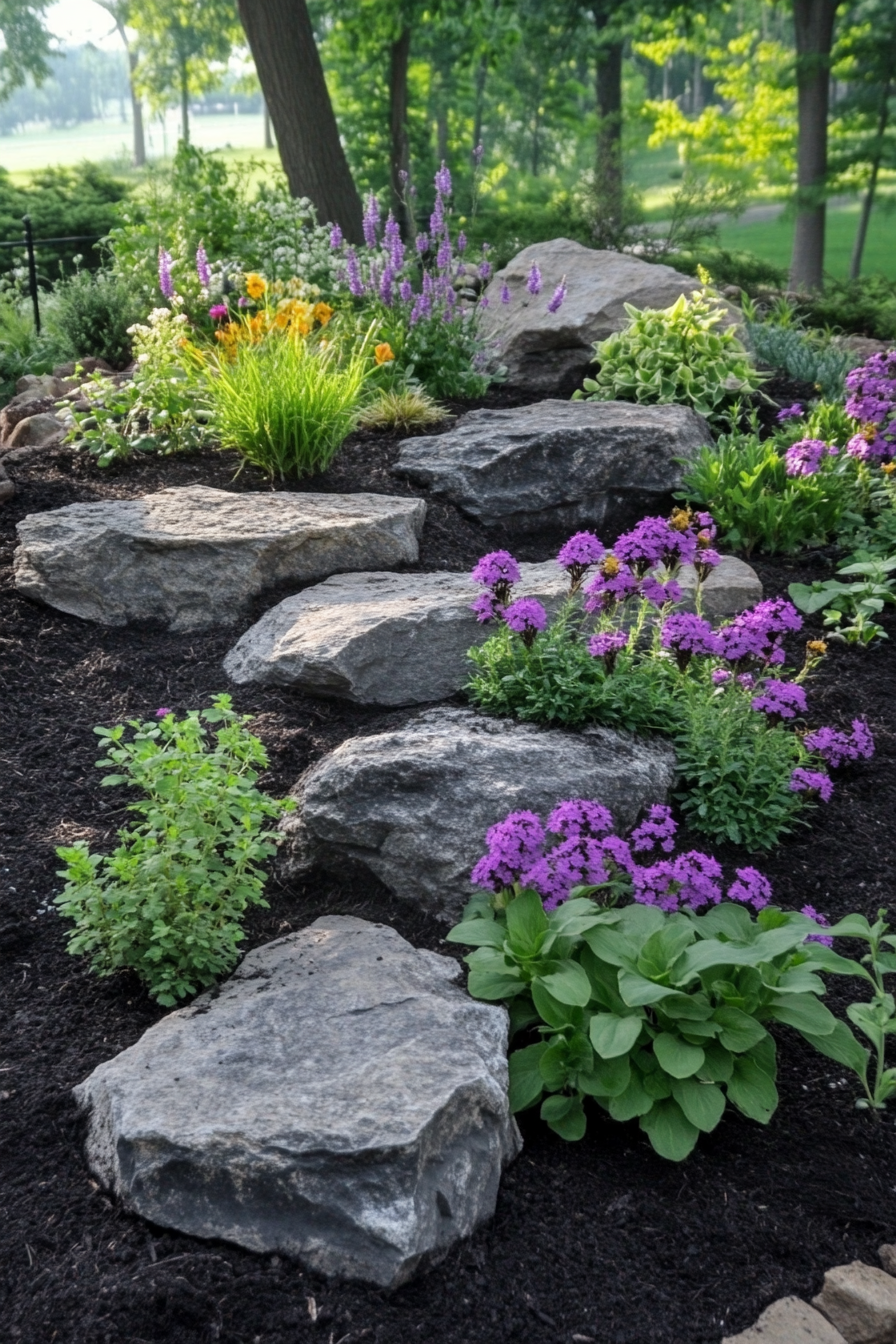
Statement Boulders: One Rock Can Do a Lot of Work

I have a single large granite boulder in my front yard that cost me $85 at a landscape supply place and took three guys and a hand truck to move.
It is the most-commented-on thing about my whole property.
People assume it’s been there for decades.
The placement is everything.
A boulder dropped in the center of a bed looks like a mistake.
That same boulder shifted off-center, partially buried, with some low grasses around it looks like a landscape feature that was designed by someone who knows what they’re doing.
The rule I follow: bury about a third of the height.
So if your boulder is 24 inches tall, sink it roughly 8 inches into the ground.
It anchors it visually and physically, and it stops it from looking like it just fell off a truck.
Position it off-center — use the rule of thirds if you’re unsure.
A boulder at the junction of two pathways creates a natural pause point.
One tucked near a seating area gives the whole corner a backdrop and a sense of enclosure.
For plantings around it, I go low.
Blue fescue, creeping thyme, a few sedums.
Nothing that competes with the boulder’s shape, just things that soften the base and make it look settled.
Uplighting it at night is genuinely dramatic — the shadows the texture throws are worth the extra outdoor outlet.
Multiple boulders of different sizes grouped together create a rock outcropping effect that looks almost geologically real if you get the arrangement right.
The trick is to vary sizes more than you think you need to, and resist making them evenly spaced.
Alpine Rock Gardens: The Most Low-Maintenance Bed I’ve Ever Made


My alpine bed is in the sunniest, most neglected corner of my backyard.
Bad soil, no irrigation, full sun all afternoon.
I used to kill things there seasonally.
Now it’s the one bed I never have to worry about.
Alpine gardens are built on the idea that the right plants for rocky, well-drained, lean conditions basically take care of themselves once they’re settled in.
This is true.
Mostly.
You want a slight slope if possible, or build one up with imported soil mixed with coarse sand and gravel.
Drainage is the whole point — these plants rot in wet feet.
The slope doesn’t have to be dramatic.
Even a gentle grade is enough to keep water moving through.
For rocks, I use a mix of limestone and sandstone pieces that look weathered.
Not freshly split quarry rock, which looks harsh.
The chunkier, more irregular pieces are better.
Arrange them in clusters like they naturally settled, tilted slightly into the slope, partially buried, with pockets between them where plants can get a foothold.
My plant list for this bed:
- Hens and chicks (sempervivum) — they spread slowly between rocks and look amazing year-round
- Various sedums, especially the low mat-forming types
- Blue fescue grass for texture and that silvery color
- Crocuses and dwarf daffodils tucked between rocks for early spring color
- Ice plant for summer color and zero water needs
The whole bed costs almost nothing to run once it’s in.
No fertilizer, rare watering, the occasional weed pull.
It changes with the seasons in a quiet way — some things go dormant, others fill in.
I love it more every year.
Rock Retaining Walls That Actually Look Good (Not Like a Concrete Bunker)

If your yard has any slope at all, a stone retaining wall is probably the most useful thing you can build.
It stops erosion, creates flat usable areas, and when done right it looks like it belongs there completely.
I’ll be honest: a wall over two feet tall really should be engineered or at least professionally consulted on, because the soil pressure behind a tall wall is no joke.
But shorter walls — under 18 inches or so — are very DIY-able with stacked natural stone and a little patience.
Stone options that work well: fieldstone for a rustic, organic look; flat stacked slate for a more refined appearance; cut limestone if you want clean lines that read as more contemporary.
Match whatever’s closest to your home’s existing materials and you’ll be fine.
The basics of building one:
- Excavate below the frost line for your foundation course.
Frost heave is what makes walls crack and shift over time.
- Build with a slight backward lean (called a “batter”) into the hillside — even just a half inch per foot of height.
This helps the wall resist the pressure of the soil behind it.
- Stagger your joints.
Never let two vertical seams line up between courses.
This is what makes a dry-stacked wall strong.
- Backfill behind the wall with coarse gravel, not plain soil.
Add a perforated drain pipe at the base to release water pressure.
This step is what separates walls that last from walls that bow out after two winters.
- Cap with flat stones for a finished look.
These also function as seating if you make them wide enough — mine is 14 inches wide and I’ve served coffee on it.
Cascade plants over the top edge.
Creeping phlox, trailing rosemary, sedum — anything that softens the stone and makes it feel integrated rather than constructed.
Gravel Pathways: How to Do Them So They Stay Nice

Gravel paths are one of my favorite things in a garden and also one of the things most people install wrong and then regret.
The installation prep is boring and a little tedious, which is exactly why people skip it.
Don’t skip it.
The path in my backyard is pea gravel over decomposed granite, edged with steel landscape edging.
It crunches underfoot, it drains perfectly, and it’s been down for three years with almost no maintenance beyond occasional raking.
Here’s what makes gravel paths actually work long-term:
- Excavate 4 inches down.
This isn’t optional — shallow paths migrate and look messy within a season.
- Landscape fabric on the bottom.
Again: not optional.
One summer without it and you’ll be pulling grass through your gravel by hand.
- Install your edging first, before you add gravel.
Metal or steel edging holds better than plastic over time.
Budget for the good stuff.
- Base layer of coarse gravel (1.5 inches), then your decorative top layer (another 2 inches).
The base is for drainage, the top is for looks.
- Light compaction of the surface.
Not packed solid — just settled enough that you’re not sinking in with every step.
For gravel types: pea gravel is classic and pretty but migrates more than crushed granite, which compacts better and stays put.
Decomposed granite is my favorite for a stable, smooth-ish surface.
River rock looks dramatic but is harder to walk on comfortably — I’d use it as an accent, not a main path.
Plant the borders generously.
Low-growing perennials, ornamental grasses, seasonal flowers right at the edge of the path.
The contrast between the loose gravel and the soft plants on either side is what makes gravel paths feel intentional and designed instead of just… a walkway.
Rock Mulch Beds: What Nobody Tells You Before You Install Them

I have a controversial opinion about rock mulch: it’s genuinely great for the right plants in the right climate, and genuinely wrong for everything else.
I’ve seen people put river rock around hydrangeas and roses and then wonder why their plants look terrible.
(Rock mulch raises soil temperature and reduces organic matter — things that moisture-loving plants hate.)
But for drought-tolerant plants, ornamental grasses, yucca, agave, and anything in a xeriscape-style bed?
Rock mulch is fantastic.
It doesn’t decompose, doesn’t blow away, doesn’t need replacing every spring, and it looks clean and permanent in a way that wood mulch never quite does.
The types worth knowing:
- Lava rock — excellent drainage, great colors (deep reds, near-blacks), very lightweight so it’s easy to handle.
Can look a little dated depending on your aesthetic.
- River rock — smooth and rounded, neutral earth tones, works with almost any style.
My personal favorite for front yard beds.
- Crushed granite — more angular, formal-looking, available in consistent size grades.
Very tidy appearance.
Installation process that actually works:
- Remove all existing vegetation completely, including roots.
Landscape fabric won’t stop established weeds that are already there.
- Install commercial-grade landscape fabric (not the cheap garden-center stuff — it breaks down fast and weeds punch right through it).
- Cut holes for each plant just barely big enough for the root ball.
Larger holes become weed entry points.
- Apply rock to 2-3 inches depth.
Pull it back a few inches from plant stems — moisture trapped against stems causes rot over time.
Top it off: rock mulch looks sharp for years with almost no maintenance.
Occasional blowing out of leaves in fall is basically the only task.
For the right setup, it’s worth every penny.
Rock Fire Pit Area: My Favorite Thing I Built With My Own Two Hands

We use our fire pit probably three seasons out of four.
It’s where we end up after dinner in September, where I drink coffee on cold October mornings with Biscuit on my feet, where the neighborhood kids show up in July.
Building it with fieldstone was one of the better decisions I’ve made in this house.
A few things before you start: check local codes first.
Some areas restrict open burning or have setback requirements.
And the 10-foot clearance rule from structures and overhanging branches is real — don’t fudge it.
For stone selection: natural fieldstone has a beautifully rustic look and is often the most affordable option if you can source it locally.
Cut limestone creates cleaner lines and suits more modern outdoor spaces.
Volcanic rock handles heat exceptionally well and has great visual texture.
Whatever you choose, make sure the interior lining is fire brick or a specifically heat-resistant stone — regular decorative rock can crack or even spall (basically explode fragments) when it gets hot enough.
How I built mine:
- Excavated a circle about 4 feet across, 6 inches deep
- Gravel base layer for drainage and stability
- Dry-stacked fieldstone walls in overlapping courses to about 18 inches high, leaving small gaps between stones for airflow
- Interior lined with fire brick — this protects the outer wall and extends the whole structure’s life significantly
For seating, I built a low stone bench along one side of the pit area and used Adirondack chairs on the other side.
Mixing built-in and moveable seating gives you flexibility for different group sizes.
Pathway lighting from the house to the fire pit matters more than you’d think.
Guests shouldn’t be navigating across your lawn in the dark.
Solar stake lights along a gravel path is cheap and effective.
Rock Water Features: More Achievable Than You’d Think

The sound of water moving over rocks is genuinely one of the most relaxing things you can add to an outdoor space.
I know that sounds like something off a spa brochure but I mean it practically.
It masks traffic noise, it masks whatever the neighbors are doing, and it makes sitting outside feel like being somewhere intentional.
A pondless bubbling boulder or a small stacked-rock waterfall is honestly more achievable DIY-wise than most people realize.
The basic concept: a submersible pump in an underground reservoir recirculates water continuously.
No pond, no standing water to maintain, no mosquitoes.
Location considerations: you need access to an outdoor GFI electrical outlet for the pump.
Position the feature where you can see it from inside the house — there’s something really nice about watching water move from your kitchen window in winter.
Also think about multiple sightlines through your yard, because a water feature that only looks good from one angle is a missed opportunity.
For rock selection: limestone looks formal and elegant, granite is rugged and natural-feeling, slate has such smooth surfaces that water sheets over it beautifully.
Whatever you choose, vary textures within the same feature — a mix of rough and smooth reads as more natural than all one type.
Planting around it: ferns, hostas, ornamental grasses along the banks or edges.
Add aquatic plants to any pooling area — they help keep the water quality up naturally and make the feature feel alive.
Outdoor lighting aimed at the water creates completely different effects at night — the movement of the water throws light in ways that are honestly mesmerizing.
Rock Borders: The Easiest Way to Make Your Whole Yard Look More Pulled-Together

This is the thing I tell people to start with if they’re overwhelmed by all of this.
Before you build a dry creek or a retaining wall, lay some rock borders.
It costs almost nothing, takes a weekend, and it makes every bed in your yard look deliberately designed instead of just… there.
Rock borders define the edge between your lawn and your planting beds in a way that’s permanent and natural-looking.
No plastic edging strips, no metal banding required.
Just stone, set into the ground, doing exactly what it looks like it should be doing.
Stone options: fieldstone for cottage/traditional gardens, it has a wonderful casual quality.
Cut stone for contemporary or formal designs.
River rock for a softer, more transitional edge that doesn’t feel as structural.
I use fieldstone around my cottage-style front beds and river rock along the back garden where things are looser and more naturalistic.
How to install them properly:
- Lay out your line first with spray paint or a garden hose — get the curve right before you dig anything
- Excavate a shallow trench, maybe 3-4 inches deep, along your marked line
- Set each rock so about half its height is below grade — this is what keeps them from migrating every time someone brushes past with a mower
- Keep rocks close together; gaps become weed corridors
- Backfill around each stone firmly so there’s no rocking or shifting
What goes right inside the border makes a difference too.
Low perennials, ornamental grasses, or seasonal color plants right at the inner edge creates a layered look where the stone transitions gently into the planting.
That transition is what makes a garden bed look professionally designed.
The Zen Rock Garden: Small Space, Big Payoff

I’ll be honest — I resisted adding a zen garden for a long time because it felt a little precious.
And then I built a small one in a forgotten corner near my back fence and it became my favorite spot in my whole yard.
It’s not about replicating a Japanese temple garden.
It’s about using simple materials — rocks, raked gravel, minimal plantings — to create a quiet space that asks nothing of you except to sit and look at it.
Start with a relatively flat, somewhat enclosed area.
The sense of enclosure — a fence, a hedge, a privacy screen — is what makes a zen garden feel like a retreat rather than just a corner.
The rock placement: one larger “anchor” stone goes in first, positioned thoughtfully and asymmetrically.
Additional stones arranged around it in groupings of odd numbers, varying sizes, no uniform spacing.
The negative space between rocks is as important as the rocks themselves.
Take your time with this part.
Move things around until it feels balanced in a way that isn’t obvious.
Fill open areas with fine gravel or decomposed granite, raked into patterns.
Parallel lines suggest flowing water.
Concentric circles around a stone suggest ripples.
You don’t need fancy tools — a wooden rake works, or even a large fork dragged through the gravel.
For plants: minimal is better.
One carefully pruned evergreen shrub.
A clump of ornamental grass.
Maybe some bamboo for gentle movement and screening.
Moss encouraged to grow over rocks and in shadier spots adds color and that sense of age that takes a garden from looking new to looking established.
A flat rock or simple wooden bench for sitting.
That’s it.
The whole thing can be 10 feet by 10 feet and still feel like enough space to breathe.
The maintenance ritual — the regular raking, the occasional placement of a new stone — is part of the appeal.
It becomes a practice, not a chore.
That’s the part nobody explains until you actually have one.
Gravel Beds for Drought-Tolerant Planting: Rock Mulch Done Right
I want to come back to rock mulch for a second because there’s a version of it that goes beyond just “replacing bark.” The best use I’ve found is building entire xeriscape-style planting beds around it, where the rock IS the design.
Think: a wide, generous bed of smooth river rock with three or four architectural plants rising out of it.
A single large agave.
A clump of blue oat grass.
Maybe a yucca in the back corner.
Spaces between them filled with irregular shaped smaller rocks, maybe a piece of driftwood.
It looks intentional, almost sculptural.
This style works particularly well in areas with hot, dry summers, or on the street-facing side of a property where you want minimal maintenance without sacrificing visual impact.
It’s also a strong choice for areas with drought restrictions — once established, many of these plants need almost no supplemental water.
The installation follows the same steps as any rock mulch bed: cleared soil, quality landscape fabric, strategic planting holes, rocks applied 2-3 inches deep.
The difference is in plant selection and spacing — give each plant room to breathe, because the negative space of the rock between plants is part of the composition.
It’s not for everyone.
It has a modern, dry-landscape look that doesn’t fit every home style.
But in the right setting it’s genuinely striking, and it will look exactly the same in ten years with almost no work.
That part I will die defending.


