That dusty, cluttered garage doesn’t have to stay that way forever.
If you’re a weekend warrior or serious woodworker, the right workshop layout can dramatically boost your productivity and make DIY projects way more enjoyable.
Design Your Dream Room in Minutes! – By Madison
🏡 Start Creating FREE →The Wall-to-Wall Workbench System

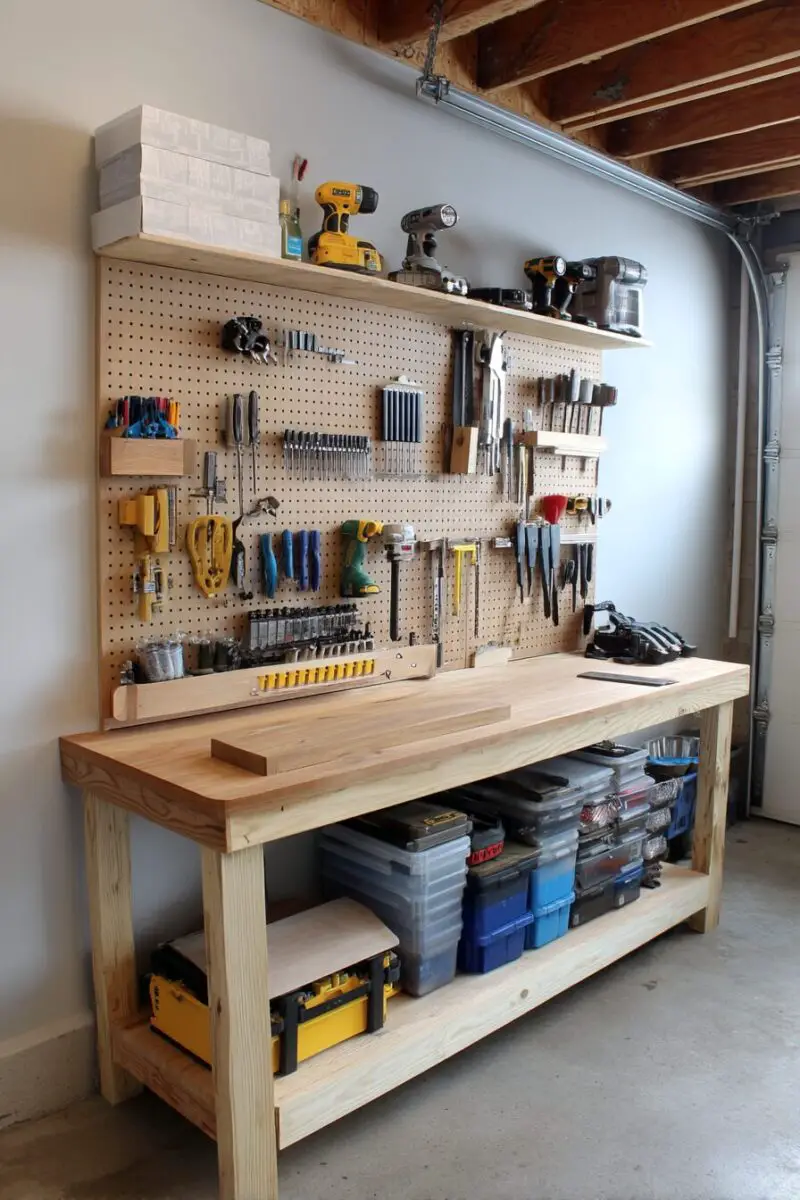
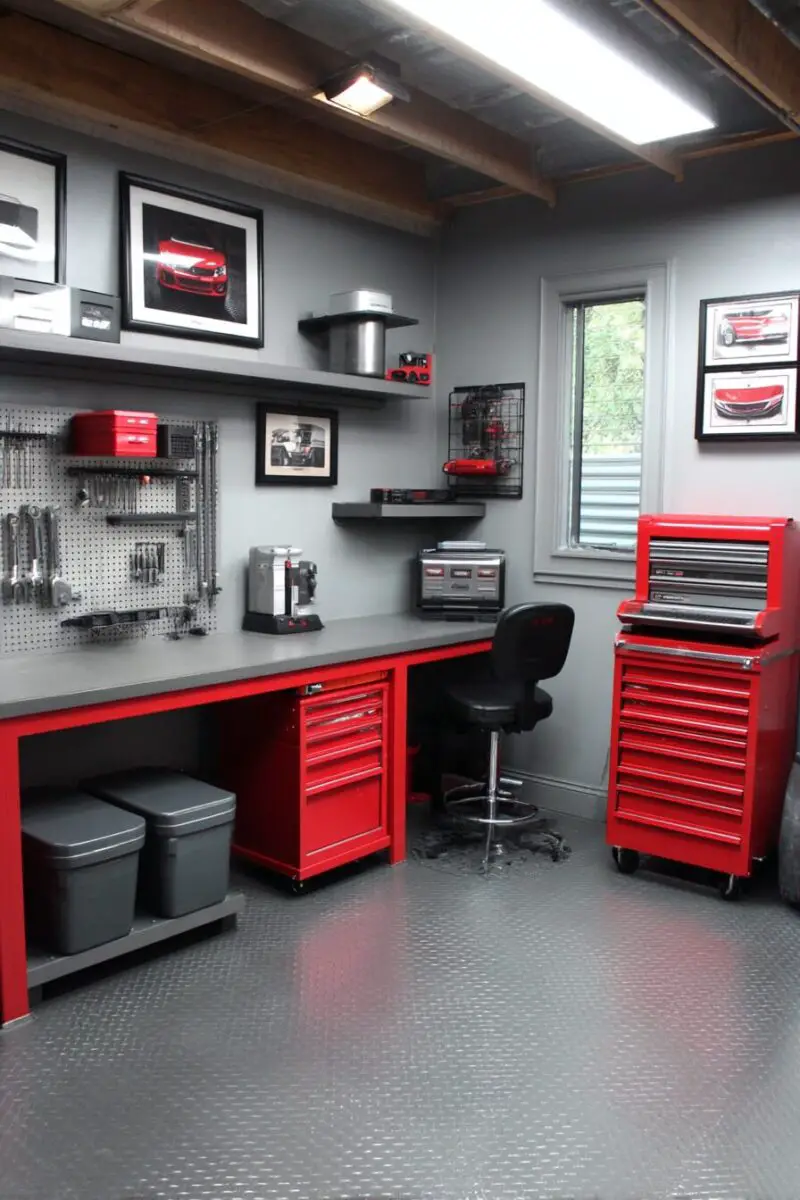
Nothing transforms a garage workshop faster than a continuous workbench system running along the perimeter.
This layout immediately multiplies your work surface while creating a professional-looking space that screams “serious business.”
You’ll want to build or buy benches at the perfect height for your body – typically 36-38 inches for most folks, but customized to prevent back strain during long projects.
The beauty of wall-to-wall benches is the storage potential underneath, where drawers and cabinets can house everything from hand tools to hardware.
Above your benches, install pegboard, slat wall, or French cleats to keep frequently used tools within arm’s reach.
Power strips mounted under the lip of your workbenches ensure you’ll always have juice for your tools without dangerous extension cords crossing your floor.
Task lighting is crucial here – install LED strip lights underneath wall cabinets to eliminate shadows on your work surface.
For maximum flexibility, consider making portions of your workbench mobile with heavy-duty casters that can lock into place when stationary work is needed.
The continuous flow of this layout creates a natural workflow that can significantly reduce the time spent walking around looking for tools or materials.
The Mobile Island Workshop
Garage workshops with fixed layouts are so yesterday – the mobile revolution puts freedom of movement at the center of your DIY space.
This layout centers around rolling workbenches, tool stands, and storage carts that can be reconfigured on the fly for whatever project you’re tackling.
Start with a substantial rolling workbench as your primary work surface – look for one with locking casters rated for at least 300 pounds.
Supplement your main bench with purpose-built mobile tool stations for equipment like table saws, planers, or drill presses.
The true genius of this approach is how it lets you push everything against the walls when you need to park cars, then pull your workshop back out when it’s project time.
Create docking stations along the perimeter with marked floor positions and power outlets so your rolling components have a home base.
Color-code your mobile units or label them clearly so you can quickly grab exactly what you need for specific tasks.
For stability during precision work, invest in wheel chocks or caster cups that prevent unwanted movement once your layout is positioned.
The flexibility of this system means your workshop can evolve as your skills grow without requiring a complete overhaul.
The Vertical Storage Revolution
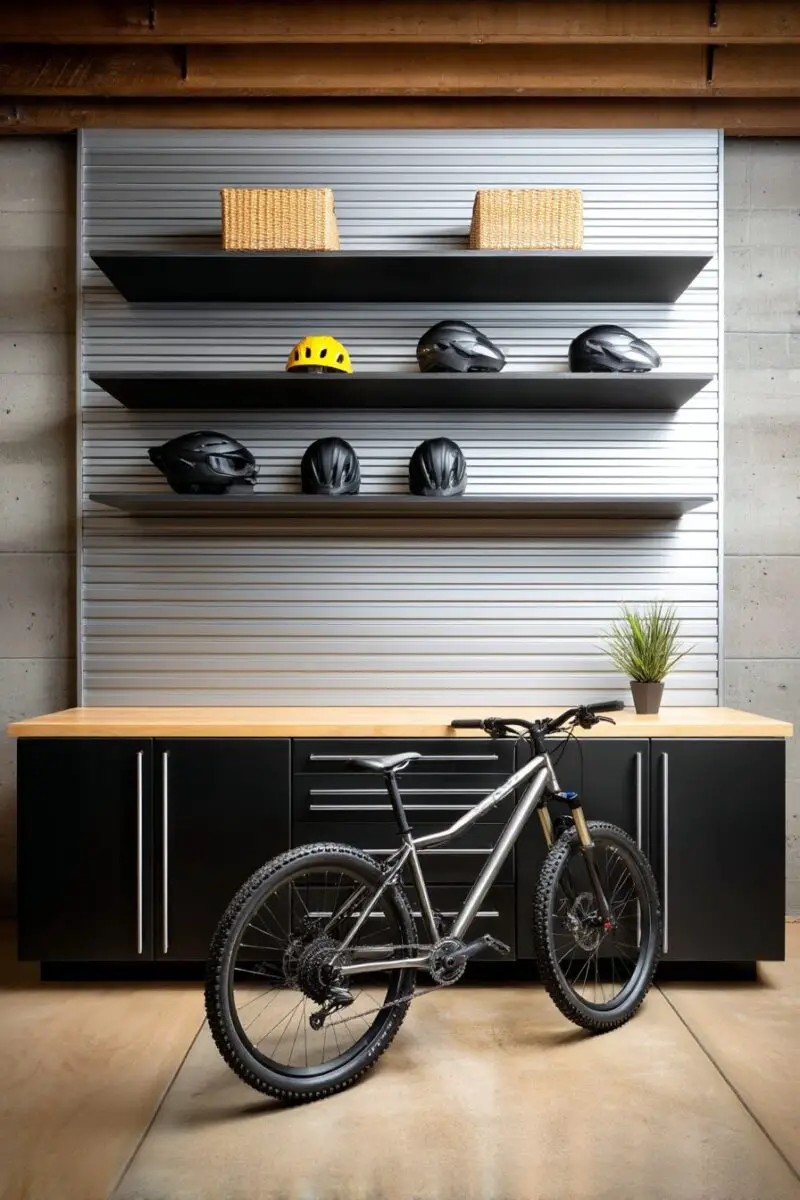
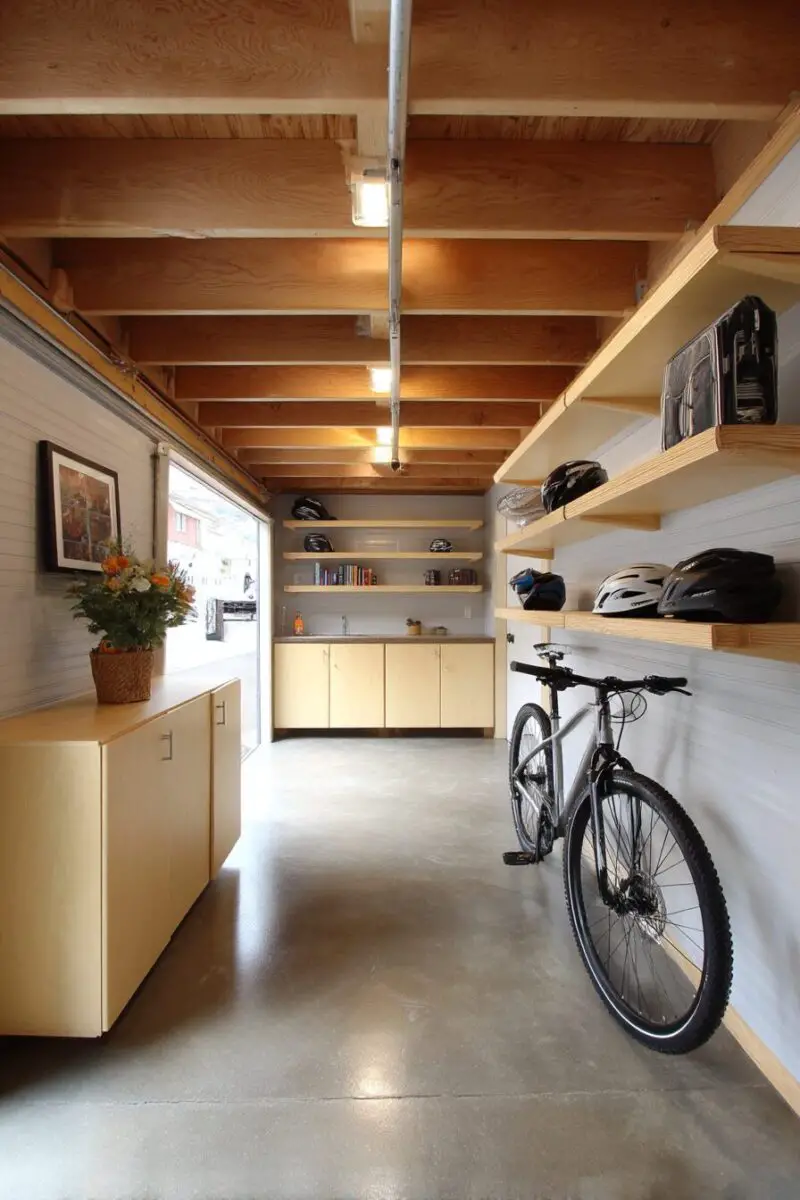
When floor space is at a premium, the savvy workshop owner looks up – way up.
This layout takes full advantage of your garage’s vertical space, using walls and even ceiling areas for storage while keeping the floor clear for work.
Start by mapping your wall space and installing a combination of pegboards, slat walls, and adjustable shelving systems from floor to ceiling.
Heavy-duty ceiling-mounted racks can store lumber, pipes, seasonal items, and other bulky materials completely out of your way.
Tool cabinets with vertical drawers rather than traditional chests maximize storage while minimizing footprint, leaving more room for your projects.
Wall-mounted fold-down workbenches give you a solid work surface when needed but disappear when not in use.
Specialized vertical storage solutions like rotating tool towers can put hundreds of tools in a footprint smaller than a garbage can.
Paint outlines or shadows on your pegboards and tool walls so everything has a designated spot that makes it immediately obvious when something is missing.
Invest in a quality step ladder or rolling shop stool with adjustable height to safely access your upper storage areas.
The psychological effect of this vertical layout is significant – walking into a garage with clear floor space feels liberating and less overwhelming.
With careful planning, even a single-car garage can store an entire workshop’s worth of tools while still leaving room to actually work.

💭 I Wrote a Book About My BIGGEST Decorating Mistakes!
When I decorated my first home, I thought I knew what I was doing. Spoiler alert: I DIDN’T. 😅
💸 I bought a sofa that was WAY TOO BIG for my living room. I chose paint colors that looked amazing in the store but terrible on my walls. I spent THOUSANDS on pieces that didn’t work together. Sound familiar?
“Things I Wish I Knew Before I Decorated My First Home” is your shortcut to avoiding ALL my costly mistakes. ✨ Inside, you’ll find practical, NO-NONSENSE advice that will save you time, money, and a whole lot of decorating regret. 🏡
Design Your Dream Room in Minutes! – By Madison
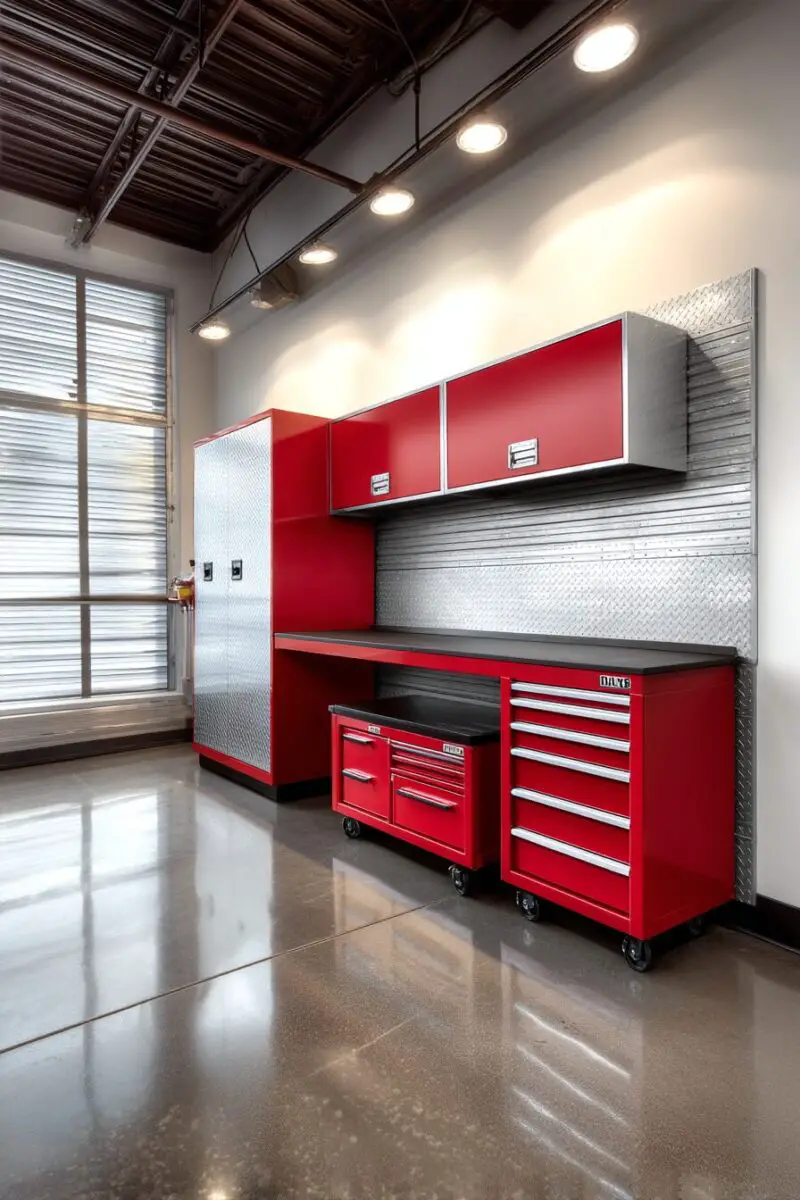
🏡 Start Creating FREE →The Modular Workshop Grid

Think of your garage floor as a giant game board where each square holds unlimited potential.
The modular grid layout divides your workshop into standardized squares (typically 2’x2′ or 3’x3′) with each module serving a specific purpose.
Start by actually marking your grid on the floor with tape or paint – this visual guide helps maintain organization and workflow patterns.
Design custom workbenches and tool stands that fit perfectly into your grid dimensions for a clean, integrated look.
The beauty of modular design is the ability to swap functions – today’s sanding station can become tomorrow’s assembly area without disrupting your entire workshop.
Create “plug-and-play” zones with dedicated power drops from the ceiling that align with your grid, eliminating cord hazards.
Wheeled cabinet systems designed to match your grid dimensions can slide perfectly into designated squares, maintaining the system’s integrity.
Color-code your grid zones based on function – perhaps blue for wood processing, red for metalwork, and green for finishing.
The modular approach allows for easy expansion, simply adding new modules as your needs and skills evolve over time.
This system excels at multi-user workshops, as different grid sections can be claimed by different people without creating chaos.
Your future self will thank you for the forethought when rearranging your workshop takes minutes instead of days.
The Fold-Away Space-Saver
Not everyone has the luxury of a dedicated workshop space – sometimes your garage needs to pull double or triple duty.
This ingenious layout focuses on fold-away, roll-away, and hide-away components that transform your space from parking to workshop in minutes.
Wall-mounted fold-down workbenches serve as the heart of this system, providing solid work surfaces that disappear when not needed.
Pair these with wall cabinets featuring drop-down doors that function as additional workspace when open and secure storage when closed.
Ceiling-mounted storage racks on pulley systems bring your materials down to working height, then raise them out of the way afterward.
Invest in collapsible sawhorses with customized tops that can be stored flat against walls but quickly deployed for project work.
Tool storage goes vertical with French cleat systems where individual holders can be reconfigured or temporarily removed as needed.
Create dedicated docking stations for mobile tools like table saws or drill presses, with quick-connect power and dust collection.
The key to making this layout work is ruthless organization – every item must earn its keep by being either multi-purpose or absolutely essential.
Track lighting on movable rails ensures you have proper illumination regardless of how your space is currently configured.
The psychological benefit of this system is entering a clean, open garage that transforms into a fully-functional workshop before your eyes.
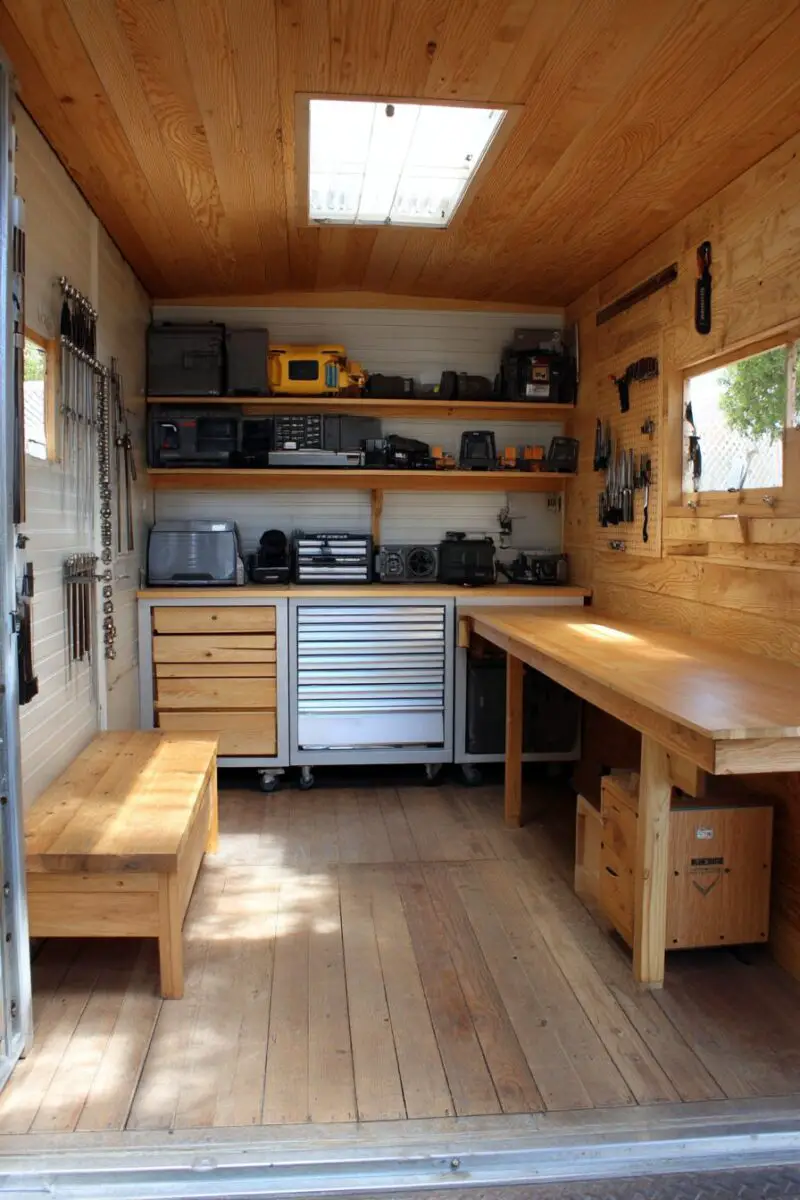
The Corner Maximizer Layout
Corners are the most underutilized real estate in most garage workshops, but this layout turns them into productivity powerhouses.
The corner maximizer focuses on specialized corner workbenches, storage solutions, and tool arrangements that transform these awkward spaces into workshop focal points.
Start with a custom corner workbench with a 45-degree or curved front edge that gives you access from multiple angles.
Above the corner workbench, install nested corner shelving that extends upward to maximize vertical storage in this often-wasted space.
Corner-specific pegboard arrangements or French cleat systems can accommodate angled tool storage that wouldn’t work on flat walls.
For larger shops, dedicated corner “cockpit” arrangements can house your most-used tools within arm’s reach from a central seated position.
Task lighting for corners requires special attention – consider adjustable arms that can illuminate your workspace from multiple angles to eliminate shadows.
If your garage has multiple corners, consider dedicating each to a different function – perhaps one for precision work, another for power tools, and a third for computer/design work.
Specialized corner dust collection systems can capture debris from multiple directions, keeping your workspace cleaner.
The psychological advantage of well-utilized corners is substantial – your workshop suddenly feels more complete and intentional rather than having dead zones.
By reclaiming these overlooked areas, you effectively expand your usable workspace without changing the dimensions of your garage.
The Ceiling Storage Masterplan
The most overlooked space in your garage isn’t on the walls or floor – it’s right above your head.
This layout treats your ceiling as prime real estate, creating a comprehensive overhead storage and organization system that keeps your workspace clear.
Start by assessing your ceiling’s structure to identify joists or trusses that can support suspended storage systems.
Install heavy-duty overhead racks for seasonal items, rarely-used tools, and bulk materials that would otherwise consume valuable floor space.
Retractable extension cord reels and air hose systems mounted to the ceiling provide power and air exactly where needed without dangerous cords on the floor.
For lumber storage, nothing beats ceiling-mounted racks that keep your wood flat, organized, and out of the way until needed.
Install specialized tool hangers for ladders, long clamps, and other awkward items that never seem to have a proper home.
Motorized lifts for heavier equipment like generators or air compressors can bring these items down when needed and raise them when not in use.
The key to making this system work is clear labeling and organization – you need to know exactly what’s stored where without having to climb a ladder to check every bin.
The psychological impact of this layout is remarkable – walking into a garage with clear floor and wall space creates an immediate sense of order and possibility.
Design Your Dream Room in Minutes! – By Madison
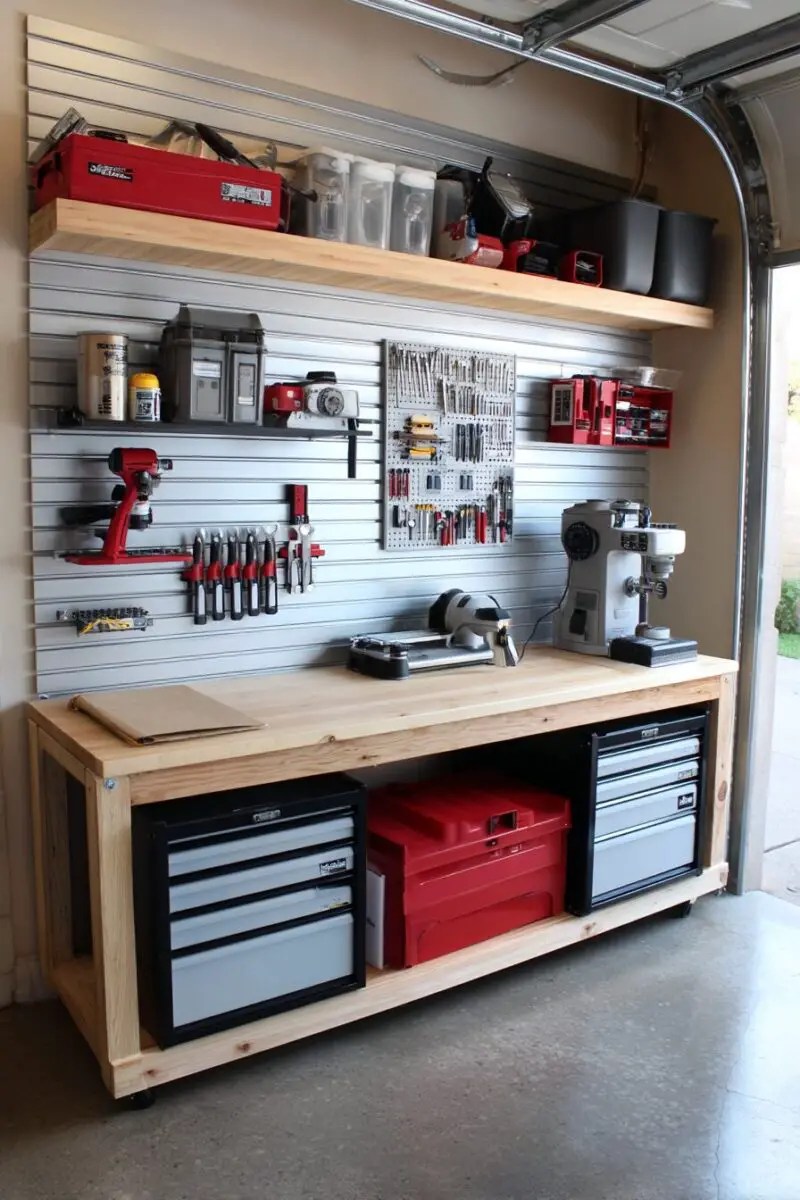
🏡 Start Creating FREE →The Track System Workshop
Fixed workbenches and permanent tool locations are becoming a thing of the past with the revolutionary track system approach.
This layout centers around horizontal and vertical tracks installed throughout your garage that allow components to slide, adjust, and reconfigure on demand.
Start with heavy-duty wall tracks that can support adjustable shelving, tool holders, cabinets, and even fold-down work surfaces at any height.
Complement these with ceiling tracks that support sliding storage bins, lighting systems, and even small tools that can be positioned directly above your work area.
Floor track systems allow heavy equipment like table saws or workbenches to glide effortlessly into different positions without lifting.
The genius of this system is how it grows with you – simply add new accessories to your existing tracks rather than redesigning your entire workshop.
Specialized track-mounted tool holders can keep everything from screwdrivers to circular saws organized yet accessible with a simple slide.
The track system excels at accommodating users of different heights or abilities, as work surfaces and tools can be instantly adjusted for each person.
For maximum flexibility, invest in universal mounting adaptors that allow almost any tool or storage container to connect to your track system.
Color-coded track sections can designate different work zones or functions, maintaining organization even as components move around.
The investment in a quality track system pays dividends in versatility – your workshop becomes infinitely reconfigurable as projects and needs change.
The Zone-Based Workshop Layout

Efficiency experts have long known that workflow is everything, and this layout brings industrial efficiency concepts to your garage.
The zone-based approach divides your workshop into dedicated functional areas that create a logical progression from raw materials to finished projects.
Start by mapping the typical workflow of your projects, identifying key stages like material storage, cutting, assembly, finishing, and project storage.
Create dedicated zones for each stage with the appropriate tools, storage, and work surfaces concentrated in that area.
The materials zone should be closest to your garage door for easy loading/unloading, with progressively “cleaner” zones as you move toward finishing areas.
Color-code your zones with wall paint, tool handles, or storage bins to create visual separation and make it instantly clear where things belong.
Install task-specific lighting in each zone – brighter for precision work, softer for finishing, and adjustable for inspection areas.
The dust collection needs of each zone will differ – prioritize powerful collection at cutting stations while maintaining ambient filtration throughout the shop.
Create natural bottlenecks between zones where quality checks can occur before materials move to the next stage of your process.
Zone-based layouts naturally discourage clutter as materials and tools have clear “homes” based on their function in your workflow.
The psychological benefit of this system is significant – moving from zone to zone creates a sense of progress and accomplishment as your projects take shape.
💭 I Wrote a Book About My BIGGEST Decorating Mistakes!
When I decorated my first home, I thought I knew what I was doing. Spoiler alert: I DIDN’T. 😅
💸 I bought a sofa that was WAY TOO BIG for my living room. I chose paint colors that looked amazing in the store but terrible on my walls. I spent THOUSANDS on pieces that didn’t work together. Sound familiar?
“Things I Wish I Knew Before I Decorated My First Home” is your shortcut to avoiding ALL my costly mistakes. ✨ Inside, you’ll find practical, NO-NONSENSE advice that will save you time, money, and a whole lot of decorating regret. 🏡
The Indoor/Outdoor Expandable Workshop
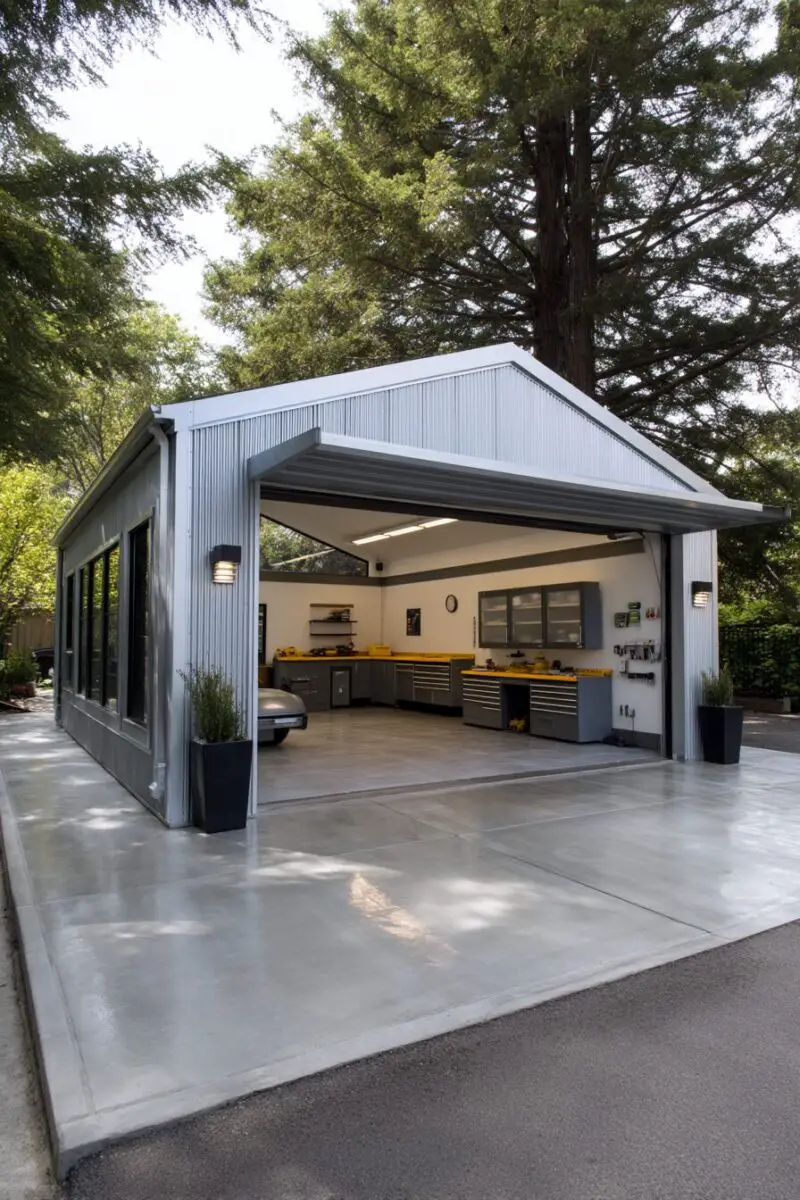
Why limit your workspace to the garage interior when your driveway offers valuable additional square footage?
This innovative layout creates a seamless transition between indoor and outdoor work areas, effectively doubling your usable space during good weather.
Start by positioning your garage workbenches and tools with outdoor expansion in mind – perhaps on the garage wall nearest the door for easy access.
Install heavy-duty sliding or bi-fold doors instead of traditional garage doors to create a wide-open connection between indoor and outdoor spaces.
Invest in mobile tool bases and workstations that can easily roll outside when weather permits, then back in for security and protection.
Consider installing permanent outdoor features like concrete work pads, anchored benches, or sunshades that make outdoor work comfortable year-round.
Weather-resistant storage cabinets positioned near the garage opening can serve both indoor and outdoor work areas without moving tools back and forth.
Retractable hose reels and extension cords mounted near the garage door can quickly supply your outdoor workspace with air, water, and power.
For dusty operations like sanding or spray finishing, the ability to move outside can significantly improve air quality in your main workshop.
Security becomes important with this layout – consider lockable outdoor storage and security cameras if tools will sometimes remain outside.
The flexibility of this approach is perfect for larger projects that simply won’t fit inside your garage, while still maintaining a home base for precision work.
With proper planning, you’ll find yourself naturally moving between indoor and outdoor spaces as your projects and the seasons dictate.
With these innovative layout ideas, even the most modest garage can transform into a productivity powerhouse that makes every DIY project more enjoyable.
Remember that the perfect workshop evolves over time – start with the layout that addresses your biggest current pain points, then adapt as your skills and projects grow.